How to Draw a Seven-Pointed Star
In this simple tutorial, I will demonstrate two fundamentally different methods on how to draw a seven-pointed star for kids and beginners.

How to Draw a Seven-Pointed Star: Introduction
So, if you wanted to know how to draw a seven-pointed star, you’ve come to the right place. Today I will show you how to do this with minimal effort. My tutorial is adapted for beginner artists and for children, so you won’t run into any problems.
If you are really painting for the first time in your life, I would recommend using a ruler. However, if you are trying to improve your drawing skills, the ideal way is to avoid using any auxiliary tools.
So grab your favorite painting tools, put on some good music, relax, and start painting. I think you will get a great workout in your drawing skills.
Seven-Pointed Star Drawing Tutorial
Materials
- Pencil
- Paper
- Eraser
- Coloring supplies
Time needed: 20 minutes
How to Draw a Seven-Pointed Star
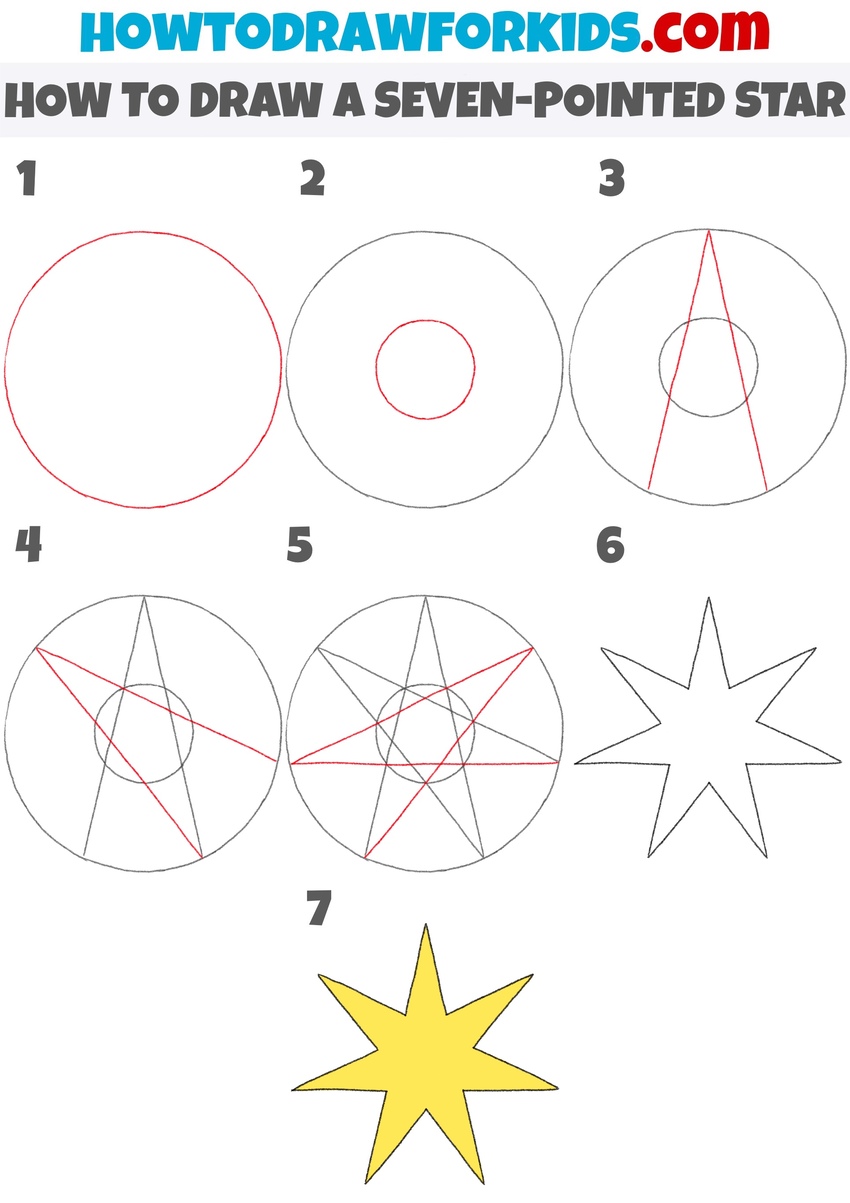
- Draw the outer circle.
At first, draw a large circle in the center of your paper. This circle will act as the outer boundary of the seven-pointed star. Use a compass to ensure the circle is perfectly round. The size of this circle will determine the size of your star, so choose the diameter based on your preference.

- Add the inner circle.
Inside the outer circle, draw a smaller circle, centered within it. This inner circle will help guide the placement of the inner points of the star. You can use a compass for this circle or draw it freehand. The distance between the two circles will define the length of the star’s points, so adjust the size accordingly.

- Draw straight lines for the arm of the star.
Now, draw two vertical lines from the top of the outer circle down to the bottom edge. These lines line will serve as the first point of the seven-pointed star. Make sure the lines are straight and intersects both circles at the top and bottom edges.

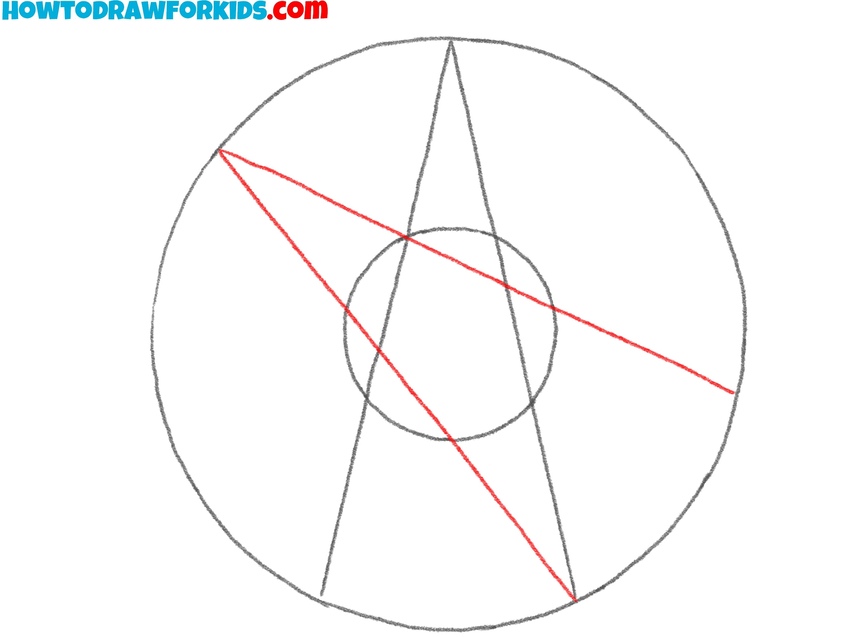
- Add more straight lines.
Next, draw a diagonal line starting from the right side of the outer circle to the opposite side. Continue the line drawing it to the opposite side, creating another arm of the star. This step begins to show how the points of the star will take shape.
- Complete the remaining lines.
Continue by drawing more diagonal lines, to finish drawing the arms of your seven-pointed star. This will finish to form the star’s structure. Make sure the intersections are clean, and the lines are straight and symmetrical within the circles.

- Erase the guidelines and polish the sketch.
Now, erase all the unnecessary guidelines, including the circles and intersecting lines that helped to form the star. Focus on keeping the star’s shape intact while ensuring that the outline is clean and smooth. Carefully go over the edges of the star, refining any parts that may appear uneven or rough.

- Add some colors.
Now that the star outline is complete, it’s time to color it. In this example, the star is filled with a yellow shade, but you can use any color of your choice. If you want to add more realism to the seven-pointed star drawing, you can include shading or highlights to give it a three-dimensional effect.

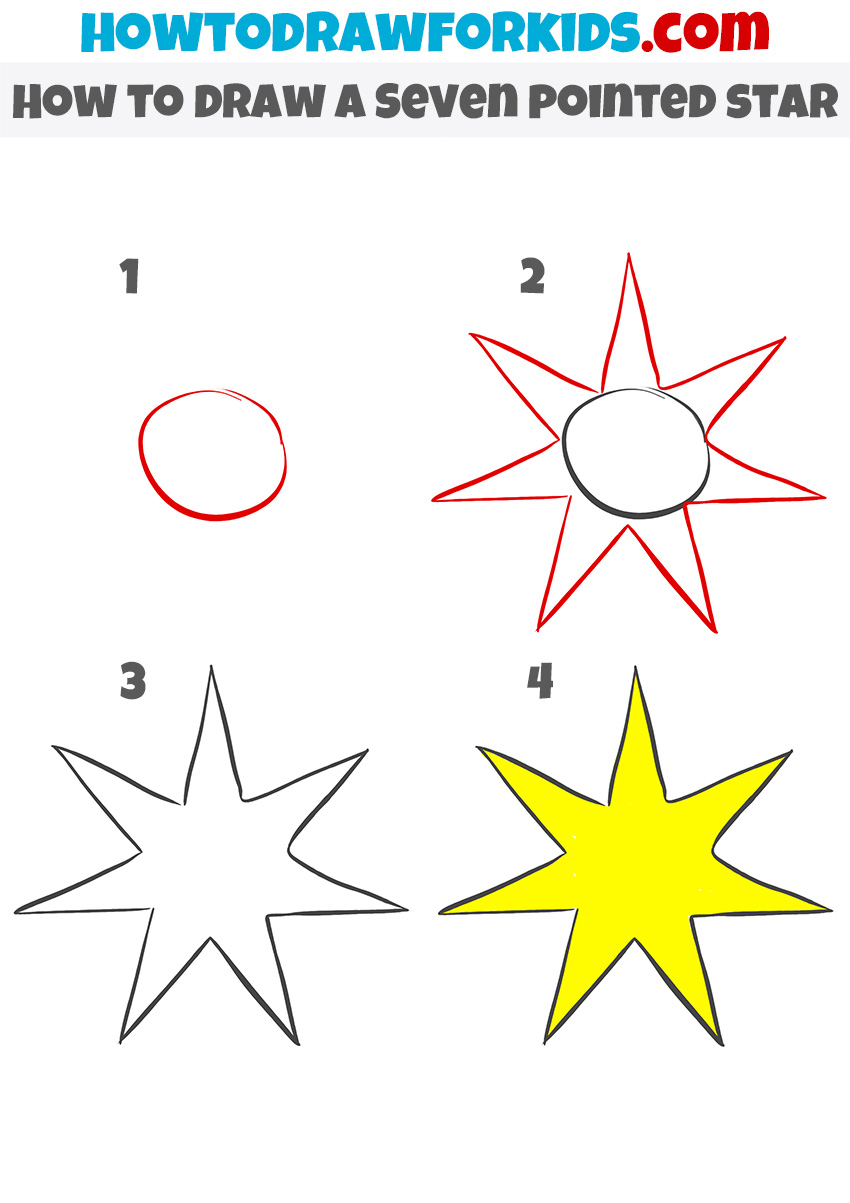
Alternative Technique
This is a more simplified version of drawing a seven-pointed star compared to the previous tutorial. The star has seven symmetrical points, and the process involves fewer lines and steps, making it more simple for beginners. The main difference is that this version eliminates some of the construction lines and details seen in the first tutorial, focusing instead on just a few key guidelines.
To draw this simplified seven-pointed star, first, draw a circle for the inner boundary of the star. Use straight lines to create points or arms. Once all lines are drawn and the star is fully structured, erase any unnecessary guidelines, such as the circle and extra intersecting lines. Finally, fill in the star with color. In this case, yellow is used, but you can choose any color you like.