How to Draw a Hippopotamus
Learn how to draw a cute hippopotamus step by step with this easy guide. Follow along to create an adorable cartoon hippo with simple and fun techniques!

How to Draw a Hippopotamus: Basic Information
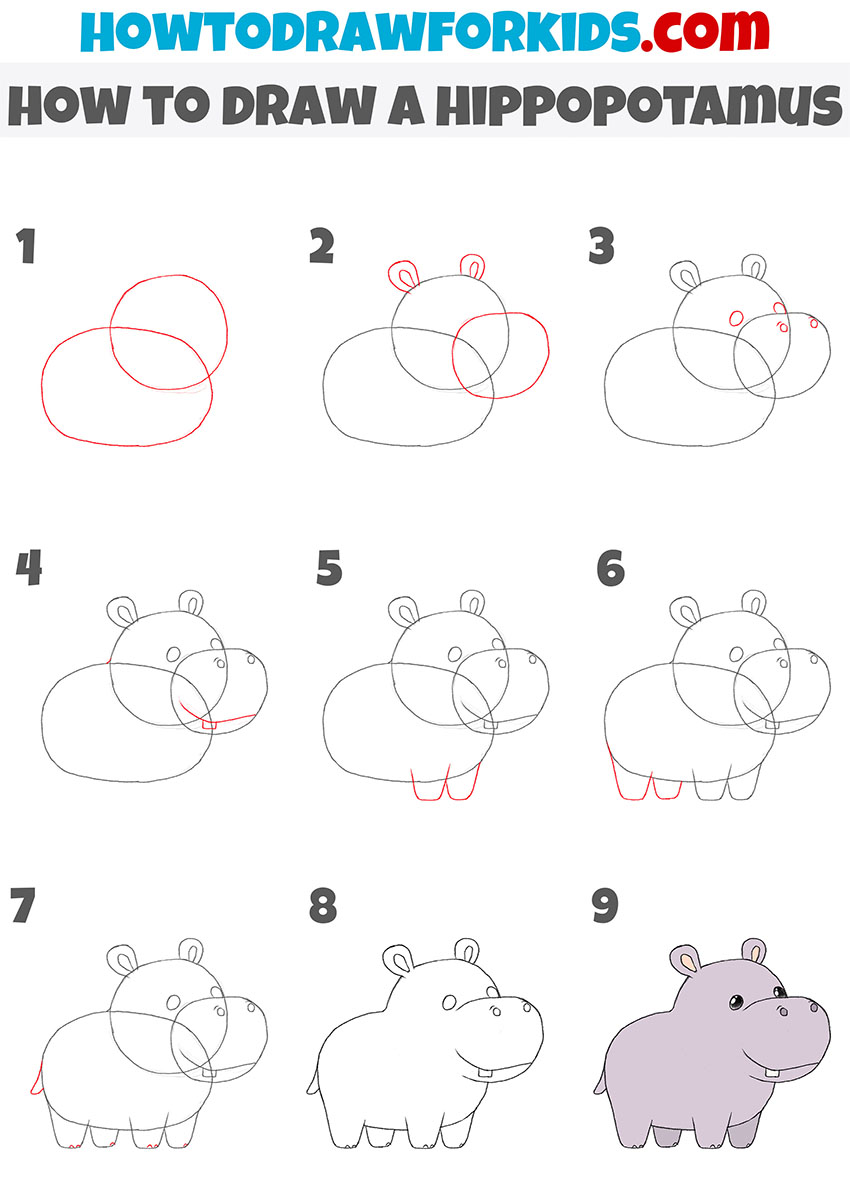
Today, we will learn how to draw a hippopotamus using a set of clear, step-by-step instructions that anyone can follow. Hippos are fascinating creatures, and learning to illustrate their form on paper requires focusing on their distinct features. This guide will help us understand the basic shapes and proportions of this animal that make the drawing process easier.
Drawing a hippopotamus helps young artists practice managing unique proportions that aren’t found in many other animals. The hippo has a disproportionately large body and head, short legs, making it ideal for studying how to accurately depict such varied shapes in one drawing.
The hippo’s bulky, heavy body makes it perfect for learning how to convey weight and mass in a drawing. illustrating the grounded, solid appearance of a hippopotamus can teach young artists how to add a sense of physical presence to their artwork.
Throughout the process, it’s important to keep your lines soft, allowing room for correction and refinement. The use of an eraser will help adjust any small mistakes. Once we finish the basic structure, we can improve the drawing by adding more detailed features, such as the mouth, nostrils, and smaller body parts.
Hippopotamus Drawing Tutorial
Materials
- Pencil
- Paper
- Eraser
- Coloring supplies
Time needed: 30 minutes
How to Draw a Hippopotamus
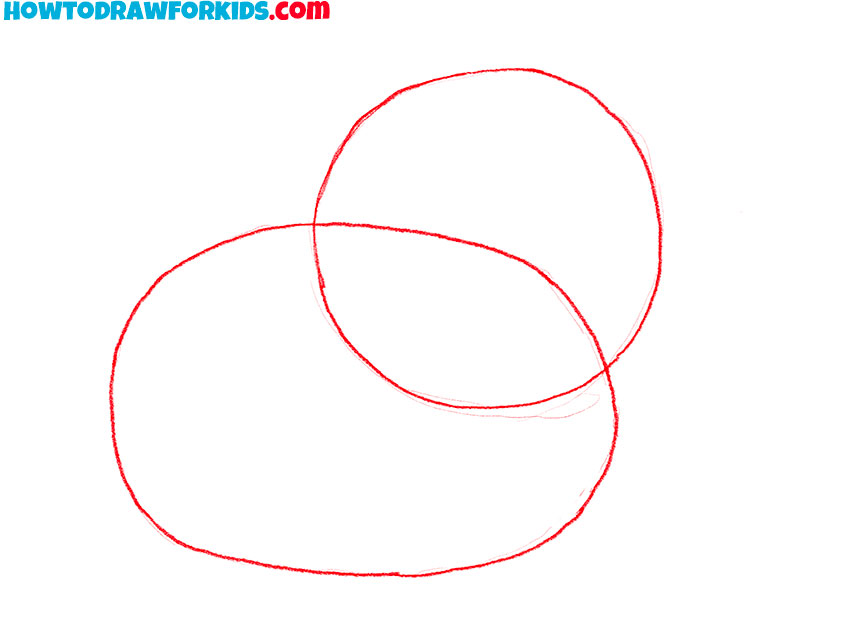
- Draw two overlapping ovals.
These ovals will serve as the base shapes for the hippopotamus’s body and head. The lower oval should be wider and slightly tilted, representing the hippo’s round body. The upper oval should be smaller and placed higher to represent the head.
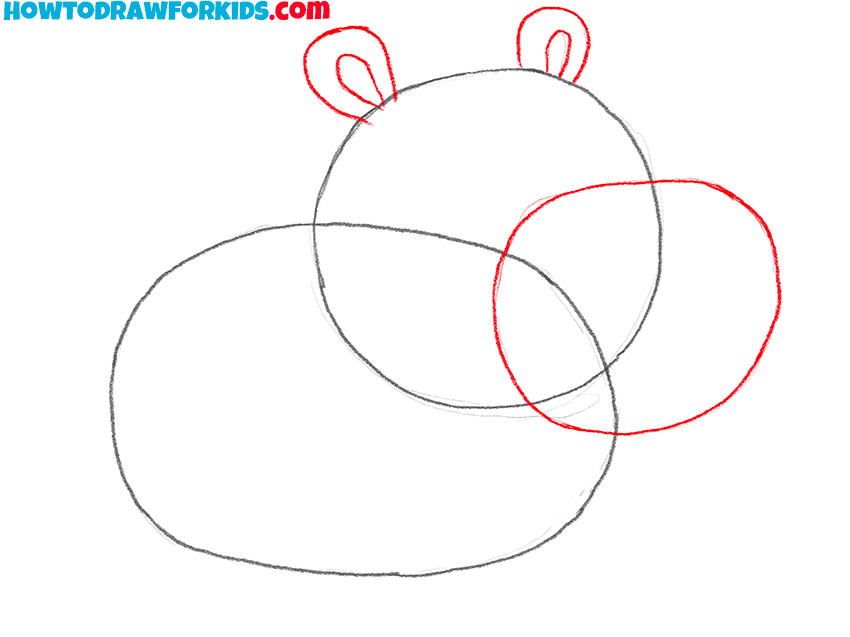
- Add the ears and detail the head.
In this step, add two small, rounded ears on top of the upper oval to start shaping the hippo’s head. Draw these ears symmetrically, ensuring they are positioned slightly towards the center. Then, outline the front part of the snout by tracing a round shape from the right side of the head oval.
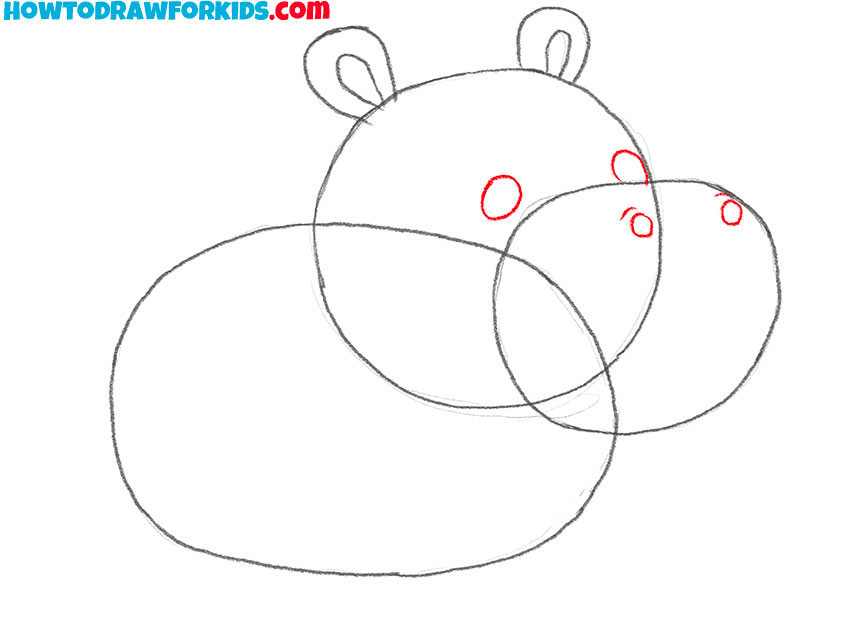
- Draw the eyes and nostrils of the hippo.
Add two small circles for the eyes near the top of the head. Then, sketch two tiny circles towards the front of the snout for the nostrils. The hippopotamus’ eyes should be drawn as two small ovals to achieve a cartoonish appearance.
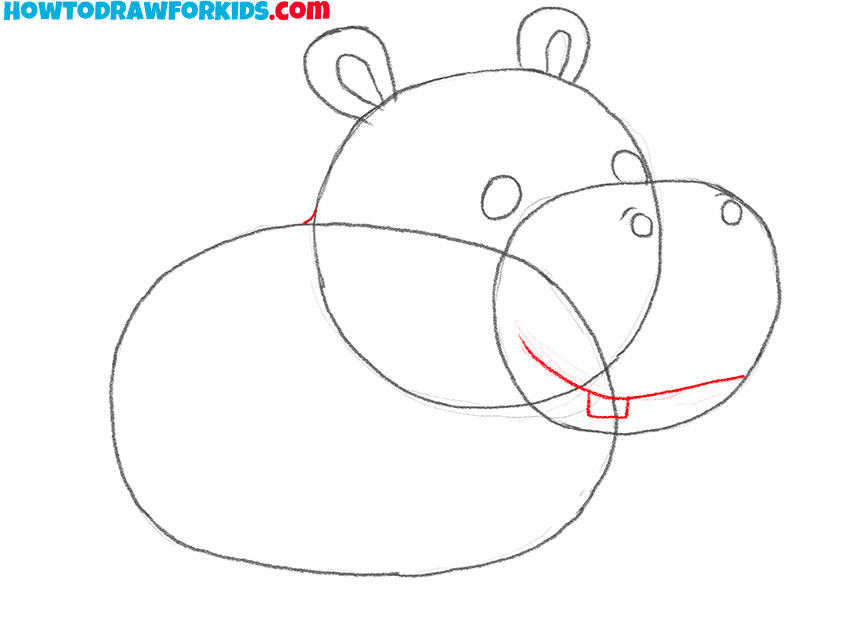
- Draw the mouth of the hippopotamus.
It’s time to give the hippo a smile! In this step, sketch a simple curved line below the snout to form the mouth. This line should follow the shape of the head and be placed towards the lower part of the snout. Then draw the tooth with a couple of simple lines.
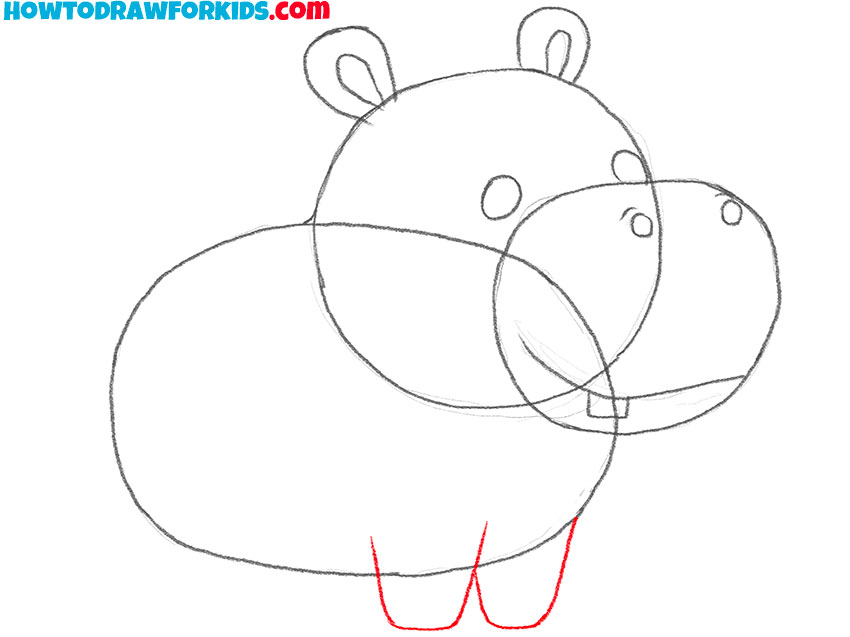
- Sketch the front legs.
Begin drawing the legs of the hippopotamus by sketching two short, rounded shapes at the bottom of the body oval. These front legs should be short and slightly curved. As we’re drawing the hippopotamus in a simplified cartoon style, aim to keep the details minimal and avoid adding too much complexity.
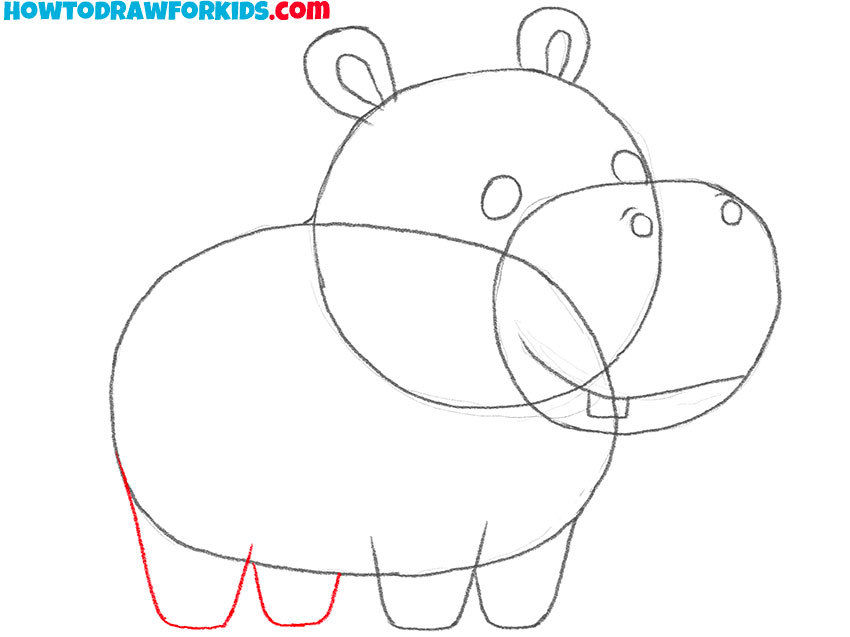
- Draw the back legs of the hippopotamus.
Now, draw the back legs, which should mirror the shape of the front legs. These legs will be positioned at the back of the hippopotamus body oval. Make sure the curves follow the same structure as the front legs, maintaining the consistency in style.
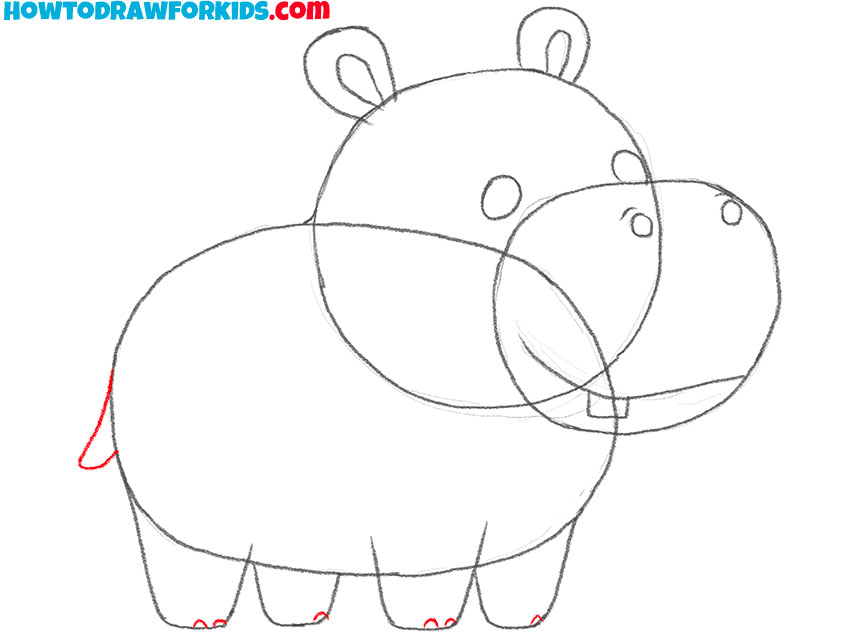
- Add the tail and feet details of the animal.
In this step, add a small, triangular tail at the back of the body, near the right side. The tail should be short and point downwards slightly. Next, refine the feet of the hippopotamus by adding simple, curved lines at the bottom of each leg to illustrate the toes.
- Refine the body and face of the hippopotamus.
Erase the overlapping lines from the initial ovals and refine the shape of the body and head to create smooth, clean outlines. Add more definition to the mouth by including a small square tooth on the upper lip. Make sure the body of the hippo looks round and the head blends naturally with the body.

- Add some colors and final touches.
Typically, hippos are light grey or lavender, so you can use a soft, pastel shade of purple or grey for the body. Color the ears, nostrils, and eyes with darker tones to add contrast. You can also add a light pink color to the inside of the ears for extra detail.

How to Draw a Hippopotamus: Video Tutorial
Additional Content
I made a special treat for you – a free PDF of our hippo drawing lesson. It’s like a mini adventure that you can take with you anywhere, no internet needed! Just download it, and you can draw this happy hippo whenever you want. It’s easy-peasy and lots of fun, so you can make your very own hippo friend anytime!
How to Draw a Hippopotamus: Additional Tips
You have completed your drawing of a hippopotamus, but there are a few additional steps you can take to improve it further. These tips will help guide you as you refine your work and add final touches to make your hippopotamus drawing even more interesting.
Although hippopotamuses in nature are generally gray or brown, experimenting with a broader color palette can improve your drawing and make it more visually interesting. Try using a variety of colors to depict your hippopotamus in a more imaginative way. You might consider using blues, purples, or even pastel shades for a more stylized look.
Since hippos spend much of their time in water, adding a pond, river, or other water features to your drawing can enrich the scene. This makes the setting more relevant to the animal and challenges you to draw water effects such as reflections or splashes. Introducing additional elements into your drawings helps build a fuller composition and improves your ability to think critically about background details.
Improve your hippopotamus drawing by creating a background that complements the subject. Consider placing your hippopotamus in a natural environment, such as a jungle, or in a zoo enclosure. By adding trees, rocks, or other elements, you can build a really interesting scene. This approach improves your skills in composition.
Cartoon drawing often involves exaggeration, and the hippopotamus provides a great subject to learn this. You can experiment with making the head even larger or the legs shorter to see how it affects the overall character. This approach teaches you how to create a unique cartoon style. Exaggeration is a powerful tool in animation, comic art, and caricature.
Conclusion
Your drawing of a friendly hippopotamus is now complete. There are many other tutorials available on my website, such as a guide on how to draw frog or other from my Animals section. Feel free to check new lessons and continue practicing your skills.
Additionally, you can follow me on social media to stay updated on new drawing tutorials and activities. Subscribe to my YouTube channel for video versions of all drawing tutorials, perfect for following along in real-time. On Pinterest, you’ll find step-by-step collages, plus many other drawing-related images.


