How to Draw a Hippopotamus Face
In this very easy instruction, you will learn how to draw a hippopotamus face step-by-step. You can easily cope with this task.
How to Draw a Hippopotamus Face: Introduction
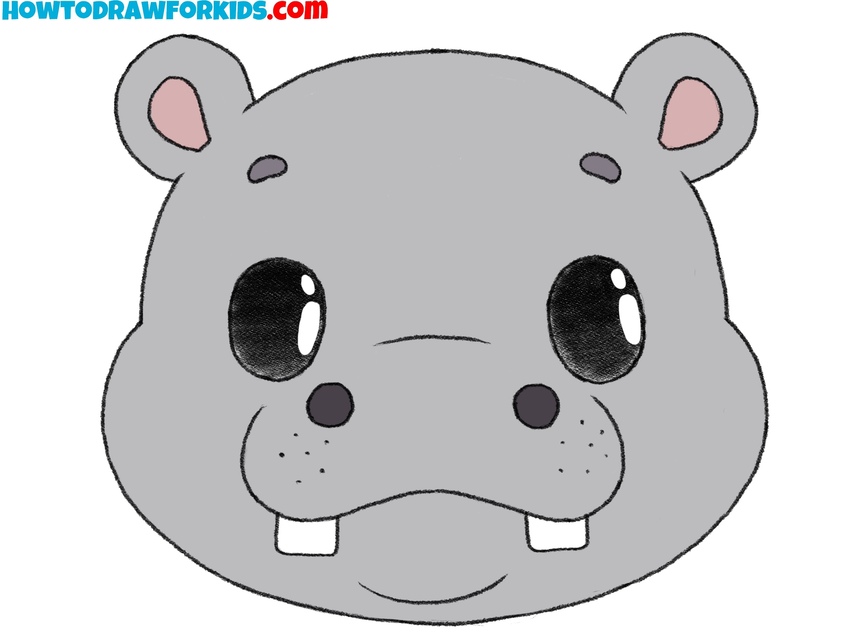
This lesson on how to draw a hippopotamus face does not involve a complicated technique. The hippo face design will be simple and similar to those often seen in cartoons. I’m confident that any beginner can draw a hippo face by following my step-by-step instructions.
The hippopotamus is a large animal with big, bulky features. When drawing a hippo face, it is important to keep this in mind. This requires using large, rounded lines and shapes to make the sketch closer to the appearance of a real animal.
If this tutorial seems too challenging, you can first try my simplified hippo face sketching guide, designed for preschoolers. You will find it at the end of this page. That guide is much simpler, using only basic shapes and lines in a four-step process.
In this tutorial, we’ll use a cartoon and simplified style, avoiding complex details and shapes. However, if you want to make your artwork more realistic, you could adjust the design by making the eyes smaller, adding folds and creases, and giving the face a neutral expression instead of a smile. For now, let’s focus on drawing a hippo head in a simple style.
Hippopotamus Face Drawing Tutorial
Materials
- Pencil
- Paper
- Eraser
- Coloring supplies
Time needed: 35 minutes
How to Draw a Hippopotamus Face
- Draw the hippo head outline.
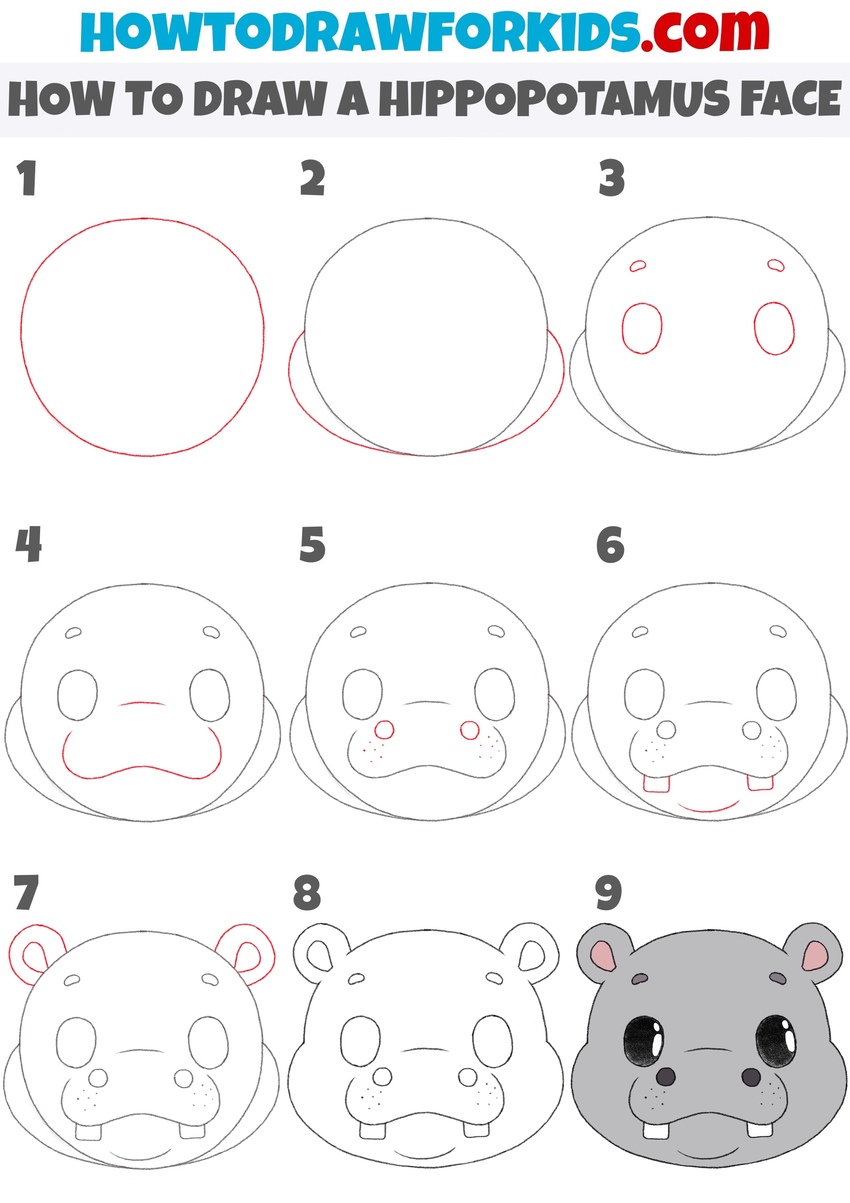
Start by drawing the base shape of the hippopotamus face. Draw a large, rounded oval that will serve as the outline of the hippo’s head. This shape gives the face a wide, rounded appearance, illustrating the general form of a hippopotamus head.

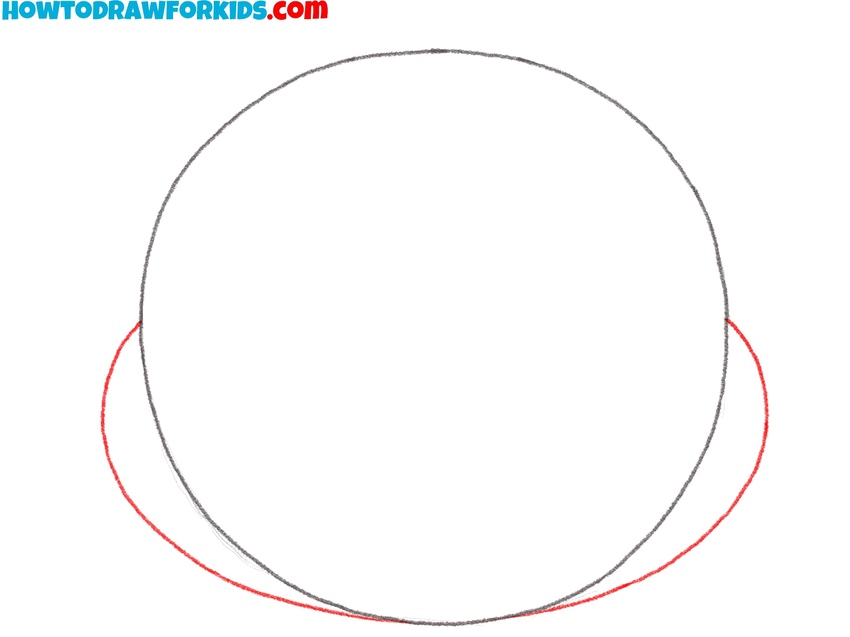
- Draw the cheeks on the sides of the head.
Next, add two rounded shapes on each side of the hippo’s head outline to represent the cheeks. These should be smaller, slightly oval shapes that attach seamlessly to the bottom sides head. These cheeks add volume to the face, illustrating the hippo’s large, bulky structure.
- Draw the eyes and eyebrows.
Now, add two oval shapes near the top of the head shape to draw the eyes of the hippo. These ovals should be positioned high up on the head, as hippos typically have eyes that sit slightly elevated. The size of these ovals will help give the hippopotamus a cartoon-like appearance.

- Outline the snout.
Draw a wide, curved line just below the eye outlines to shape the snout. This line should be rounded, giving the snout a broad look typical of a hippopotamus face. The snout helps give the hippo its recognizable look, setting up the space where you’ll add details.

- Add the nostrils and freckles.
With the hippo’s snout outline in place, add two small circles for the nostrils near the sides of the snout. Below these, add a few small dots on each side to represent freckles. These freckles give the hippopotamus face more natural and realistic look, keeping the overall style cartoonish.

- Add the teeth and chin.
Below the snout, draw two rectangular shapes to represent the hippo’s teeth. Position them symmetrically to give the face a recognizable look. Add a gentle curve below the teeth to outline the chin, completing the snout structure.

- Illustrate the ears.
Go over your hippo face drawing, refining the lines of the head to ensure they are smooth and polished. Erase any unnecessary guidelines, and make sure all parts of the face connect cleanly. This step prepares the drawing of the hippo head for the final details and coloring.

- Give the hippo face sketch a finished look.
Now, add two rounded shapes at the top of the head for the hippopotamus’s ears. These should be positioned on each side of the head, curving outward slightly. Inside each ear, add a smaller curve to show the inner ear structure.

- Add color to the hippo head.
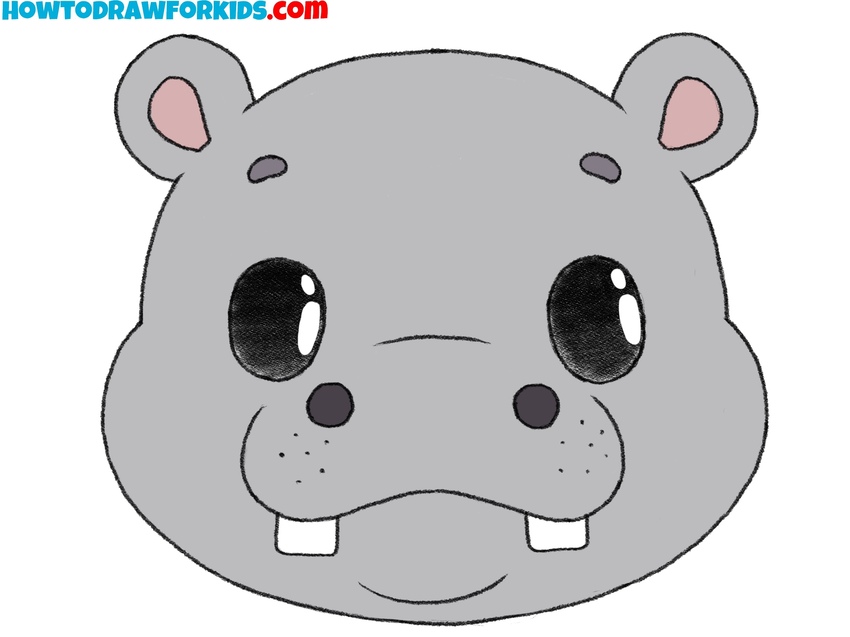
Use a gray shade for the skin of the hippo and a darker tone for the nostrils. Color the eyes black, leaving a small white spot to represent a light reflection. To make your drawing of a hippo face look more cute, color the inner parts of the ears pink.
How to Draw a Hippopotamus Face for Preschoolers
This version of the tutorial on how to draw a hippo face is simplified for preschoolers, and uses fewer steps and basic shapes. Unlike the first tutorial, which includes more details like teeth, freckles, and refined outlines, this guide only shows the main head structure, ears, eyes, and mouth, making it more approachable for younger children.
To start, draw a large oval at the bottom for the hippo’s snout and a smaller arc on top of it to outline the head. Next, add two round shapes on top of the head to form the hippo’s ears. Above the snout shape, draw two smaller ovals for the nostrils.
Then, draw two circles within the head shape for the eyes, and add a slight curve on the snout for the mouth. Complete the hippo face drawing by coloring the head a gray shade. Paint the eyes black and add a small highlight in each eye to give the hippo face a cute appearance.
I want to remind you that especially for your convenience, I have created a PDF file that contains a short version of this lesson. You can download and use this file at any time convenient for you, even if there is no Internet connection.

Conclusion
You have completed drawing the face of a hippo. I hope you found this tutorial helpful and managed it well. There are many similar animal drawing tutorials available on my site. For instance, you can learn how to draw a husky face or try drawing a wolf face.
I would appreciate it if you could share your thoughts on this lesson with your friends and leave a comment. Additionally, you are welcome to subscribe to my Pinterest for additional content and to my YouTube channel for video tutorials.

