How to Draw a Husky Face
To draw dogs well, you need to be able to draw their faces. In this lesson, I’ll show you how to draw a husky face using four methods.

How to Draw a Husky Face: Introduction
You may already have some skills in drawing dogs, and this lesson will provide additional knowledge that could be useful in the future. Here, I’ll show you how to draw a husky face. This lesson will be practical for those interested in this breed and who want to understand how to draw this animal in more detail.
If you’ve noticed, a husky resembles a wolf in many ways. Scientists believe that the husky’s ancient ancestors were direct descendants of true wolves. So if you’re interested in learning how to draw a wolf, this lesson may also be helpful.
This husky face drawing tutorial consists of simple elements, making it easy to follow. As mentioned earlier, the husky has thick fur. The sides of its head are fluffy, and it has small eyes and triangular ears. All these details should be represented in the drawing.
To boost your skills in drawing huskies, in addition to the main tutorial, I’ve included three bonus techniques. Each of these tutorials consists of a few simple steps, making them accessible to any aspiring artist. Follow all steps in the additional guides sequentially and use the provided PDF printables. Let’s get started.
Husky Face Drawing Tutorial
Materials
- Pencil
- Paper
- Eraser
- Coloring supplies
Time needed: 30 minutes
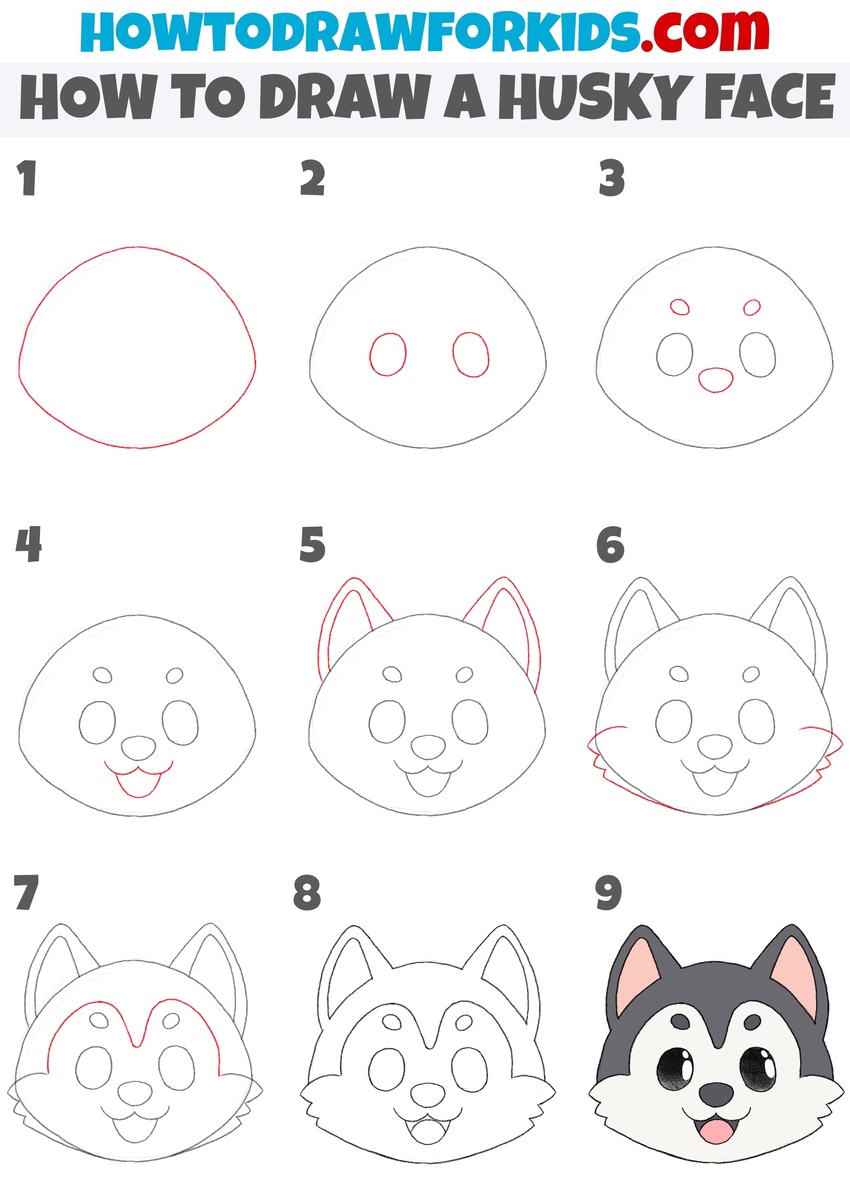
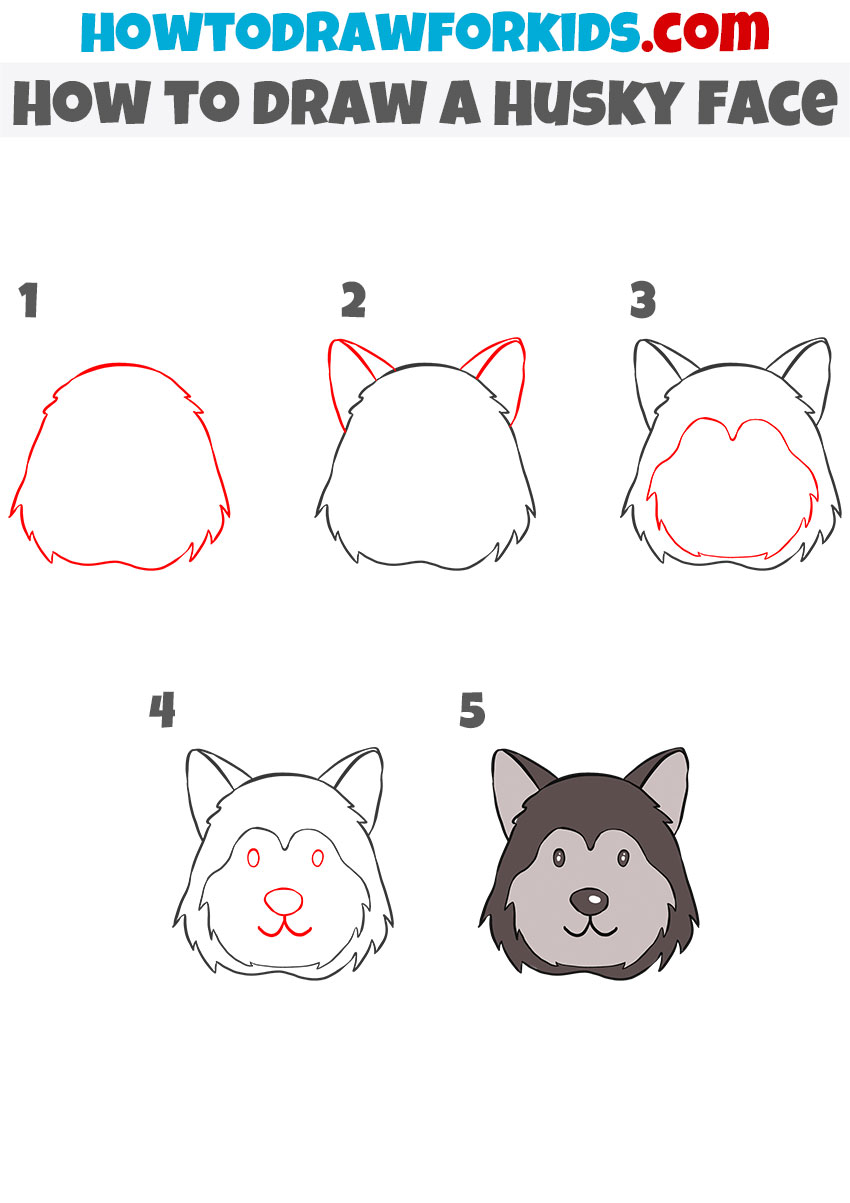
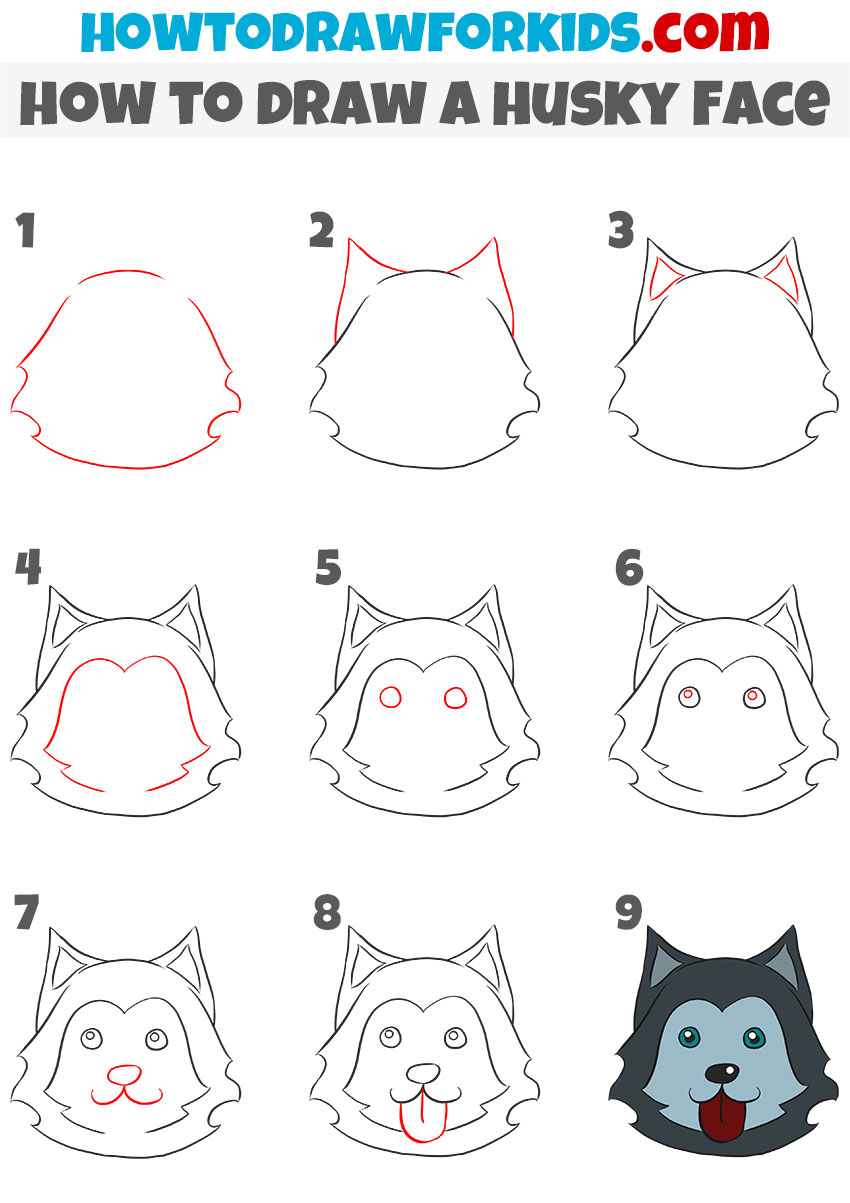
How to Draw a Husky Face
- Draw the outline of the husky face.
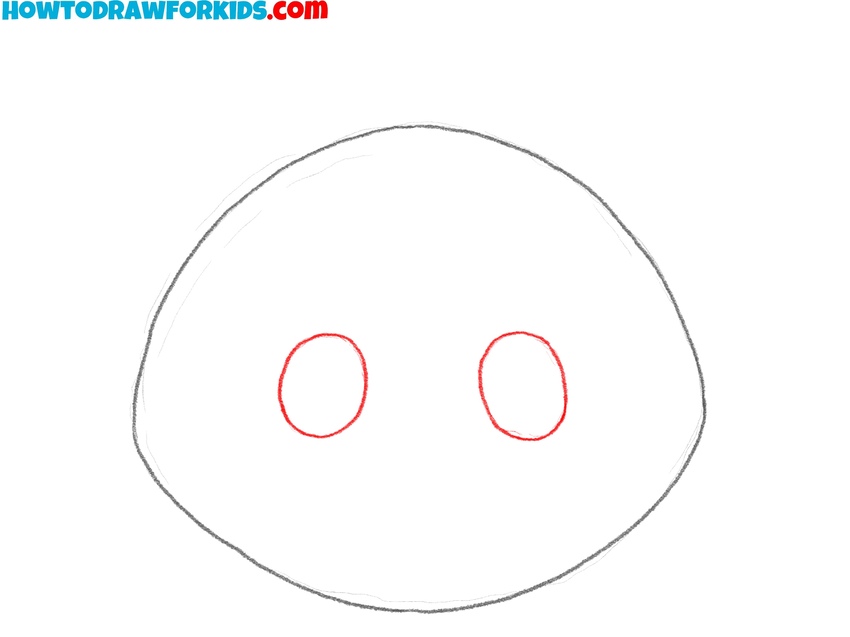
Start by sketching a large oval shape for the husky’s head. This will be the base outline of the husky face, so keep it simple and symmetrical. In shape, the basic outline of the husky’s head at this stage should somewhat resemble a football.

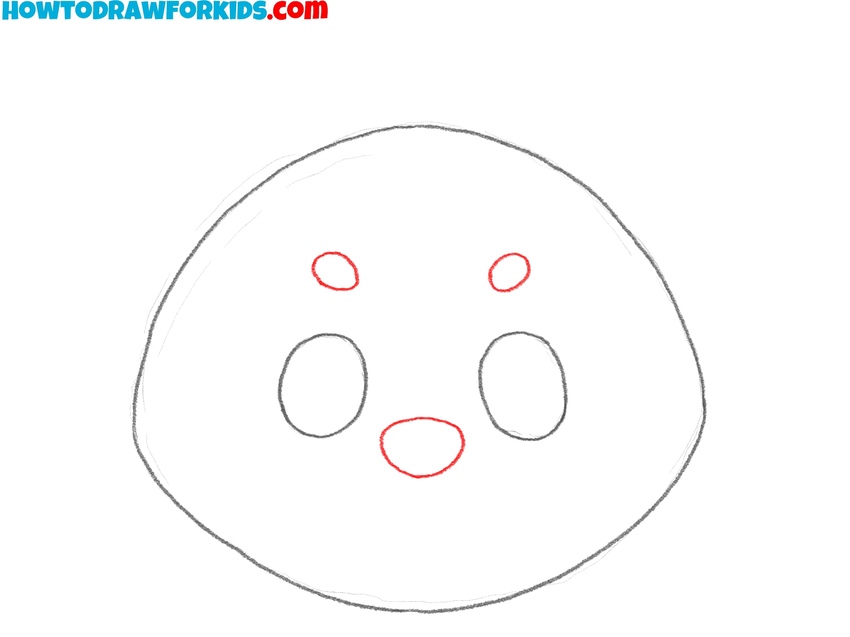
- Draw the eyes of the husky.
Next, draw two small ovals inside the head outline for the eyes. Make sure the eyes of the husky are about the same size and aligned symmetrically on each side. To make the task easier, you can first sketch a light horizontal line and then use it as a guide to draw the eyes.
- Draw the nose and eyebrows.
Now, add a small oval between and slightly below the eyes to represent the nose of the husky. Place it just below the center of the face. After that, draw the eyebrows of the husky dog using a couple of small ovals above the eyes.
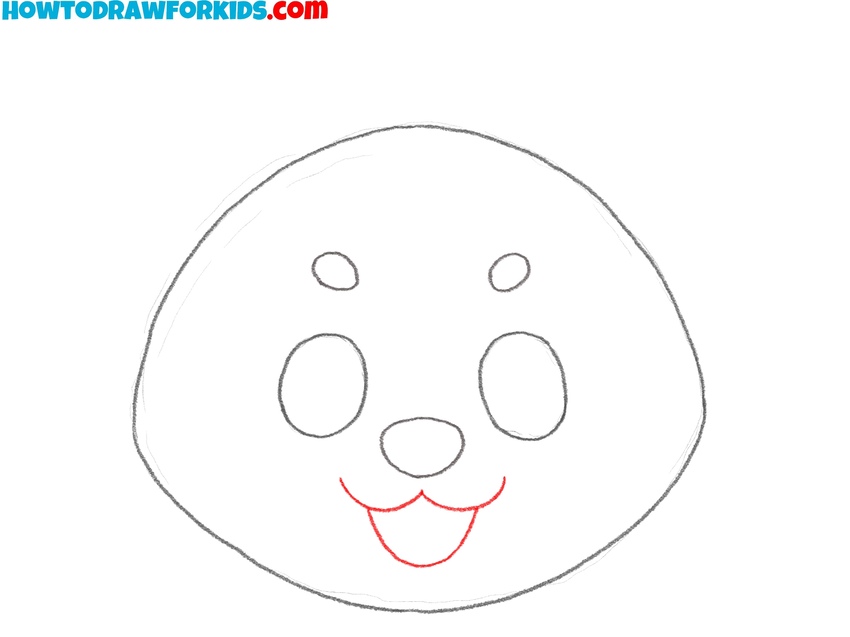
- Add the mouth and tongue.
Below the nose, draw a couple of small curved lines to form the mouth of the husky dog. Then, draw a curved line below, to indicate the lower lip or the tongue of the animal. The shape of the dog’s mouth should resemble the letter W or the number 3 turned on its side.
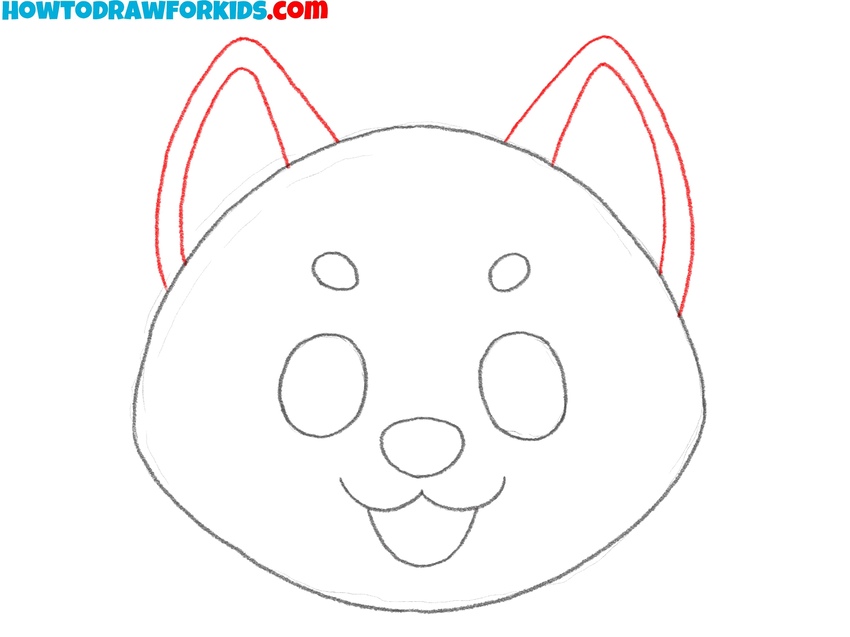
- Draw the ears of the dog.
Next, draw two triangular shapes at the top of the dog’s head outline for the ears. Huskies have prominent, upright ears, so make sure they are fairly large and pointy. Add an inner line within each ear to represent the inner outlines.
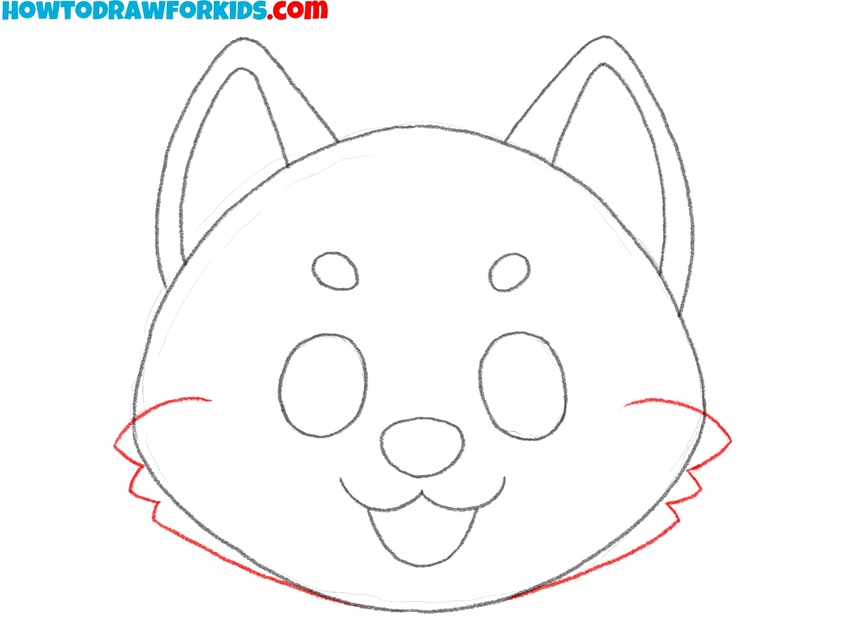
- Draw the fluffy cheeks.
On each side of the face, add curved lines to create the fluffy cheek fur typical of a husky. These lines should extend outward slightly from the head outline and have a jagged or wavy look to mimic the texture of fur. When drawing this part, it is very important to maintain symmetry.
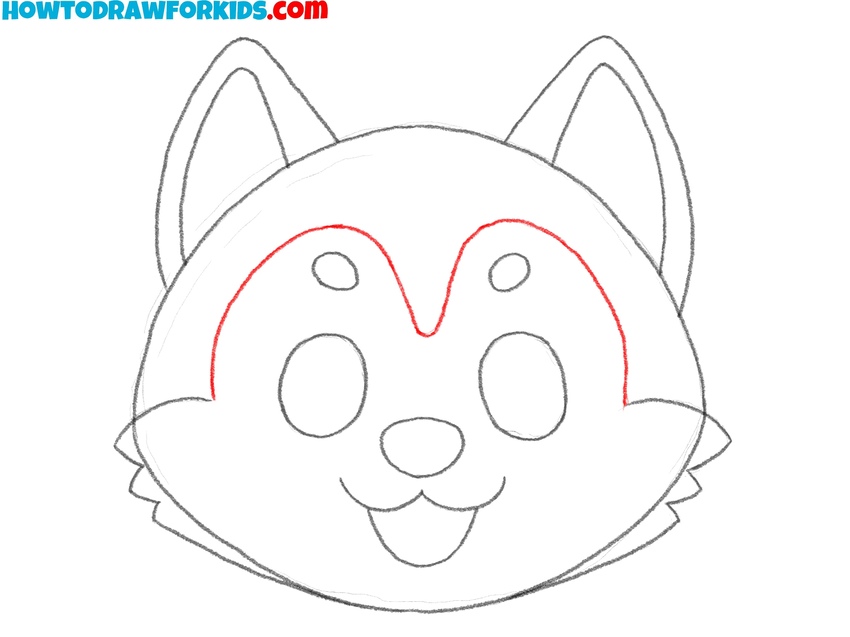
- Add the facial markings.
Now, add markings on the face of the husky by drawing a curved line above the eyes that arches downward and reaching the fur on the cheeks from the previous step. Huskies have unique facial markings, often resembling a mask pattern, and it is very important to replicate it in your drawing.
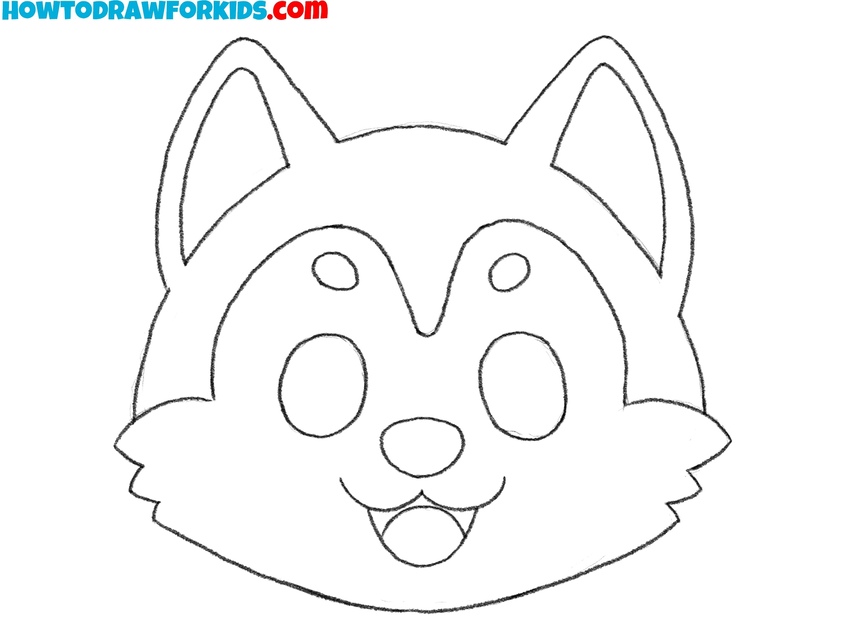
- Finalize the sketch of the dog head.
In this step, go over your drawing of a husky face and clean up any rough or extra lines. Refine the outline of the head, eyes, nose, and mouth to make everything look neat and polished. You may also want to add some details to make your husky face drawing look more realistic.
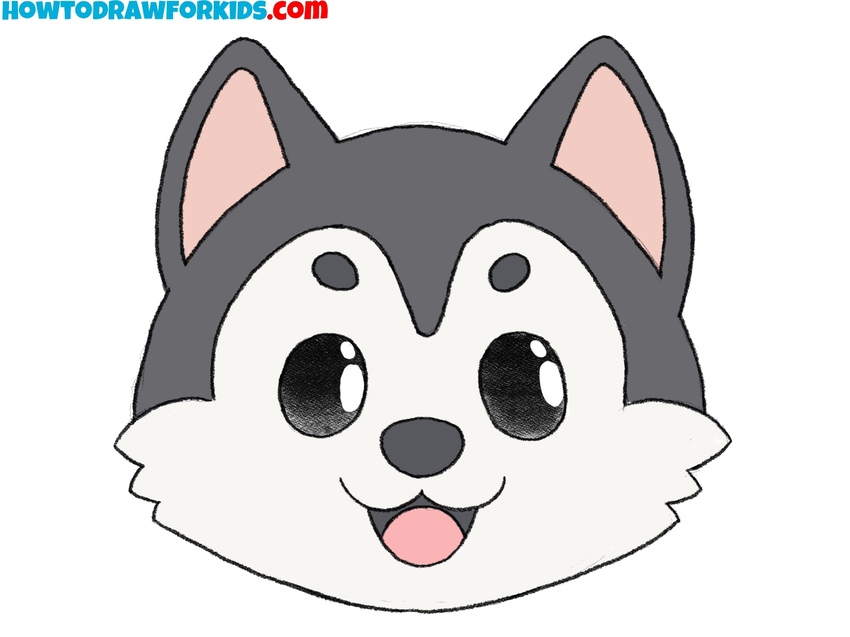
- Color the husky face.
Typically, huskies have a combination of black, gray, and white fur. Color the upper part of the head with a darker shade, leaving the lower part lighter to create the recognizable husky face color palette. Use black for the nose and eyes, and add pink for the tongue and inner parts of the ears.
Additional Drawing Tutorials
Above you saw a lesson on drawing a husky head in 9 simple steps. But this, of course, is not the only way to draw the head of this dog. Below I will show you three more methods, which, although not fundamentally different from each other, show the entire process of sketching a husky head from different angles.
Also, especially for your convenience, I have prepared PDF versions of these husky face drawing tutorials. These files contain drawing steps and other useful tools. Download the additional file and draw a husky head in any free time.
Easy Husky Face Drawing Tutorial
This husky head drawing tutorial has fewer steps and demonstrates a simplified, stylized dog face with minimal features, making it easier and quicker to follow. It uses basic shapes without detailed features like individual fur lines.
To draw a husky face in this tutorial, start by sketching the outline of the husky’s head, creating a slightly rounded shape with a jagged edge at the bottom to represent fur. Next, add two pointed ears at the top, positioning them symmetrically. Draw an inner outline within each ear. Then, add a distinct marking on the face that resembles the husky’s mask-like pattern, curving it around the eyes and cheeks.
Place two small circles for the eyes within this marking, making them simple. Below the eyes, draw a rounded nose in the center and a small mouth line just below it to complete the facial features. Finally, color the husky face with typical shades, using darker tones for the outer fur and lighter tones within the facial marking. This tutorial shows a clear, easy way to create a recognizable husky face.
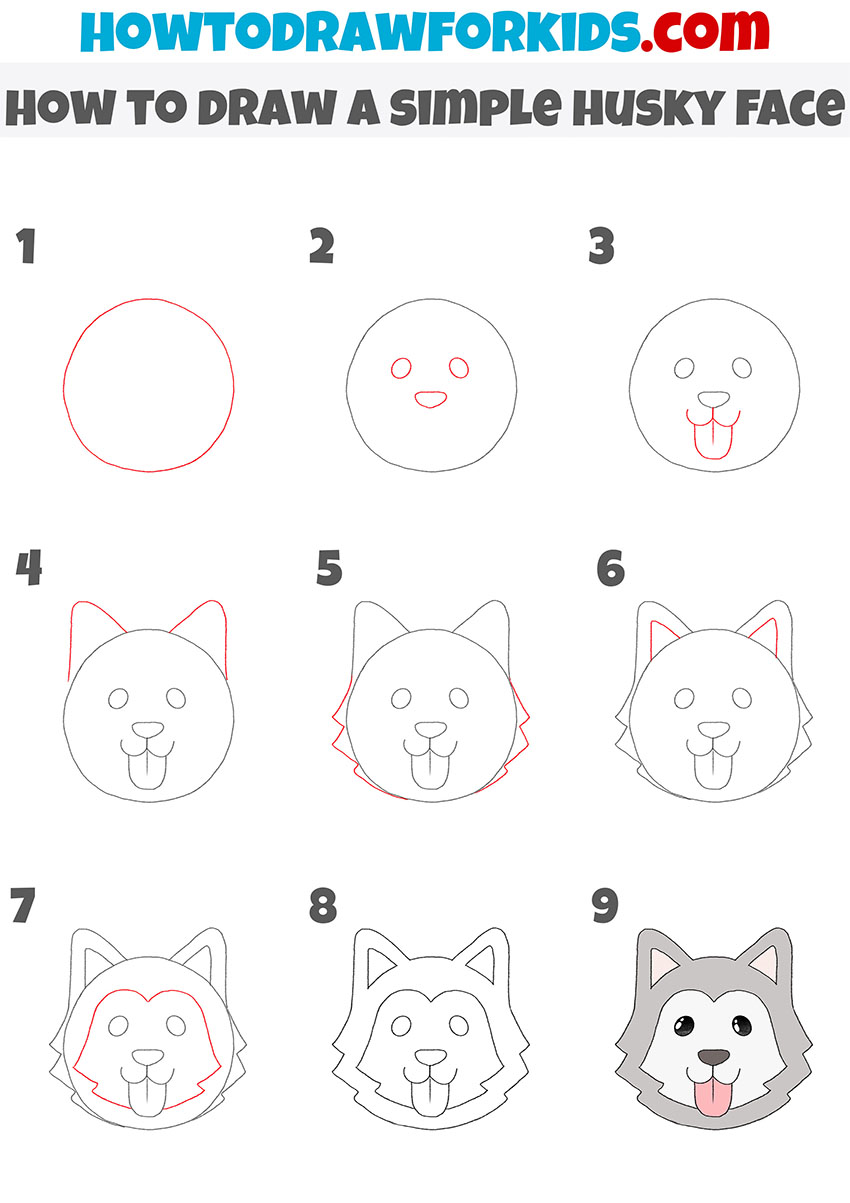
Simple Husky Head Drawing Tutorial
This lesson on drawing a husky head is a little more detailed than the previous one, but less detailed than the very first tutorial. This tutorial presents a basic and rounded style for drawing a husky face. It uses simple shapes and a few details.
To draw a simple husky face, start by drawing a large circle for the head outline. Inside the circle, add two small ovals for the eyes and a slightly larger oval below for the nose. Under the nose, draw the mouth and tongue by extending a rounded shape downwards. Next, draw two triangular ears at the top of the head.
Add fluffy lines on each side of the head to create the characteristic husky fur texture. Inside each ear, draw a smaller triangular outline to represent the inner ear parts. Then, add the distinctive husky mask by sketching a curved line around the face. Finally, color the husky face, using a mix of gray for the fur, black for the eyes and nose, and pink for the tongue.
Alternative Method
Here you can see a cheerful husky with his tongue hanging out. This lesson is also very simple, and the sequence of steps here is also a little different.
To draw an easy husky face in this style, begin by sketching the outline of the head, shaping it with curved lines that hint at the fluffy fur around the face. Next, add two pointed ears at the top. Inside each ear, draw an inner triangular shape for added detail. Then, create the husky’s characteristic face pattern by drawing a large shape around the face that covers the forehead, cheeks, and muzzle area.
Add two small circles for the eyes, placing them within the mask area, followed by smaller circles inside for the pupils. Below the eyes, draw a small nose and two curved lines for the mouth, giving the husky a Fre cognizable look. Finally, color the husky face, using a darker tone for the outer fur and a lighter shade within the mask area, finishing with black for the nose and eyes and red for the tongue.
Conclusion
Now you have mastered the next lesson in drawing animals. And it’s time to apply the knowledge you’ve gained and try to draw a husky.
Was this drawing tutorial helpful to you? What emotions did you experience while drawing this animal? I hope you enjoyed your time and are now happy with the result. Share your impressions in the comments. And at the same time write what other characters you would like to draw.
To take your art skills to the next level, be sure to check out my other lessons from the Animals category. There you will learn how to draw a cat, create cool drawings of horses and many other animals. And also, please subscribe to me on YouTube and Pinterest for new tutorials and coloring pages.