How to Draw a Hummingbird
Ready to learn how to draw a hummingbird with four fun and easy methods? My step-by-step guide is specially designed for kids, making drawing as enjoyable as watching hummingbirds in the garden. Let’s spread our wings with pencils and papers, and create beautiful hummingbird art together.
Step into the magical world of hummingbirds with our special lesson tailored for beginners. I’ll take you on a creative voyage to draw a hummingbird, making each step an adventure in itself. Designed with kids in mind, this lesson is your ticket to unlocking artistic potential and diving deep into the wonders of nature through art.
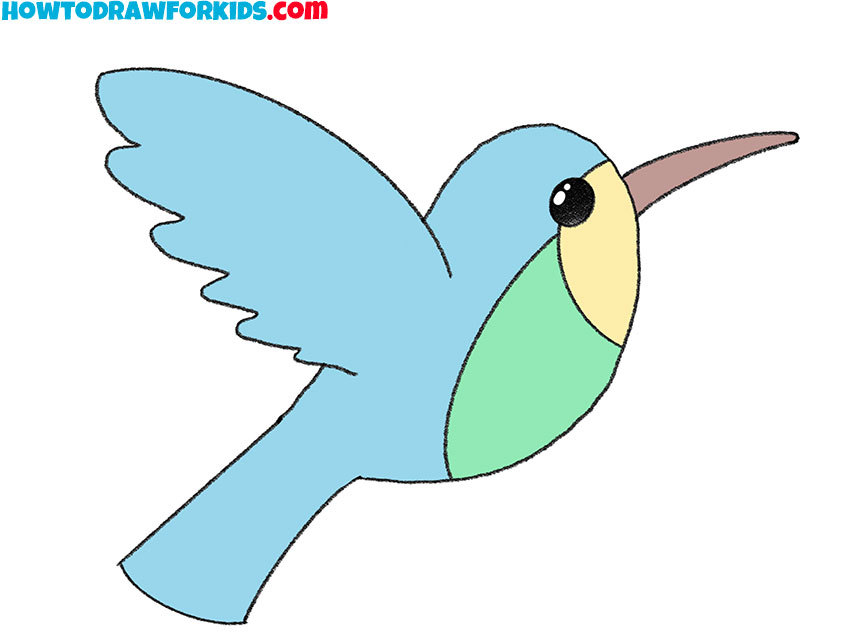
How to Draw a Hummingbird: Basic Information
Get ready, young artists, for an exciting journey in the world of art. Today, we’re going to learn how to draw a hummingbird, a tiny aviator of the natural world. With simple strokes and keen observation, we’ll begin sketching the hummingbird’s silhouette, capturing its grace and poise.
Moving forward, we’ll pay close attention to the unique attributes of our feathered subject. The hummingbird’s signature beak and rapidly beating wings will come to life as we refine our drawing. Each feature we add brings us closer to portraying the hummingbird’s dynamic essence.
By the end of our session, you’ll see how the initial shapes evolve to draw a hummingbird in all its glory. This exercise is not only about crafting a beautiful image but also about developing your skills to observe and depict the subtleties of nature’s designs. Ready your pencils and let’s breathe life into our artwork together!
Hummingbird Drawing Tutorial
Materials
- Pencil
- Paper
- Eraser
- Coloring supplies
Time needed: 30 minutes
How to Draw a Hummingbird
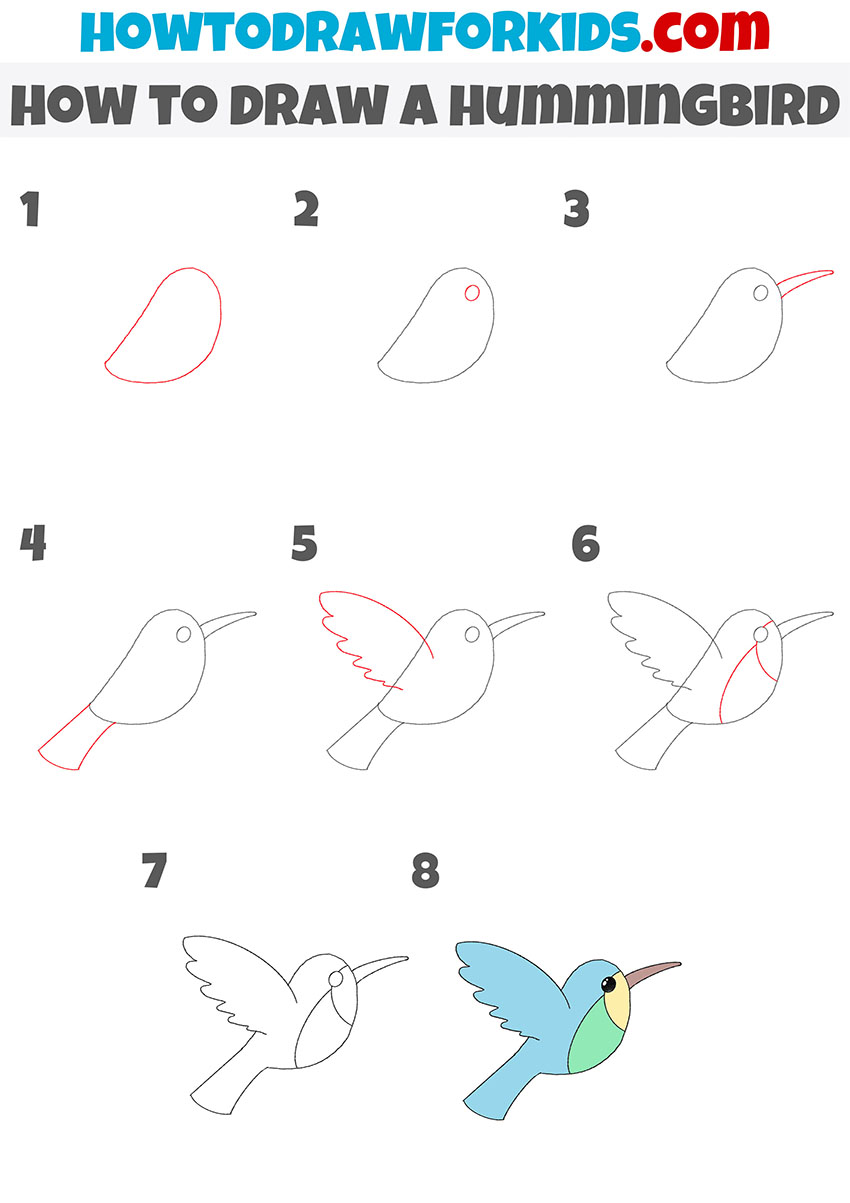
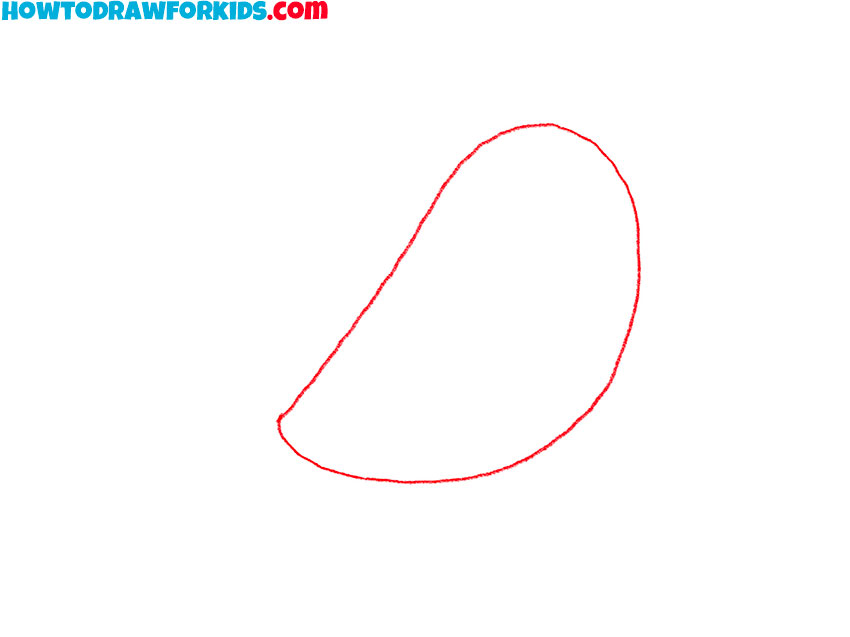
- Draw the outline of the body.
So, we start with the simplest foundation for our hummingbird: an oval shape. The oval is slightly tilted to the left, creating a dynamic posture for the bird.
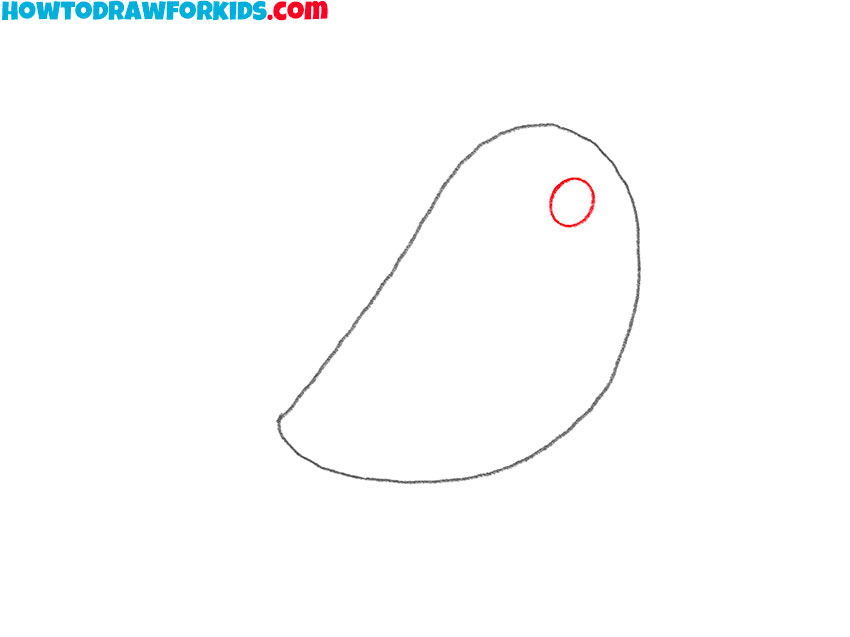
- Sketch out the eye.
The hummingbird’s eye doesn’t look too complicated – it’s just a regular circle. Use a circular motion with your pencil, keeping the lines soft and easy to adjust.
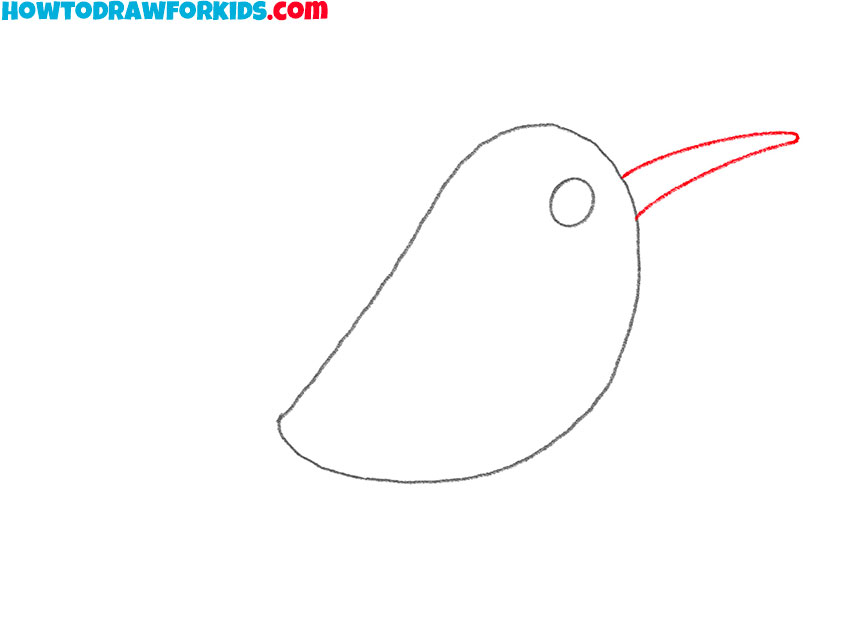
- Depict the beak.
Starting from the small circle, draw a thin triangle that tapers to a point, slanting upwards to the right. This shape captures the slender and pointed nature of the hummingbird’s beak, used for sipping nectar.
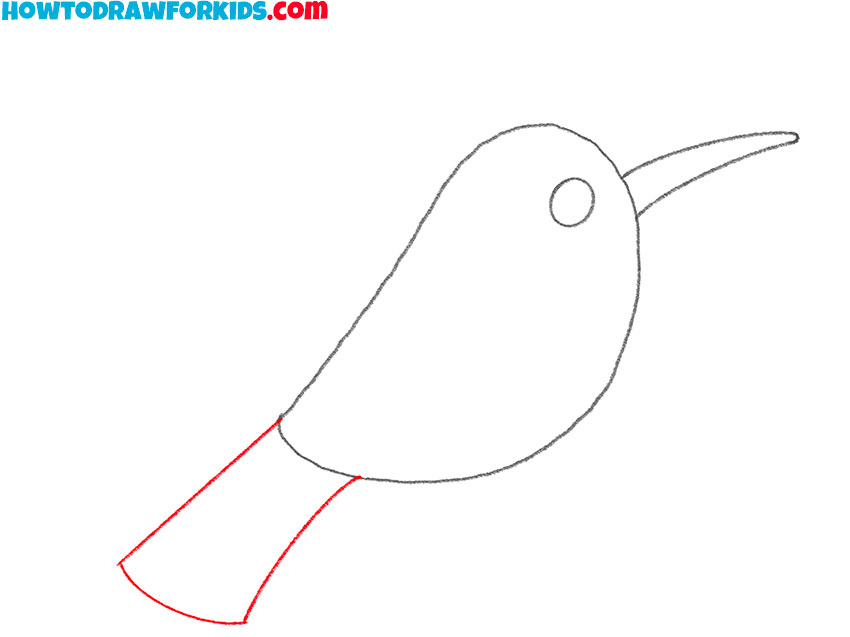
- Add the tail.
Using a few smooth lines, depict the wide tail. The tail should be proportionate to the body, balancing the overall composition of the bird.
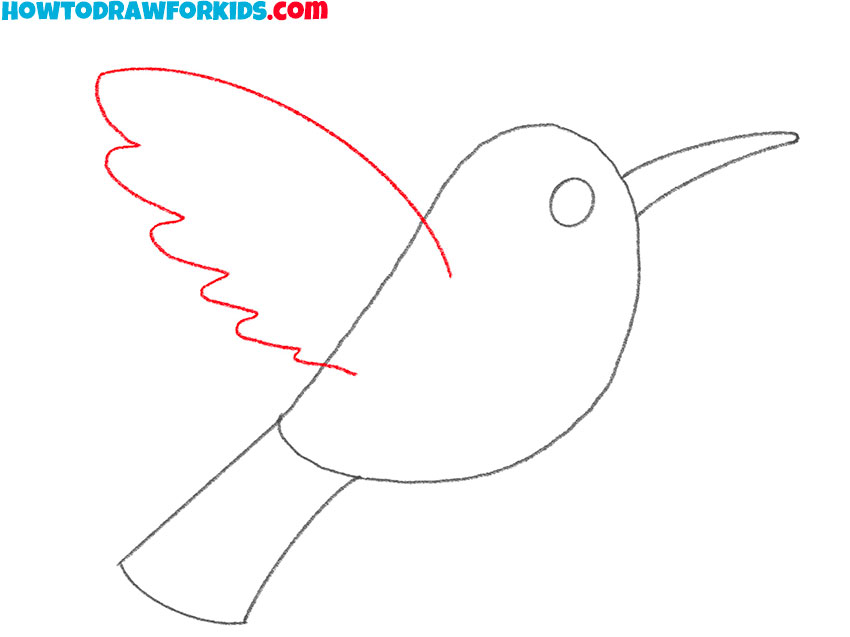
- Draw the wing.
A rounded line depicts the top of the wing and a wavy line draws the bottom. It’s important to keep the wing proportional to the body and the tail, ensuring that the bird appears balanced.
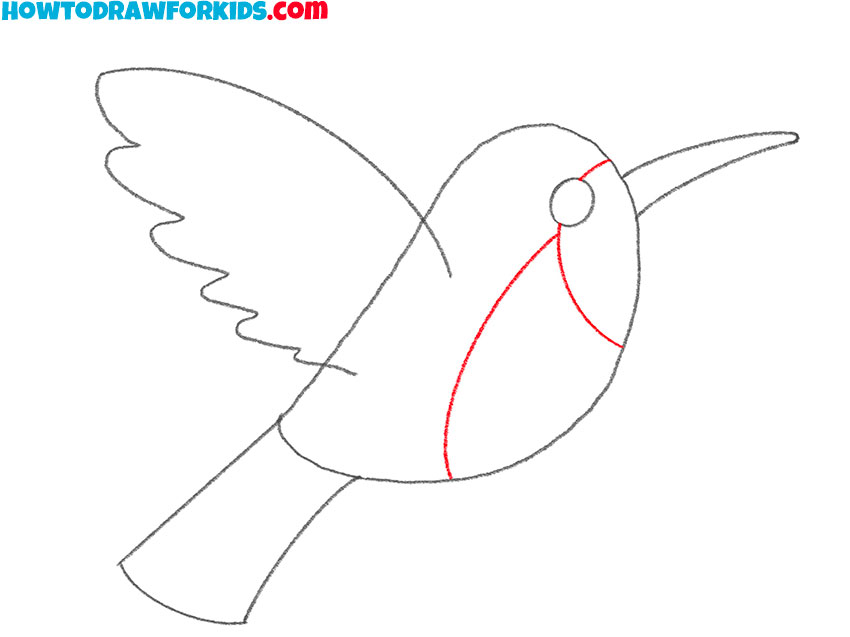
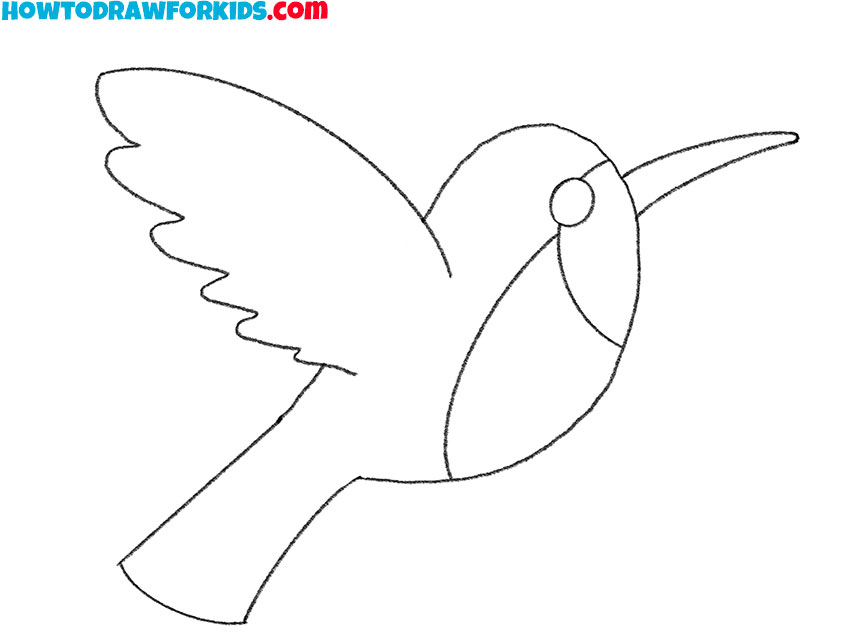
- Detail the color.
The hummingbird is a very bright and colorful bird. If you color this bird without markings, it might be a little difficult. So, mark the contour where the color of the plumage will be different with smooth lines.
- Correct inaccuracies.
Remove extra lines with the eraser and correct mistakes.
- Color the hummingbird.
Use some of the brightest colors for drawing. When coloring, use a gentle, layered approach to build up the hues gradually, allowing for a more nuanced and lifelike result.

Additional Content
Good news for young creatives looking to spread their wings: I’ve created a downloadable PDF of our popular hummingbird drawing lesson, absolutely free! This streamlined guide is filled with all the essential instructions and visual aids from the original tutorial, optimized for offline use.
It’s been specially crafted for kids, making it a breeze to follow along and create stunning artwork without an internet connection. Download your copy today and let every drawing be a flight of imagination!
Alternative Drawing Techniques
Beyond our initial lesson, I’ve put together several alternative drawing methods for hummingbirds, providing you with ample opportunities to practice and perfect your craft. These techniques range from simple to complex, covering everything from quick sketches to detailed illustrations.
They’re tailor-made to help you understand the beauty and intricacy of hummingbirds, enriching your artistic repertoire and encouraging continuous learning and improvement.
How to Draw a Cartoon Hummingbird
This drawing method presents a cartoonish version of a hummingbird, perfect for beginners or young artists. It simplifies the bird’s form into basic shapes and lines, making it accessible and fun. Starting with a basic outline resembling the bird’s body, the steps gradually build up to more defined features like the beak, wings, and tail.
This approach emphasizes the playful character of the hummingbird without worrying about intricate details, making it an enjoyable learning experience for kids. The final touches of color bring the drawing to life, capturing the hummingbird’s vibrant essence in a cheerful, animated style.
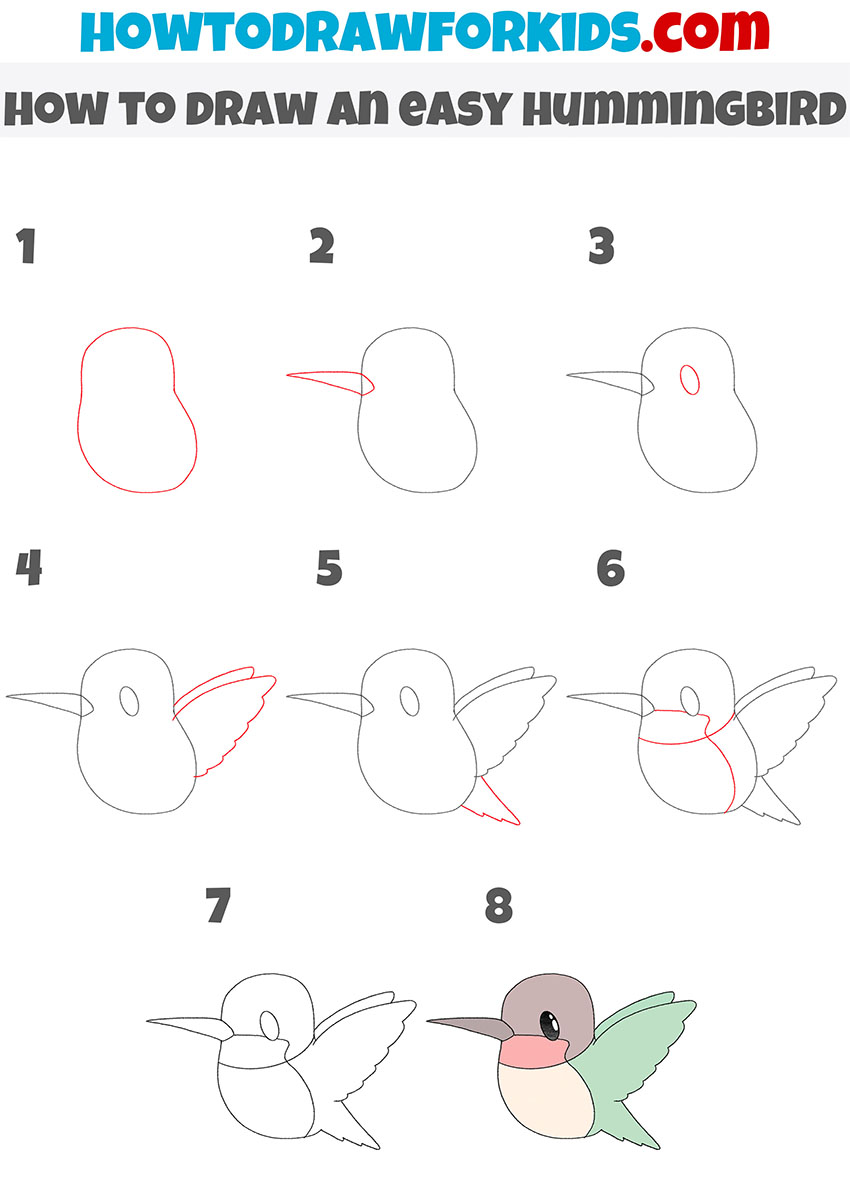
Hummingbird Drawing with Detailed Steps
This second alternative method for drawing a hummingbird offers a more detailed approach, dedicating an extra step to refine each part of the bird. Although similar to the first method, this technique encourages practice and repetition, which is crucial for improving drawing skills.
The additional step allows young artists to focus on the nuances of each feature, such as the curvature of the wings or the shape of the beak, enhancing their understanding of the hummingbird’s anatomy and how to capture it on paper.

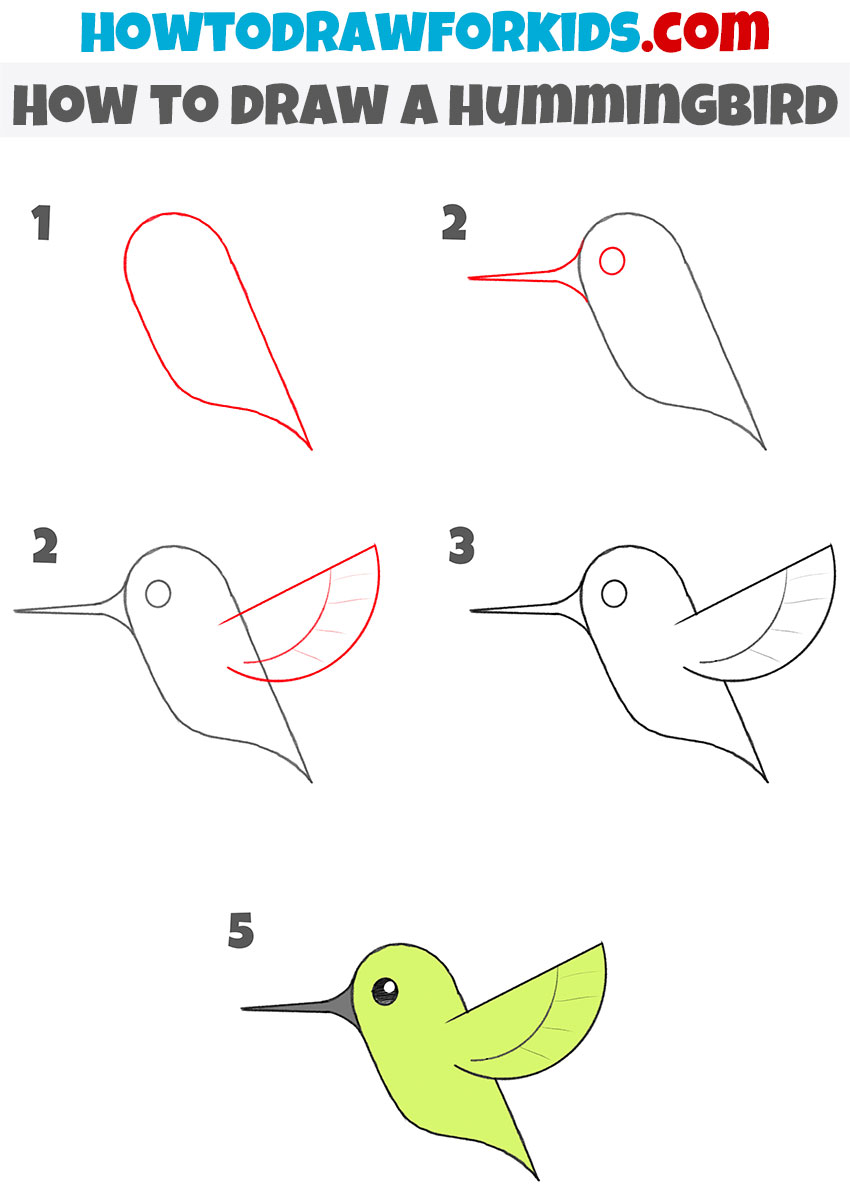
How to Draw a Hummingbird for Kindergarten
Here, drawing a hummingbird is broken down into five easy steps, making it perfect for kindergarten children. The simplicity of the technique is ideal for young beginners, as it teaches them the fundamentals of shapes and lines without overwhelming them.
Each step is designed to be straightforward and achievable, encouraging the little artists by allowing them to quickly see their progress. By the end, they will have a charming and recognizable hummingbird, instilling a sense of accomplishment and fostering their love for drawing.
Conclusion
Your creativity has truly taken flight today.There’s no limit to what you can create with a dash of imagination and a sprinkle of patience. Ready for your next artistic challenge? Hop onto my website where lessons on drawing all sorts of animals and even the curves of a human mouth await.
Stay in the loop by following my social media channels, and never miss a beat – or a brush stroke – of the exciting content we have in store for you. Keep drawing and keep dreaming!


I love it!