How to Draw a Mouth
Embark with me on a creative venture as we explore the essential steps on how to draw a mouth with precision and grace. My tutorial is designed to simplify the process, breaking down each element to make learning accessible for all. Together, we’ll translate the complexity of human expressions into a few manageable strokes.
How to Draw a Mouth: Basic Information
Welcome to an in-depth exploration of how to draw a mouth, where we translate the subtle complexities of human features into attainable steps. This guide is constructed to make the drawing process as intuitive as breathing. We’ll embark on a journey to capture not just the form, but the very essence of expressive lips.
This lesson zooms in on the specific characteristics of the mouth we aim to capture: the curve of the upper lip, the fullness of the lower, and the subtle play of light that gives the impression of softness. These details are vital, as they contribute to the realism and individuality of your drawing, setting your work apart.
As we conclude our session, to draw a mouth will no longer feel like a task, but rather a natural step in your artistic journey. The mastery of blending lines and shadows to reveal the mouth’s texture and form will become second nature, empowering you to add a breath of life to your portraits.
Mouth Drawing Tutorial
Materials
- Pencil
- Paper
- Eraser
- Coloring supplies
Time needed: 20 minutes
How to Draw a Mouth
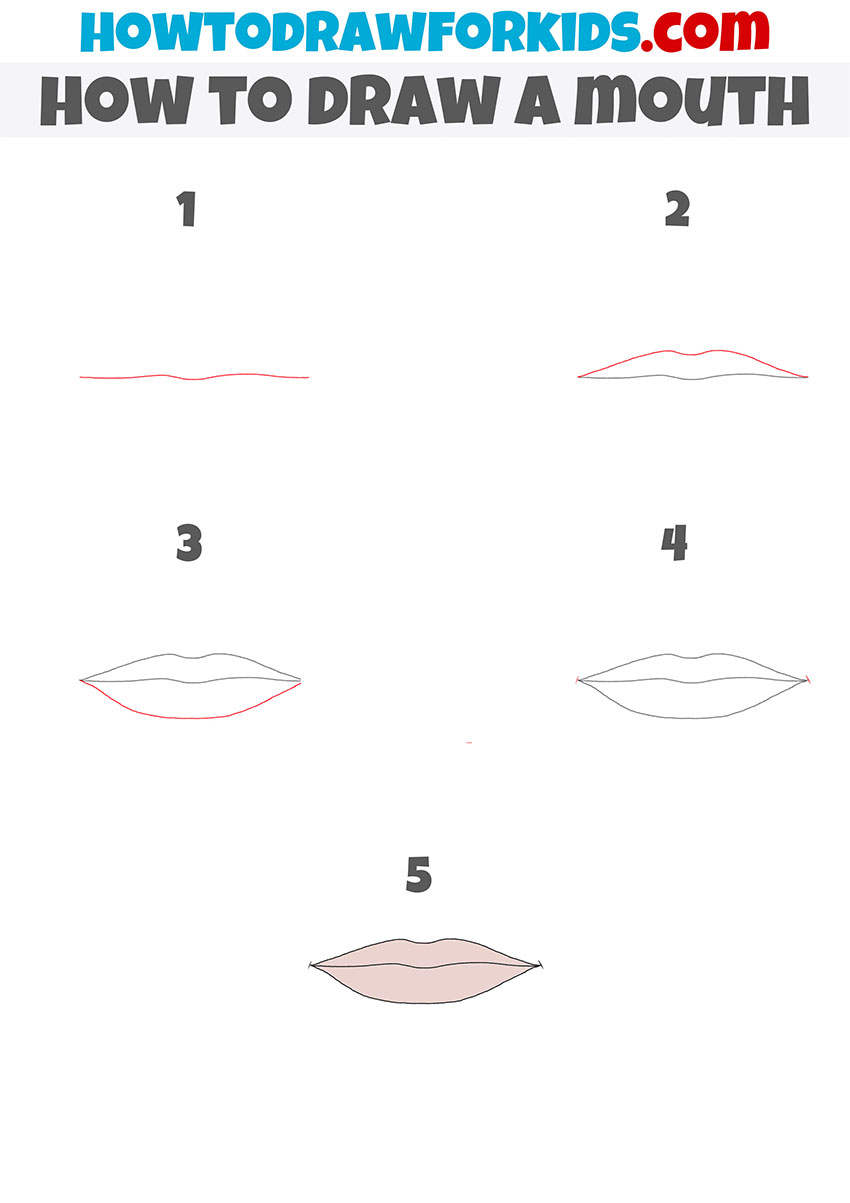
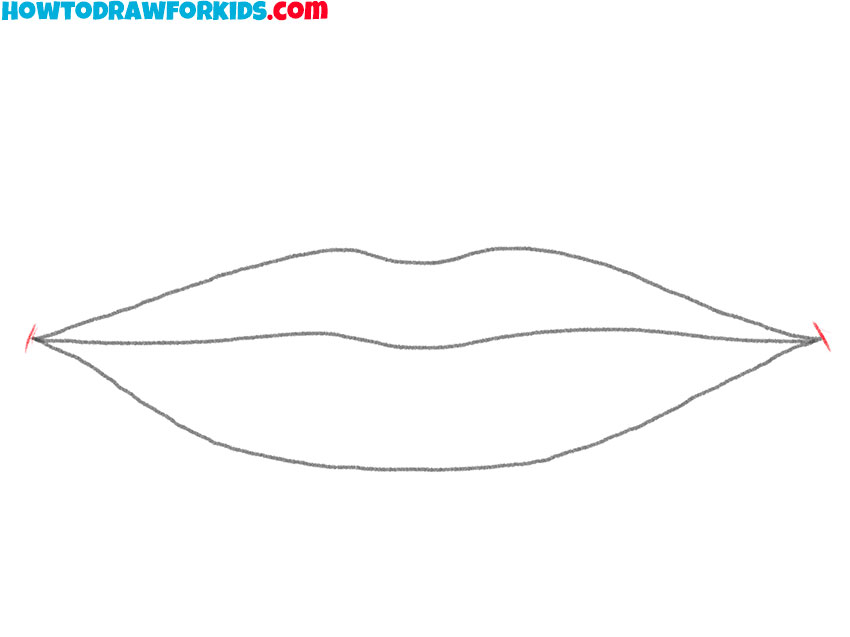
- Draw the inner outline of the mouth.
To complete this step, you need to draw one long, slightly curved line.

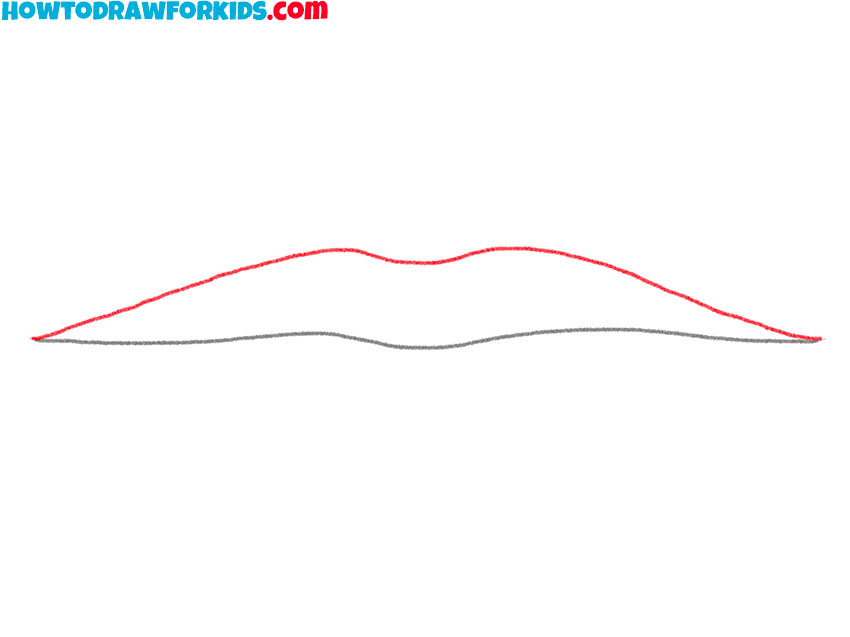
- Depict the top lip.
Above the previously drawn line, draw another curved line that has a wavy bend in the middle.
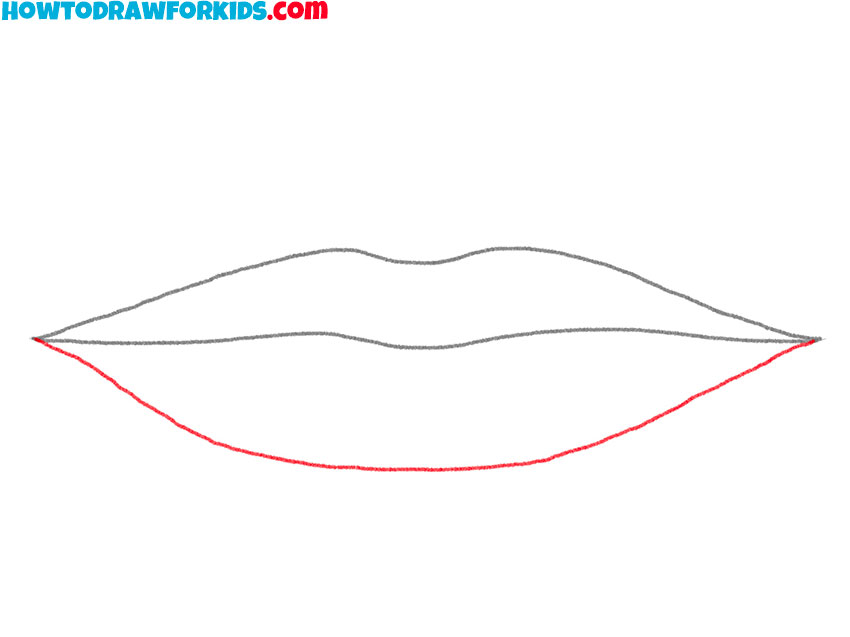
- Sketch out the bottom lip.
Below the two lines you drew earlier, draw another curved line.
- Add the corners of the mouth.
Near the points where the three previously drawn lines converge, draw two short lines.
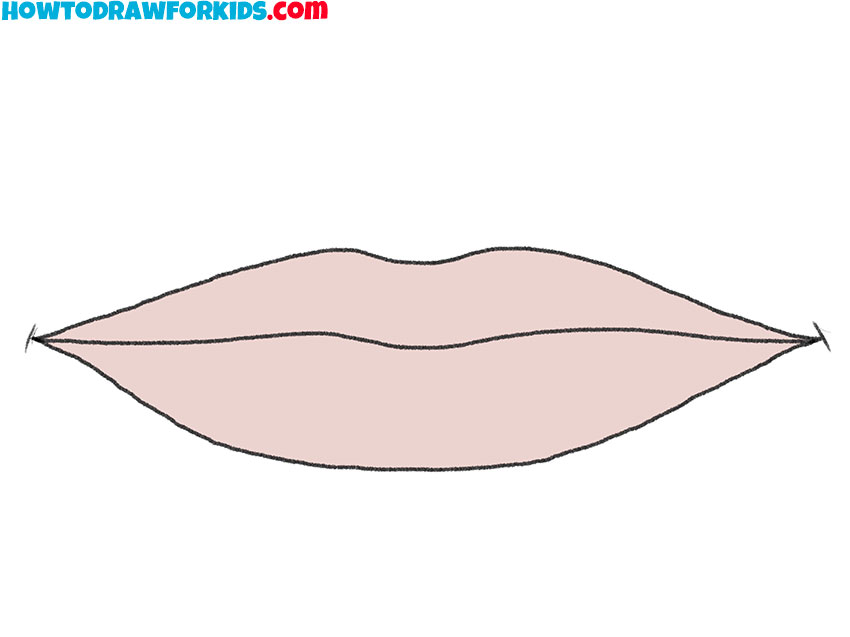
- Color the drawing.
To color the mouth, you can use light pink.
Additional Content
For all you young artists, I’ve put together a special little PDF booklet. It’s like a treasure map that leads you to the secret of how to draw a mouth, and the best part? It’s completely free! You can download it, print it, and take it anywhere. Whether you’re on a long car ride or sitting cozy in your backyard, you can practice.
And hey, guess what? You can keep this PDF forever. Whenever you feel like drawing, just flip it open, and there you’ll find all the tips to draw a mouth just right. It’s super easy to get—just one little click to download, and you’re all set to become a mouth-drawing master, no matter where you go!
Expert Tricks for Drawing Mouths
As we wrap up this lesson on drawing mouths, it’s important to remember that every little tip and trick can unlock new levels of creativity in your art.:
- Incorporate Light Shadows: Adding subtle shadows beneath the lower lip and at the corners of the mouth can give your drawing a more three-dimensional look and feel.
- Highlight for Moisture: A few strategic highlights using a white pencil or paint can mimic the natural wetness of the lips, making them appear more lifelike.
- Texture Matters: Gentle lines on the lips can replicate their natural texture, adding depth and detail to your portrayal.
- Play with Emotions: Experiment with adjusting the mouth’s shape to convey different facial expressions. It’s a great way to practice capturing a range of emotions.
- Consider Color: Using various shades of red and pink can add depth and realism to the lips, enhancing the overall effect of your drawing.
Ultimately, each artist finds their own path and style. These tips and tricks are just the beginning of your artistic experimentation. Use these recommendations as tools to develop your unique perspective on the art of drawing.
Fine-Tuning Your Drawing Craft
Here are a few key pointers to guide you further on your quest to refine your drawing skills:
- Practice Regularly: Like the ebb and flow of the tide, regular practice breathes life into your art. Dedicate time each day, even if it’s just a few minutes, to sketching mouths in various expressions and forms. Consistency is the golden thread that weaves skill into habit.
- Observe and Analyze: The world around you is brimming with examples. Observe the mouths of those you see-notice the curve of a smile, the depth of a frown. Each observation is a lesson, teaching you the subtle nuances that make each expression unique.
- Experiment with Techniques: Don’t shy away from experimenting with different drawing tools and techniques. Whether it’s a soft pencil for gentle shading or a fine liner for crisp outlines, each tool offers a new texture and depth to your drawings.
- Seek Feedback: Embrace the constructive critiques from teachers, peers, or family members. Feedback is a mirror, reflecting both your strengths and areas for improvement, guiding you toward becoming a more skilled artist.
Every stroke of your pencil, every observation, and every piece of feedback are stepping stones towards improvement. Keep your spirits high, your mind open, and your pencil ready, for the world is your canvas, and your potential is boundless.
Conclusion
We’ve reached the end of our lesson on drawing mouth, but this is merely the first brushstroke on your canvas of learning. There’s a whole world of artistic challenges waiting for you on my website, from the enchanting details of drawing an elf to the unique challenge of sketching a camel.
Stay connected with me through social media to catch the latest tutorials. Your input is invaluable, so please, leave a comment with any wishes or ideas for future lessons. Together, we can make this artistic voyage even more exciting and fulfilling. Let’s keep the creativity flowing and turn the blank pages into masterpieces.


not the best