How to Draw a Husky Puppy
In this tutorial you will learn how to draw a Husky puppy. This lesson will be useful, and it consists of only nine steps.
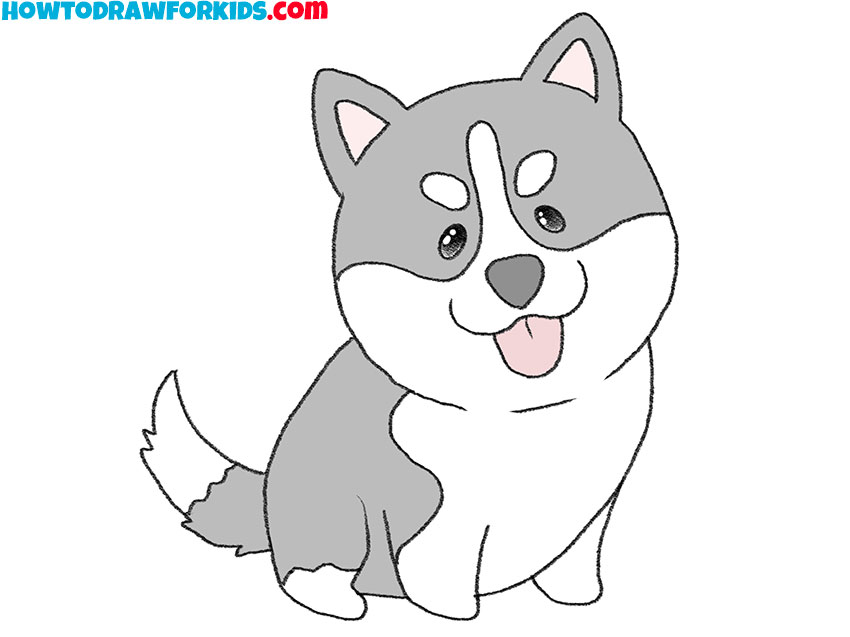
So, I am glad to bring to your attention this useful and fascinating drawing lesson in which I will tell and show you how to draw a husky puppy step by step.
Huskies are a well-known northern dog breed. Husky puppies look cute and funny. By learning how to draw a husky with the help of this instruction, you will be able to draw this puppy against the backdrop of a natural landscape or some other picture in the future.
To get started with this exciting lesson, prepare the necessary materials and start drawing and enjoy the creative process.
Husky Puppy Drawing Tutorial
Materials
- Pencil
- Paper
- Eraser
- Coloring supplies
Time needed: 30 minutes
How to Draw a Husky Puppy
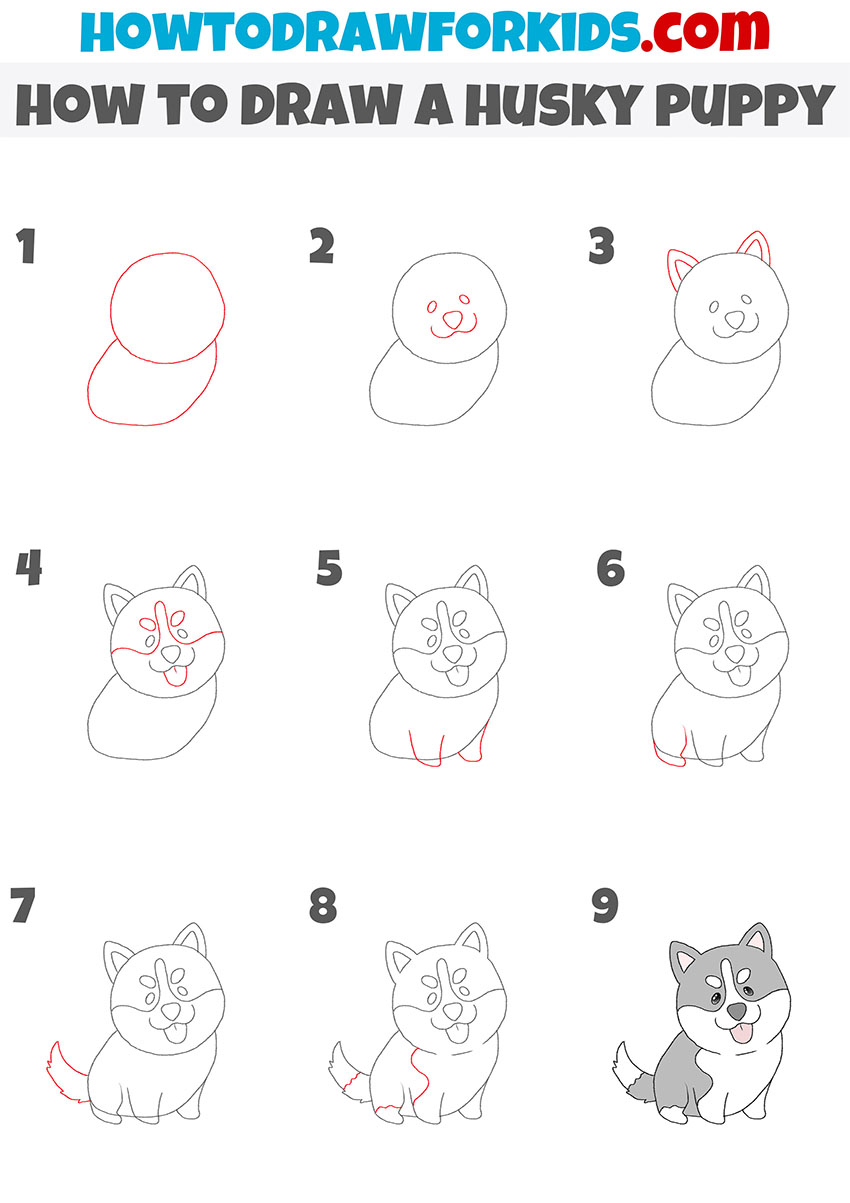
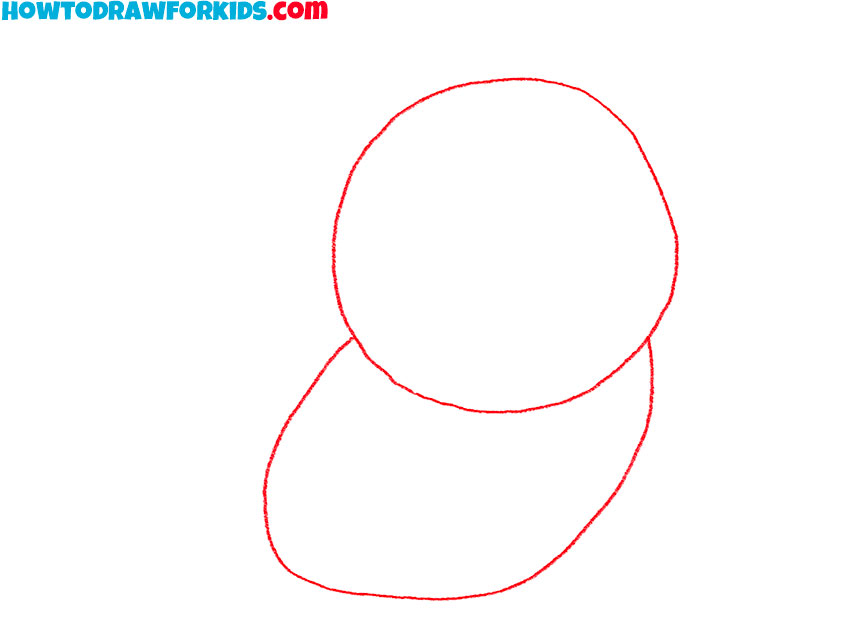
- Draw the outlines of the head and torso.
Add the head as a circle and also add the torso as a curved line below the head of the puppy.
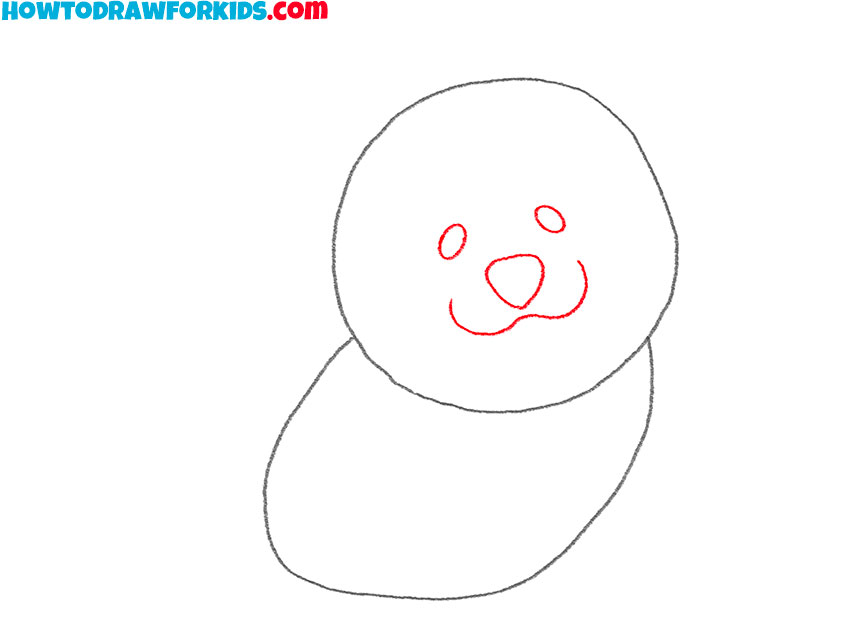
- Add the facial features.
Inside the outline of the head draw the eyes, nose, and mouth.
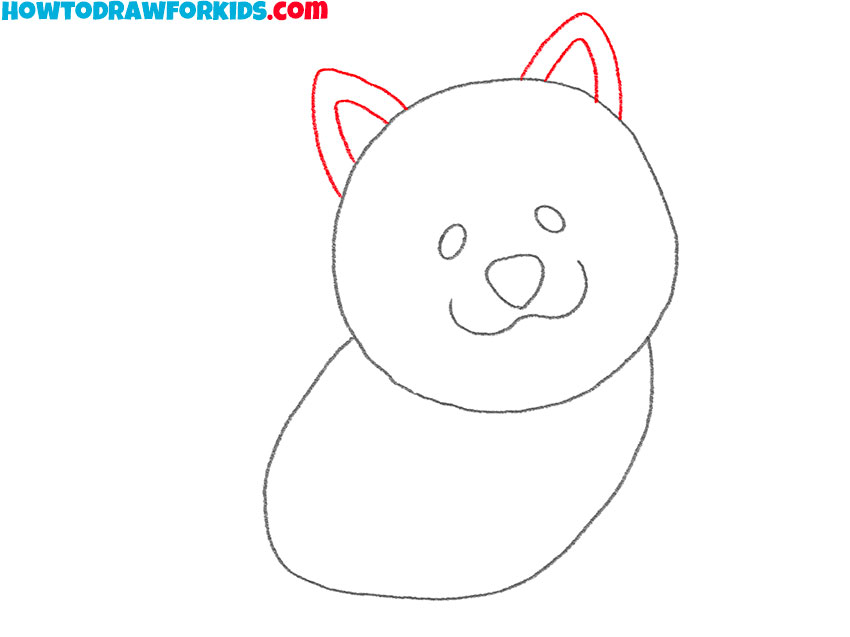
- Depict the ears.
At the top of the head, draw two symmetrical ears using curved lines of different lengths.
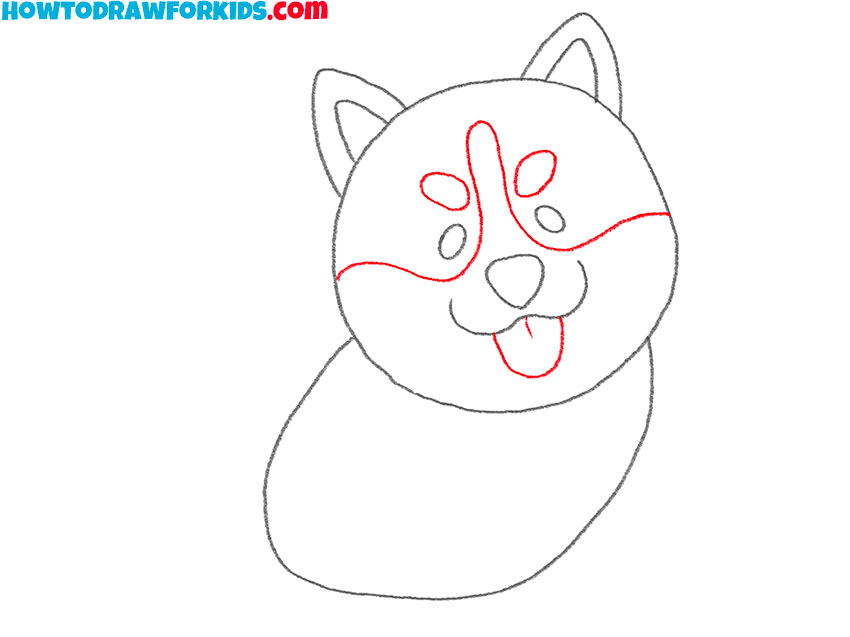
- Finish drawing the face.
Draw the eyebrows, tongue, and color outline using oval shapes, an arc, and curved lines.
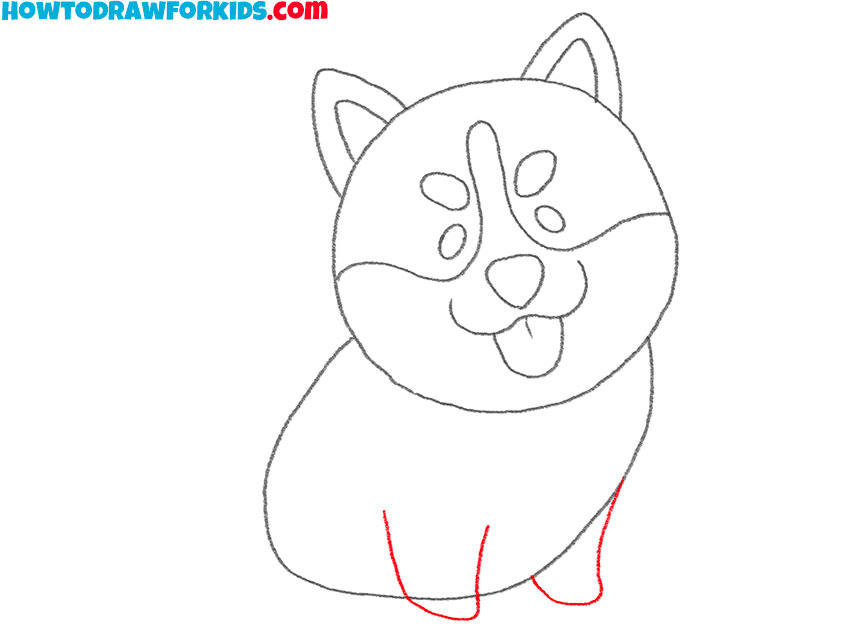
- Add the outlines of the forelimbs.
At the bottom of the torso draw two legs pointing in the same direction using curved lines.
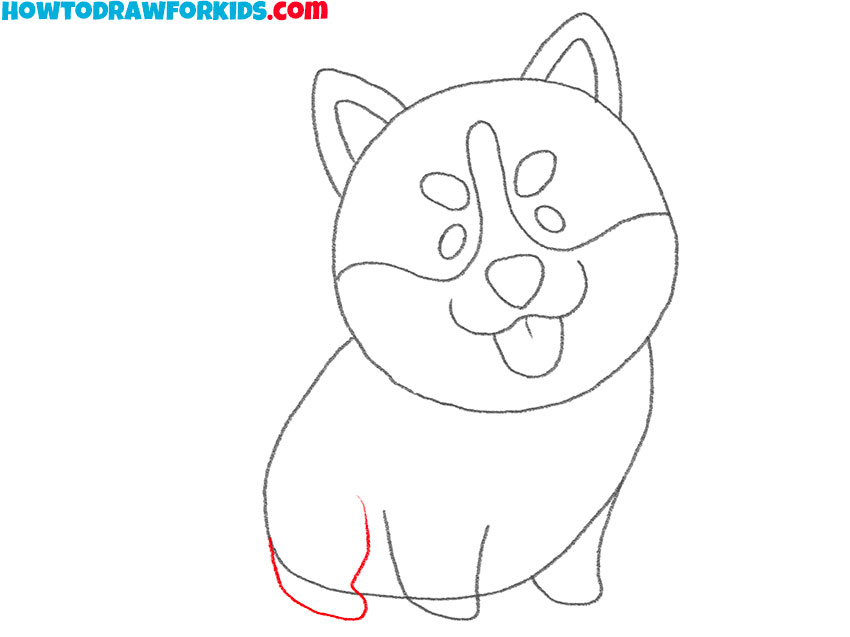
- Draw the back paw of the husky puppy.
At the lower back of the torso, draw another paw using one curved line, as shown.
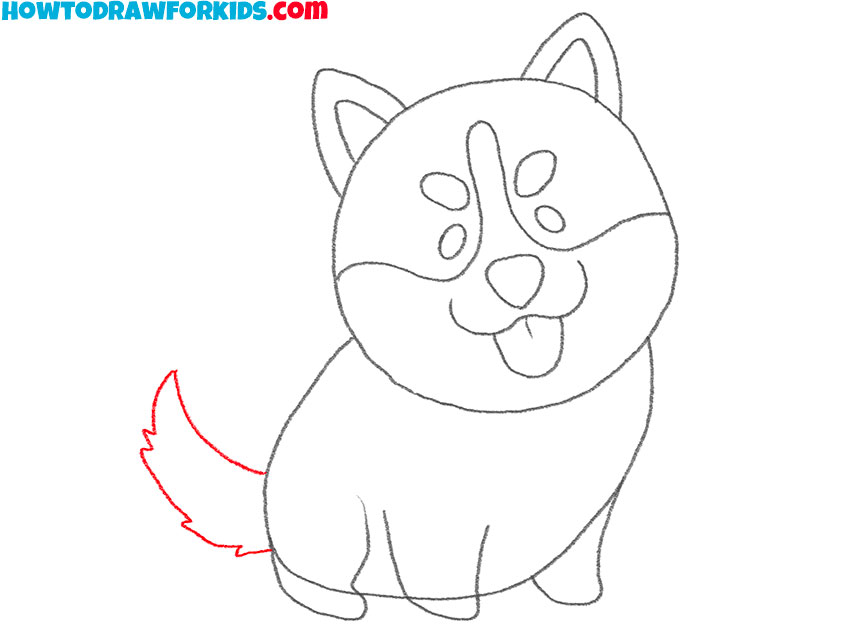
- Sketch out the tail.
On the left side of the torso, draw the tail raised up using an arc and zigzag lines.
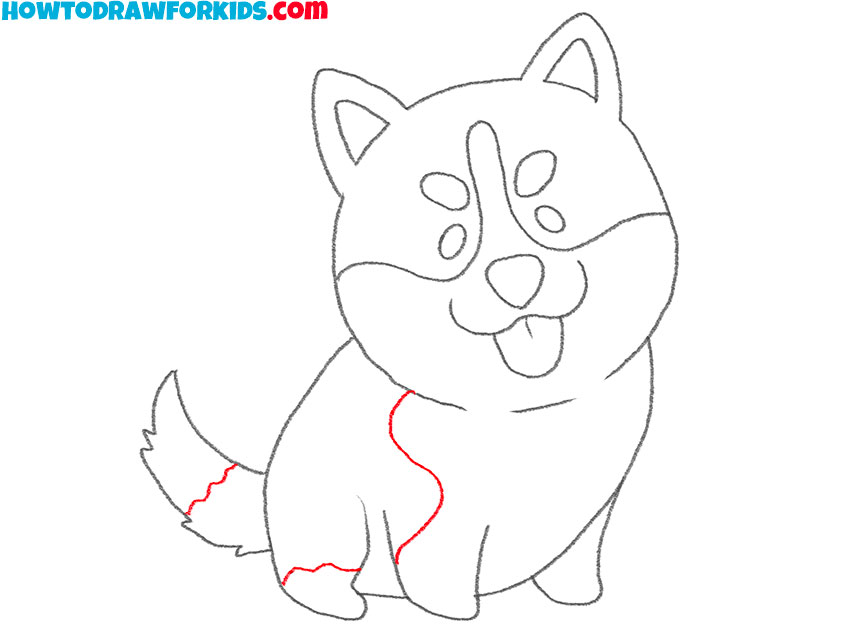
- Add decorative elements.
To indicate the color of the puppy, draw wavy lines of different lengths on the body, paw and tail.
- Color the drawing.
To color the puppy, use shades of gray, shades of pink, as well as black, and add highlights.
So the next drawing lesson came to an end. If you like drawing animals, visit other drawing lessons on our website. For your convenience, I have prepared a PDF file in advance, which contains a short version of the lesson. Download the file and draw at any time.