How to Draw a Penguin
Learn how to draw a penguin with my collection of six very different but really easy and cute drawing tutorials for kids and beginners.
How to Draw a Penguin: Introduction
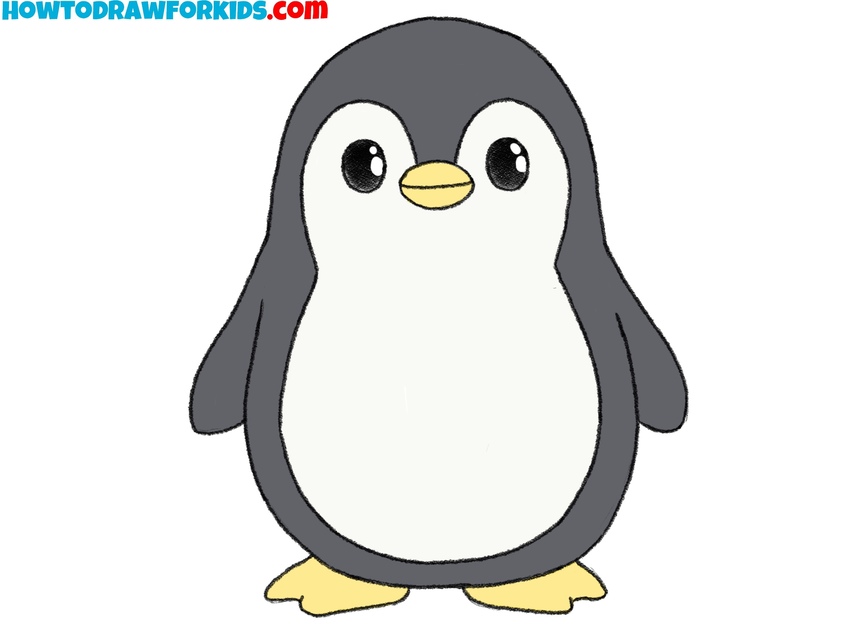
Penguins are quite common on the planet and have a wide variety of species. Gentlemen in a suit are loved by the absolute majority of children. In this lesson I will try to show you how to draw a penguin in the simplest way.
Drawing a penguin, like drawing birds of many other types is a fairly simple process, as it consists of basic features and details. But nevertheless, there are features that must be taken into account when drawing in order to give the arctic bird a truly recognizable look.
For example, it is important to ensure that the outlines of the penguin are not sharp and straight; rounded lines should be used instead. It is also necessary to maintain symmetry so that both sides of the face, body, wings, and legs appear smooth and natural.
It is important to consider the color palette. The penguin’s body is primarily composed of black and white tones, giving it a resemblance to a person in a tuxedo. The beak and feet should be colored yellow or orange. In this tutorial, a simple palette will be shown, but to give the penguin a more dimensional appearance, shadows can be added.
Penguin Drawing Tutorial
Materials
- Pencil
- Paper
- Eraser
- Coloring supplies
How to Draw a Penguin: Additional Tutorials
Time needed: 35 minutes
How to Draw a Penguin
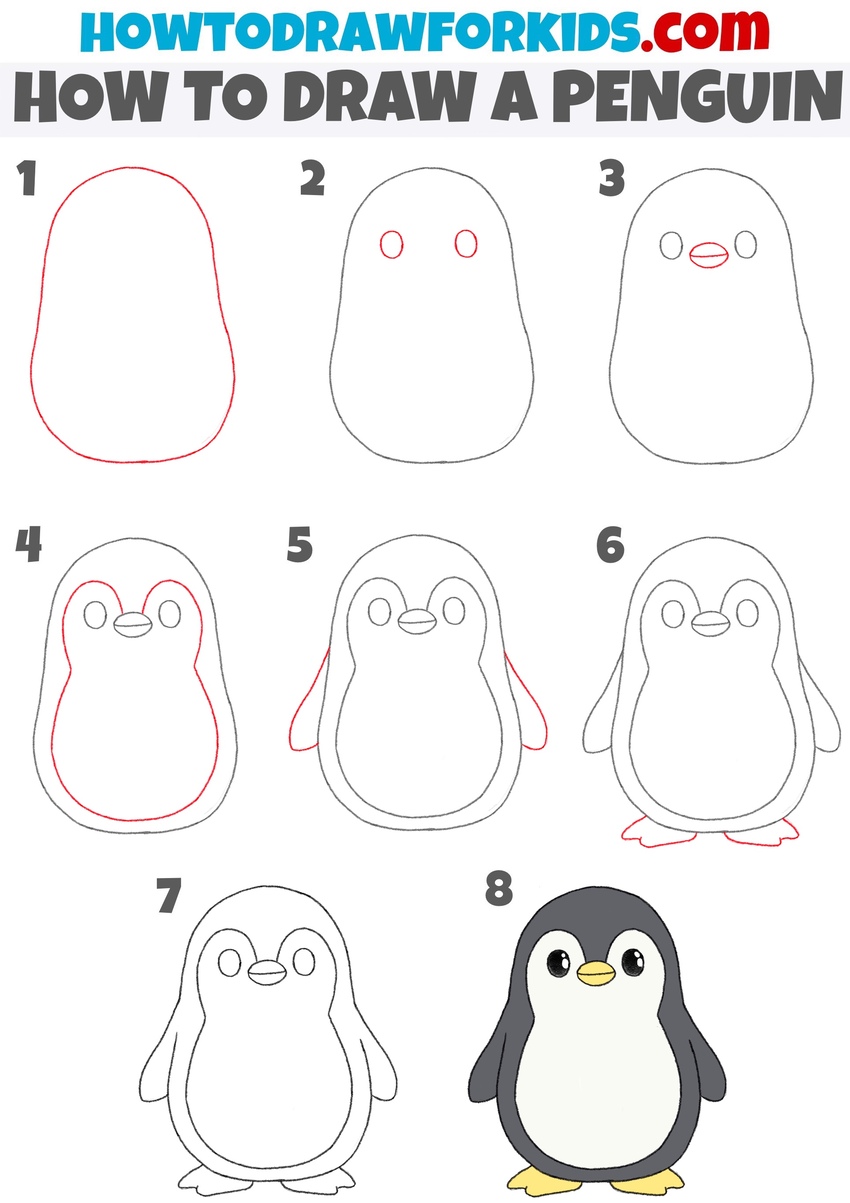
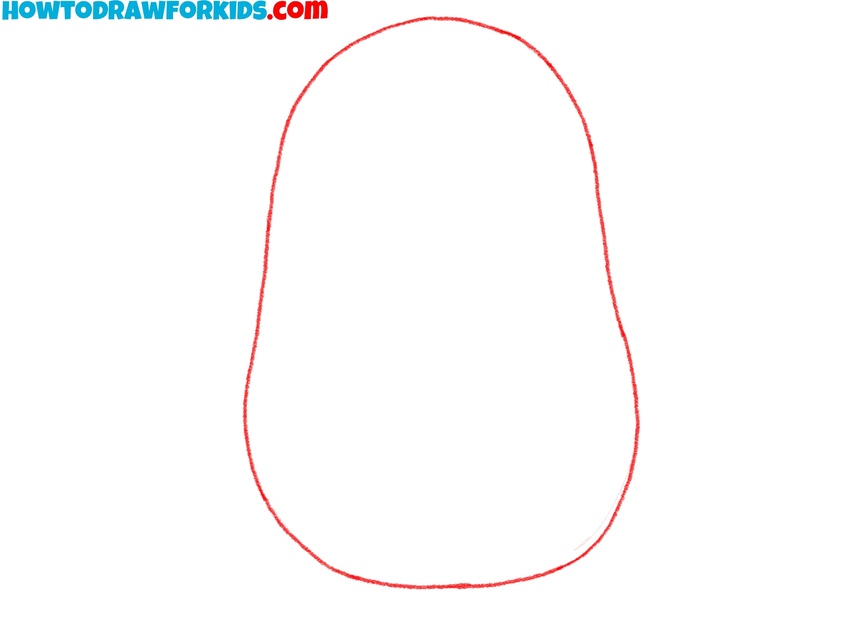
- Sketch the basic outlines of the penguin.
Begin with a simple shape resembling an oval, but slightly wider at the bottom. This will serve as the outline for your penguin’s body. Keep your lines light, as you may need to adjust them later. This body shape will act as the basic shape for the other details you’ll add as you progress.
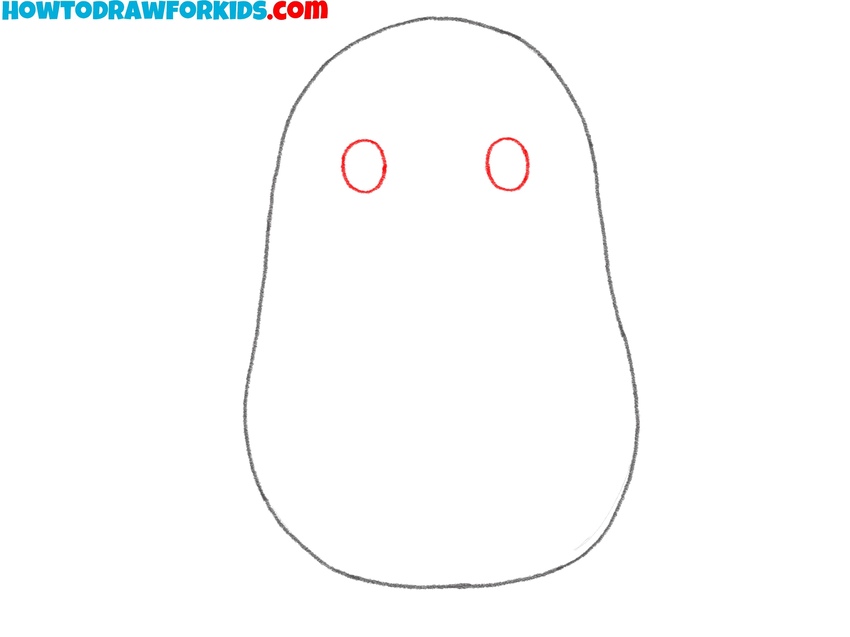
- Sketch the eyes of the bird.
Next, draw two small circles or ovals near the upper part of the body for the eyes of the penguin. Drawing the eyes as ovals will give the penguin drawing a simple, cartoon-like appearance. For a more realistic look, draw the eyes in an almond shape.
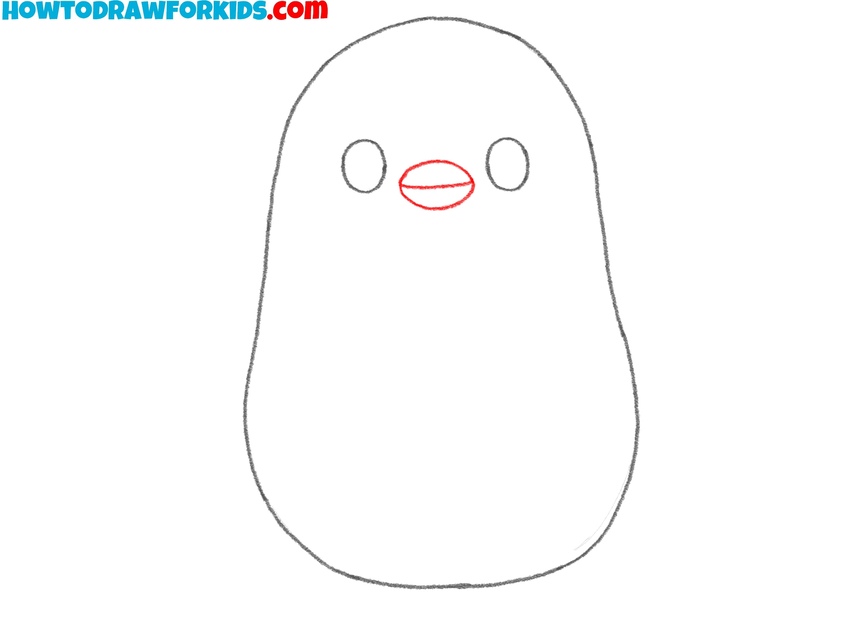
- Add the beak below the eyes.
For the beak, draw a small oval horizontally below the eyes. Add a line across the middle of the oval to define the beak’s shape. The beak should be centered between the eyes. Try to make the image of the penguin and parts of the face as symmetrical as possible.
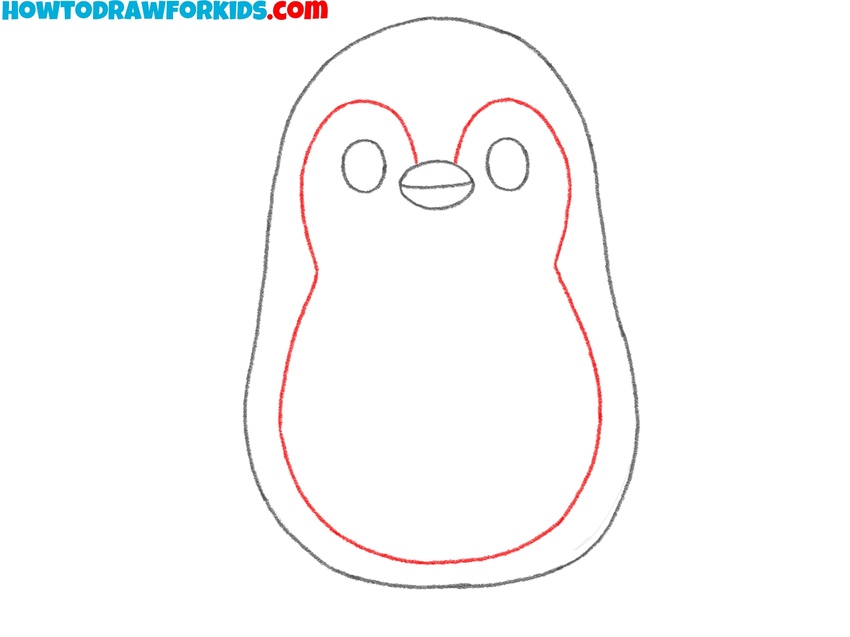
- Illustrate the color boundary line.
Now, draw a line inside the outline of the penguin’s body to separate the black section from the white. Begin this line at the top of the beak, curve it upwards around the eyes, bring it down along each side, and finally connect it at the bottom.
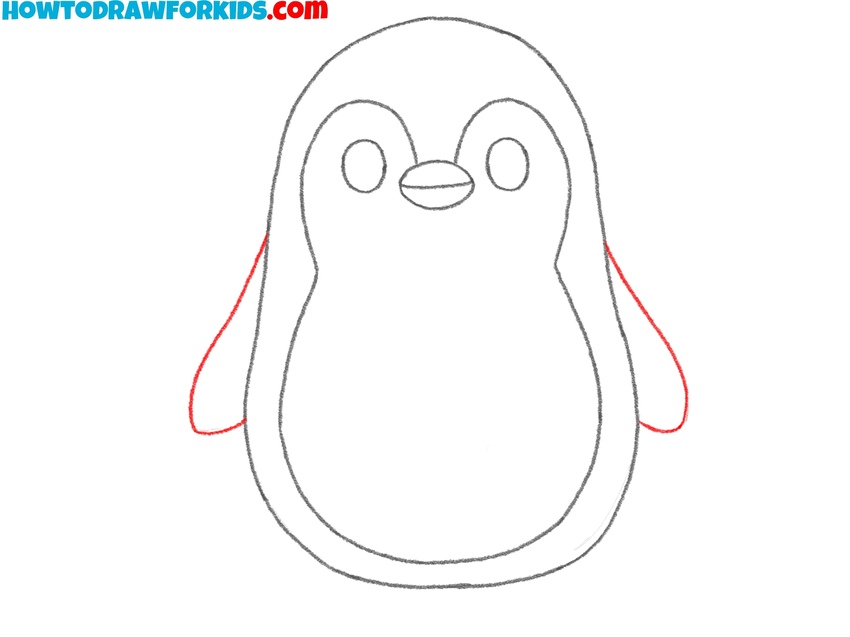
- Sketch the wings at the sides.
To give your penguin its wings, draw two small, rounded shapes on each side of the body. These wing shapes should be slightly curved and positioned around the midsection. The wings don’t need to be perfectly symmetrical; just keep them similar in size and shape.
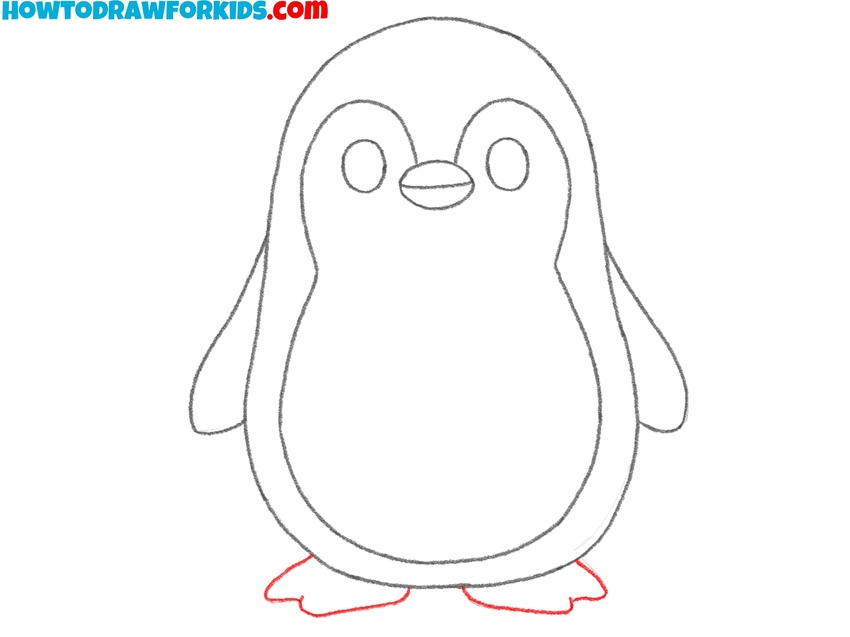
- Draw the feet of the penguin.
Below the body of the penguin, add two small feet. Each foot consists of two pointed shapes, resembling simple triangular flippers. To check its symmetry, you can use a mirror or lightly sketch a vertical guideline down the middle to help keep the features balanced.
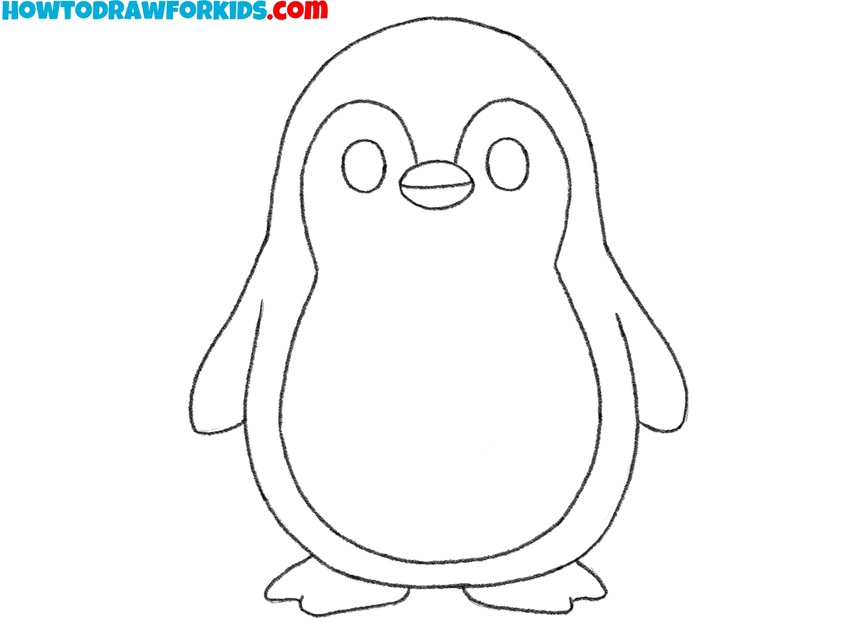
- Erase the guidelines and refine the sketch.
Now, go over your penguin drawing and make any necessary adjustments to smooth out the lines and erase any unnecessary guidelines. Refine the outline of the body, belly, wings, and feet to ensure everything looks clean. This step is important to give the penguin drawing a polished look before adding any colors.
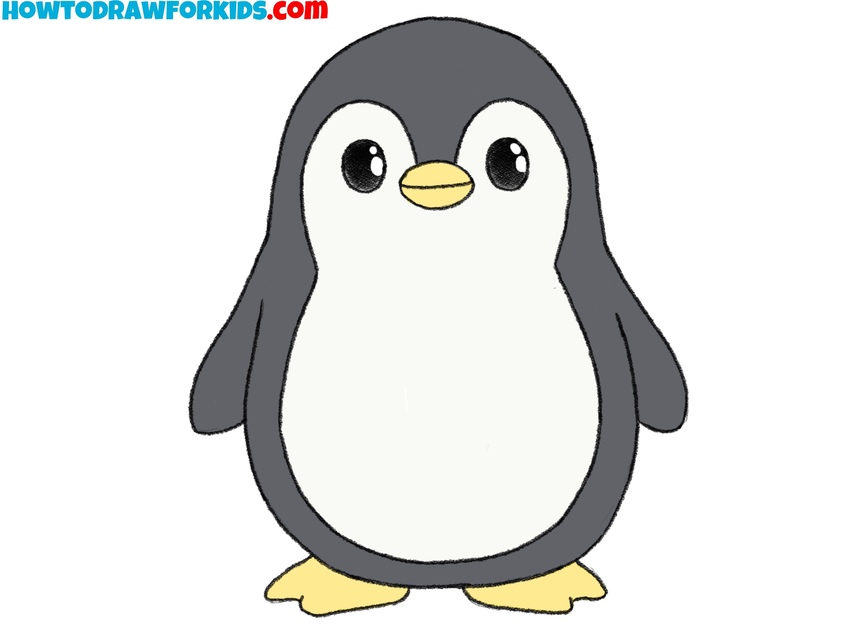
- Color the penguin.
Typically, penguins are black and white, so color the body black, leaving the belly and face white. Add a yellow or orange shade to the beak and feet. You can use any coloring tools you prefer, such as crayons, markers, or colored pencils, to give your penguin drawing a completed look.
How to Draw a Penguin: Additional Tutorials
How to Draw an Easy Penguin
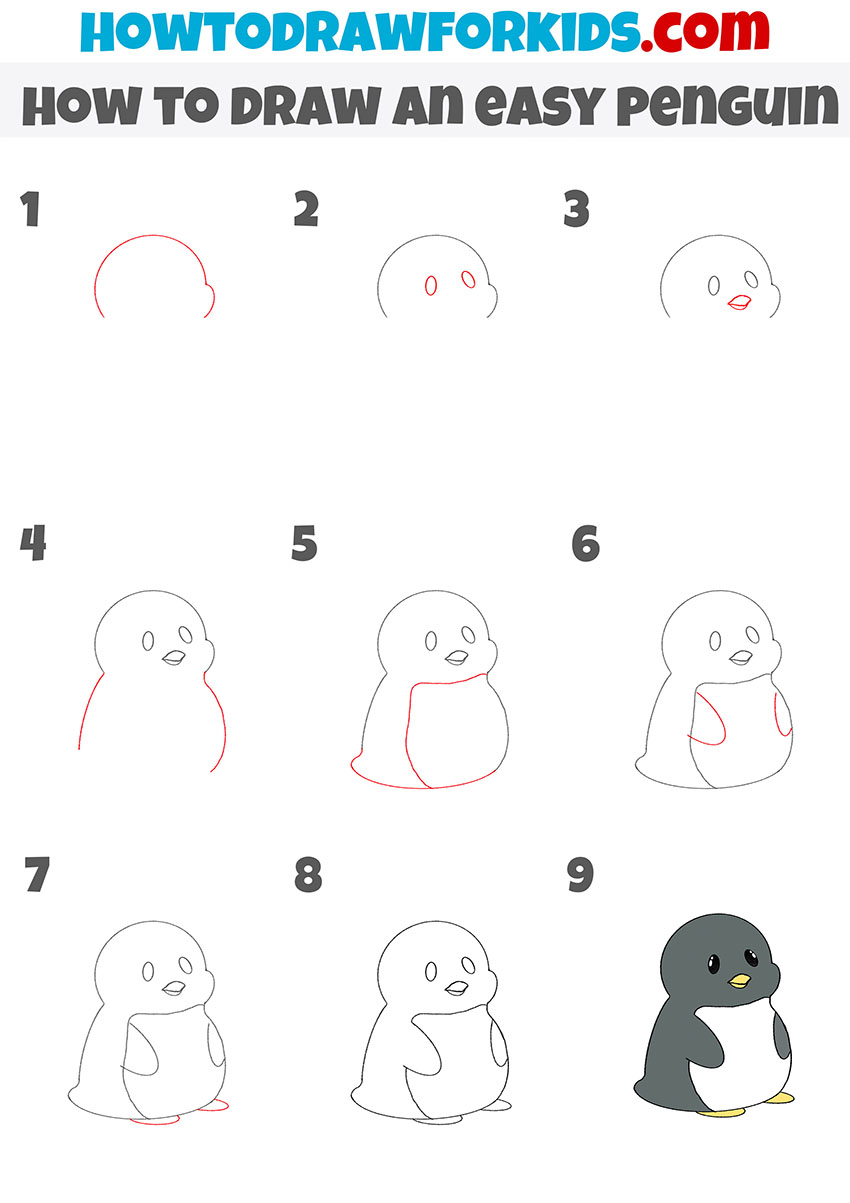
So, this is the first additional tutorial and in it I will show a slightly more simplified version of drawing a penguin. Here the details, although slightly, are simplified to make the process a little easier for children. Following these steps will help you create an easy penguin drawing with a simple, recognizable look.
To learn how to sketch an easy penguin, start by sketching the top of the head with a rounded line. Next, add two small ovals for the eyes. Below the eyes, draw a small beak with a slight curve in the middle. Extend a curved line downwards on each side to create the body outline. Then, draw the belly by adding a rounded shape within the body, connecting it to the sides.
Add two wing outlines on each side of the body, curving slightly inward. Draw two small, flat ovals at the bottom to represent the feet. Refine any rough lines and add details to complete the penguin shape. Finish by coloring the body black, leaving the belly white, and coloring the beak and feet yellow.
Alternative Penguin Drawing Technique
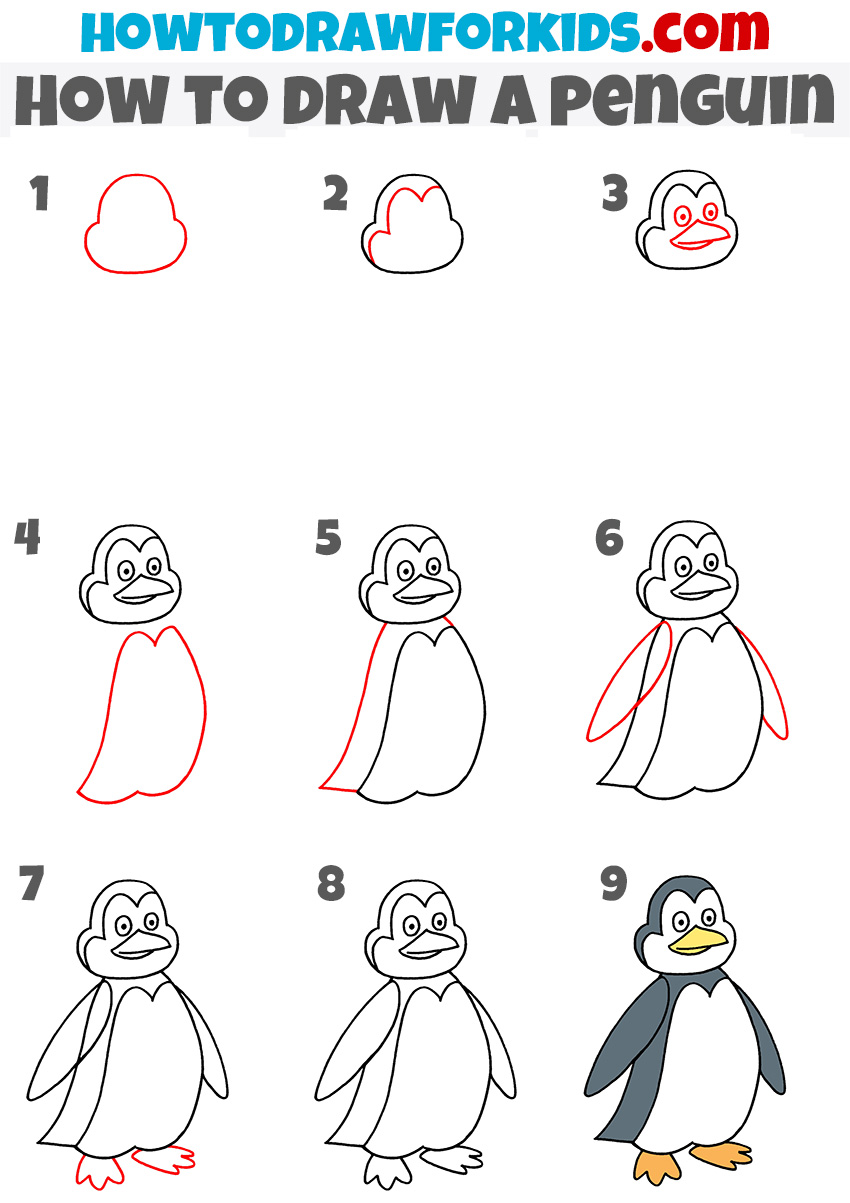
To follow the steps on how to draw a penguin in alternative way, start by sketching the head shape with a curved top and rounded sides. Next, add an inner outline for the face area, creating a smaller shape within the head. Draw two small circles for the eyes and a rounded beak with a line in the center for detail. Extend the body downwards from the head with a slightly rounded outline, shaping the lower part with slight curves to form the legs.
Then, add a line along the side of the body to outline the back. Draw two elongated ovals on each side for the wings, positioning them midway down the body. At the bottom, add two webbed feet with pointed ends for toes. Complete the drawing by erasing unnecessary lines and adding color – black for the body, white for the belly, and yellow for the beak and feet – to finish the penguin illustration.
Simple Penguin Tutorial
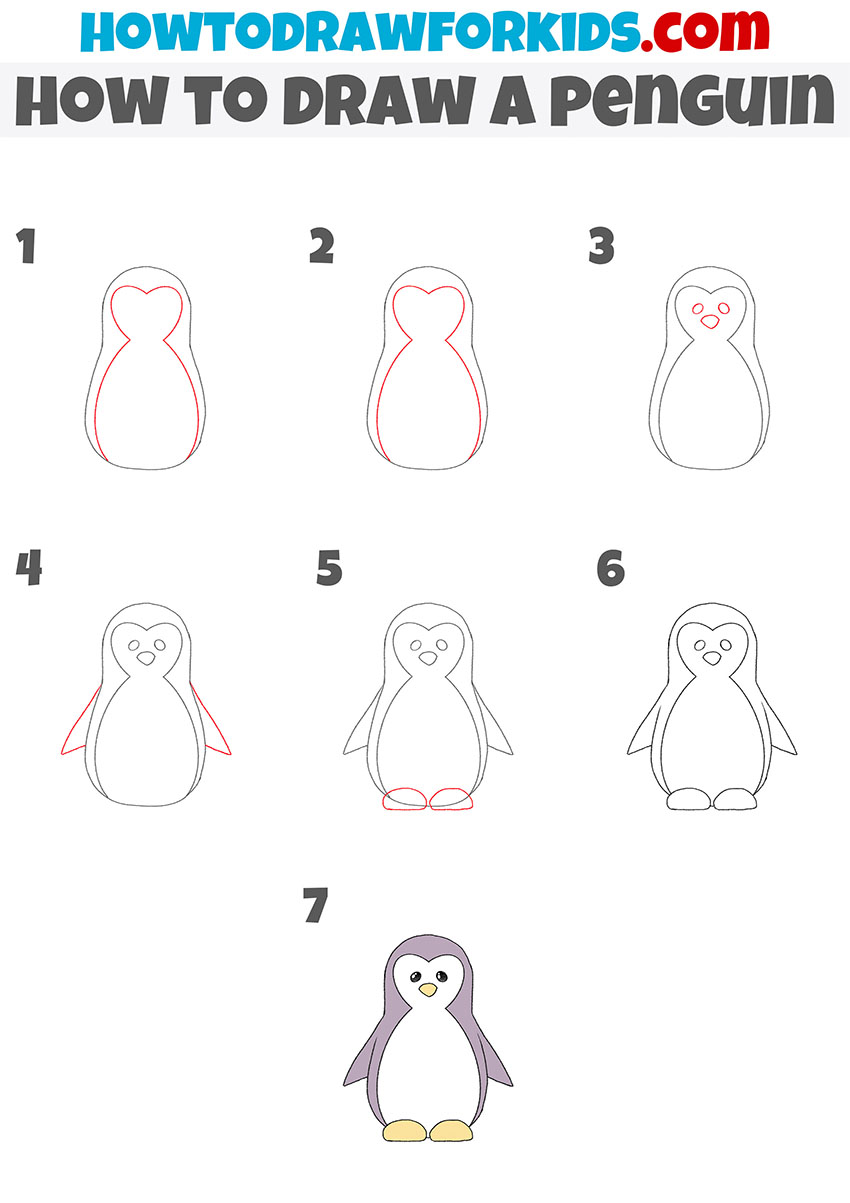
In this picture, the penguin is presented in a cartoon form and looks very simple and cute. The body of the penguin is rounded, the wings are simple, and the paws look like two ovals. With a few simple steps, you can easily draw such a penguin and get a good result.
To learn how to draw a simple Penguin in this technique, start by sketching the basic body shape as a large, rounded form. Inside the body, draw an inner outline beginning from the top and curving down to form the face and chest area. Add two small circles near the top of the head outline for the eyes, and a small oval below them for the beak.
On each side of the body, draw the wings as two angled lines that taper at the ends. For the feet, add two small, oval shapes at the bottom of the body. Refine any rough lines and add final details to complete the penguin outline. Finish the drawing by coloring the body a dark shade, leaving the chest area white, and coloring the beak and feet yellow or orange to create a simple, recognizable penguin.
Small Penguin Drawing Tutorial
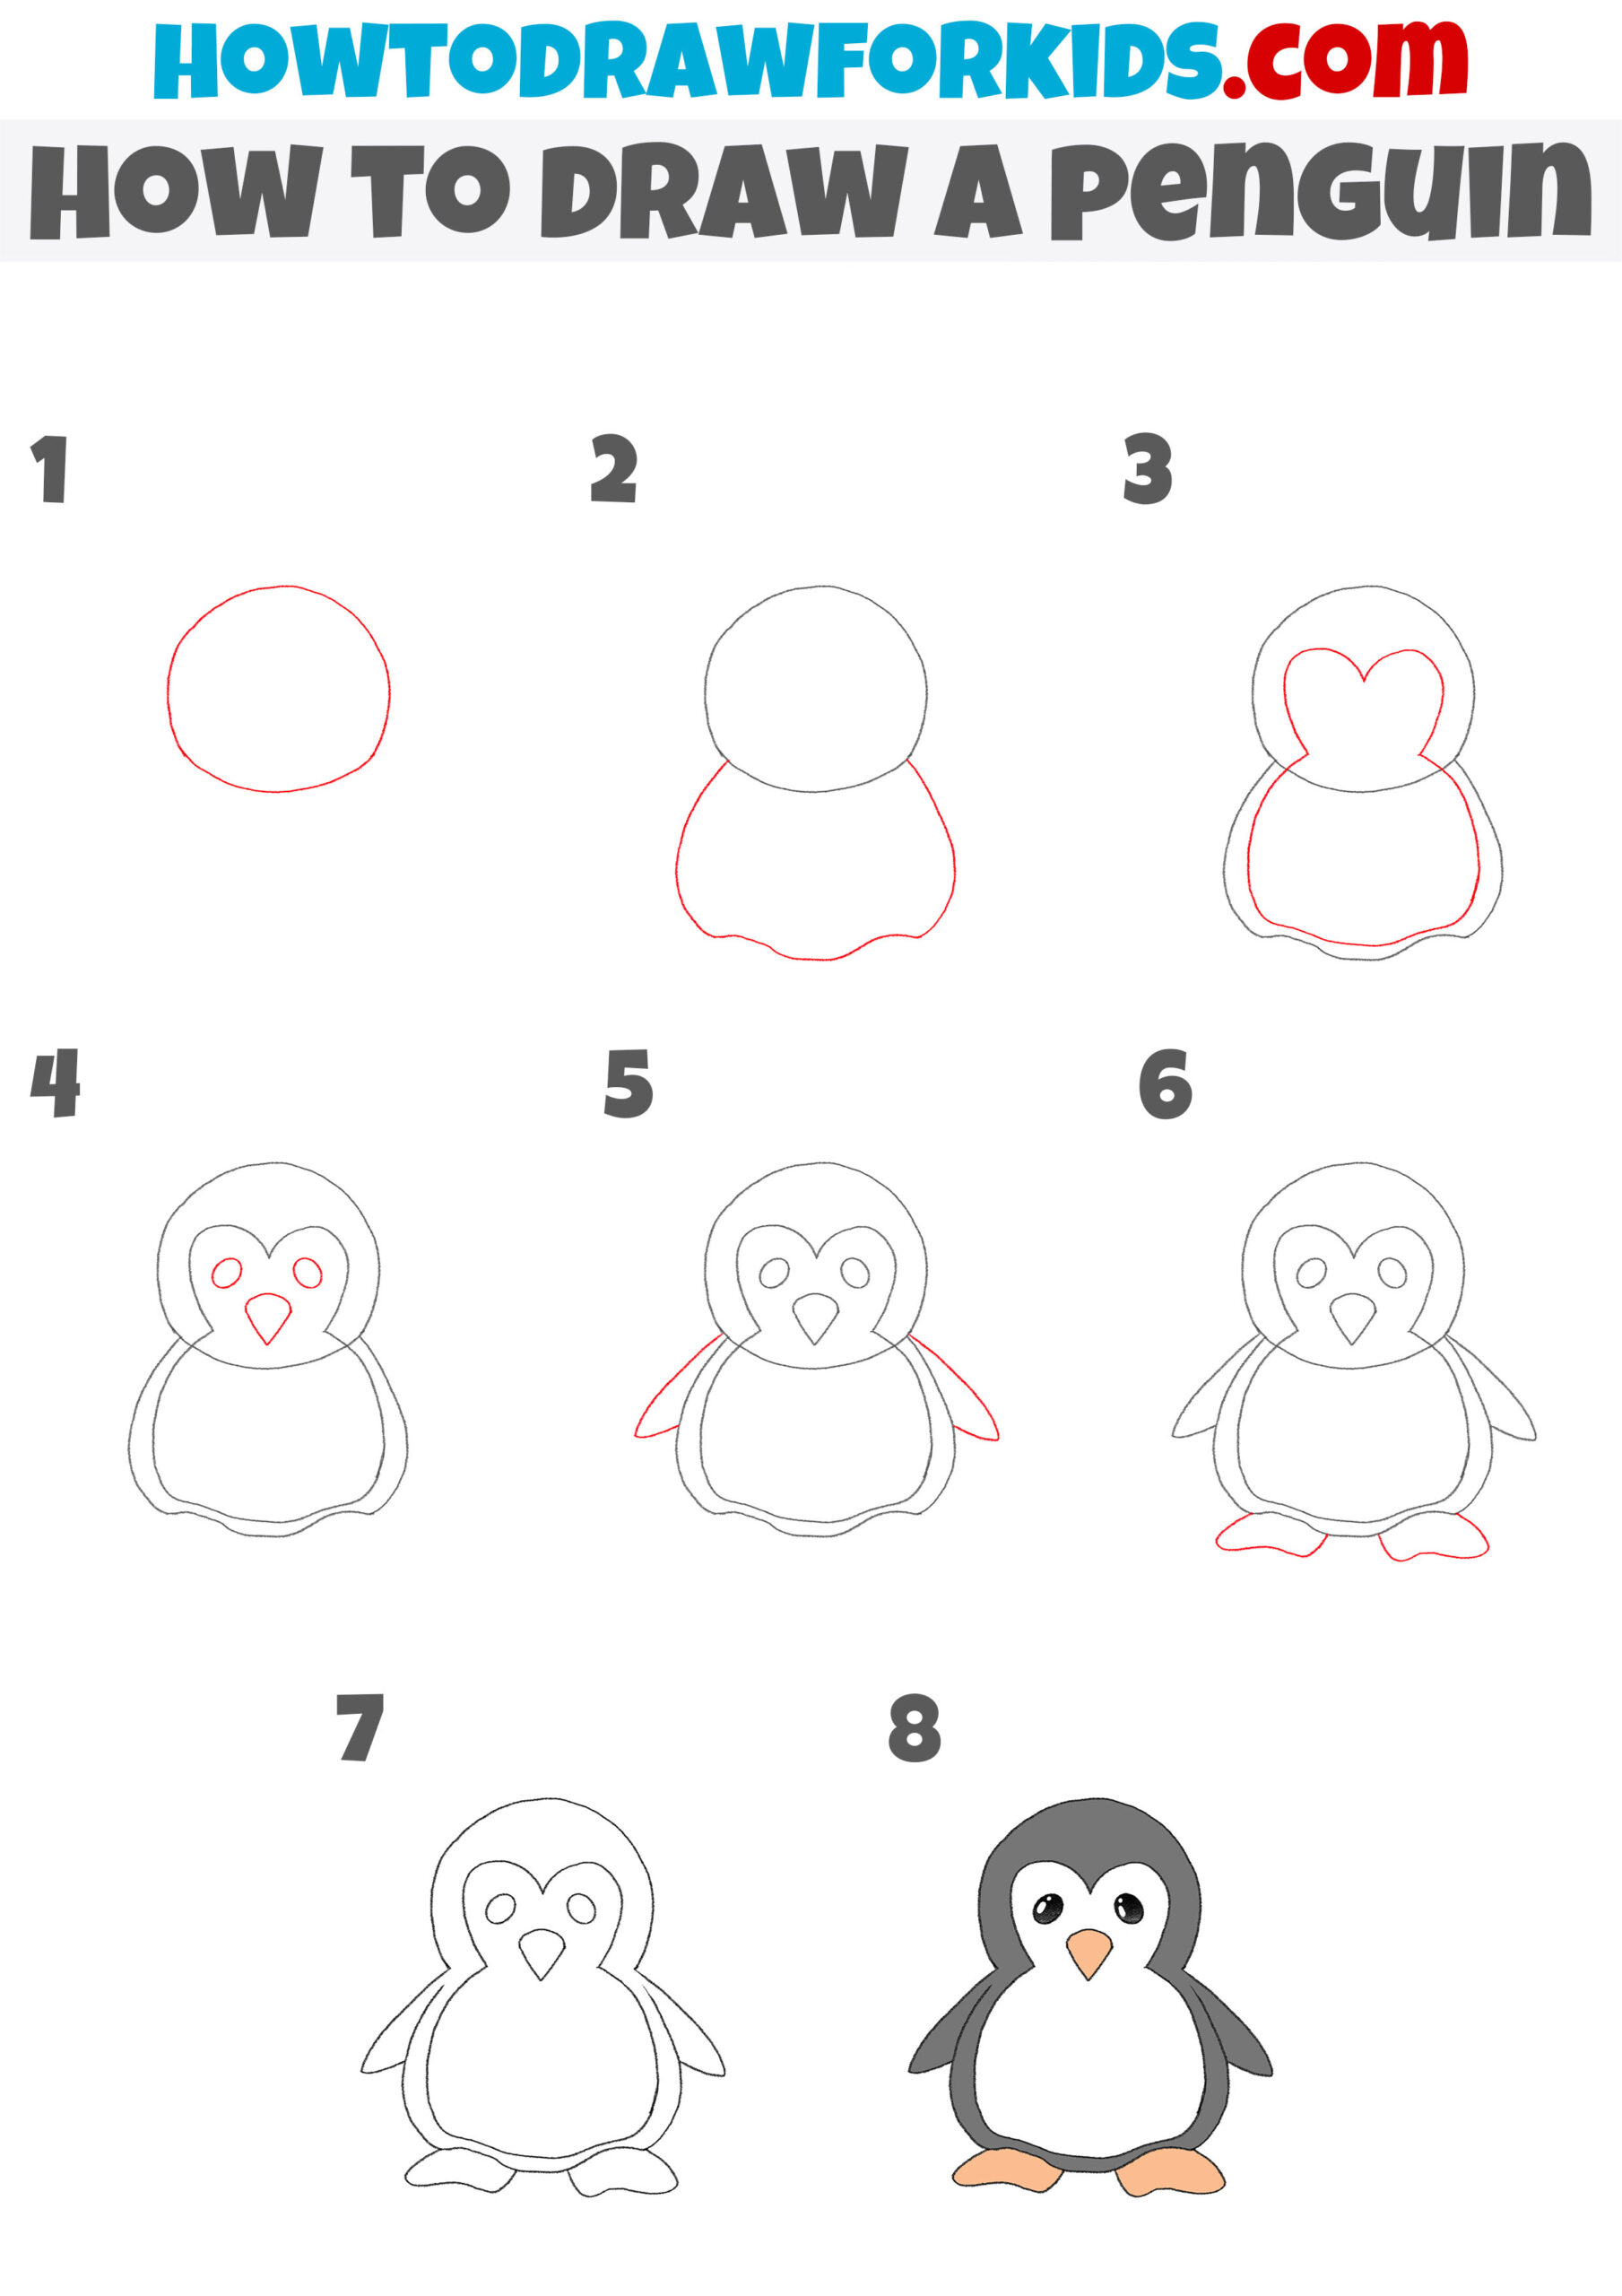
To learn how to draw a small penguin with this method, begin by drawing a circle for the head. Below the head, add a wider, rounded shape to form the body, giving it a slight scalloped bottom edge. Next, inside the head, draw a heart-shaped outline that connects to the body, creating the boundary of the colors. Draw two small circles inside the face area for the eyes, and add an upside-down triangle for the beak.
Attach small, curved lines on each side of the body to form the wings. At the bottom of the body, draw two small, rounded feet. Refine the lines to complete the outline of the penguin. Color the head, wings, and body in a dark shade, leaving the face and chest area white, and color the beak and feet orange. This approach will help create a small, cute penguin drawing with clear, simple features.
How to Draw a Penguin for Preschoolers
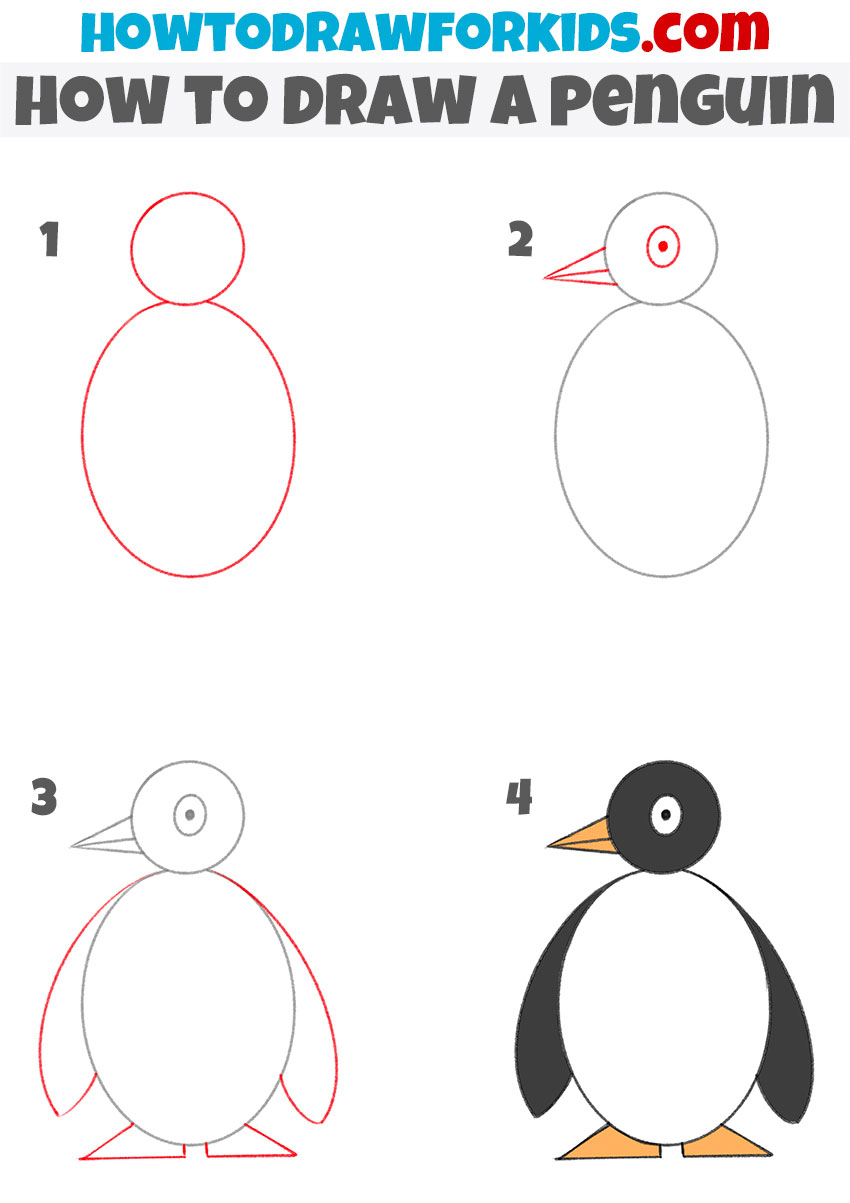
If you want to draw more complex characters, take a look at other sections of my site. In this additional guide, we are working with the most simple lesson that will help you believe in your abilities, even if you first picked up a pencil today. So, I invite you to tune in to a pleasant job with a simple drawing lesson for preschoolers. Grab your favorite drawing tools, provide good light, and start drawing!
Sketch a large oval for the body and a smaller circle on top for the head. Then, add an eye of the bird by drawing a small circle within the head, and next to it, draw a simple triangular beak extending from the side of the head. To complete the wings of the penguin, draw two curved lines on each side of the body, shaping them to follow the body’s outline.
At the bottom of the body, draw two flat triangles for the feet. Once the basic shapes are in place, go over the lines to make them more finished. Finally, add color by filling the head and wings with black, leaving the belly area white, and coloring the beak and feet orange.
Conclusion
The lesson on drawing a penguin has come to an end, and I hope it was informative for you. If you would like to continue learning and know how to draw other animals, consider visiting the lesson on drawing a dog, as well as the instructions on how to draw a cat.
If you want to further expand your drawing knowledge, be sure to follow me on Pinterest so you don’t miss a single new tutorial and on YouTube for video versions of my lessons. Also, be sure to share this tutorial with your friends so that they can also get involved in art.

