How to Draw a Tiger
I created several simple tutorials on drawing the king of the jungle, specifically for those who have wanted to learn how to draw a tiger.

How to Draw a Tiger: Introduction
This tutorial will cover how to draw a tiger. To make this tutorial as useful as possible, I have created several variations for drawing this big cat. Each set of instructions presents the process from a different angle, using a different set of steps and a distinct drawing style.
The first thing you need to know is that a tiger is a cat, albeit a large one, which means that drawing a tiger is in many ways similar to drawing a cat. So, just like with the cat, we’ll be sketching out the basic shapes, then adding details and recognizable features.
The tiger’s distinctive features are its stripes, which means you should capture this feature in order to give your tiger drawing a more recognizable look.
Since we will be drawing a tiger in a simplified style, we will not focus on complex details, depicting only the most important and necessary parts. This approach will help simplify the drawing process for beginner artists and children.
Tiger Drawing Tutorial
Materials
- Pencil
- Paper
- Eraser
- Coloring supplies
Time needed: 35 minutes
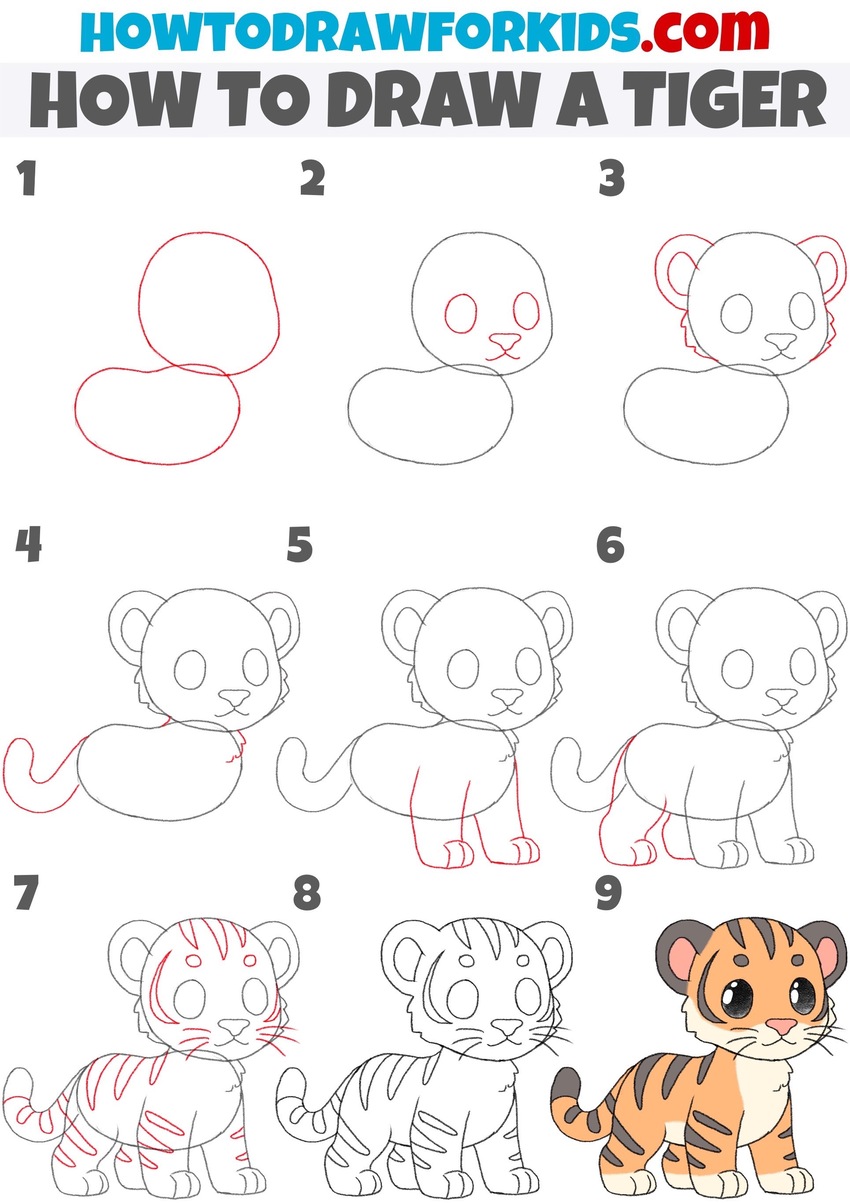
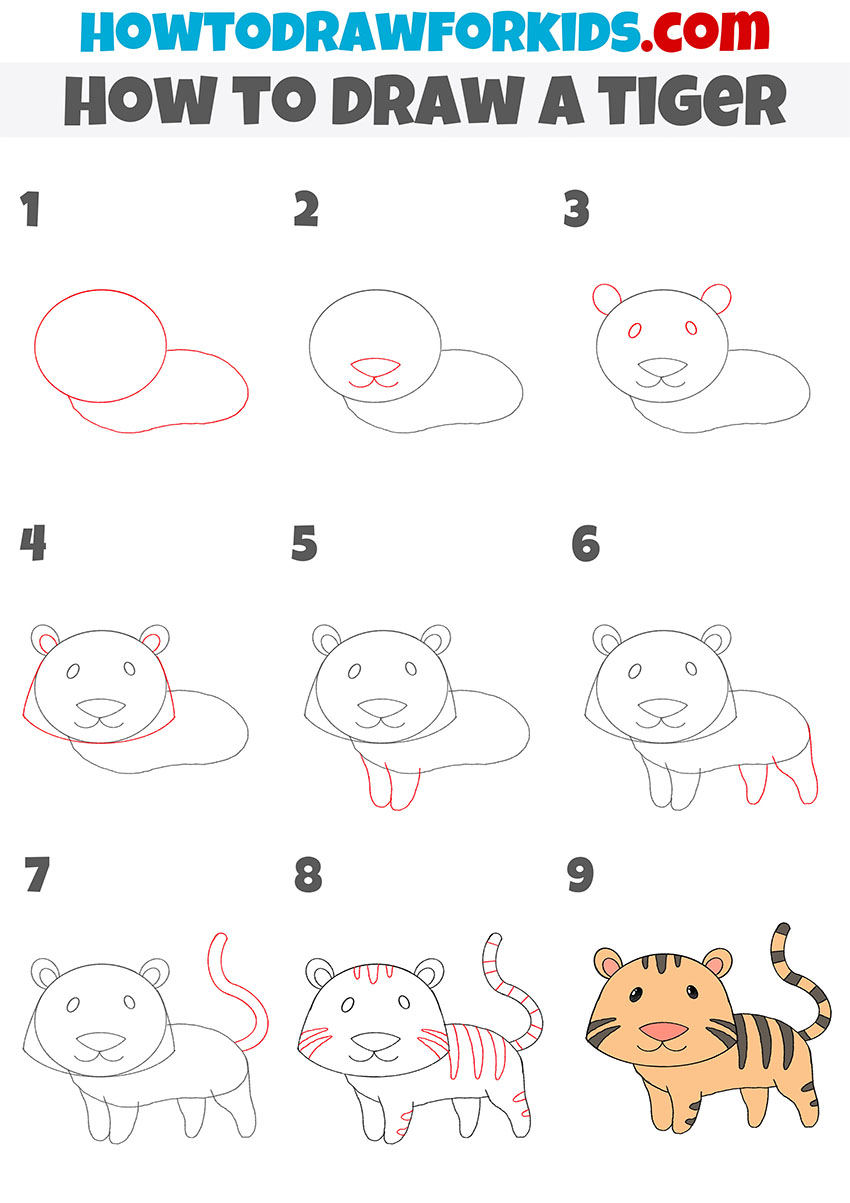
How to Draw a Tiger
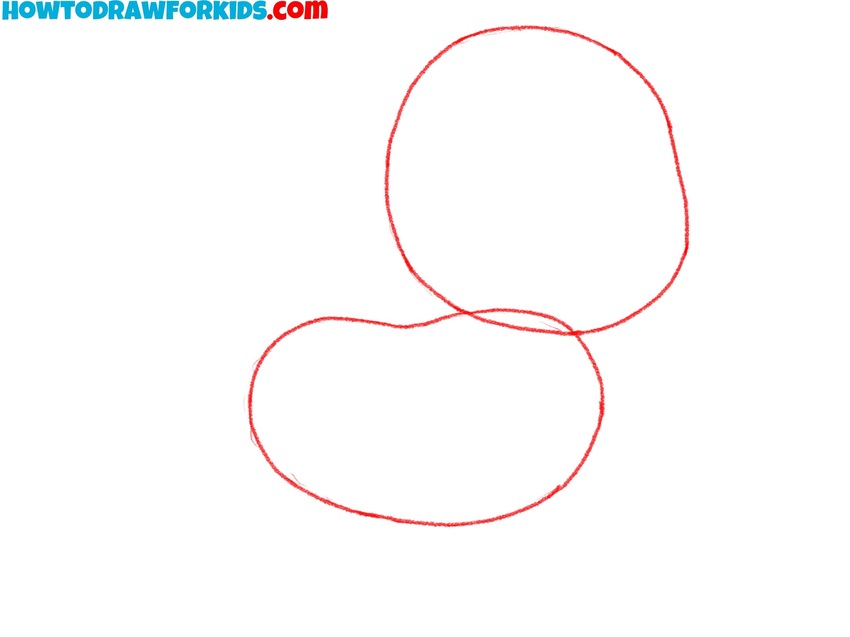
- Draw the head and body outline.
Sketch two overlapping ovals to represent the tiger’s head and body. Make the head slightly larger than the body, and ensure the two shapes overlap at the base. The ovals do not need to be perfectly symmetrical. This step helps create the foundation for the tiger drawing.
- Add the tiger face details.
Add two small circles inside the head oval for the tiger’s eyes. Below the eyes, draw a small, rounded nose in the center. Extend two curved lines downwards from the nose to form a simple mouth shape. You can give your tiger’s face a more realistic appearance by making the eyes almond shaped.

- Draw the ears and cheeks of the tiger.
In this step, add two rounded ears on top of the tiger’s head. Draw each ear as a simple curved shape with an inner line to show the inner part of the ear. After that, draw the fur on the tiger’s cheeks using simple lines. You can make the tiger’s face more detailed by adding more fur texture.
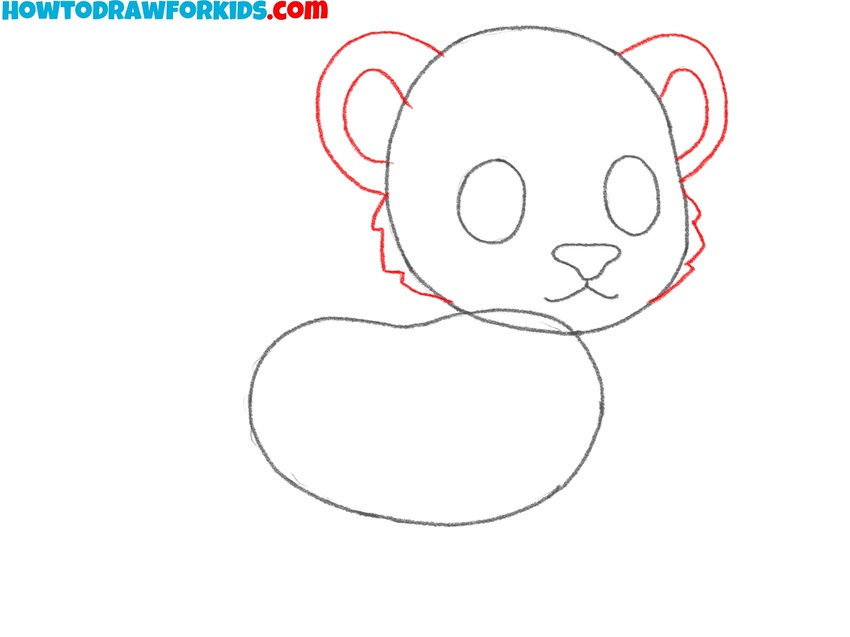
- Draw the neck and tail of the tiger.
Now, sketch the tiger’s tail extending from the back of the body. Draw a long, slightly curved line that loops upwards to give the tail more natural look. Also, to make the big cat look more realistic, draw the neck and the fur on the chest using simple lines.
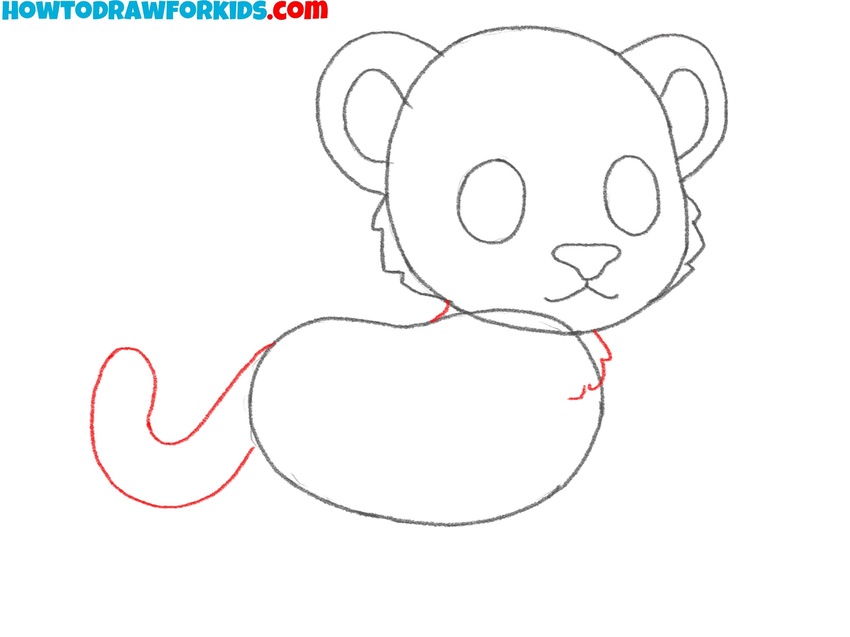
- Outline the front legs.
Sketch two short, rounded legs at the front of the tiger’s body oval. Each leg should be shaped like a small rectangle with rounded edges. To give the tiger’s feet a more realistic and natural look, draw the toes using simple, short lines.
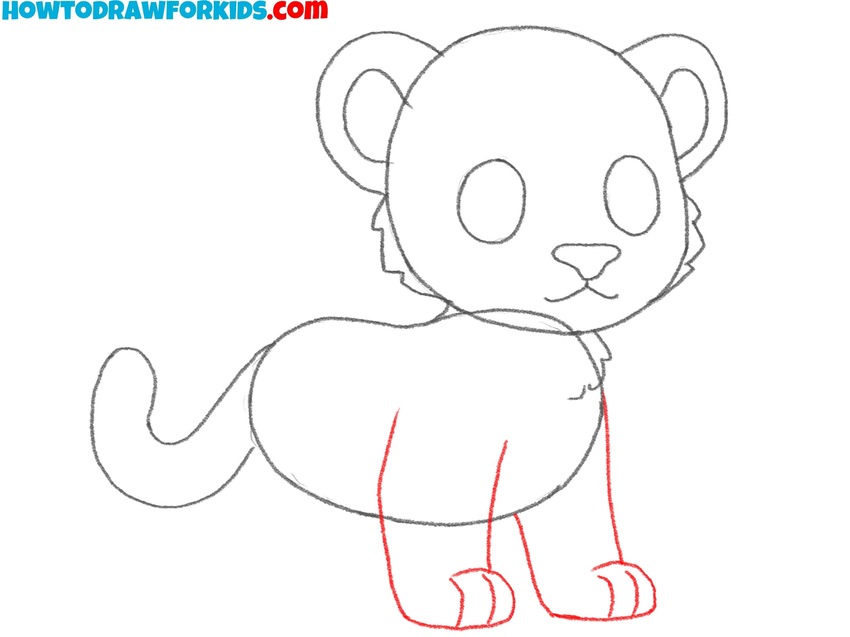
- Sketch the hind legs of the big cat.
Add the hind legs by drawing two more rounded leg shapes at the back of the body oval. These should be similar in size and shape to the front legs. The only difference between the hind legs and the front legs is that the hind legs have a slight bend.
- Add the stripes.
To give the tiger its characteristic look, add stripes on its face. Draw a few curved lines around the forehead, cheeks, and near the eyes to create these stripes. Then, add stripes to the tiger’s body and legs. Draw a few curved lines along the back, tail, and sides of the legs. These stripes can be slightly varied in length.
- Finalize the sketch.
In this step, carefully erase any guidelines from your tiger drawing to clean up the overall appearance. Remove any extra lines around the head, body, legs, and tail, leaving only the final outlines. As you erase, make sure the main lines of the tiger are smooth, giving it a polished look.
- Color the tiger.
Use a warm orange or red shades for the body of the tiger, with black or dark brown for the stripes, and a light cream or white color for the paws, face, and belly. Use pink for the inner parts of the ears and nose. Color the eyes black, leaving small highlights.
Watch the Full Video Tutorial
Alternative Ways to Draw a Tiger
So, the basic tiger drawing lesson is over, and it’s time to consolidate the knowledge. Below you will see a number of additional drawing tutorials. I strongly advise you to check out each of them to hone your skills and find the style that suits you best.
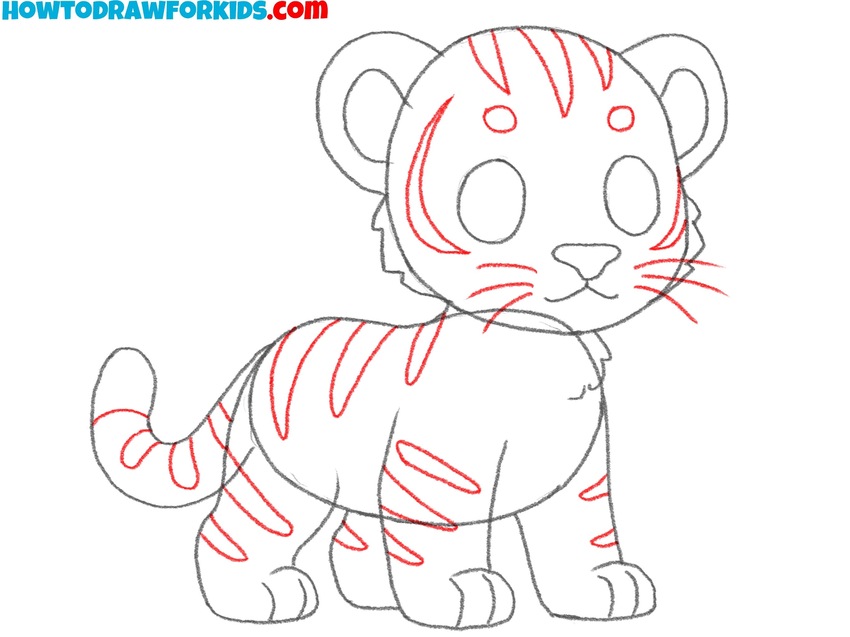
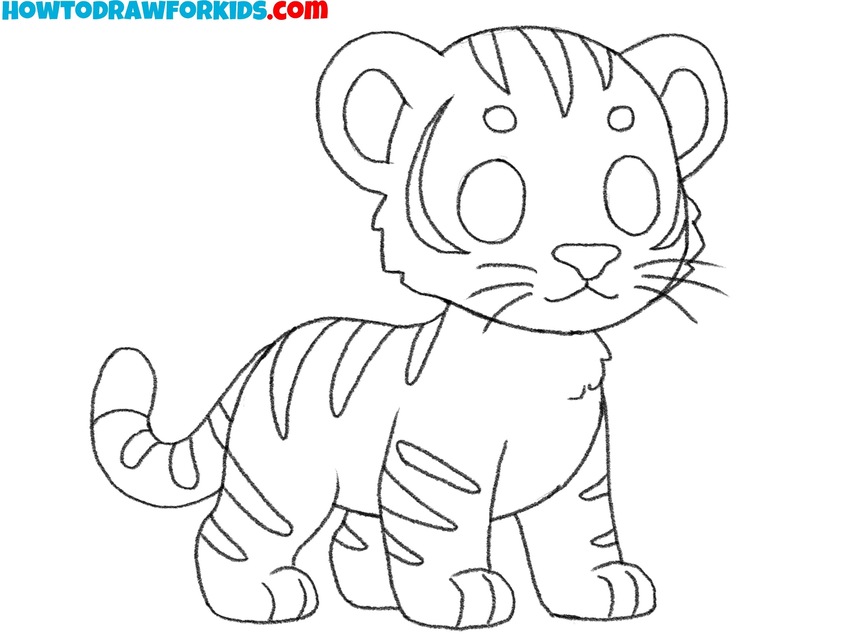
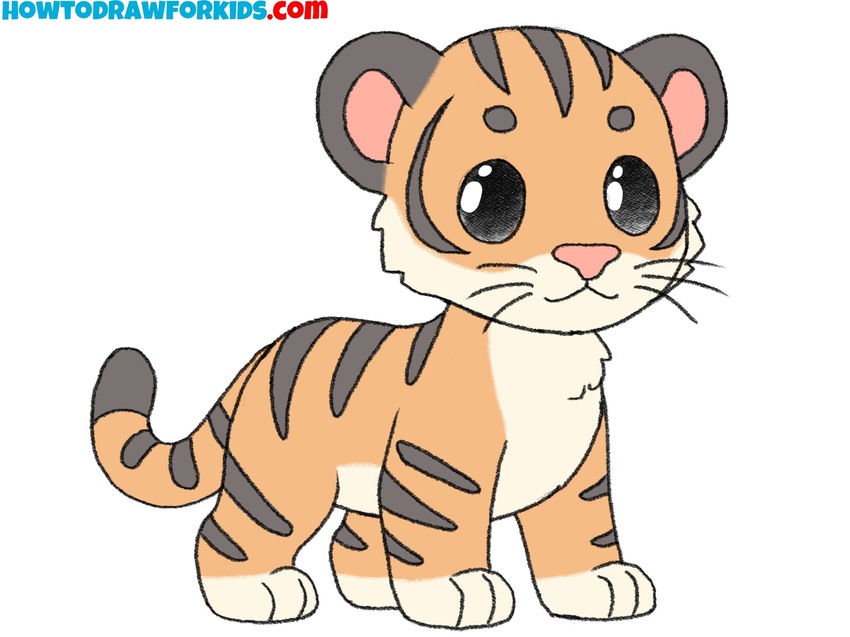
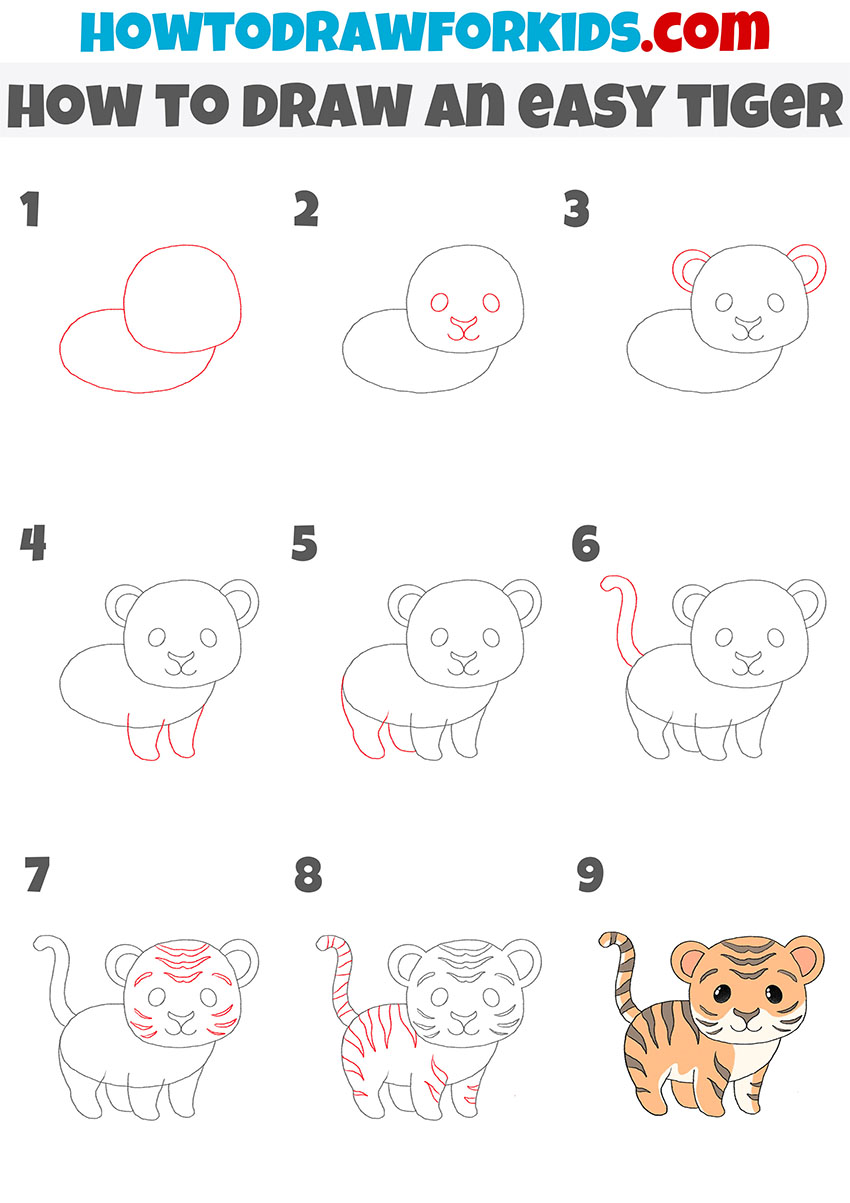
How to Draw an Easy Tiger
The picture shows a baby tiger, which looks very cute. This tiger drawing tutorial will be a little easier than the previous one, as there are simpler details and fewer complex lines.
To draw an easy tiger, begin by sketching two overlapping ovals for the head and body. Next, add the facial features by drawing two small circles for the eyes and a simple rounded nose with a small mouth below. Draw rounded ears on each side of the head. Outline the front legs using short, rounded shapes beneath the head and body, then add the hind legs in a similar style at the back of the body.
Sketch a long, curved tail extending from the back of the body. To give the tiger its recognizable look, add stripes on the head, body, and legs, following the curves of the form. You can also add additional facial details like small whiskers and markings. Finally, color the tiger drawing with orange for the body, black for the stripes, and lighter tones for the inner ears and belly to complete the sketch.
Cute Small Tiger Drawing Tutorial
In this tutorial, the tiger is presented in a cartoon style and looks completely harmless, even very cute. In the figure, the tiger has a large head and a relatively small body, the paws are very short. You can easily draw such a tiger if you carefully follow all the steps of drawing.
To draw a tiger in this cute style, start by sketching a large oval for the head and a smaller, slightly curved oval for the body, overlapping at the neck area. Add facial features by drawing a small nose and a simple mouth shape below it, followed by two eyes positioned above the nose. Draw rounded ears on each side of the head, then outline the face with curved lines to illustrate cheeks.
Add two front legs below the head and body, making them short and rounded. Draw the back legs in a similar shape, positioned at the body’s rear end. Sketch a long, curved tail extending from the back of the body. Add simple tiger stripes on the head, body, legs, and tail to give it a distinctive look. Finally, color the tiger with an orange body, black stripes, and lighter tones for the face and belly to complete the drawing.
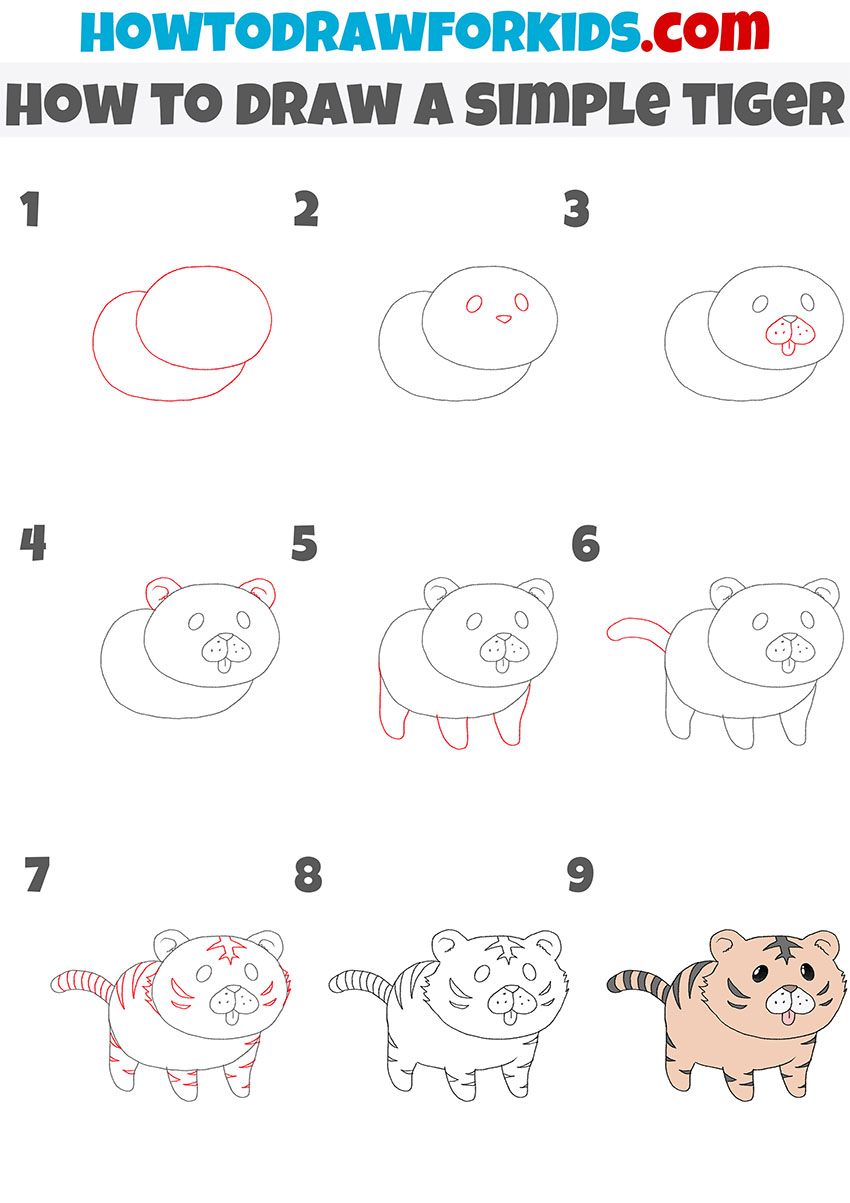
How to Draw a Simple Tiger
Here the tiger does not look realistic, but it is very cute. The body and head of the tiger are rounded, the legs are very short. Thanks to such proportions, the tiger looks very funny. Follow the instructions carefully and use small hints in each step. Now take all the necessary art supplies and start sequentially following all the steps in this instruction. And I wish you creative success!
To draw a simple tiger, start by sketching two overlapping ovals, one for the head and a smaller one for the body. Add two small circles within the head for the eyes and a small nose with a rounded mouth below it. Next, draw a nose shape and add dots to illustrate the whiskers. Sketch rounded ears on each side of the head, and add simple legs beneath the body, positioned to give the appearance of a standing pose. Draw a curved tail extending from the back of the body.
Add stripes on the head, body, and legs to create the tiger’s recognizable pattern, positioning the stripes to follow the curves of each part. Finalize the drawing by refining the lines and adding small facial details. For color, use orange for the body, black for the stripes, and lighter tones for areas like the face and belly to complete the simple tiger illustration.
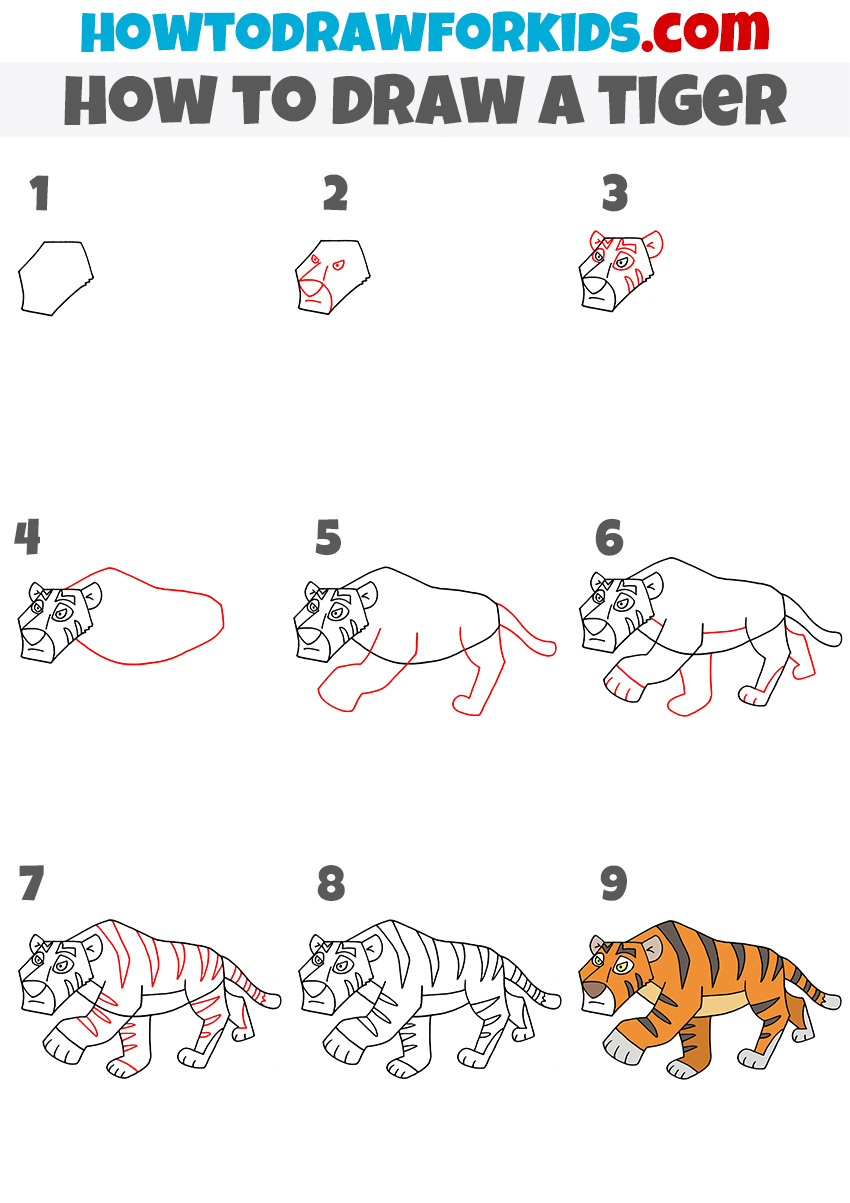
Alternative Tiger Drawing Technique
Now, let’s draw a tiger using a completely different sequence of steps. In previous tutorials, we began with basic shapes and gradually added details. In this guide, we will draw the tiger part by part. Additionally, a completely different style is used here.
To draw a tiger on this alternative style, start by sketching a roughly pentagonal shape for the head, ensuring the top is wider and the sides angle downwards. Add facial details by drawing two eyes near the upper part, a nose lower down, and a mouth beneath it, shaping the face with strong lines. Draw rounded ears on the sides of the head and add a few stripes for the pattern on the face.
Extend a large, rounded shape for the tiger’s body connected to the head. Outline the front and back legs with simple shapes. Add a curved tail at the back of the tiger’s body. Sketch the tiger’s recognizable stripes along the body, legs, and tail, varying their direction to follow the contours of the form. Complete the tiger drawing by coloring the body in orange with black stripes and lighter areas on the face and belly for a realistic look.
Conclusion
So the step-by-step tutorial on drawing a tiger is over. I am sure you have an excellent result. Let me remind you that this is only one of thousands of drawing tutorials available on my site. To continue practicing, you can learn to draw a dog or other animals using my simple instructions.
To stay updated with new tutorials and other content on my site, subscribe to me on social media, such as YouTube for video tutorials and Pinterest for announcements, collages, and to share your cool drawings.