How to Draw a Big Truck
Do you want to learn how to draw a big truck? In this tutorial, I’ll show you five simple step-by-step methods that make drawing a big truck easy for kids and beginners.
Prepare to Draw a Big Truck
Big trucks are some of the most interesting vehicles on the road, and in this guide I’ll show you how to draw one step by step.
We’ll start with an easy version and then try several more methods with different designs and levels of detail.
Although a big truck may seem complicated at first, it’s actually made up of simple shapes like rectangles and circles.
This tutorial will teach you how to break a complex vehicle down into simple shapes. You’ll draw the wheels as circles, the cab and body as rectangles, and then connect these basic forms with a few simple lines.
Once you learn this approach, drawing trucks and many other vehicles will become much easier.
Big Truck Drawing Tutorial
Materials
- Pencil
- Paper
- Eraser
- Coloring supplies
Time needed: 30 minutes
How to Draw a Big Truck
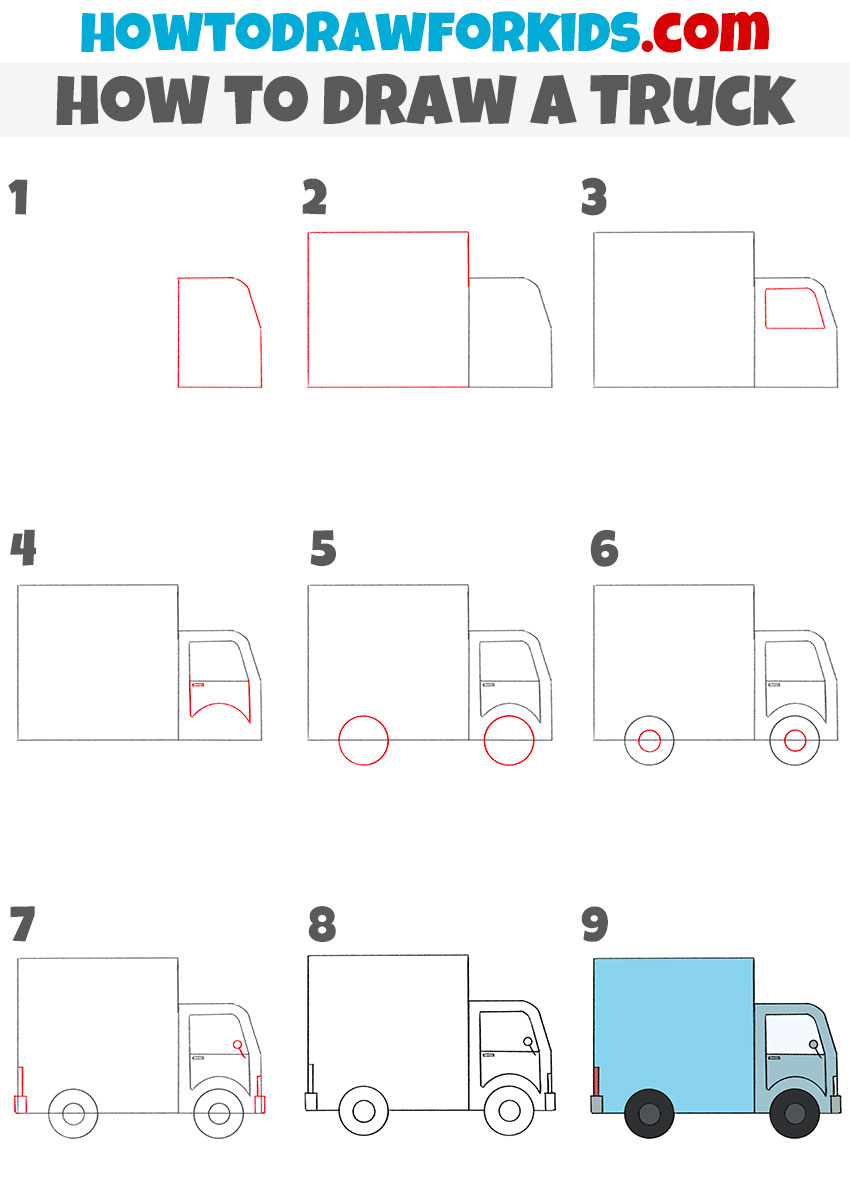
- Draw the bottom outline and cabin.
Depict a horizontal line and then add a curved line to represent the driver’s cab.

- Depict the cargo area.
On the other side of the drawing, add the cargo compartment, which is shaped like a rectangle.
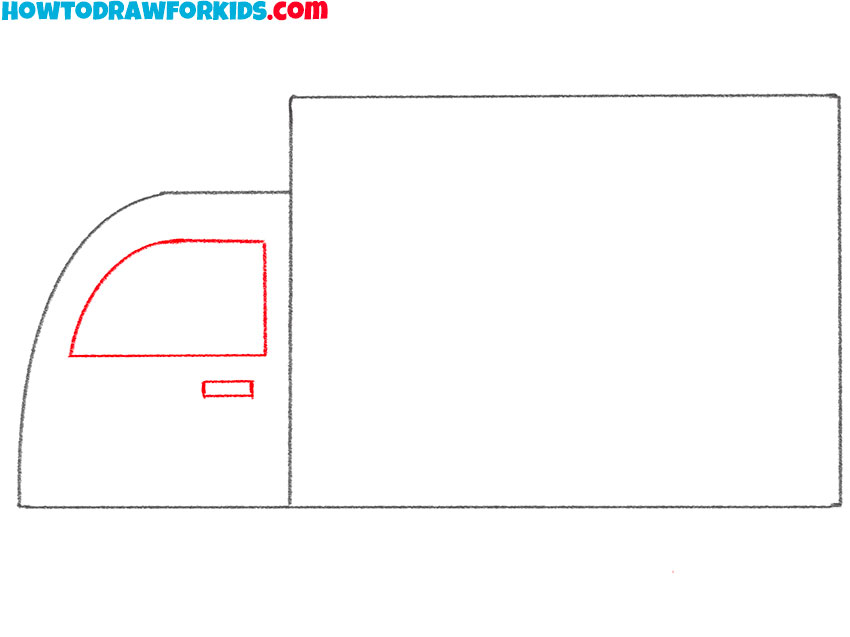
- Add the window and the doorknob.
On the door, draw the window of the same shape as in the example and add the doorknob.
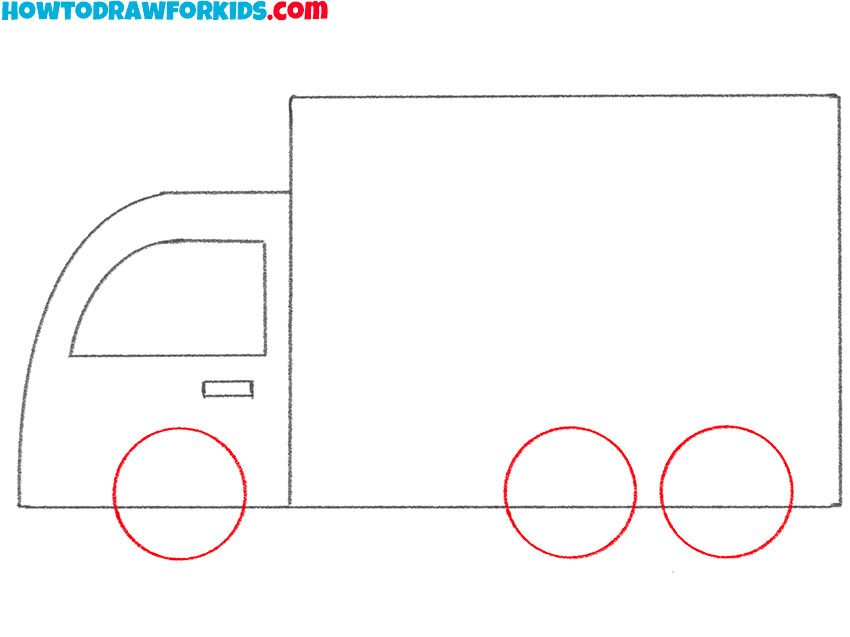
- Sketch out the wheels.
Draw three even circles to represent the front and rear wheels.
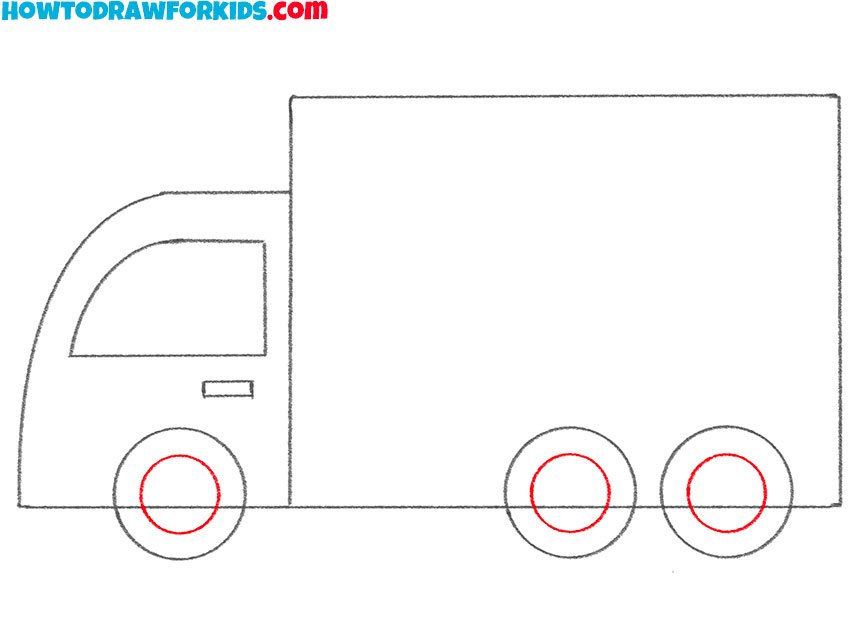
- Detail the wheels.
Within each wheel, add even circles to depict the inner outline.
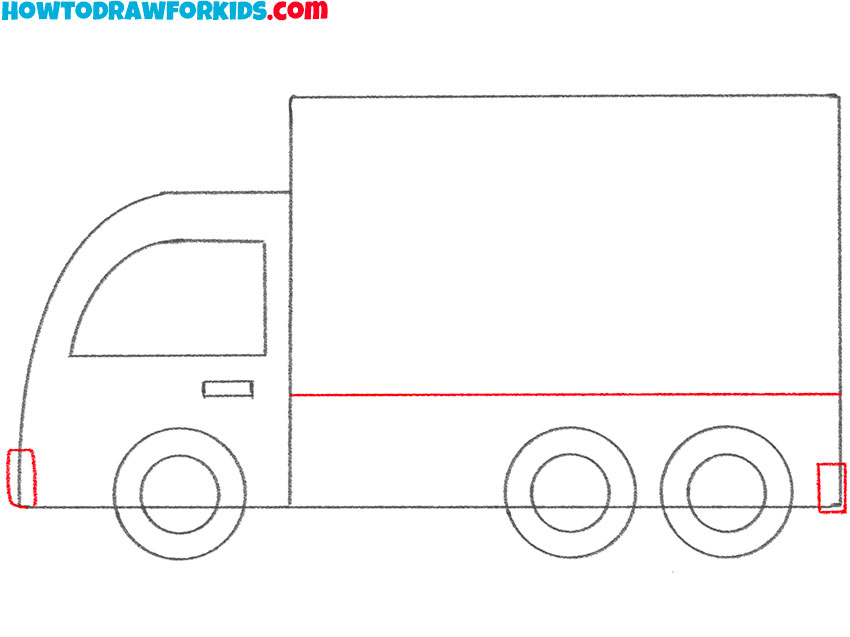
- Detail the bottom of the car.
Add the rectangular bumpers and draw a horizontal line at the bottom of the body.
- Draw the door and the rest of the headlights.
With the help of several lines draw the door. Add the front and rear lights and the side mirror.
- Correct inaccuracies.
Use the eraser to remove all extra lines in your drawing.
- Color the drawing.
You will need different shades of gray, also blue, beige, and pink.
Additional Content
I’ve also prepared a free PDF version of this tutorial for you. It includes a simplified version of the tutorial, a coloring page, a tracing worksheet, and a grid drawing worksheet.
Download it for free and practice drawing your big truck anytime, even without an internet connection.
Alternative Drawing Techniques
Once you’ve completed the main tutorial, be sure to try the additional big truck drawing methods. Each one uses a slightly different approach.
This will you more practice with the same basic shapes and helping you improve your drawing skills. As you work through these tutorials, you’ll become more confident drawing trucks and other large vehicles.
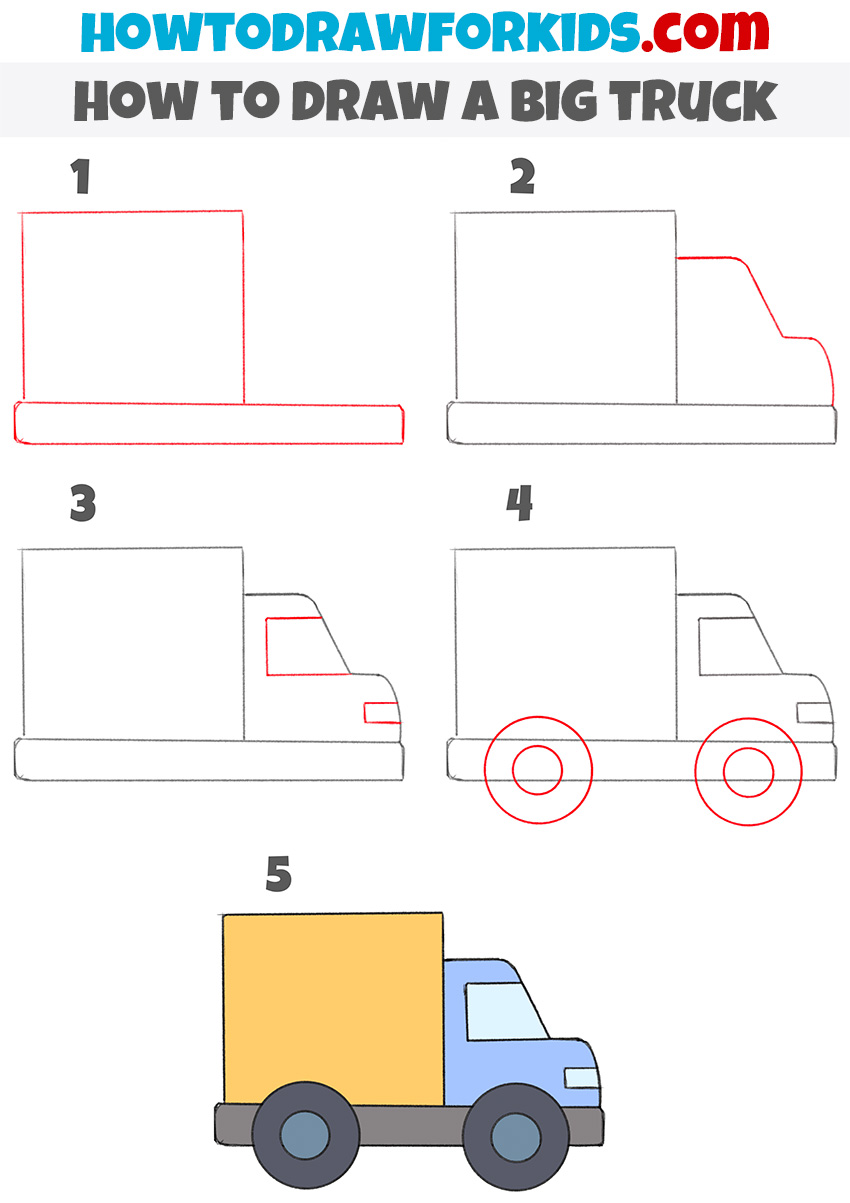
How to Draw an Easy Big Truck
In the main tutorial, you drew a big truck with a tall cargo box and a small cab. In this version, the truck has a slightly different cab and different shapes. Although it looks a little different, it is still built from the same simple geometric forms.
Start by drawing the cab, then add the large rectangular cargo box behind it. Draw the windshield, the headlight, and the curved wheel arches.
After that, add two large wheels and finish the truck with the bumper and the remaining small details. Color the truck using the same colors as in my example or create your own color combination.
Big Truck Drawing for Kindergarten
This version is much simpler and created especially for preschoolers. It has a slightly different shape and only five simple steps.
In the previous method, you started with the cab. This time, you’ll begin with the long chassis and the large cargo box before drawing the front of the truck. The cab has a longer hood with smooth curved lines.
Draw the long chassis first, then place the large rectangular cargo box on top of it. After that, sketch the outline of the cab at the front. Add the windshield and headlight, then draw the two large wheels underneath the truck.
Complete the drawing by refining the outlines and coloring the truck.
How to Draw a Realistic Big Truck
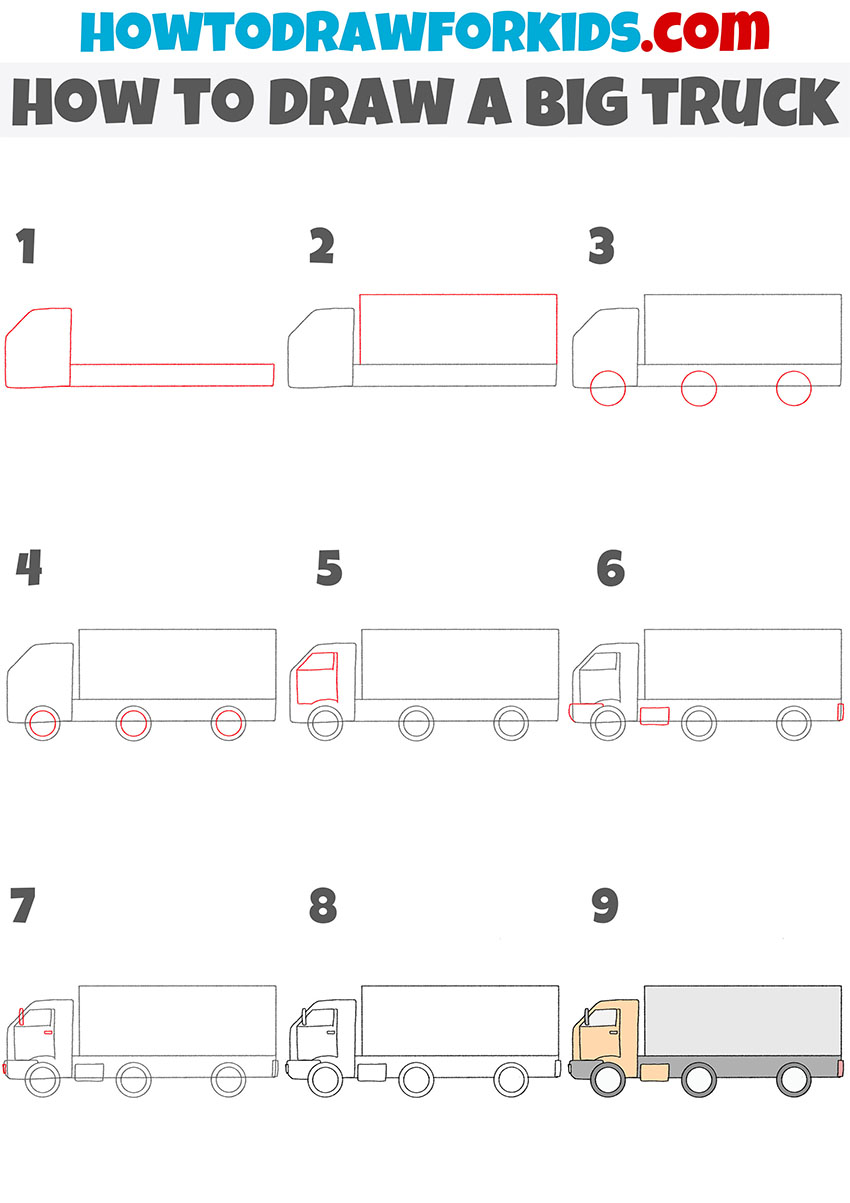
The previous truck had two wheels and a short wheelbase. In this tutorial, you’ll draw a much longer truck with three visible wheels and a large cargo compartment. The cab remains short, while the body becomes much longer.
Begin by drawing the cab and the long horizontal frame behind it. Next, add the large cargo box above the frame
Draw the three wheels, then continue with the window, door, bumper, fuel tank, mirrors, and the remaining details on the cab.
Finish by coloring the cab and cargo box. Compare this truck with the previous one and notice how the extra axle and longer body completely change the appearance of the vehicle.
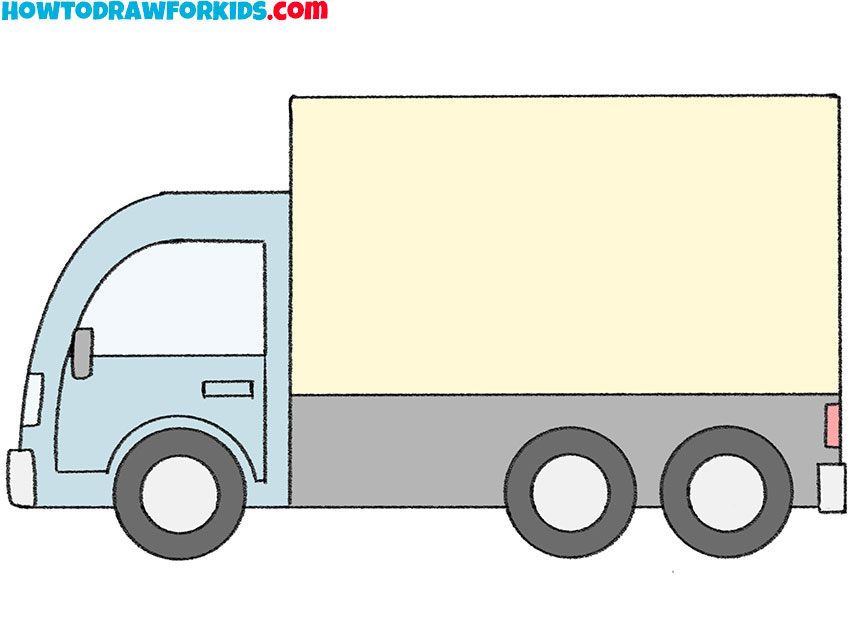
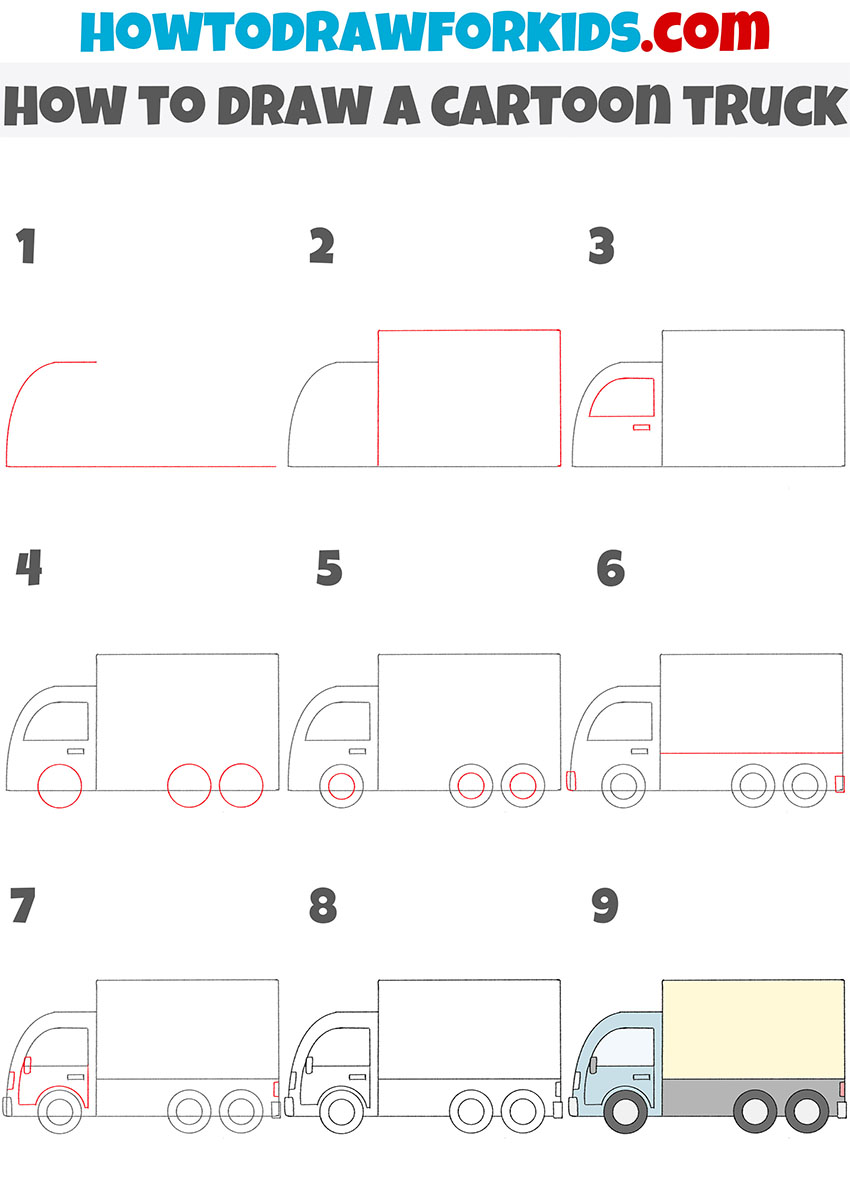
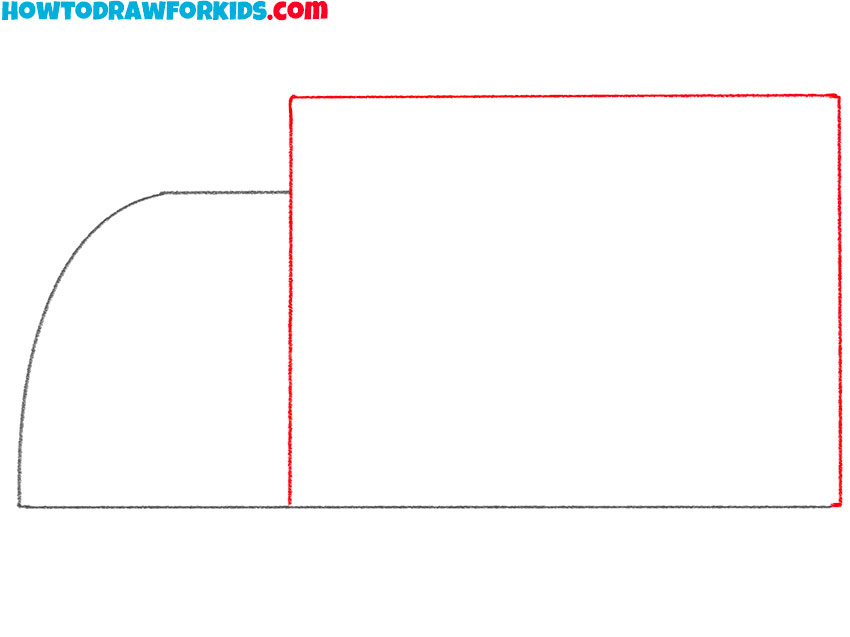
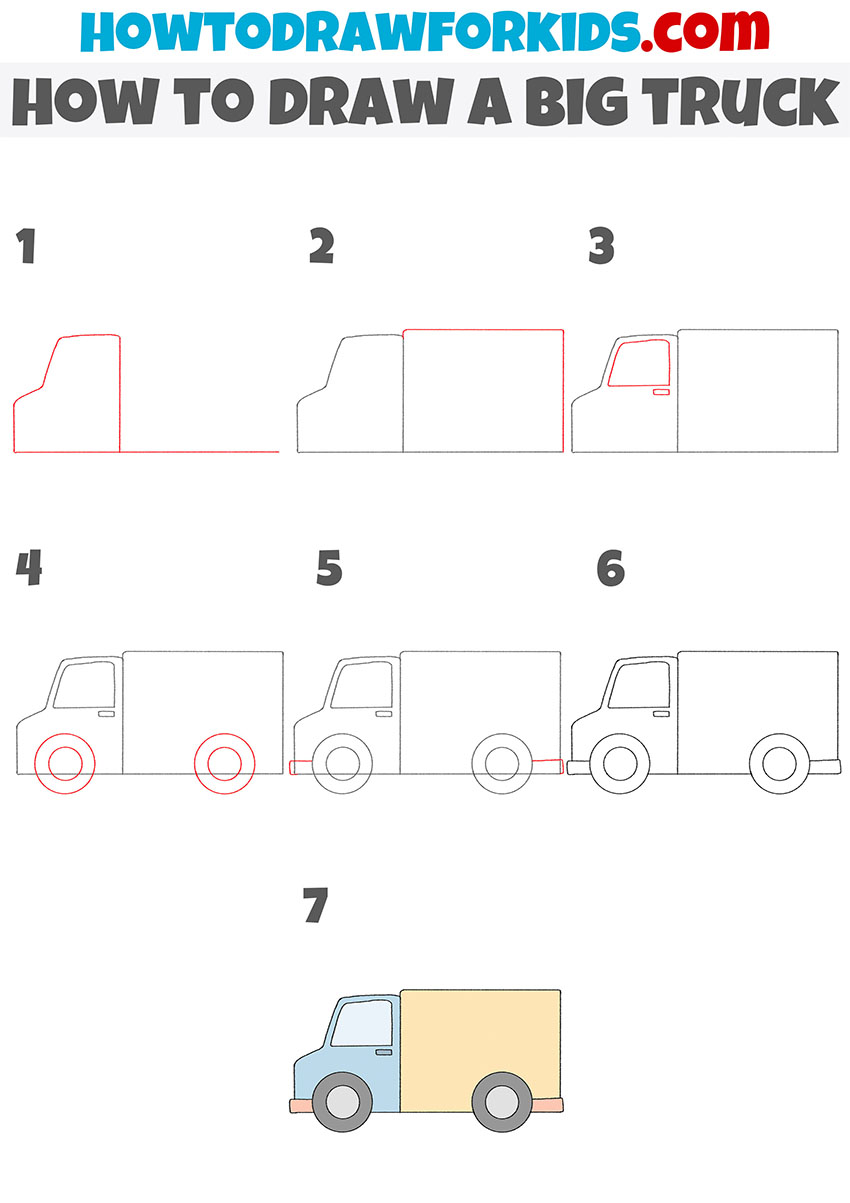
Cartoon Big Truck Drawing
This final method returns to a shorter two-wheel truck. Compared to the previous version, the cargo box is shorter, there is no extra axle, and the drawing requires fewer steps. The cab also has a different front shape with a more upright windshield.
Start by drawing the outline of the cab, then add the large rectangular cargo box behind it. Draw the window and door before adding the two wheels underneath the truck.
Finish the drawing by adding the front and rear bumpers and refining the outlines.
Color the truck using the same colors as in my example or choose your own combination. After completing this tutorial, compare all the trucks you’ve drawn and notice how changing only a few shapes creates different types of trucks.
What’s Next?
Now you know how to draw a big truck using several different methods. I hope this tutorial helped you understand how to build a complex vehicle from really simple circles and squares.
If you’d like to continue practicing, try drawing a pickup truck using your own design or change the size and shape of the cab, cargo area, or wheels. You can also use the same approach to draw many other types of vehicles.
Don’t forget to download the free PDF versions of the tutorials.
If you’d like to keep learning with me, be sure to follow me on social media. I share every new drawing tutorial there, and you’ll find links to all my social networks at this page.