How to Draw a Yo-Yo
The two simple methods on this page will show you how to draw a yo-yo, a simple but cool toy that everyone is familiar with.
How to Draw a Yo-Yo: Basic Information
Have you ever wondered how to draw a Yo-Yo with a simple technique? This lesson provides that guidance. The yo-yo in this tutorial is a simple circle with a string, that will teach you how to create symmetry in your artworks. By following these steps, you will understand how to illustrate its fundamental form.
Simple lessons like this serve as effective exercises for developing the basic skills of beginning artists. The use of simple details and lines helps prevent overwhelm, allowing focus on fundamental elements, which provide a solid foundation for further skill development.
The yo-yo consists of two round parts, providing an opportunity to practice drawing circles and ovals with symmetrical shapes. Additionally, the placement of these ovals one behind the other in the drawing helps young artists learn to create a sense of volume using basic techniques.
Alongside the main lesson, I have included an additional lesson on drawing a yo-yo using a simpler technique. Practicing both techniques will help consolidate the skills learned and provide a deeper understanding of drawing a yo-yo.
Yo-Yo Drawing Tutorial
Materials
- Pencil
- Paper
- Eraser
- Coloring supplies
Time needed: 25 minutes
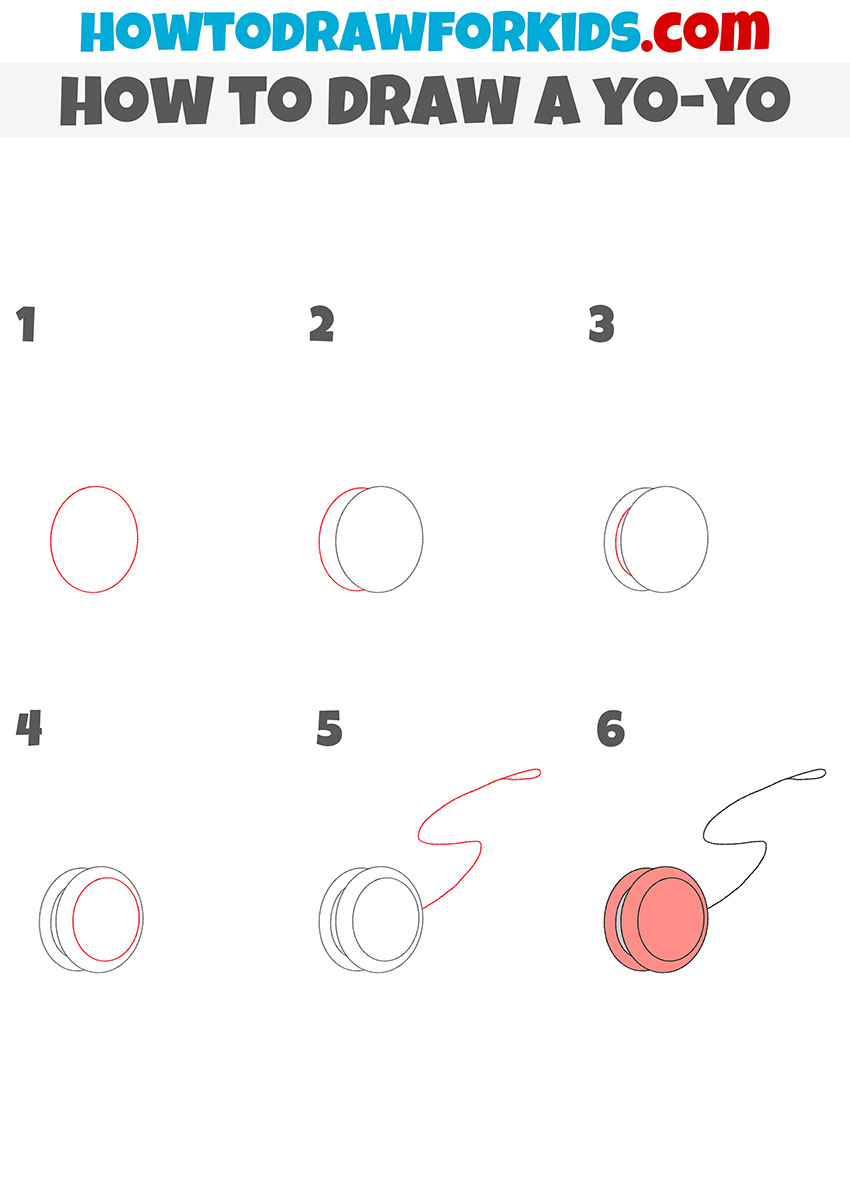
How to Draw a Yo-Yo
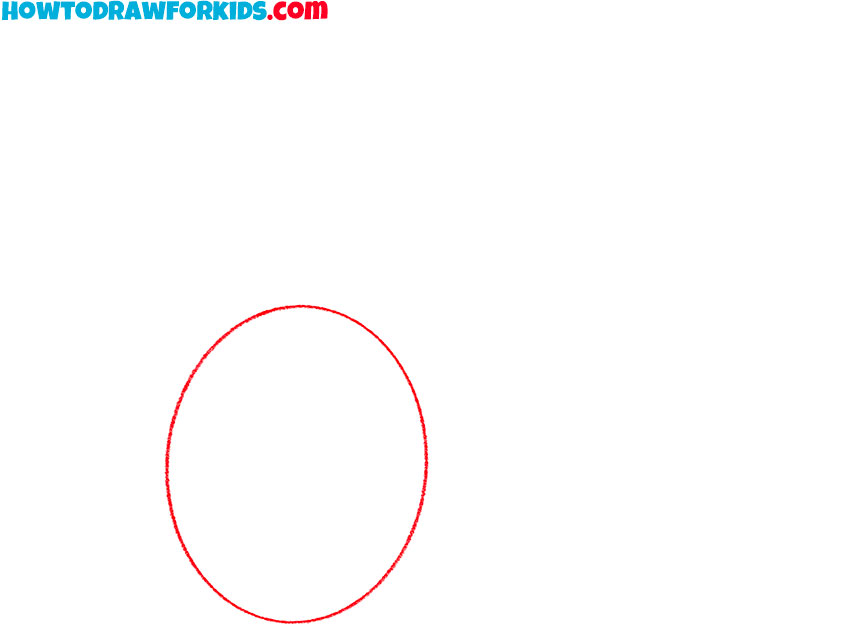
- Draw the first side of the yo-yo.
Start to draw a yo-yo by sketching a simple oval or circle, which will form one side of the yo-yo. This circle is essential for creating the yo-yo’s basic shape, so try to make it as even and round as possible. Drawing the first circle is a good exercise for learning how to draw a yo-yo or other round objects.
- Add the second side.
Next, draw a second circle slightly overlapping the first. This will represent the other half of the yo-yo and create a three-dimensional appearance. Position this circle carefully, as it should be almost identical in size to the first circle for symmetry.

- Illustrate the central part.
In this step, add a small and simple shape between the two circles to represent the central part of the yo-yo where the string is wound. Notice how a small short line placed in the right place instantly creates volume, and makes the yo-yo drawing look more dimensional.

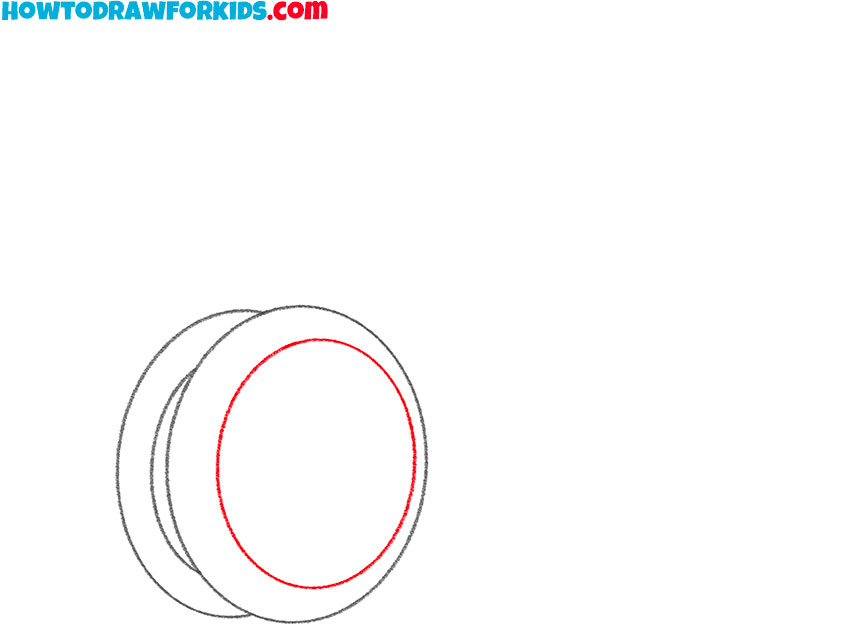
- Detail the yo-yo.
Now, repeat the oval drawn in the first step, but make it smaller and position it slightly further from the center, closer to the right edge. This will enhance the voluminous appearance of your yo-yo drawing, as this simple technique creates a linear perspective effect.
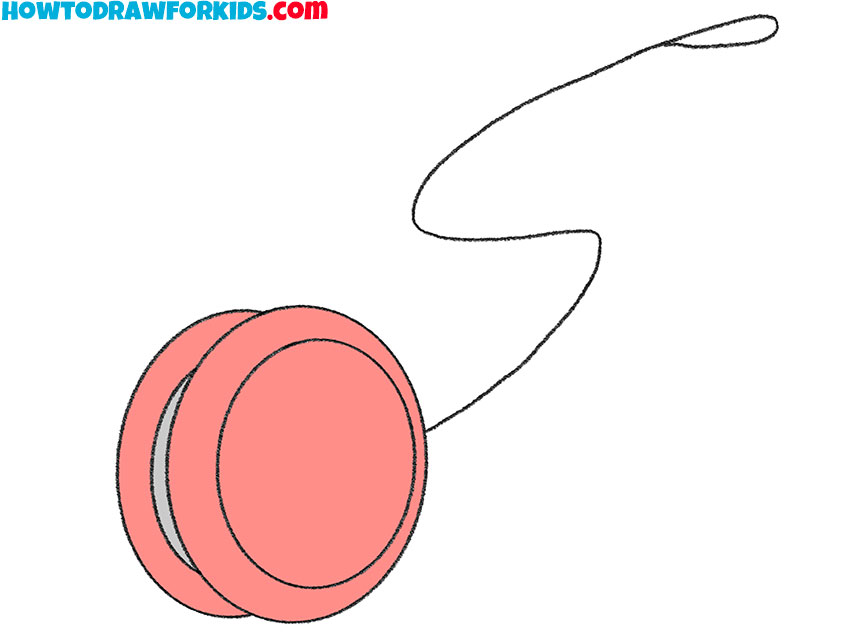
- Add the string.
Draw with a gentle, curving line that flows from the yo-yo for the string. To create a more voluminous look for the string, you can make it thicker where it connects to the yo-yo and tapering it as it extends outward. Complete drawing the yo-yo string by adding a small finger loop at the end.

- Refine and color the drawing.
Make the outlines bolder where necessary and erase any unnecessary guidelines. Once you’re satisfied with the outline, add color to give your yo-yo drawing a finished look. Typically, yo-yos come in bright colors, so feel free to choose a vibrant shade for your sketch.

Additional Content
For young artists on the go, I’ve prepared a free downloadable PDF that complements this online yo-yo drawing lesson, offering a condensed version of the tutorial in a portable format. It serves as a quick reference for classroom use or a screen-free drawing session, allowing continued practice of art skills even when offline.
Simple Yo-Yo Drawing Tutorial
This yo-yo drawing tutorial provides an alternative, simple technique, ideal for young learners, especially kindergarten students. The main difference between this yo-yo drawing tutorial and the first is that this version uses a bit more simplified technique. Additionally, this tutorial introduces a clear finger loop at the end of the string.
To draw an easy yo-yo, start with a large circle to form the base. Add a smaller circle near the center to represent the axle area and draw short lines around it to illustrate texture. Next, draw another circle overlapping the first to create the yo-yo’s second half.
Extend a line from the yo-yo’s edge to form the string, curving it naturally. Add a loop at the end of the string to represent the finger loop. Complete your yo-yo drawing by refining the outlines and adding color to each part: choose a bright color for the main body, a contrasting color for the axle circles, and another for the string. This yo-yo drawing tutorial demonstrates a simple, step-by-step way to practice sketching recognizable toy details.

Conclusion
Congratulations on completing the yo-yo drawing tutorial. I remind you, that there are many more drawing lessons available, such as the teddy bear drawing tutorial or the skateboard drawing lesson. Visit my website to access all these tutorials.
To stay updated on new content, consider joining me on social media. Follow for the latest updates and be the first to know about upcoming tutorials.