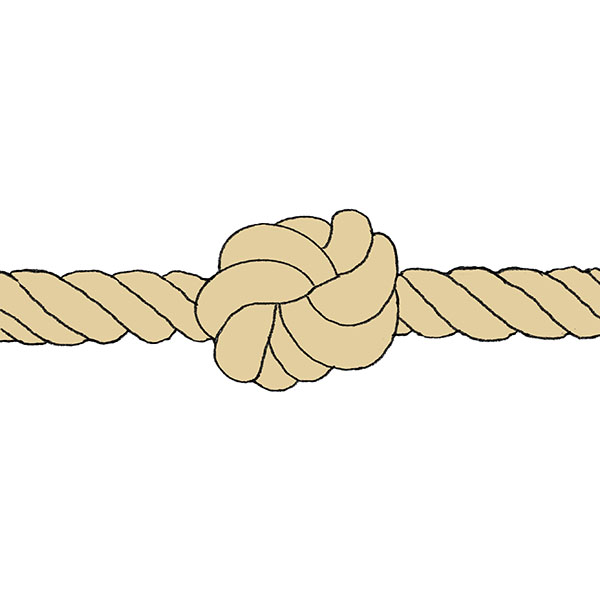
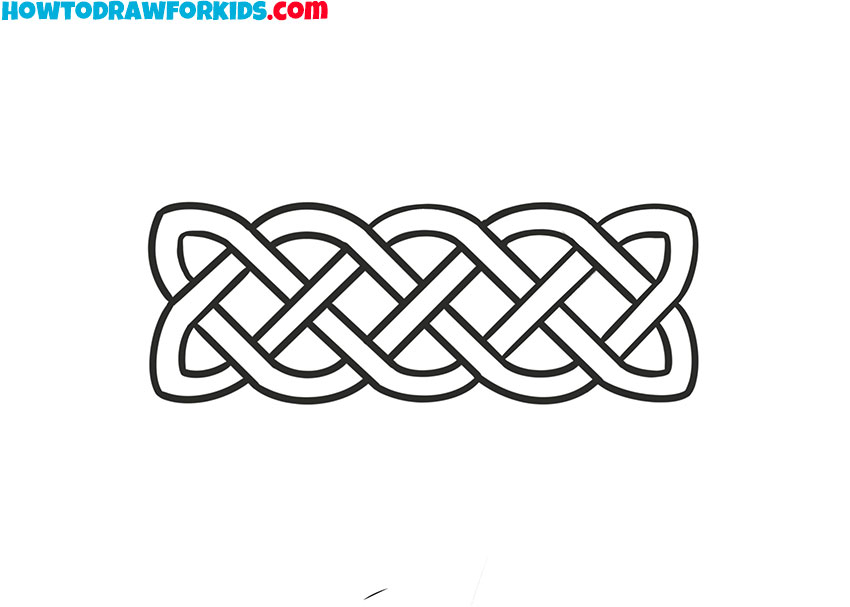
How to Draw a Celtic Knot
I invite you to a new drawing lesson in which you will learn how to draw a Celtic knot step by step quickly and easily.
Undoubtedly, this lesson will be very useful for you, and you will once again train your creative skills.
Today I bring to your attention an unusual drawing lesson in which I will show in detail how to draw a Celtic knot.
You may not have had to draw such objects, and this is the first time you will master the principles of drawing knots. Among the Ancient Celts, such knots performed a decorative function, and even in our time, Celtic knots can be seen on various souvenirs or jewelry.
At first glance, the drawing will seem complicated to you, but in fact you will quickly cope with this task and a simple instruction will help you with this, in which each step is demonstrated and supplemented with a small hint.
In order to correctly depict the Celtic knot, you must make a markup in advance, and thanks to the auxiliary lines, you can easily draw the entire object. In the future, you will be able to use the acquired skills in any design work to draw beautiful decorative elements.
Celtic Knot Drawing Tutorial
Materials
- Pencil
- Paper
- Eraser
- Coloring supplies
Time needed: 30 minutes
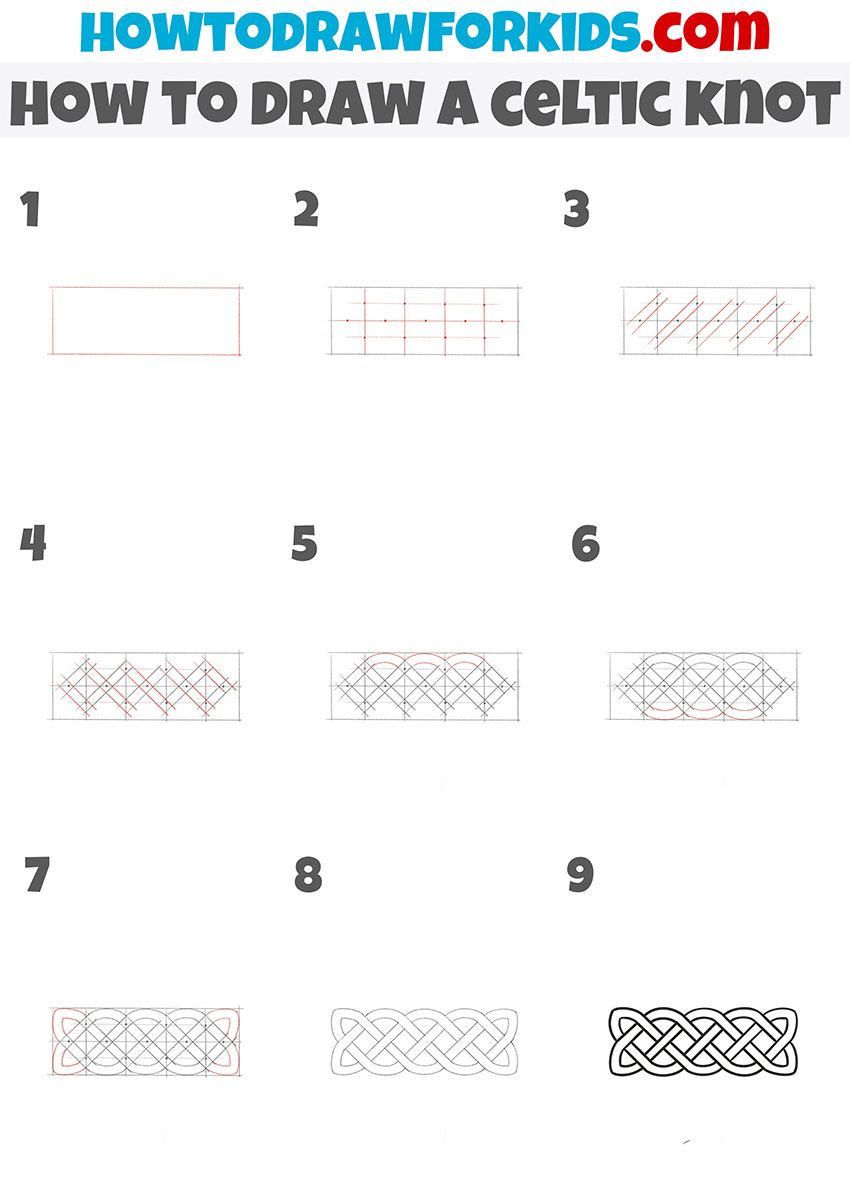
How to Draw a Celtic Knot
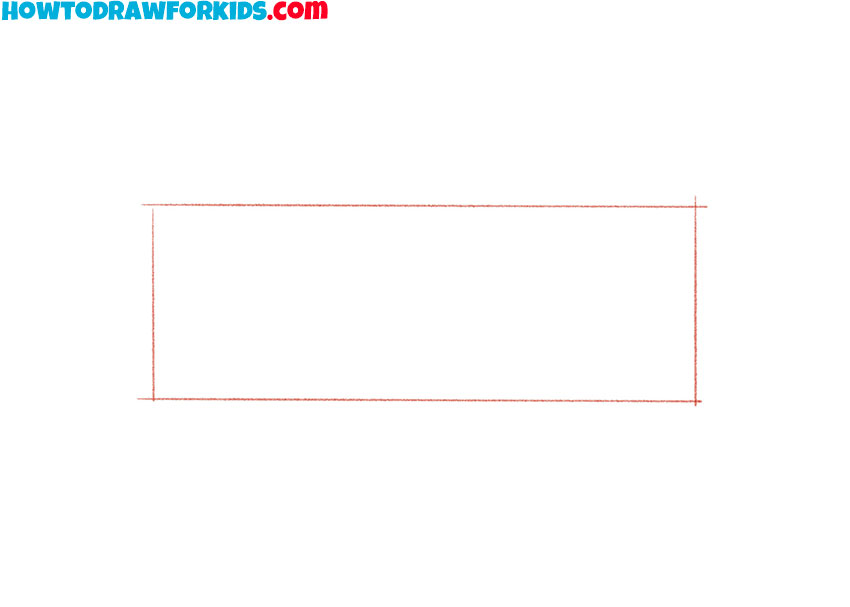
- Draw the frame.
Determine what size your drawing will be and draw an even rectangle.
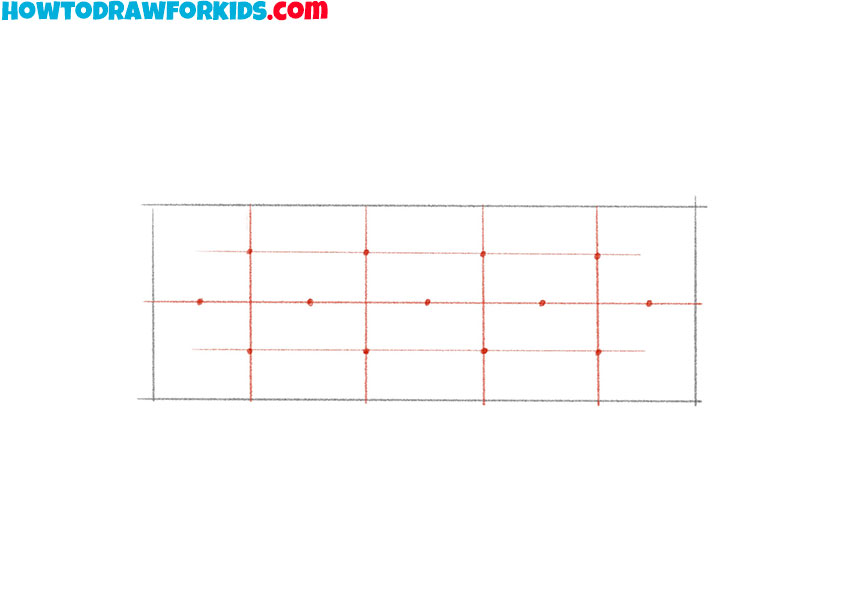
- Mark up.
Add four vertical lines and three horizontal lines, then add large dots.
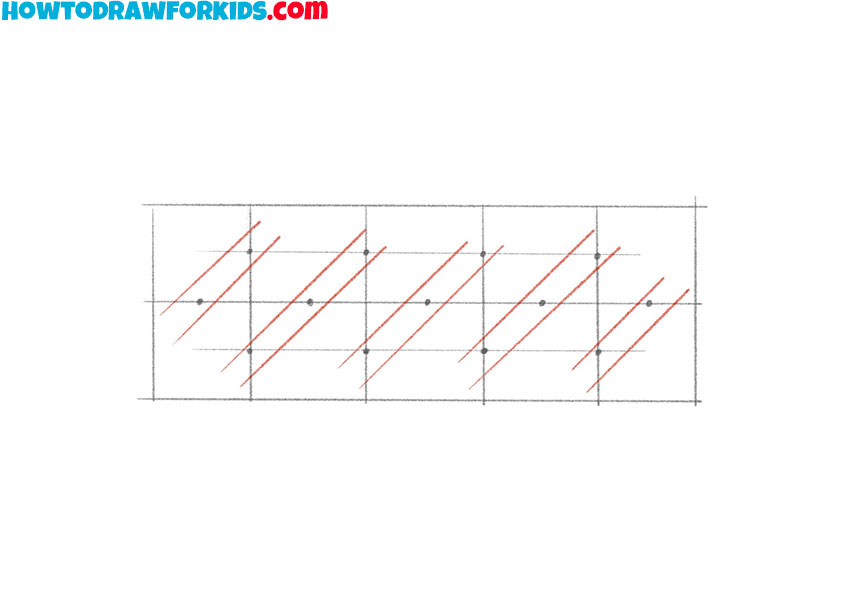
- Depict the diagonal lines.
Sequentially, sketch out several diagonal lines along the points.
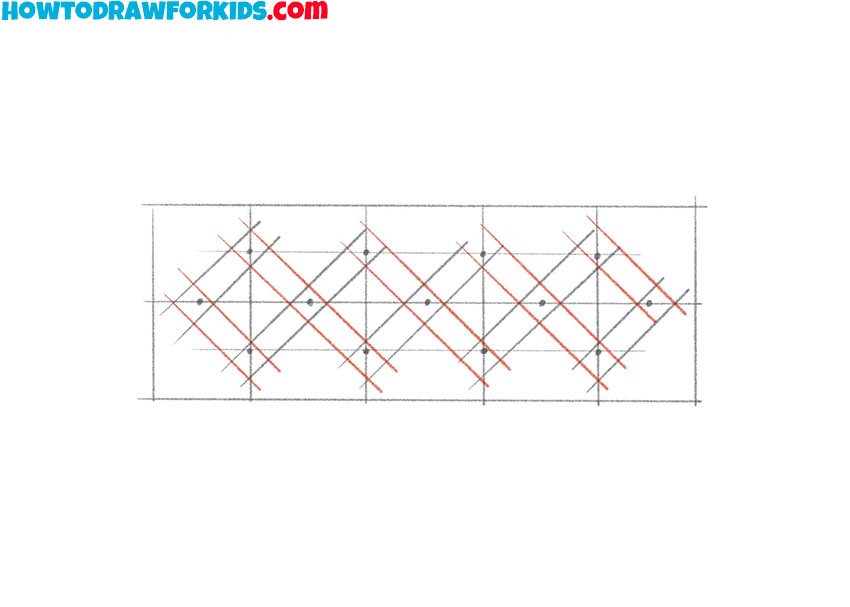
- Add the cross diagonal lines.
Repeat the previous step, but this time place the diagonal lines in the opposite direction.
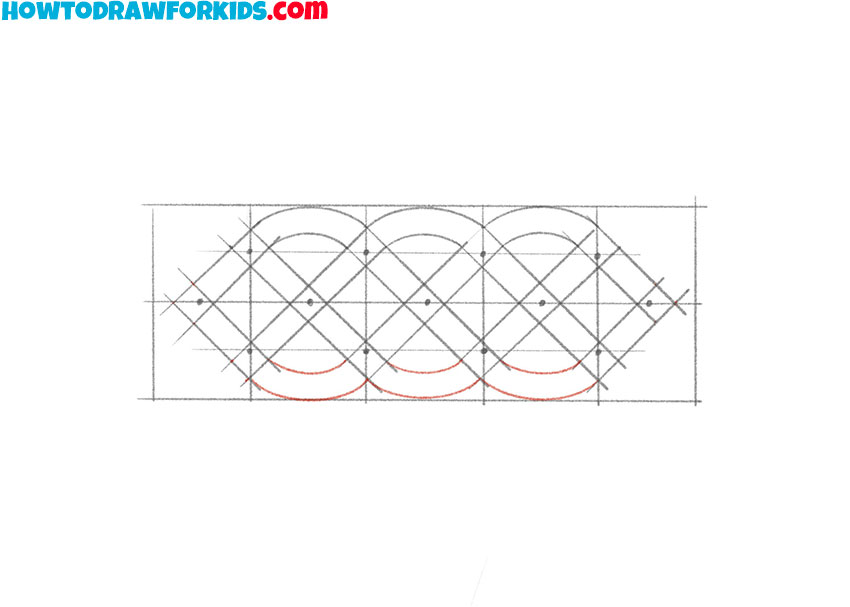
- Sketch out the connecting lines at the top.
Draw the connecting lines at the top of the node, as shown in the example.

- Add the connecting lines at the bottom.
Repeat the previous step and draw symmetrical lines at the bottom of the knot.
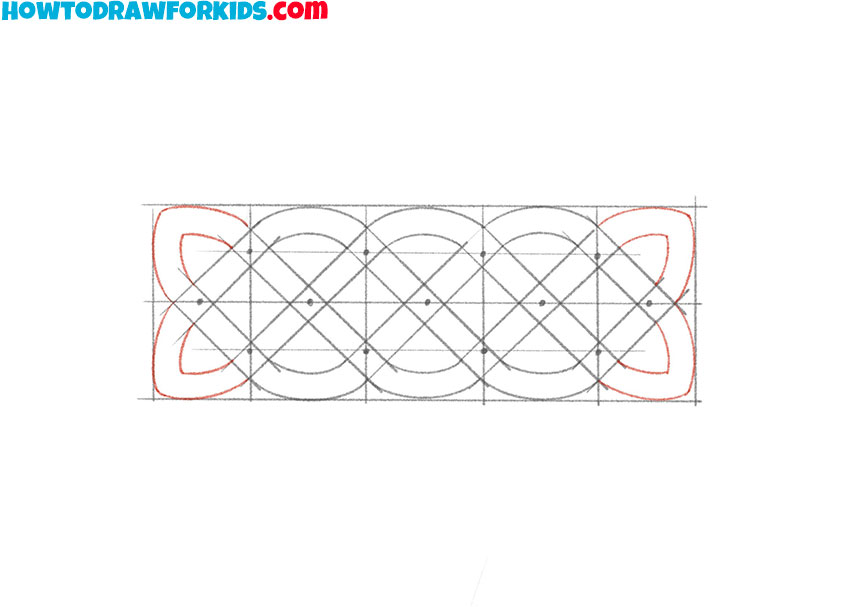
- Draw the remaining connecting lines.
On the sides, add four connecting lines of the same thickness as all the previous lines.
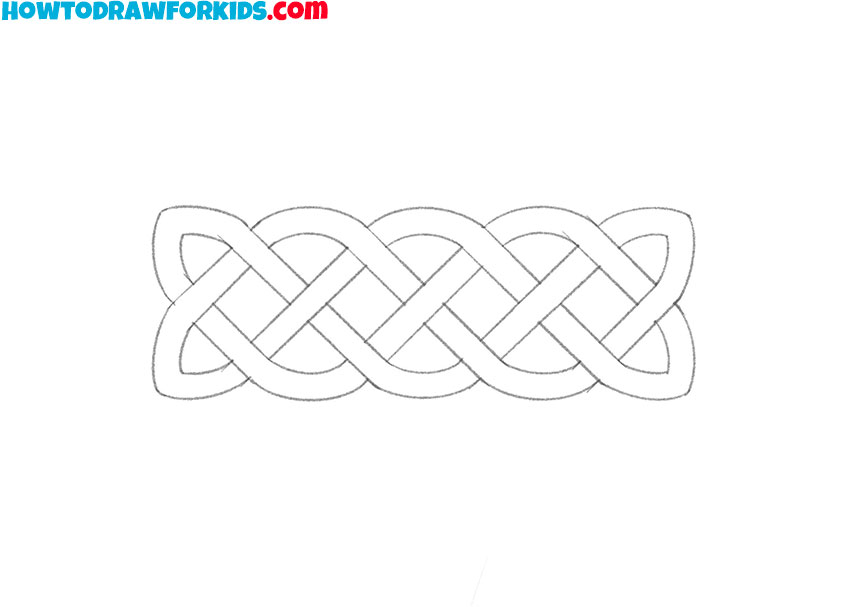
- Correct inaccuracies.
Use the eraser and carefully remove all unnecessary lines.
- Color the Celtic knot.
Use black to give relief to all lines.
At the end of the lesson, I suggest you download a brief instruction as a PDF file for free. Thus, the lesson will be available to you at any time, and you can always repeat it if necessary.