How to Draw a Cherry Blossom
Step into a world where art and nature merge with my how to draw a cherry blossom tutorial for kids. This lesson provides two techniques to depict the serene and graceful cherry blossom, ensuring a rewarding and fun drawing journey for young enthusiasts ready to explore their artistic potential.
Embark on a magical journey to draw the enchanting cherry blossom, a symbol of spring’s beauty and renewal. From the first petal to the last leaf, we’ll explore the simple shapes and gentle strokes needed to bring this floral wonder to life on your page.
How to Draw a Cherry Blossom: Basic Information
Welcome, young artists, to the serene world of cherry blossoms! Today, I’ll guide you through the enchanting process of how to draw a cherry blossom, using simple steps that anyone can follow. This lesson is tailored to help you recreate the delicate beauty of these beloved flowers, a symbol of spring and renewal.
The technique we’ll use emphasizes the gentle curves of the petals and the elegant poise of the branches. As you follow along, you’ll notice how we start with a basic twig, add the outline of petals, and slowly build up to a full bloom. This method is designed to help you understand the structure of cherry blossoms, making it easier to capture their essence.
Once you’ve completed this tutorial, you’ll have a beautiful cherry blossom artwork to show off. Remember, the key to drawing is practice, so feel free to revisit this lesson whenever you like. Now, let’s pick up our pencils and let the sweet fragrance of cherry blossom inspire us to draw!
Cherry Blossom Drawing Tutorial
Materials
- Pencil
- Paper
- Eraser
- Coloring supplies
Time needed: 35 minutes
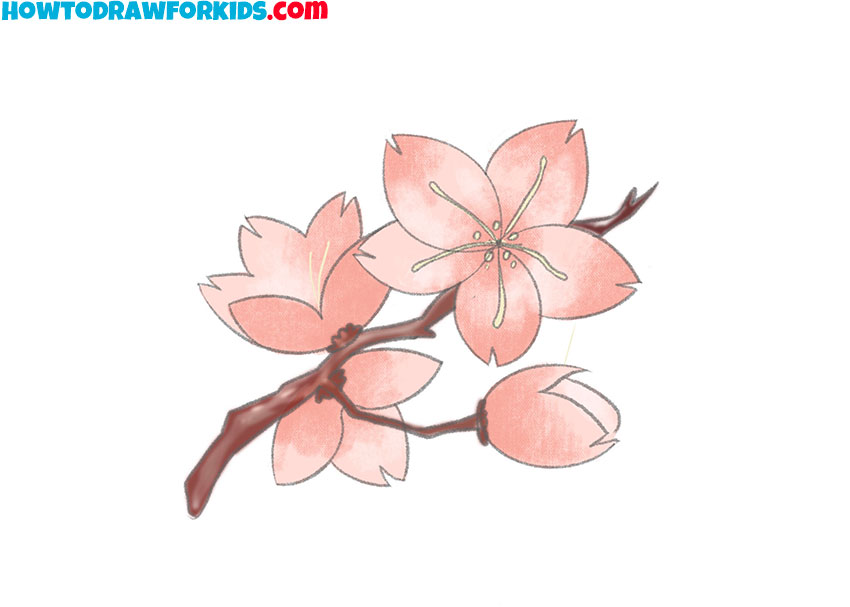
How to Draw a Cherry Blossom
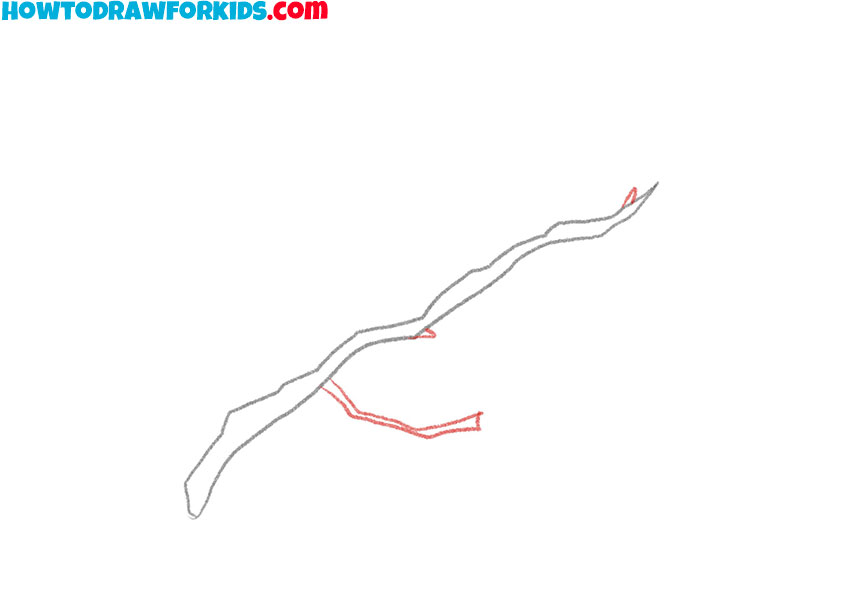
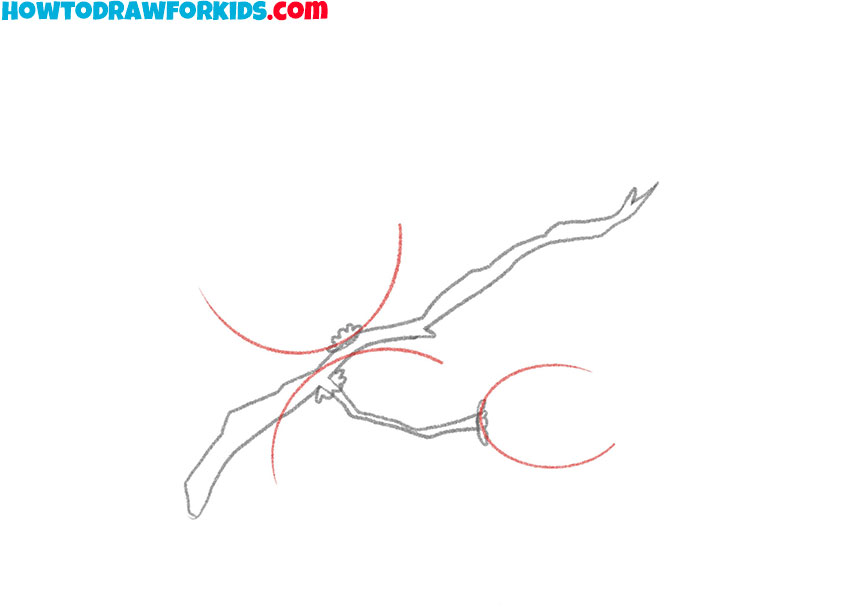
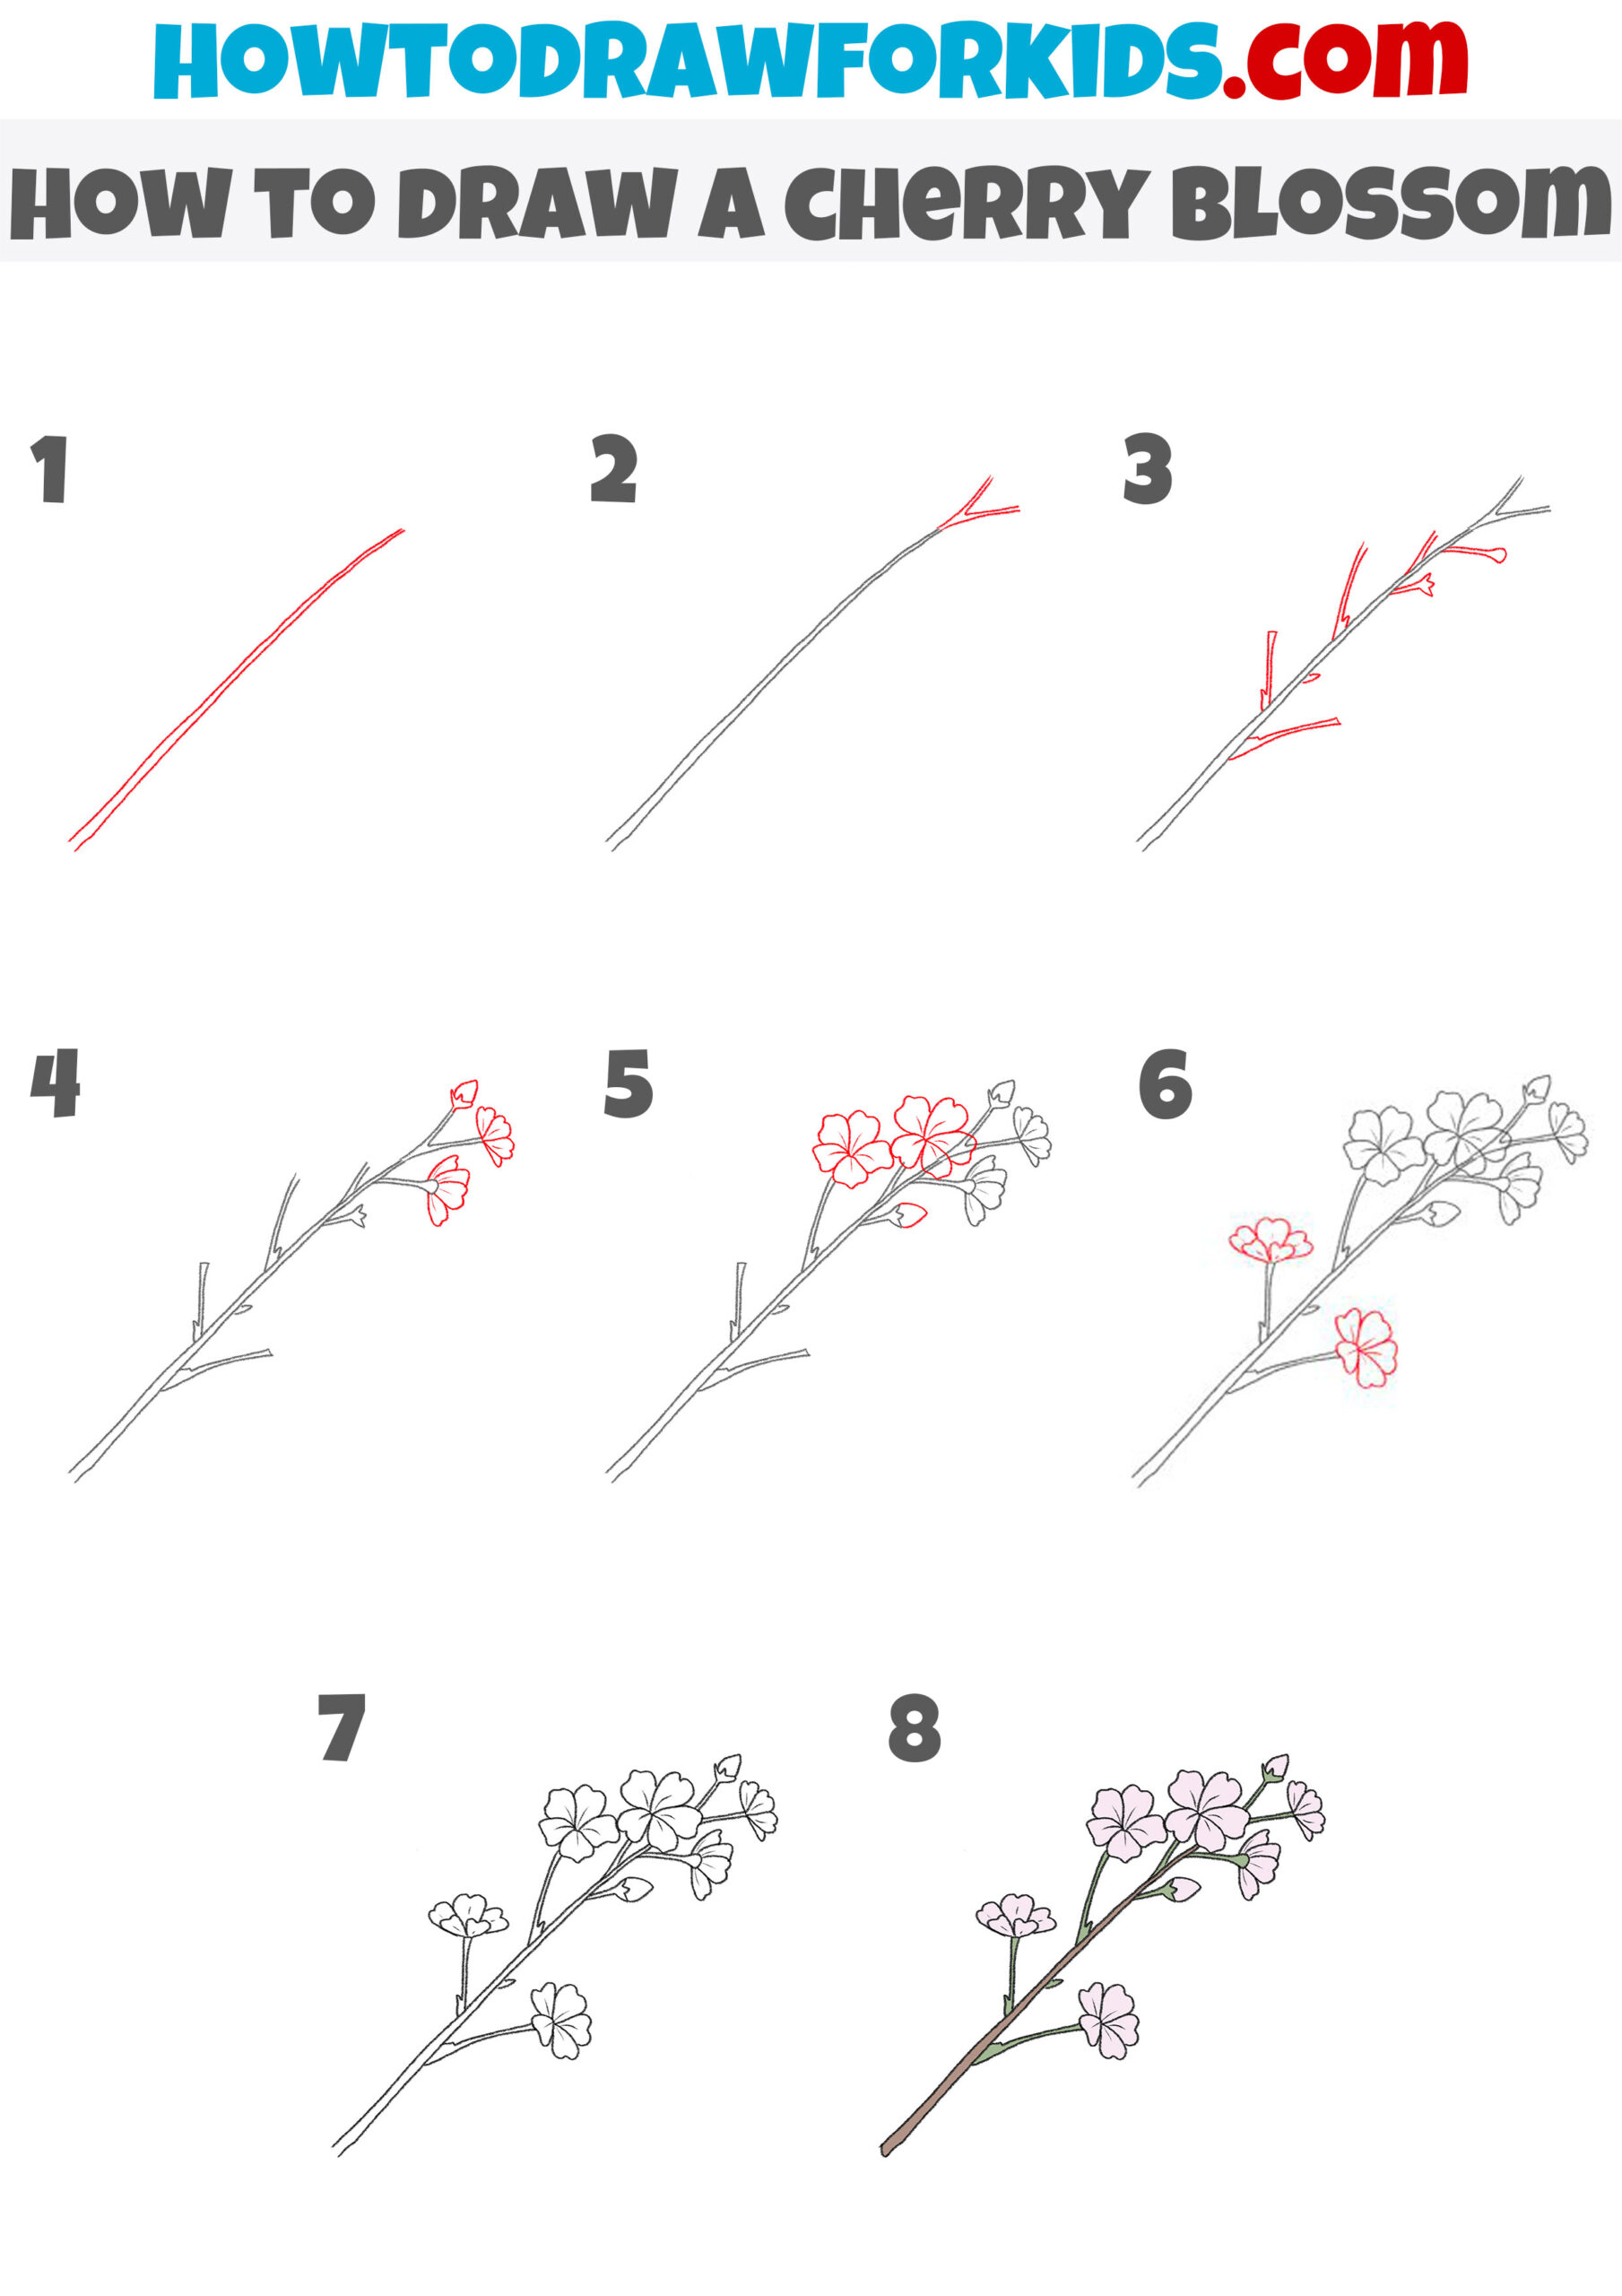
- Draw the main branch.
Depict an uneven line that is located diagonally.

- Add the side branches.
Depict another small branch and two offshoots.
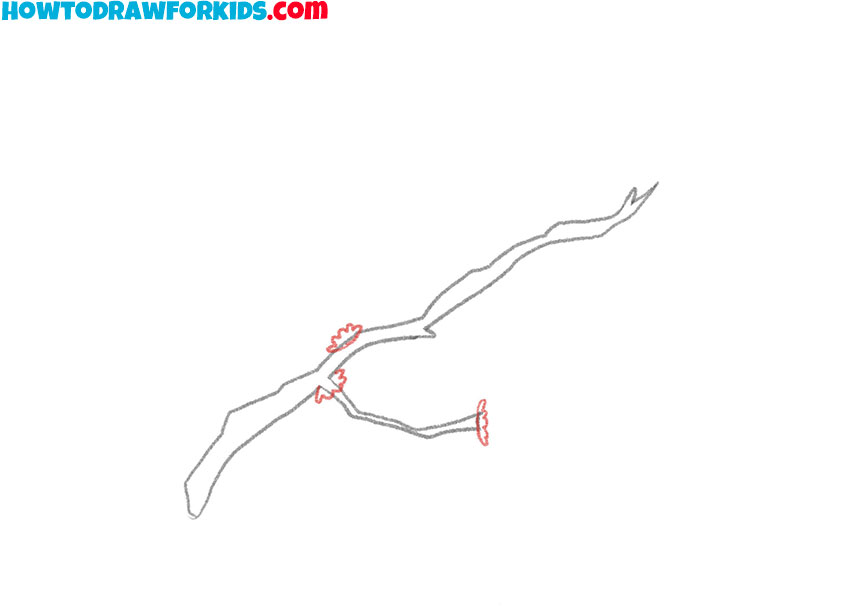
- Sketch out the sepals.
Using wavy lines, draw three small sepals.
- Depict the bottom contours of the buds.
Add the lower parts of the buds with smooth, rounded lines.
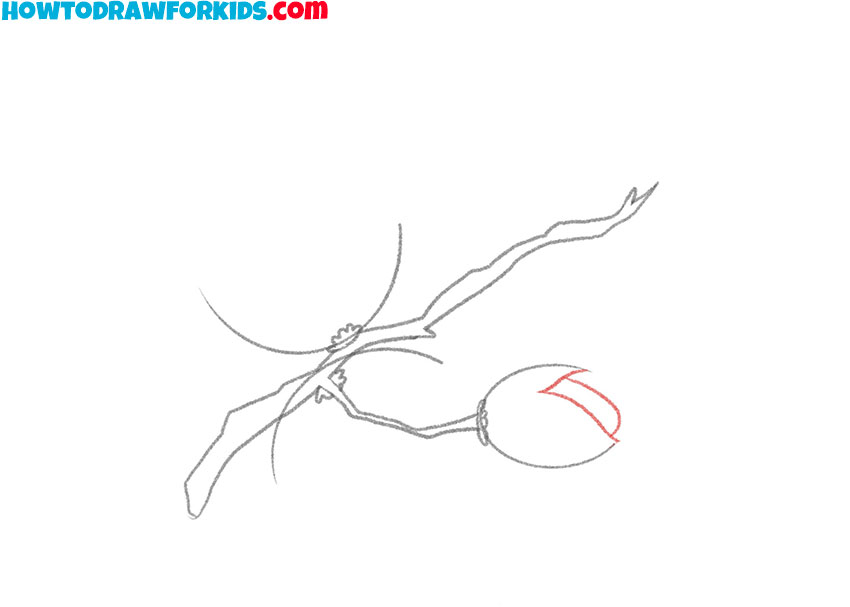
- Draw the top of the bud.
In the side flower, depict the top part with a few smooth lines.
- Add the tops of the rest of the flowers.
Depict the individual spiky petals on the other two flowers.
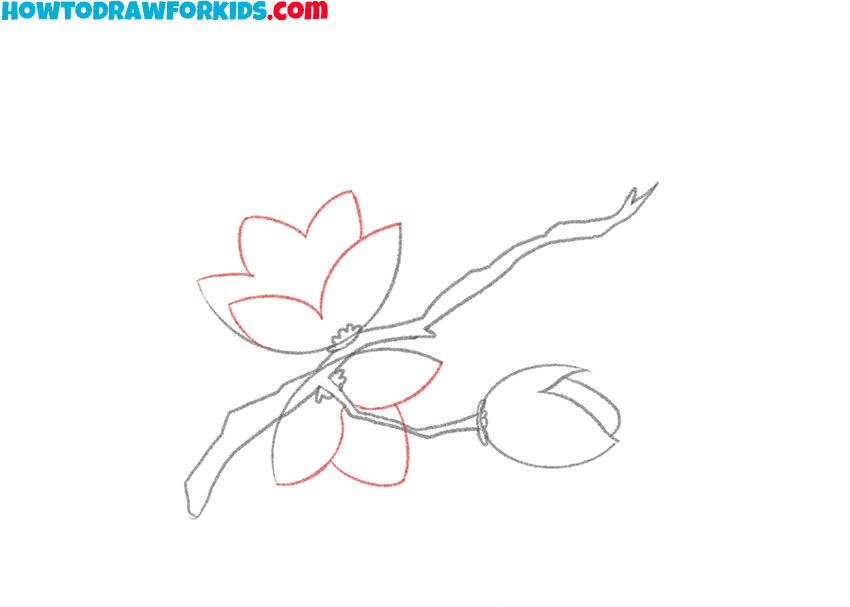
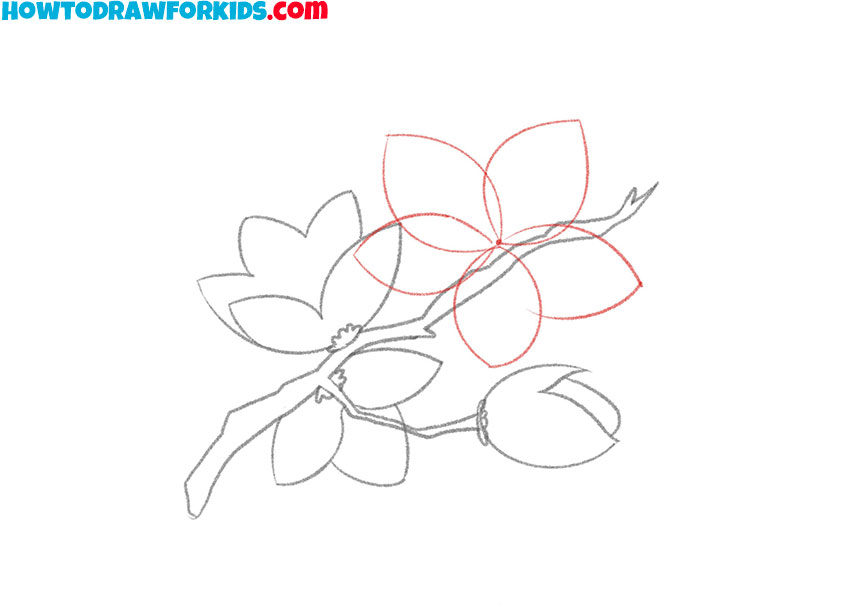
- Sketch out one big flower.
On the top of the branch, draw one blooming flower that has five petals.
- Detail the flowers.
Add the stamens on the large flower and veins on the rest of the flowers.
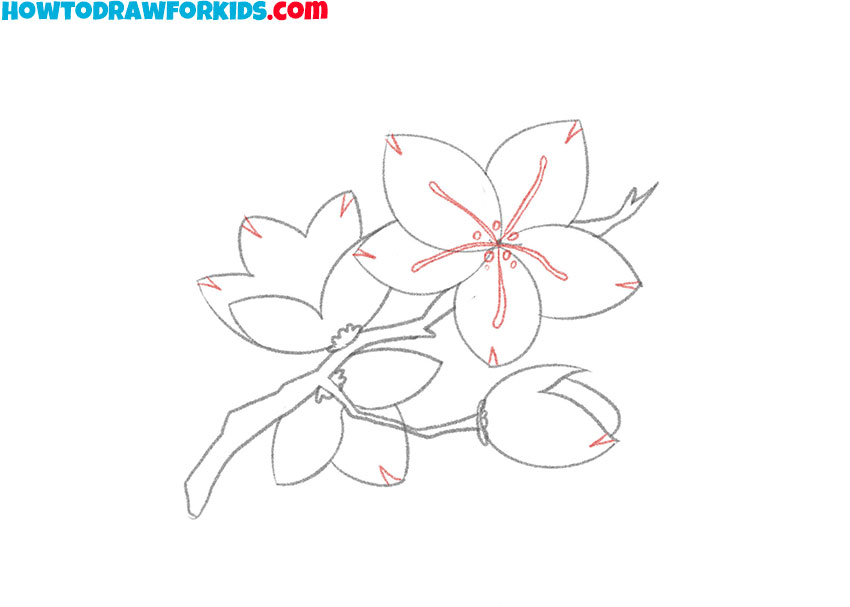
- Color the drawing.
Use brown for the branch and color the petals light pink.
Additional Content
I’m thrilled to share that I’ve created a free PDF file for this cherry blossom drawing lesson, perfect for our young artists! This compact version of the lesson includes all the essential steps, making it super easy for you to download and enjoy drawing anytime, anywhere, even without an internet connection.
Whether you’re at home, on a trip, or in the great outdoors, this PDF ensures that the beauty of cherry blossoms is always at your fingertips. So, don’t wait – download your copy today and start creating your springtime masterpiece!
Alternative Drawing Technique
Exciting news for all our budding artists out there! I’ve crafted another alternative method for drawing cherry blossoms, designed to give you more practice and enhance your artistic skills.
It’s a fantastic opportunity to expand your creativity, refine your technique, and blossom into a more versatile artist. So, grab your pencils and let’s dive into this new drawing adventure together!
How to Draw an Easy Cherry Blossom
In the second approach to drawing a cherry blossom branch, the method is streamlined with fewer steps. Instead of detailed depiction of each bud and petal, the focus is on capturing the essence of the blossoms with simpler shapes. This method begins with a basic branch outline, adding minimal strokes to suggest twigs.
Progressing swiftly, it uses broad strokes to form the general shape of the flowers, inviting a quicker transition to a fully realized cherry blossom. This approach is ideal for beginners, emphasizing the overall silhouette over intricate details.
Branch Out Your Skills: Cherry Blossom Edition
Alright, little artists, you’ve just finished drawing a cherry blossom branch, and it looks fantastic! But don’t put your pencils down just yet. Here’s how you can make your artwork even more amazing:
- Practice Makes Perfect: Try drawing the cherry blossom branch a few more times. Each attempt will help you improve and make your blossoms bloom even brighter!
- Add Some Color: Once you’re comfortable with your sketch, bring your cherry blossoms to life with color. Soft pinks and whites will make your drawing pop!
- Background Bonanza: How about drawing a scene in the background? Maybe your cherry blossoms are part of a beautiful garden or in front of a mountain.
- Details, Details: As you get better, add little details like textures on the branch or gradients in the petals for a more realistic look.
Remember, every artist starts somewhere, and every line you draw helps you grow. Keep creating, and who knows? Maybe you’ll have a whole garden of drawings soon!
Conclusion
And that’s a wrap on our cherry blossom drawing! But don’t let your creativity stop here—my website is brimming with more fun and engaging drawing lessons. Why not slither into my snake drawing tutorial, or try capturing the expressive beauty of anime eyes? There’s always something new to learn and create.
Don’t forget to join my social media family to stay updated with the latest tutorials. Follow me, and be the first to hear about new lessons. Let’s keep our pencils moving and our imaginations soaring. Happy drawing!

This good
This was kinda easy to do