How to Draw Mountains
Step into the world of landscape art as we learn how to draw mountains with two straightforward methods. This lesson is designed to spark your imagination and sharpen your drawing skills. By the end of our session, you’ll be able to beautifully render mountain ranges, ready to decorate your room or share with friends.
How to Draw Mountains: Basic Information
Imagine a world where majestic peaks rise from the whispering mist, and the horizon is an invitation to adventure. Today, we’re going to learn how to draw mountains that evoke such wonder, capturing the essence of these timeless giants with simple strokes and shades.
Together, we will outline the contours that define mountainous grandeur, adding personality to every slope and peak. With each mark, we will not just draw but also understand the form and character of mountains, creating a scenic vista that tells its own unique story.
Ready your pencils, for they are the wands we will wield to conjure mountains from the realms of our imagination, creating a landscape that beckons others into the story we’ve drawn. Let the adventure begin!
Mountains Drawing Tutorial
Materials
- Pencil
- Paper
- Eraser
- Coloring supplies
Time needed: 20 minutes
How to Draw Mountains
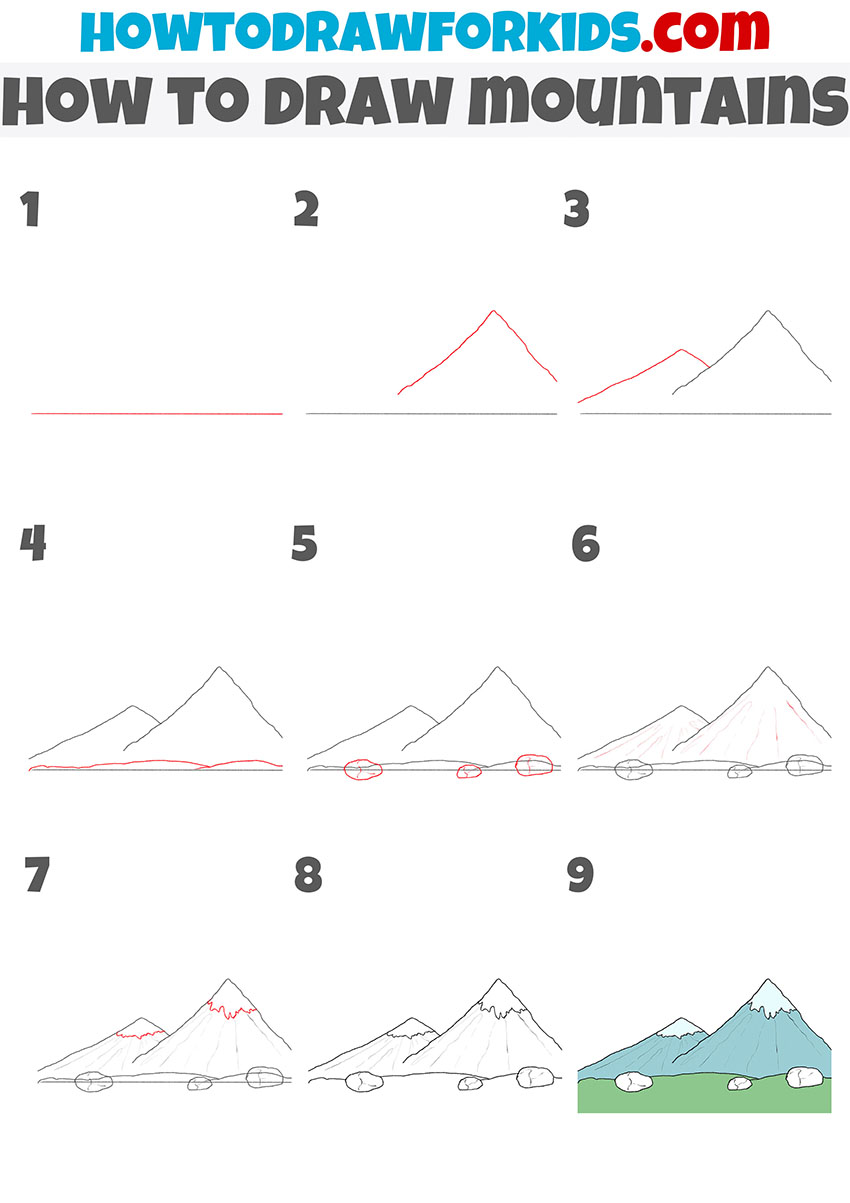
- Draw the auxiliary line.
The drawing begins with a simple horizontal line across the page. This line serves as the base from which the mountain will rise. The line should be smooth and even.

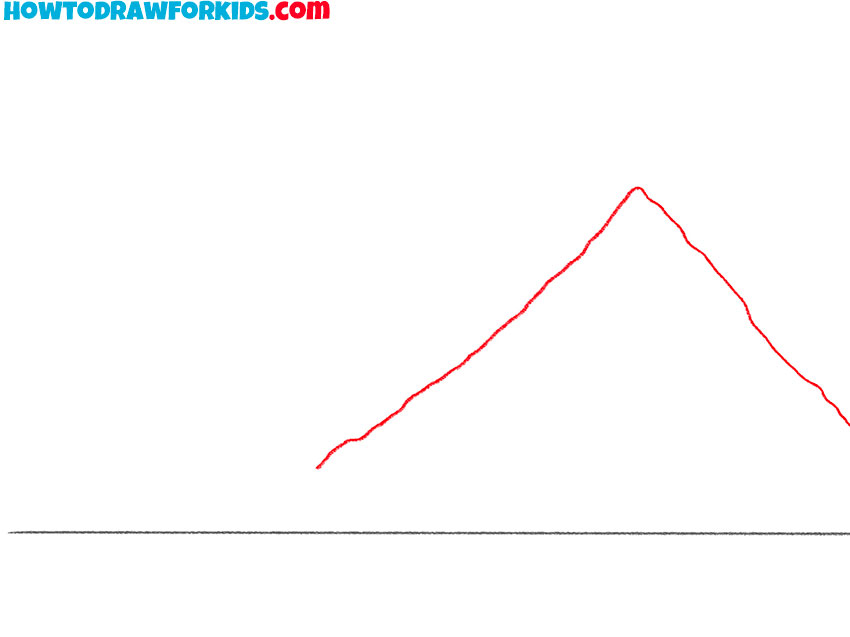
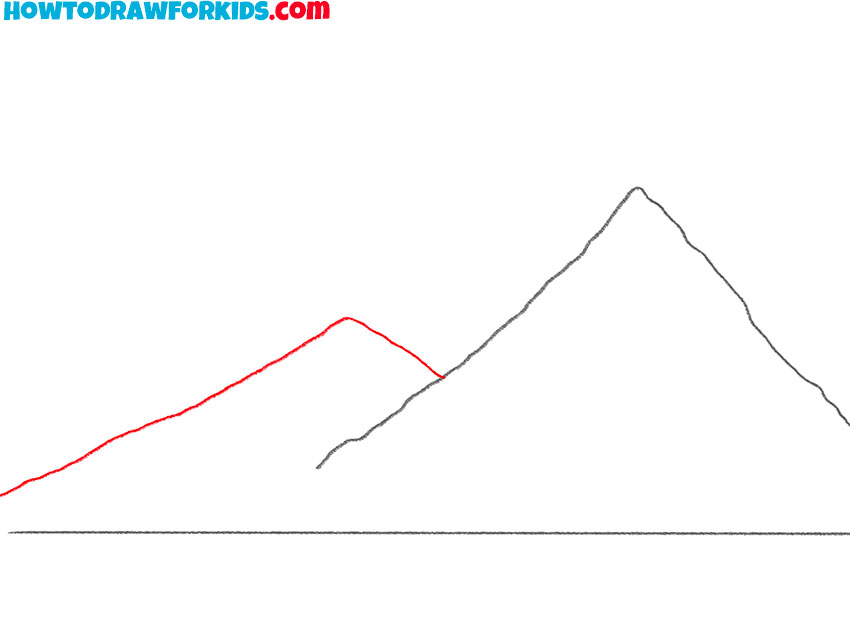
- Depict the outline of the mountain.
On top of the base line, a single peak is added. Starting from the base, draw two straight lines meeting at a point above the base line to form a simple, triangular mountain shape.
- Add the outline of the second mountain.
Adjacent to the first peak, a second peak is drawn, slightly overlapping the first. When adding the second peak, make sure that the angles vary from the first to give a natural variety to the mountain range.
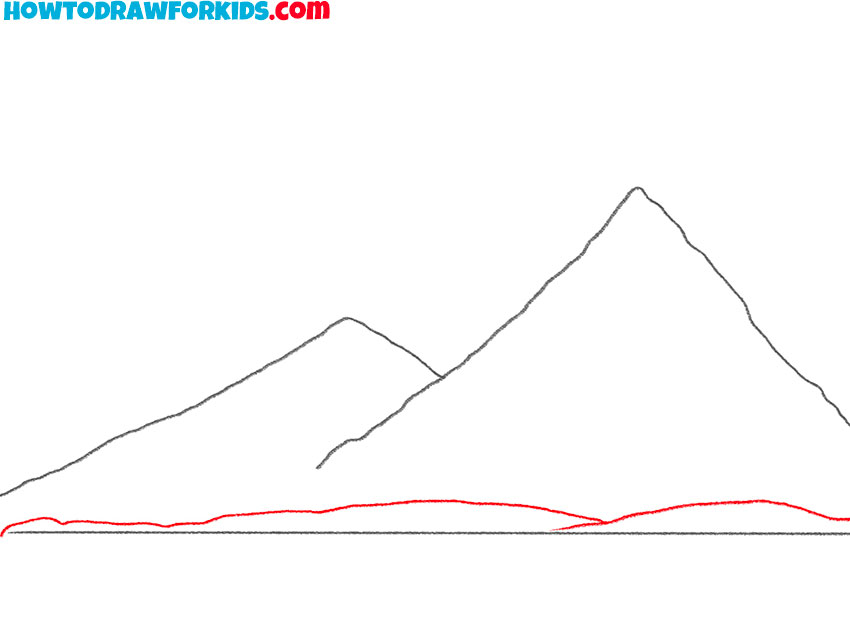
- Picture the outline of the ground in the drawing.
At this stage, the surface contours of the grassy areas at the mountain’s base are defined. To achieve this, draw a series of gentle, undulating lines along the horizontal base.
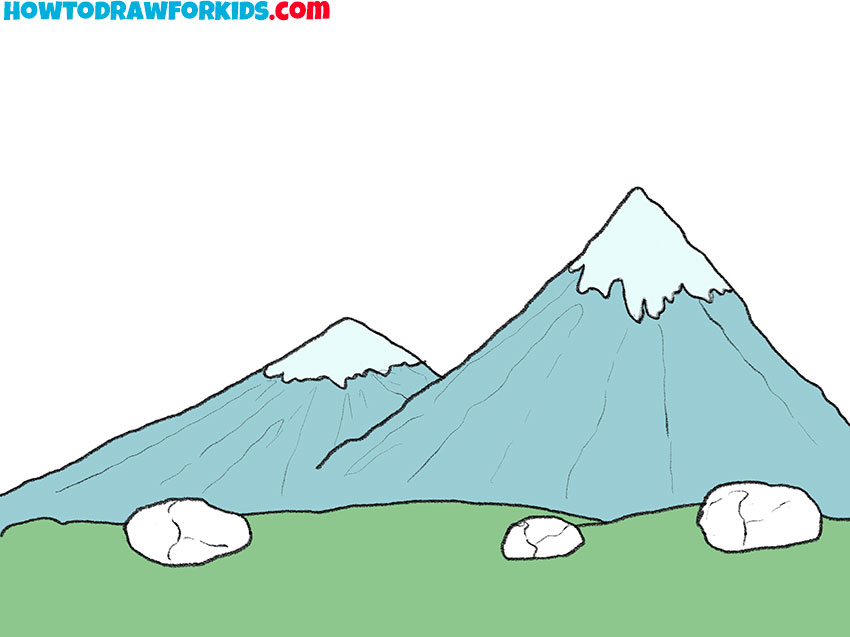
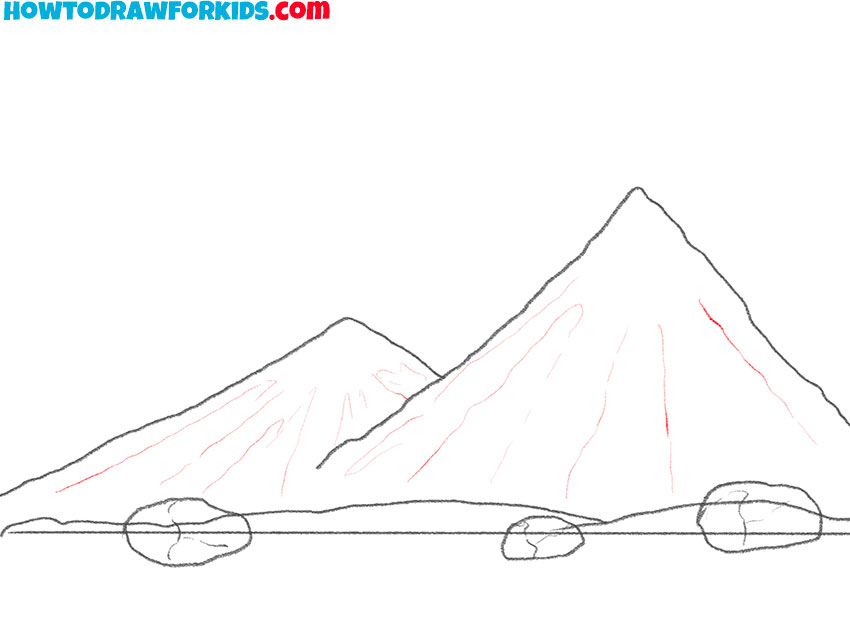
- Draw the stones.
Beneath the delineated grassy contours, the next layer adds the rocky foundation often found at the base of mountains. To depict these stones, draw several rounded shapes of different sizes.

- Add the relief of the mountains.
Now, attention is turned to the mountain peaks to give them dimension and texture. And, depict ridgelines that start from the peaks and slope down towards the base.
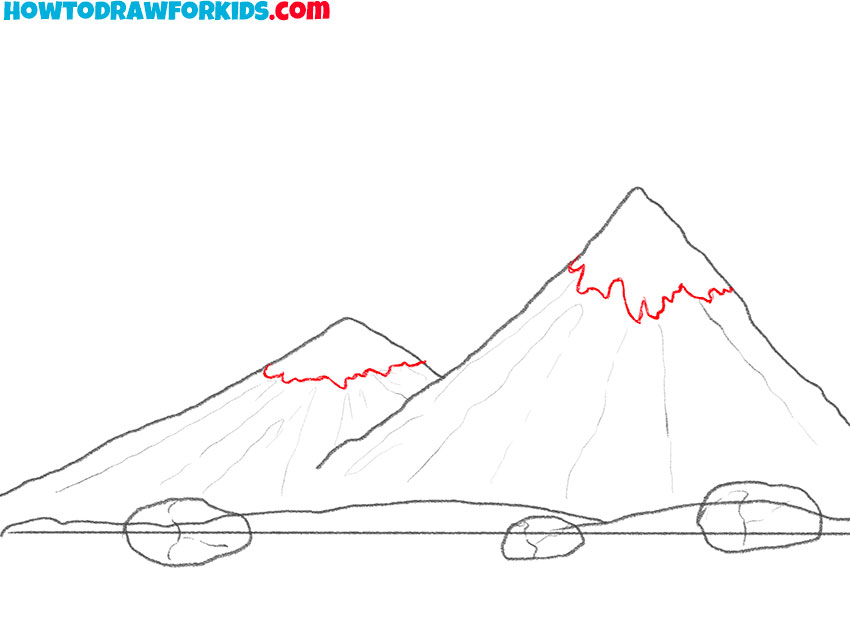
- Picture the snow-covered mountain tops.
The next step brings texture to the mountains by adding jagged lines within the peaks to suggest rocky outcrops. These should be irregular and varied to create a realistic mountain texture.
- Erase unnecessary lines.
Look carefully at your drawing of mountains, find mistakes and correct them. Add the missing elements, remove unnecessary lines and start coloring.
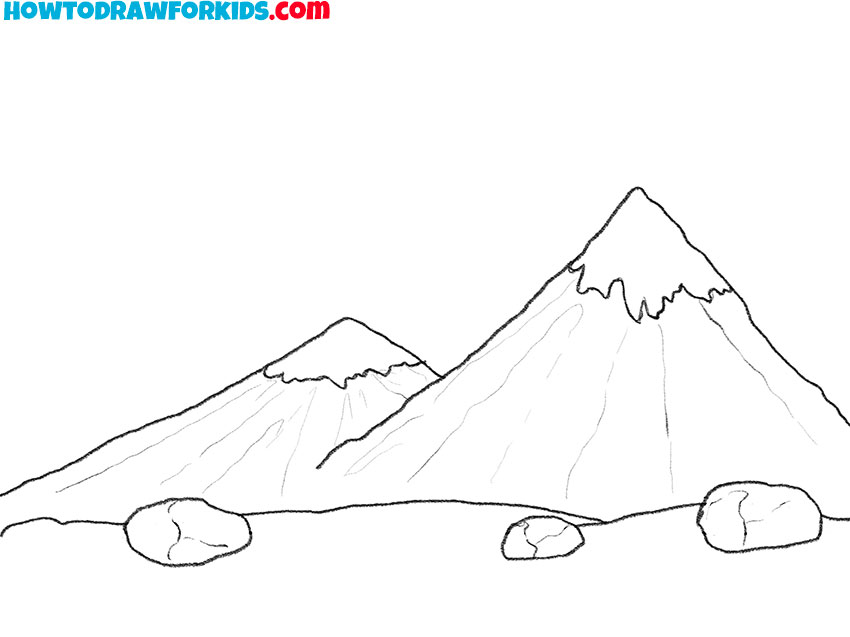
- Color the drawing.
The final step involves coloring. A gentle touch should be used to apply the color, building up layers to achieve the desired intensity.
Additional Content
As a bonus to our delightful drawing session, I’m excited to offer you a free PDF file of our mountain drawing lesson. This compact version is specially designed to fit into your creative life seamlessly, providing you with a handy reference that you can turn to anytime you wish to draw mountains.
It’s an invaluable resource for reinforcing what we’ve learned, and because it’s downloadable, you can keep it on your favorite device to use whenever the inspiration strikes, internet or no. Download it today, and let every page you fill be a reminder of the endless possibilities that await in your artistic journey.
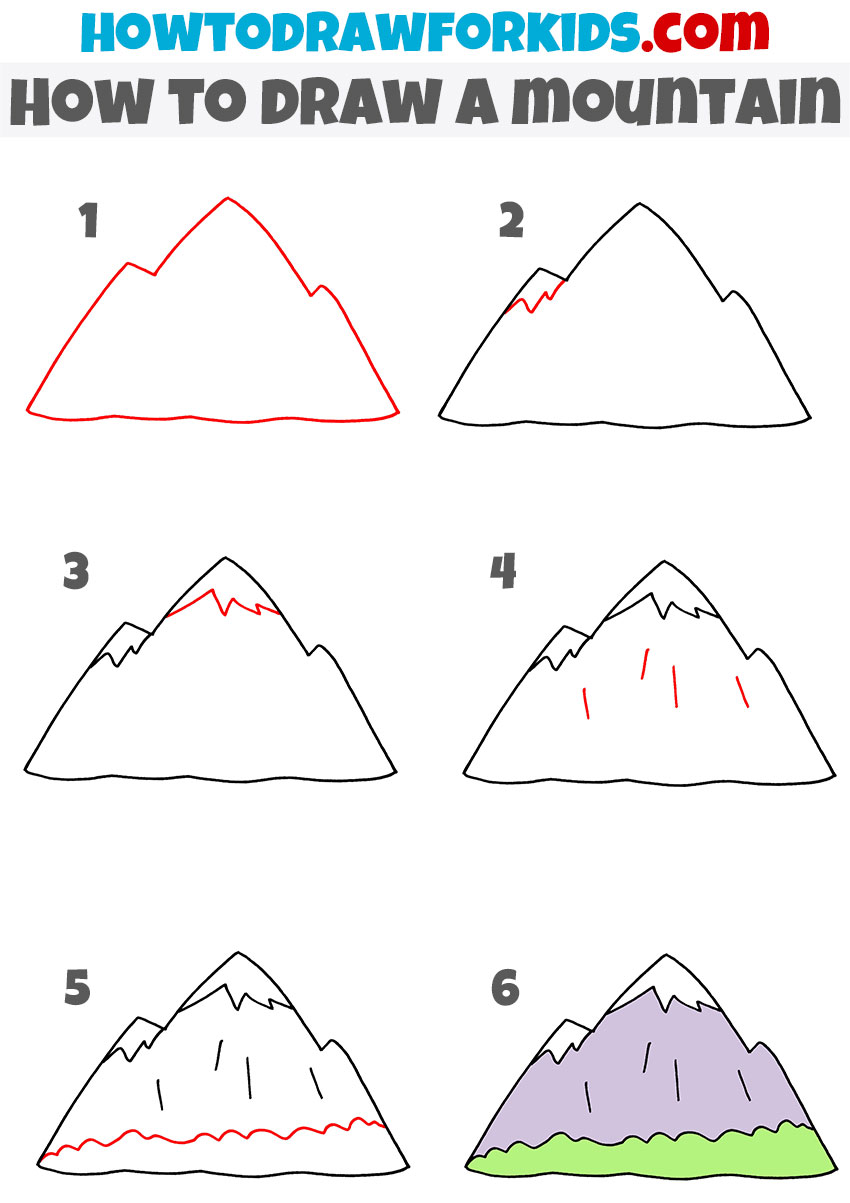
Alternative Drawing Method
In our journey through the art of drawing mountains, I’ve crafted another method to enrich your learning experience. It’s an invitation to broaden your artistic horizons, encouraging continuous practice and improvement in a fun and engaging way.
How to Draw Mountains for Kindergarten
This alternative method is beautifully simple, making it an excellent fit for kindergarten artists. The illustration shows a single mountain drawn in six easy steps, perfect for young learners to follow and succeed in creating their mountain masterpiece.
It’s an enjoyable and straightforward approach that introduces children to the joys of drawing and the basic concepts of art. With each step clearly defined, this method is designed to instill confidence and a sense of accomplishment in budding artists.
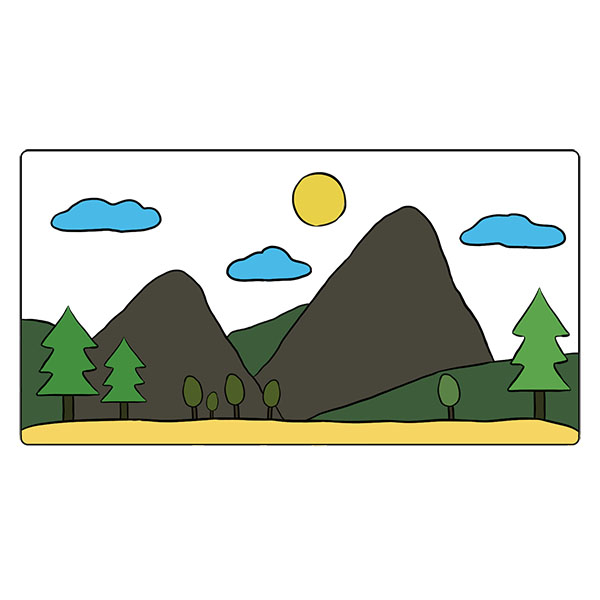
Creating a World Around Your Mountains
Dear young artists, your mountains stand tall and proud on the paper, but they are just the beginning of your adventure into art. Mountains are not just giants of rock and snow; they are the heart of a living landscape. Let’s explore how we can make our mountains part of a bigger picture:
- Forests: At the foot of your mountains, sketch rows of evergreen trees to create a lush forest that whispers tales of hidden paths and woodland creatures.
- Rivers: Imagine a sparkling river that begins as a trickle from the mountain’s peak, winding down to the valley below, bringing life wherever it flows.
- Wildlife: Dot the landscape with deer grazing in the meadows or eagles soaring in the wide skies, each adding life to your mountain scene.
- Cabins: Nestle a small, cozy cabin against your mountainside, a haven for those seeking solace in nature’s embrace.
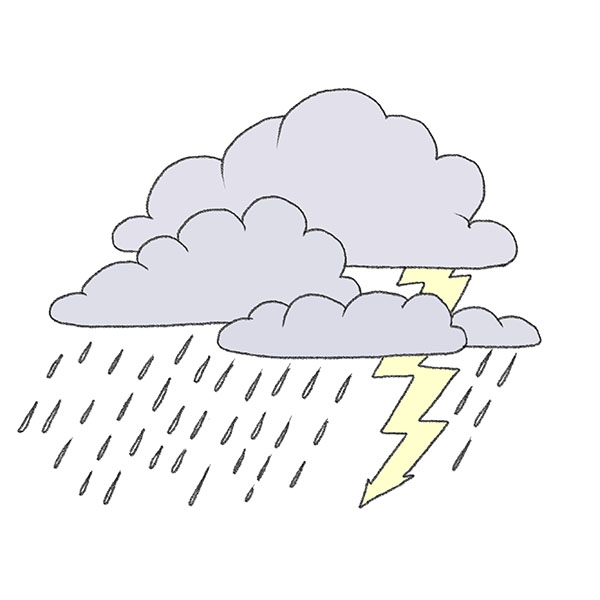
- Weather Elements: Add clouds drifting by or a sun setting behind the peaks to show the weather’s dance with the mountains.
Use the tutorials on my website to create these scenes. Each element you add weaves into the story of your mountains, turning a simple drawing into a canvas of imagination.
Conclusion
Give yourselves a round of applause; you’ve climbed the mountain of this drawing lesson with flying colors! But don’t stop now—there are many more drawing escapades waiting for you on my website. Whether you want to draw animals, landscapes, or even fantastical creatures, there’s a lesson for every curious mind.
Ready to sketch more wonders? Make sure you’re following me on social media to get the first glimpse of new lessons I whip up just for you. We’re on an endless journey of creativity, and I’m here to guide you every step of the way. So, stay tuned, stay inspired, and let’s continue to make art together!