How to Draw an Eagle
Get ready to soar with my how to draw an eagle lesson, featuring four diverse methods. I guide you through each step, ensuring you capture the eagle’s powerful stance and sharp gaze. Artists of all levels can achieve impressive results.
Transform your artistic vision into reality with my draw an eagle tutorial. This tutorial is crafted for individuals eager to explore wildlife illustration, improve their drawing techniques, or bring the spirit of the wild into their art, making it an excellent resource for creative growth.
How to Draw a Eagle: Basic Information
Welcome, young artists, to a soaring new challenge: learning how to draw an eagle with grace and power! Eagles are majestic birds known for their sharp eyes and broad wings, and this lesson is designed to guide you through capturing their essence with simple, fun strokes.
Starting with the beak and moving through the outline of the wings and body, each step in this tutorial builds upon the last, ensuring that you can follow along confidently. As your eagle’s form takes shape, remember, each line brings you closer to mastering the sketch an eagle skill.
So, let’s swoop into action, fearless artists! With a pencil in hand and a spirit as free as the eagle you’re about to depict, the sky’s the limit. By the end of this draw an eagle lesson, you’ll have a majestic bird ready to leap off the page. Happy drawing!
Eagle Drawing Tutorial
Materials
- Pencil
- Paper
- Eraser
- Coloring supplies
Time needed: 30 minutes
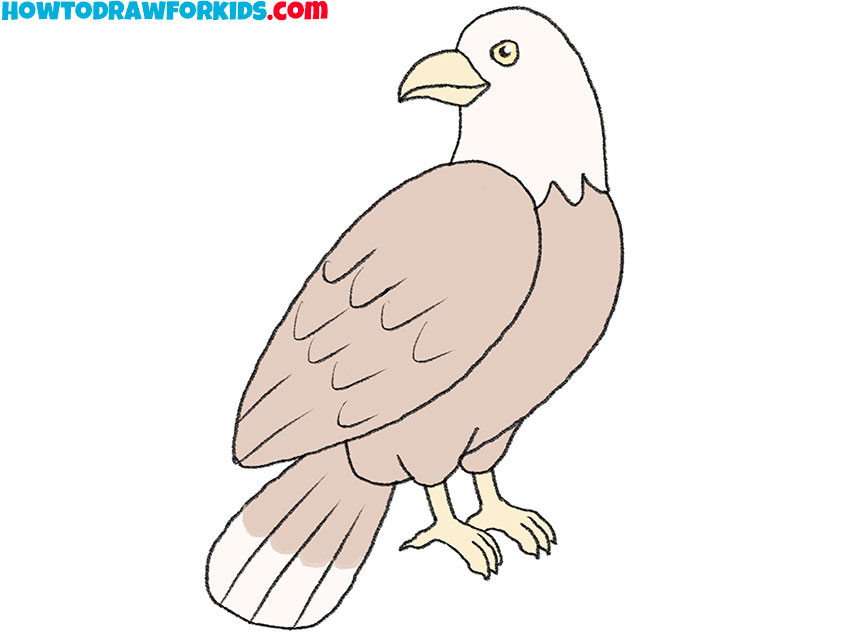
How to Draw an Eagle
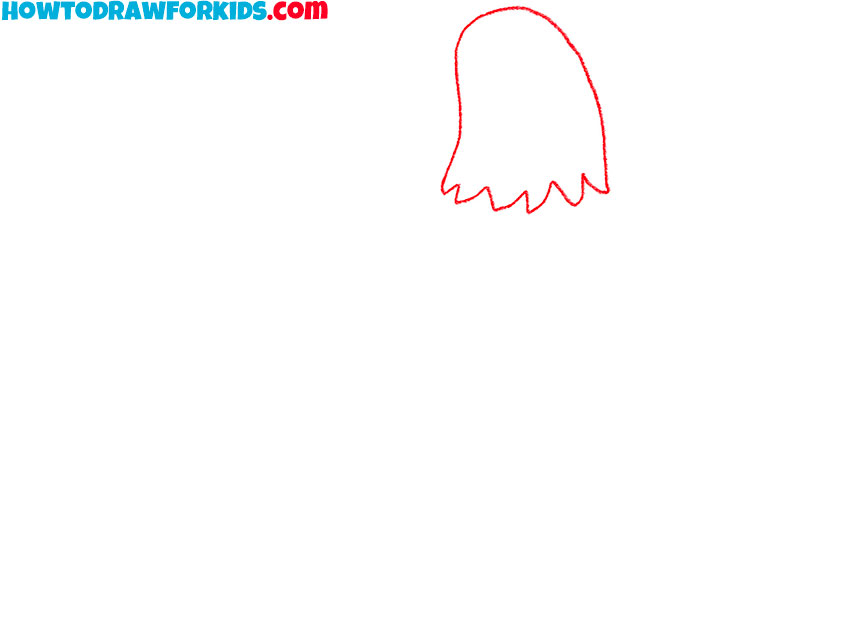
- Draw the head.
The upper part has a rounded shape, in the lower part it is necessary to draw a zigzag line.
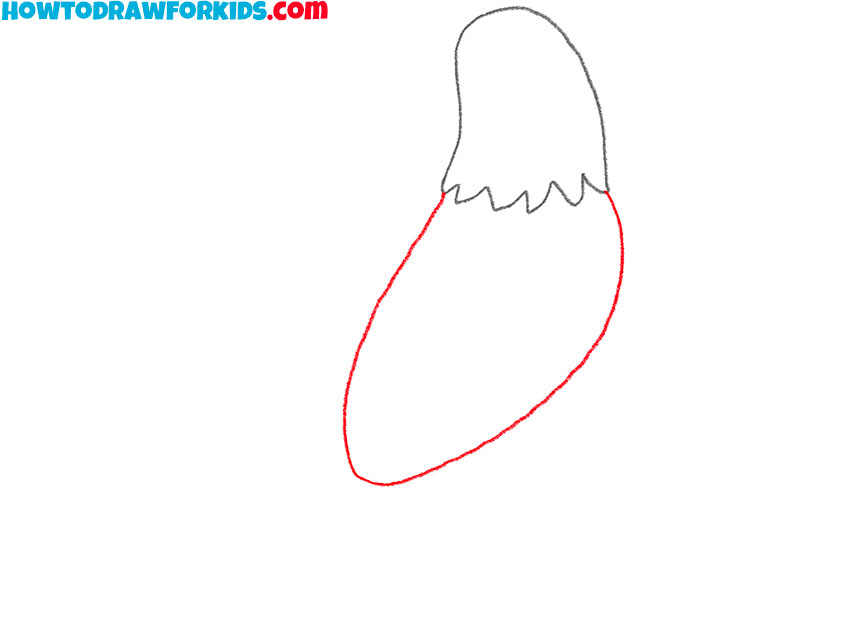
- Depict the torso.
Draw a smooth line to depict the elongated torso.
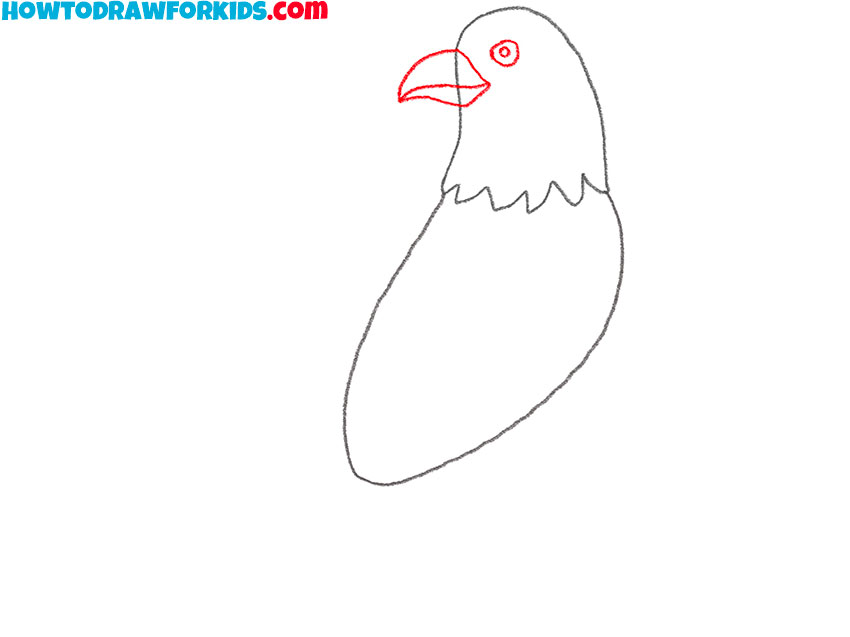
- Add the elements of the head.
Sketch out the eye and the large curved beak.
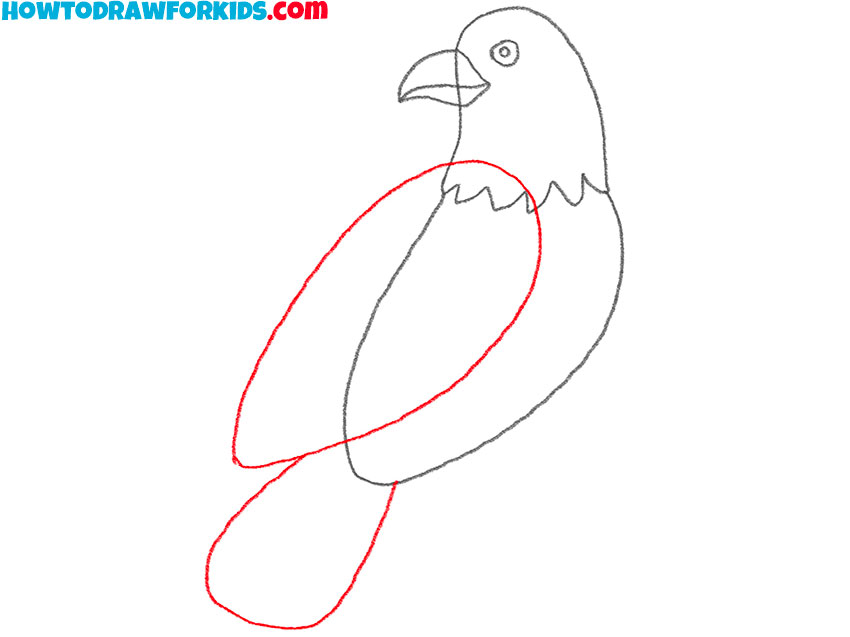
- Draw the wing and tail.
Use smooth curved lines to depict the wing and add the tail at the bottom.
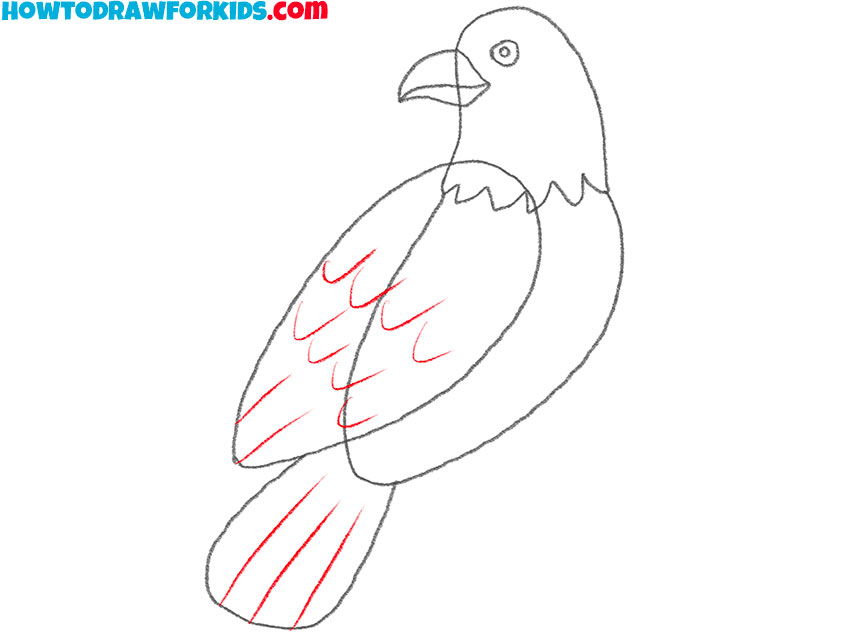
- Detail the plumage.
Add curved lines on the wing and straight thin lines on the tail.
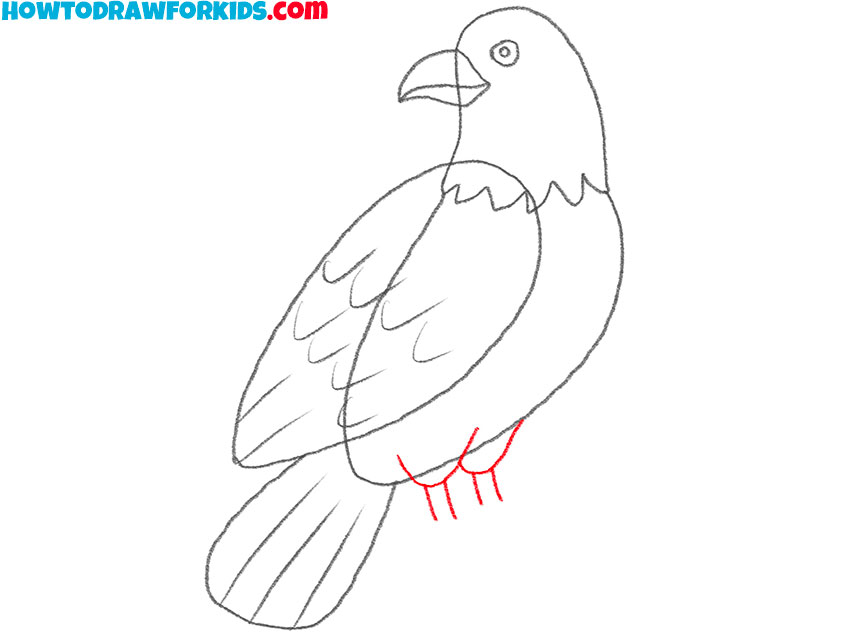
- Sketch out the top of the paws.
At the bottom of the torso, draw two paws that have a wide base and a narrow bottom.
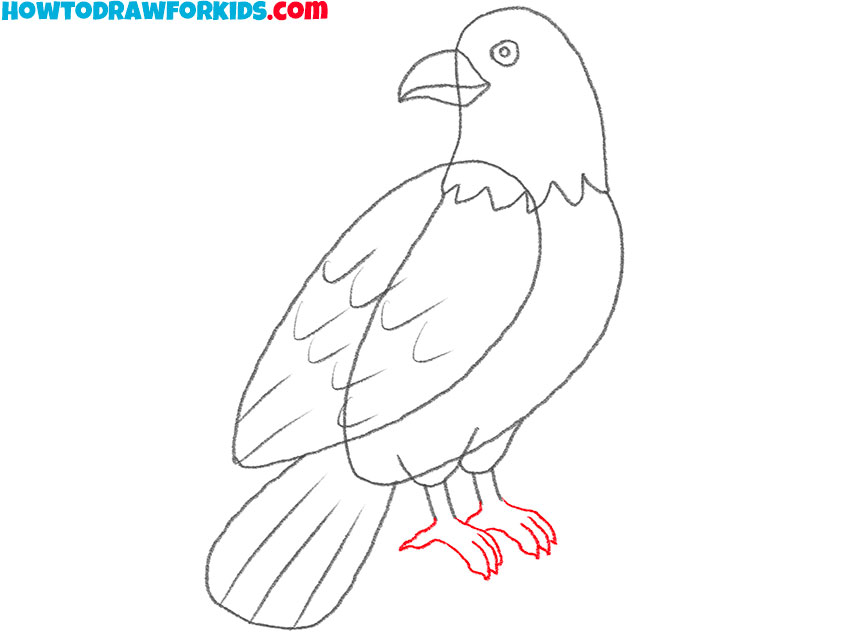
- Add the bottom of the paws.
On each paw, depict the fingers and claws.
- Correct inaccuracies.
Using the eraser, carefully remove all unnecessary lines.
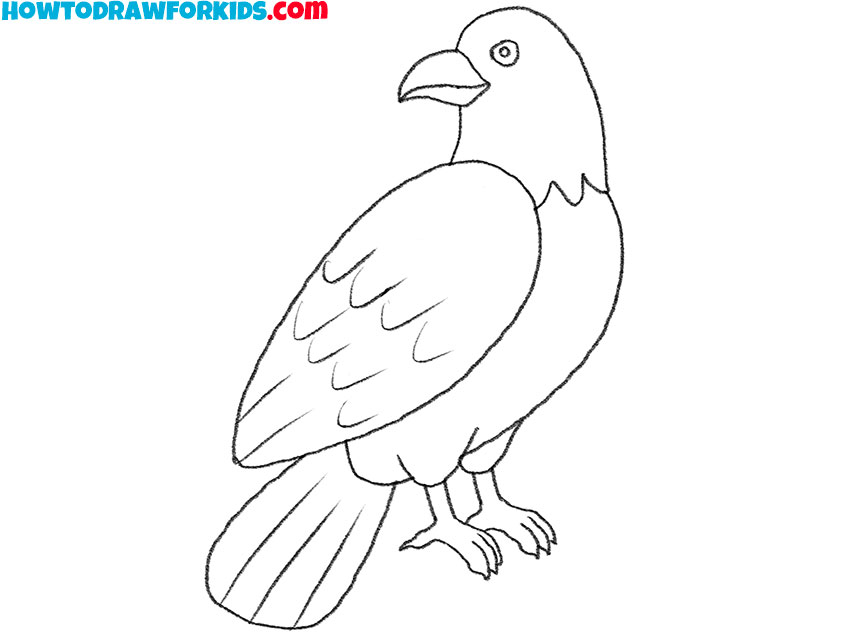
- Color the eagle.
You will need beige, brown, and yellow.
Additional Content
I’ve created a free PDF file for this lesson – it’s a concise version of the full tutorial that you can download and use anytime, even without an internet connection. This PDF is perfect for quick reference and practicing your drawing skills on the go. Make sure to grab your copy and enjoy learning how to draw an eagle at your own pace!
Alternative Drawing Methods
I’ve created several alternative eagle drawing techniques to boost your practice and artistic skills. Each method challenges you, offering various styles and approaches. By exploring these techniques, you’ll expand your artistic range and discover your preferred style. Dive in and find the method that resonates with your personal creative flair!
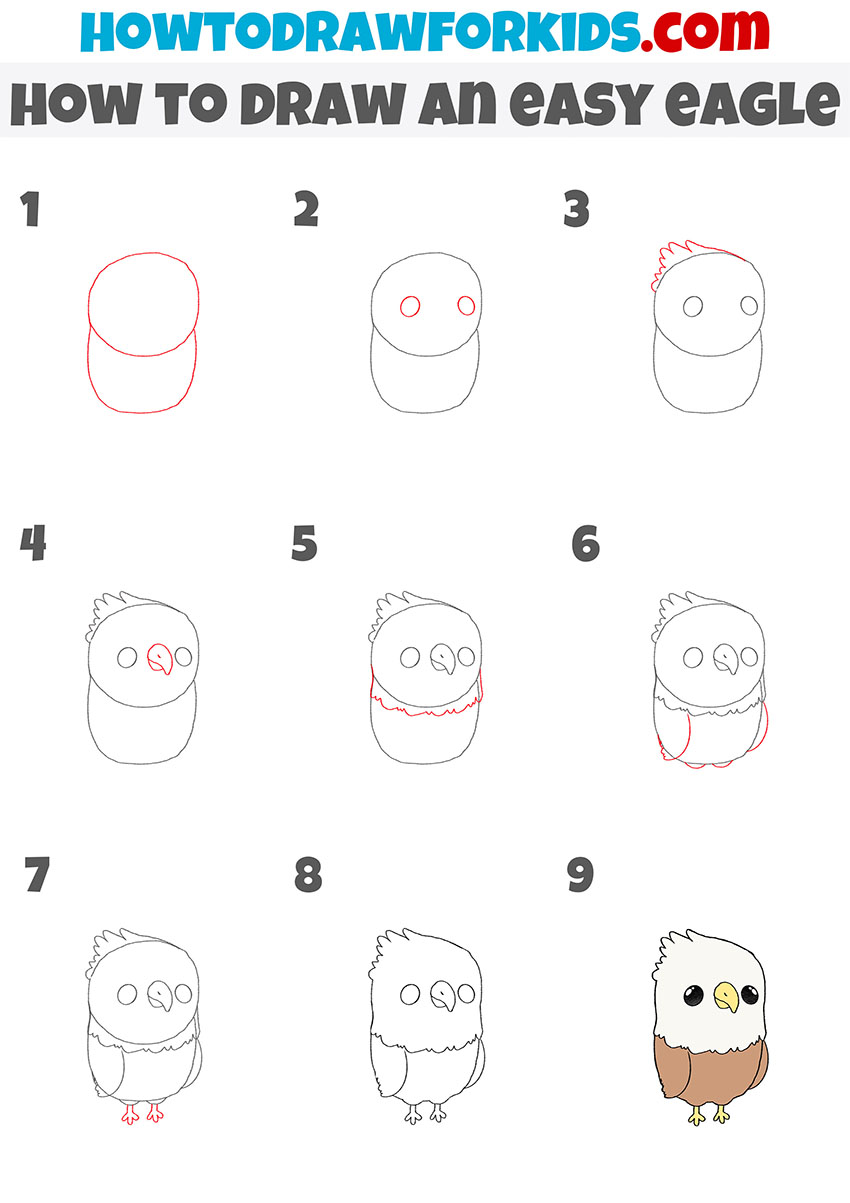
How to Draw an Easy Eagle
The second drawing method for an eagle simplifies the process by using more rounded shapes and fewer details, making it ideal for beginners or young artists. It starts with basic circles for the head and body, adding simple lines to define the beak and wings.
This approach emphasizes the characteristic silhouette of an eagle without the complexity of feathers and textures. The final drawing retains the essence of the eagle in a more approachable and playful style, suitable for a friendly cartoon representation.
How to Draw an Eagle Step by Step
This approach builds on the foundation of the previous method but shifts the perspective, adding variety to the drawing exercise. This method is particularly useful for beginners who want to practice consistency in shape and proportion from various viewpoints.
It helps in understanding the form and structure of an eagle in a fun and engaging way, which is ideal for young learners or those just starting with drawing.

How to Draw an Eagle for Kindergarten
This delightful and straightforward method to depict an eagle is perfect for young artists, particularly those in preschool. The process is broken down into five accessible steps, beginning with a basic rounded shape for the head and body.
Next, it introduces simple features like the eyes and beak, ensuring each part is easy to replicate. The subsequent steps involve adding the wings and feet with broad, uncomplicated strokes. Finally, the method concludes by filling in colors, creating a charming eagle, ideal for a young learner’s first foray into drawing birds.

Conclusion
As we wrap up this fun and easy eagle drawing, I hope you’ve found joy and confidence in your artistic skills. This is just one of many bird-drawing tutorials I have prepared for you! If you’re curious about capturing the silent glide of an owl or the vibrant flutter of a hummingbird, be sure to check out my other lessons.
Don’t miss out on any new tutorials that might spark your creativity. Follow me on social media to stay updated with the latest drawing guides. Your support means the world, and I can’t wait to see what you’ll create next. Keep those pencils sharp and your imagination ready for our next artistic adventure together!