How to Draw an Airplane
In this tutorial on how to draw an airplane, we’ll imagine ourselves as engineers shaping one of the greatest human inventions.
How to Draw an Airplane: Introduction
Airplanes are one of the most recognizable machines of the modern world. The familiar shape of an airplane is an interesting subject to practice in drawing and practicing important skills for any artist.
In this lesson on how to draw an airplane, I will show you a few very simple step-by-step methods that show the process of sketching in different styles and with the help of different sequence of steps.
When drawing an airplane, pay attention to proportions, since both wings should be equal in size and sketched properly with the body. A small mistake in symmetry can make the airplane look unrealistic.
Airplane Drawing Tutorial
Materials
- Pencil
- Paper
- Eraser
- Coloring supplies
Time needed: 30 minutes
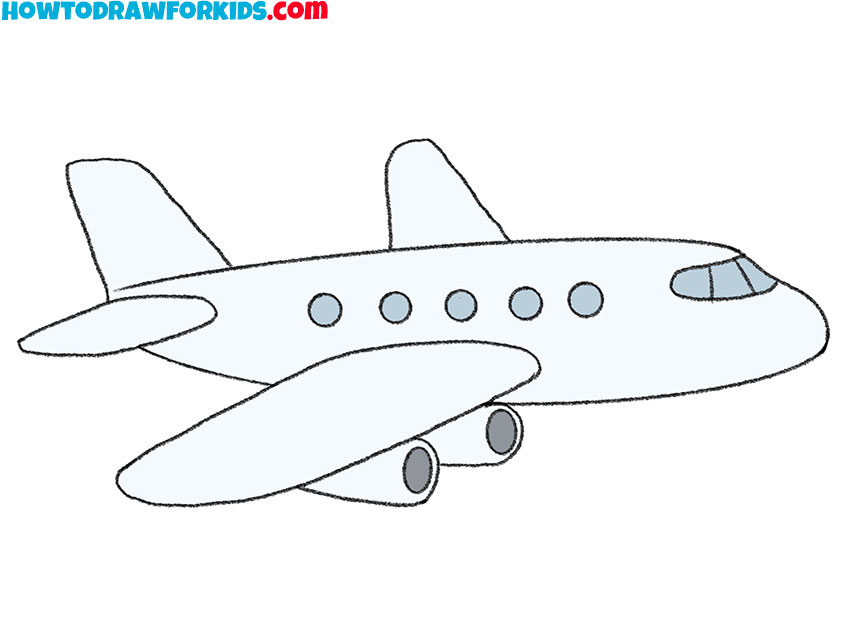
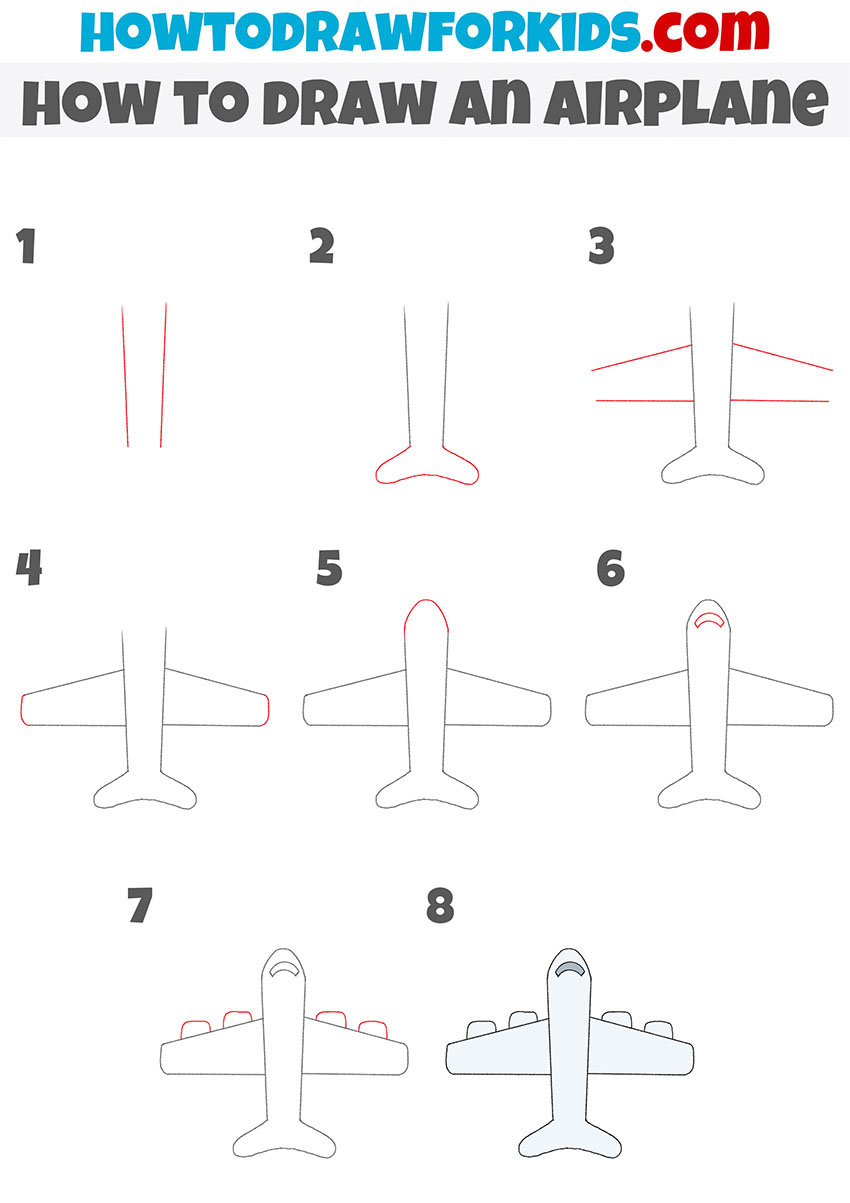
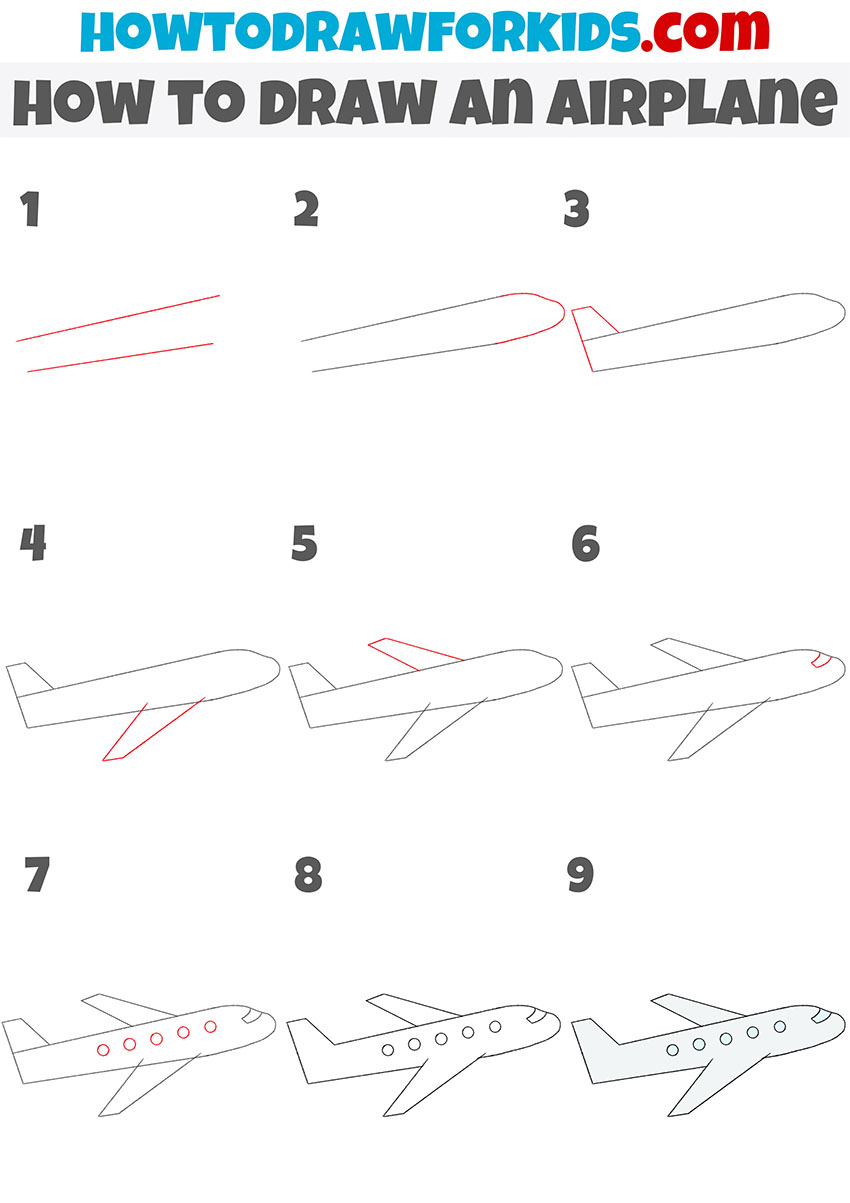
How to Draw an Airplane
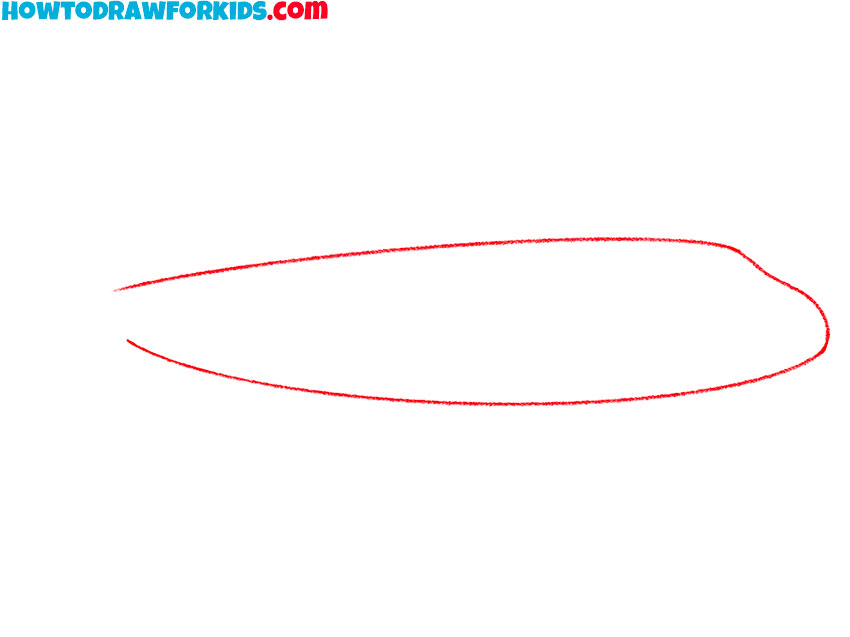
- Sketch the plane fuselage.
Sketch a long, narrow oval shape with one pointed end to form the fuselage the airplane. Try to crane a shape that allows it to look aerodynamic. Keep the line smooth and simple. Airplanes are very different, so you can make this shape longer or shorter.
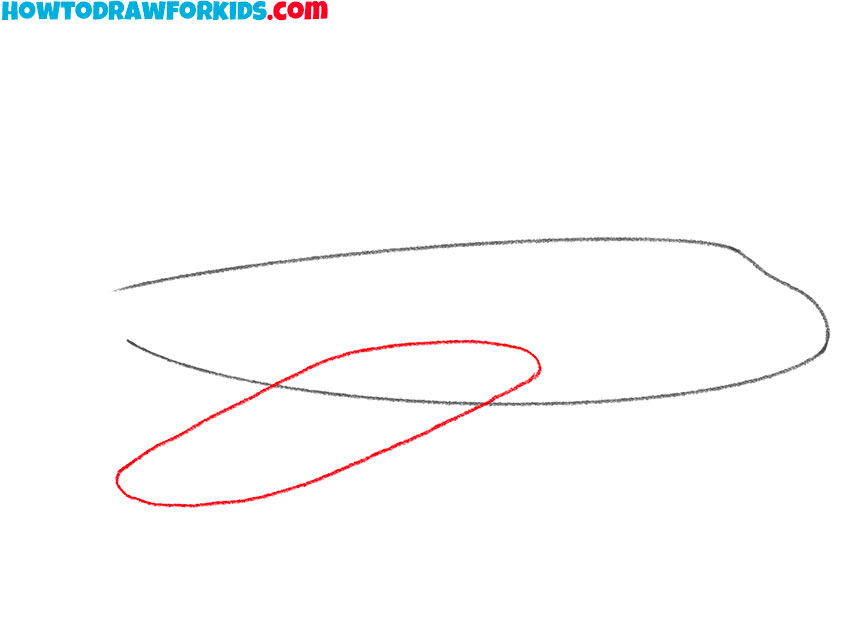
- Sketch the closer wing.
From the middle of the fuselage, sketch a long triangular shape to illustrate the airplane’s wing. Make the edges gently rounded, because airplanes consist mostly of smooth lines. This part can also be longer or shorter, depending on the type of airplane you are drawing.
- Illustrate the second fin.
Now sketch the second wing on the opposite side of the airplane, slightly smaller because of perspective. When you illustrate an airplane or other similar aircraft, it’s important to show both wings and the tail elements, even if one appears shorter. This will make your drawing look more dimensional.

- Draw the airplane tail fin.
At the back of the fuselage, draw a vertical triangular fin. After that, draw this side part of the tail fin with she shape of a smooth triangle. This is the tail, or stabilizer of the aircraft. Make it about one-third the height of the body to achieve a proportional look.

- Add the cockpit and windows.
On the upper side of the fuselage, sketch a series of small circles or ovals to represent passenger windows. You can very the size and amount of these windows. At the front, add a larger oval or smooth rectangle for the cockpit window.
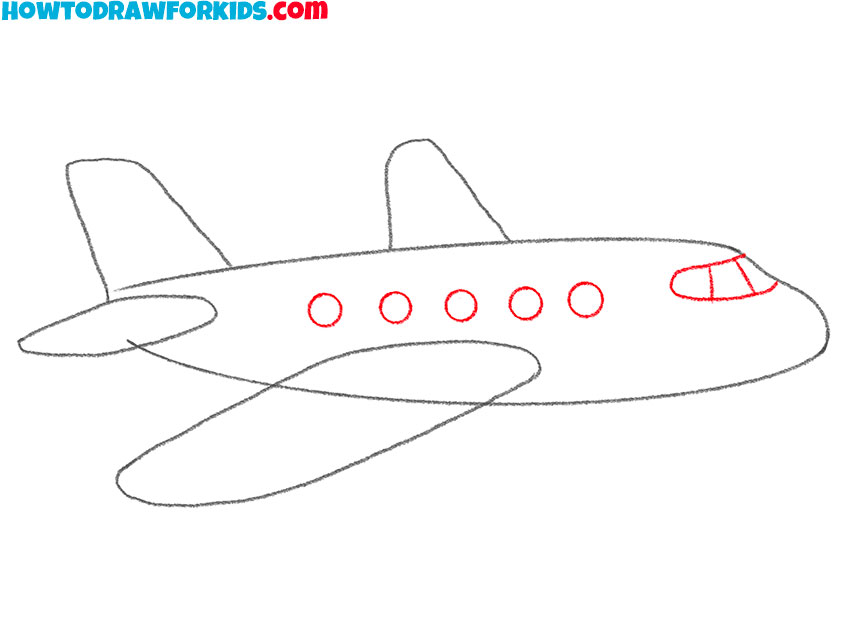
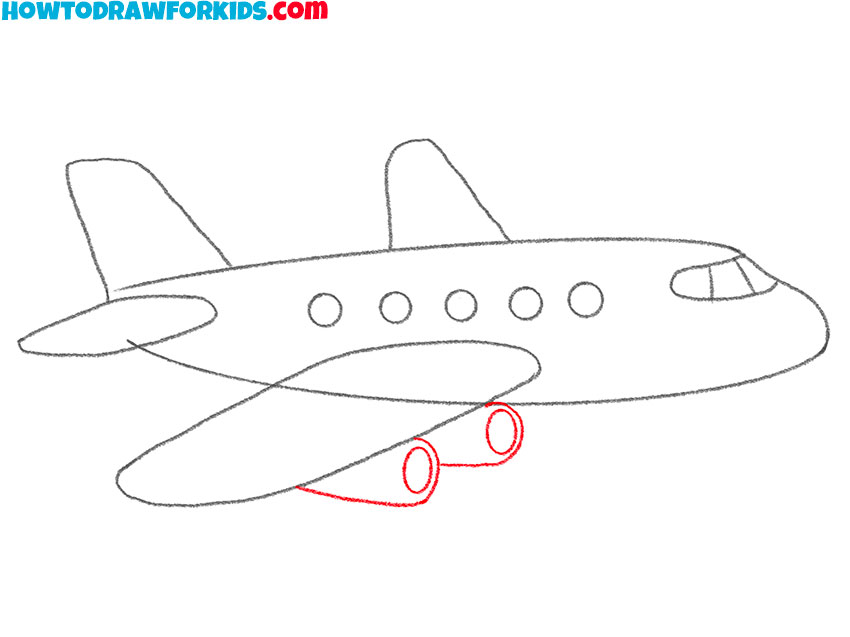
- Draw the plane engines.
Under the wings, sketch two oval shapes to illustrate the engines. Sketch them very simple and make larger than the passenger windows. I usually recommend drawing them like short cylinders with rounded ends. Keep these engines tucked close.
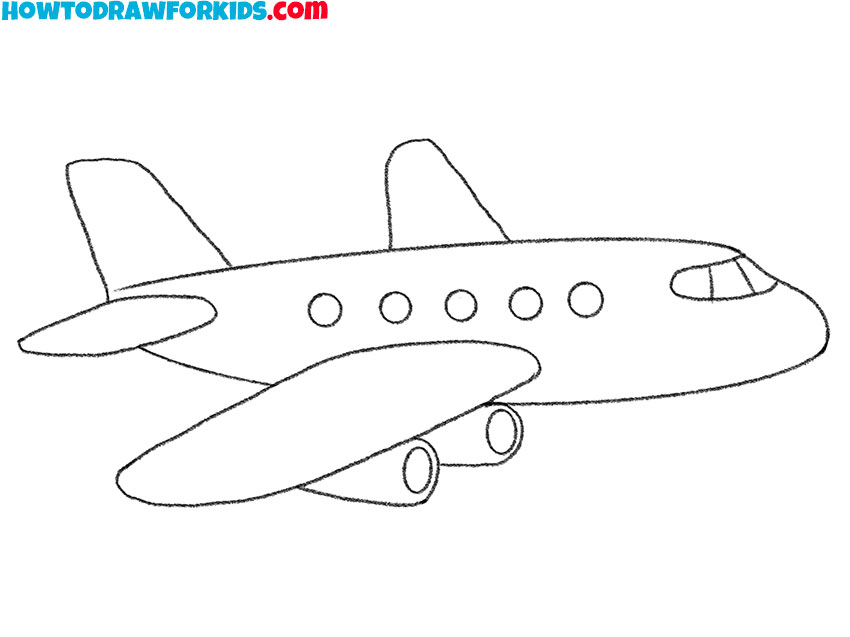
- Erase extra guidelines.
Let’s give our airplane a finished and polished look, erasing any overlapping guidelines and making the main lines clean and beautiful. After that check the proportions and correct them if it’s necessary. A neat, finished outline is what you need now to proceed to the coloring step.
- Apply color to the aircraft.
You can use light gray or white for the fuselage and engines of the plane, blue or dark gray for the windows. When I sketch an airplane or show how to do this, I often suggest leaving some highlights on the windows to make the surface look shiny, just like real airplanes. For a simple version, use flat and simple colors.

Additional Content
I have also prepared a free PDF version of this lesson. It contains a shortened step-by-step guide that you can download and use offline at any convenient time. In addition, the file includes extra materials such as a coloring page, tracing worksheet, and grid drawing worksheet to help you practice and train your skills.
Alternative Ways to Learn How to Draw an Airplane
If you’d like to keep practicing and try drawing this subject in a few different ways, I’ve prepared several additional airplane drawing lessons. These techniques show the same object from another angle or in a slightly different style, so you can strengthen your skills by comparing the variations and repeating the steps.
How to Draw an Airplane Flying Up
This example shows an airplane flying right up, giving the impression of taking off into the sky. This is the version that shows the plane from the most simple and recognizable position, and can be the starting point for the most unexpected artists.
To being this version, create the side edges of the fuselage at a vertical angle. Add the tail fins at the back and the simplified wings at the sides. Then, sketch the front of the plane and add the windshield. Smooth the curves so the shape looks continuous. Outline the final version with confident strokes and erase guidelines carefully. Apply color in flat tones for the body and window.
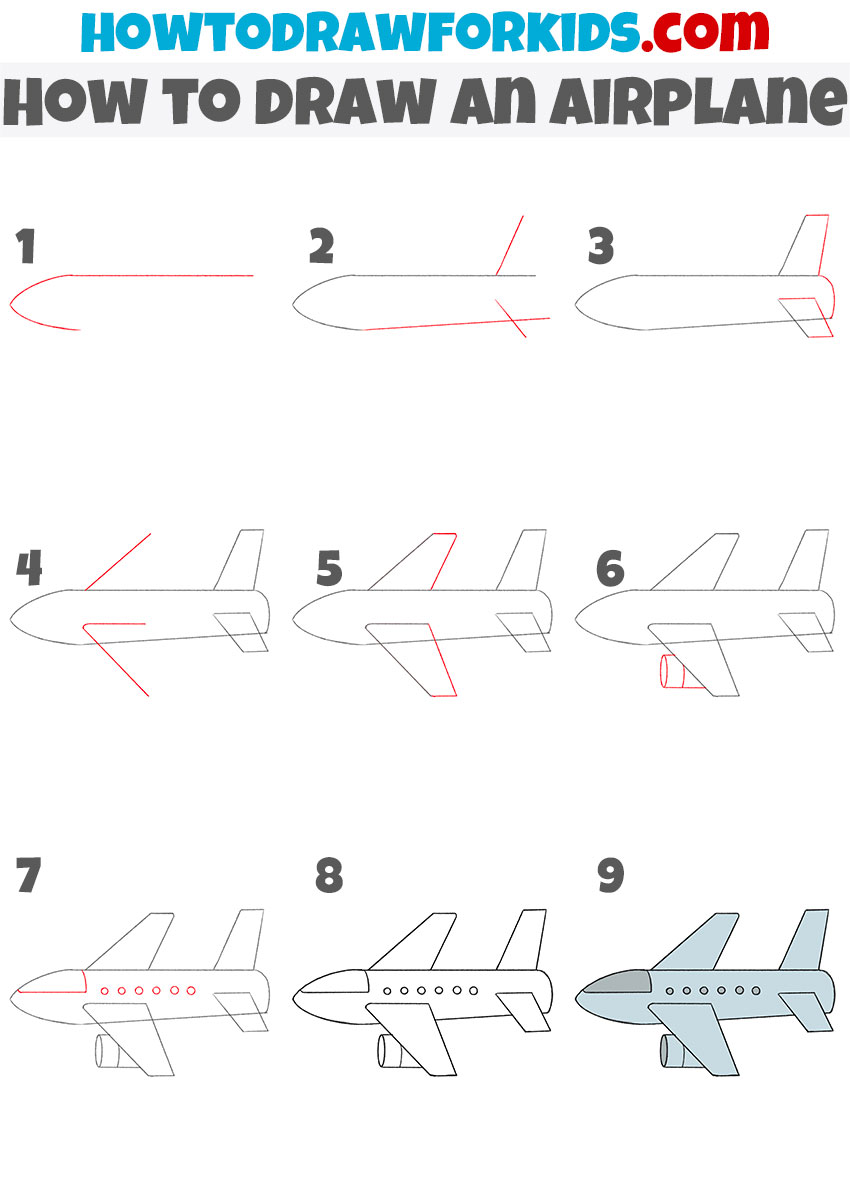
Drawing of an Airplane Taking Off
This drawing shows an airplane in the process of taking off, slightly angled with extended wings. The style balances between a basic outline and a bit more detailed version.
First, illustrate the main part if the body body of the airplane, making it slightly tilted upward to show the takeoff. Sketch the wings at an angle, keeping both sides equal in size. Add the vertical tail fin at the back. Outline the entire airplane with smooth strokes and reinforce the important edges. Once the drawing is cleaned up, apply color across the fuselage, using a neutral shade like gray or off-white.
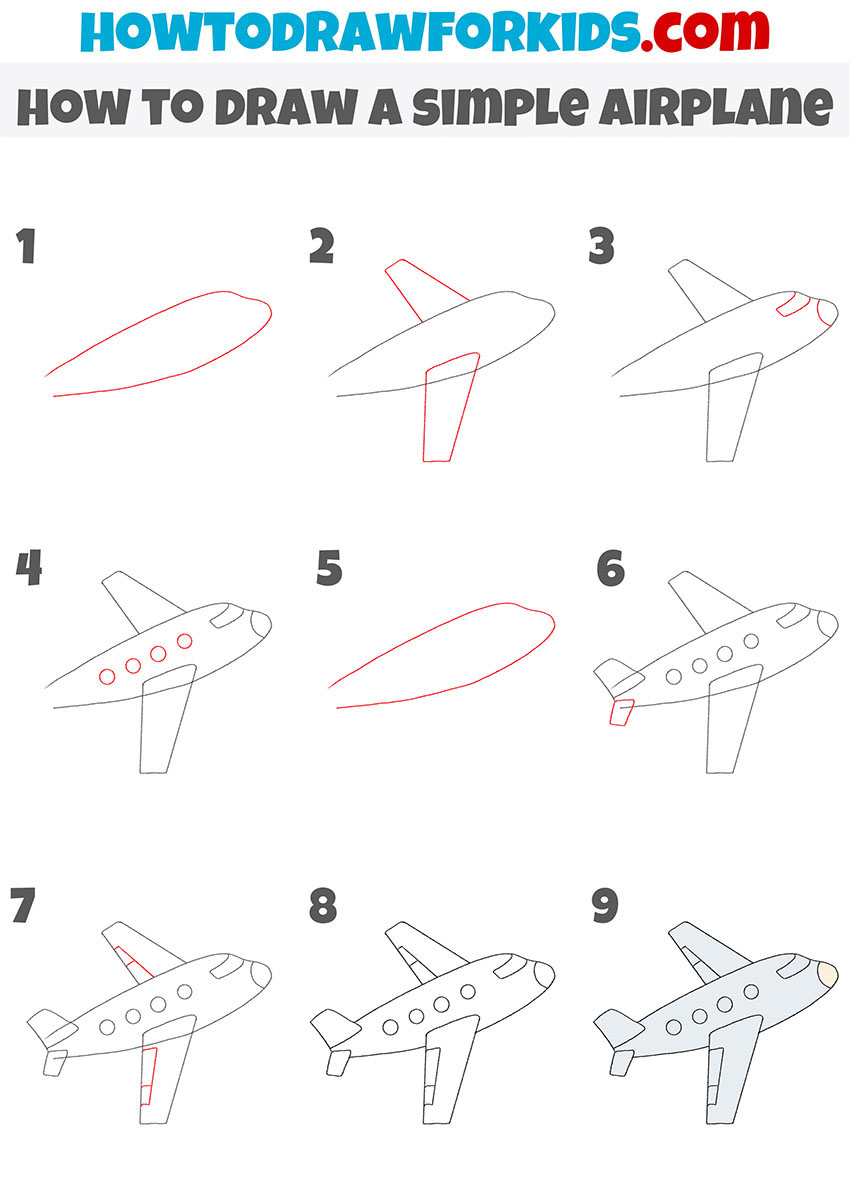
Simple Airplane Drawing Tutorial
This is another approach, and this drawing uses only the most important lines and shapes to define the plane. It is an ideal option for beginners or younger children who are just starting with detailed objects.
Sketch the fuselage of the aircraft as a long narrow shape, then add the wings as simple rectangles. Place the tail at the back with one vertical and two small horizontal stabilizers. Add a cockpit line in the front and draw windows as small circles or ovals. Make the wings symmetrical and the fuselage smooth. Outline the airplane with steady strokes, then erase all guidelines. Use flat coloring to complete the drawing, choosing light blue or gray for the body.
How to Draw an Easy Airplane
This airplane is presented in a different position and uses a very simplified form. The illustration avoids unnecessary detail, so it’s another really simple method for kids and beginners to draw a plane.
Create the fuselage as a long, rounded body and add two wings extending from the sides. Attach the tail fin at the back. Indicate the cockpit with a curved line near the front. Place the engines as small shapes under the wings if included. Add the windows as small circles or ovals along the fuselage. Outline the entire airplane carefully, smoothening the main shape. Clean up extra guidelines. When coloring, use one main shade for the body and a darker tone for the windows and engines.

Alternative Airplane Drawing Tutorial
This is another version, and in this method, the airplane is drawn from a different perspective, with a slightly longer fuselage and smaller wings. The style is still simple but introduces small variations to the body.
Mark the fuselage as a long narrow body, then attach the wings toward the lower part of the plane. Add the tail fins at the back. Outline the cockpit and nose. Add the engines under the wings if needed, and place the windows. Smooth the outline of the wings. Erase construction lines and check symmetry before finalizing the drawing. Apply color in a flat, uniform way, using lighter and darker contrasts to separate details.

How to Draw a Cartoon Airplane
This is the last but not least airplane drawing tutorial, and here you can see a simplified cartoon plane drawn with basic details.
Firstly, create the fuselage with smooth lines, then add the wings and tail. Place the windows along the body. Shape the engines and tail fins, making sure both sides look symmetrical. Once the main structure is complete, add small finishing touches like cockpit lines and smooth the edges of the sketch. Outline the airplane with a clear line, erase extra guidelines, and then apply color.
Conclusion
Now, it’s time to conclude this vary detailed plane tutorial. Since you know how to illustrate this type of aircraft in many ways, you can experiment with variations, such as drawing larger engines, adding airline logos on the tail, or sketching the airplane at a different angle. Another option is to draw birds around it to create a small scene.
If you want to continue drawing flying vehicles, you can visit my Vehicles category that connect well with this lesson. Share your finished airplane, leave a comment with your ideas, and subscribe to stay updated with new drawing guides.

goody
Thanks a lot!