How to Draw an Avocado
The subject of this guide is as good for your creativity as for your health, because here you’ll learn how to draw an avocado.
How to Draw an Avocado: Introduction
This is a simple step-by-step tutorial on how to draw an avocado. In this guide, you’ll learn to sketch the main oval shape, add the inner part with the seed, and outline the cut half to make it look more natural.
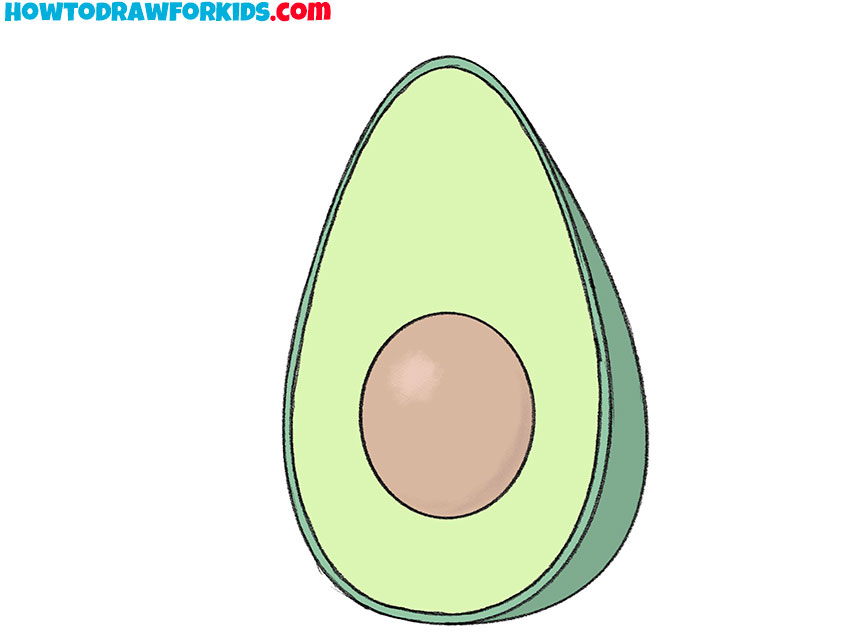
Avocado has an oval shape, thin skin and a large round bone inside. You can see all this in the picture. You can easily draw this fruit if you pay attention at every stage of drawing.
The lesson includes only five simple steps, and you will see that drawing an avocado is very simple. So, prepare all the necessary supplies for drawing and you can start this interesting creative work.
Avocado Drawing Tutorial
Materials
- Pencil
- Paper
- Eraser
- Coloring supplies
Time needed: 15 minutes
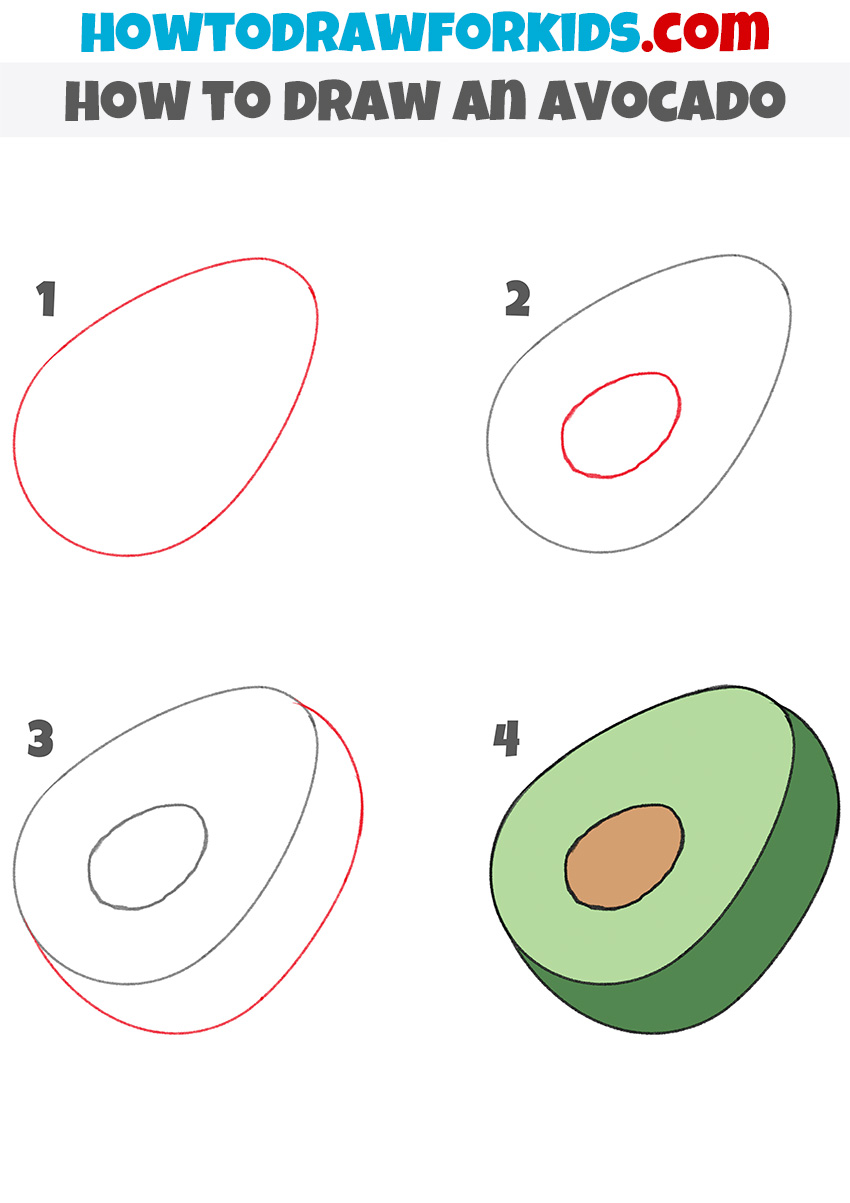
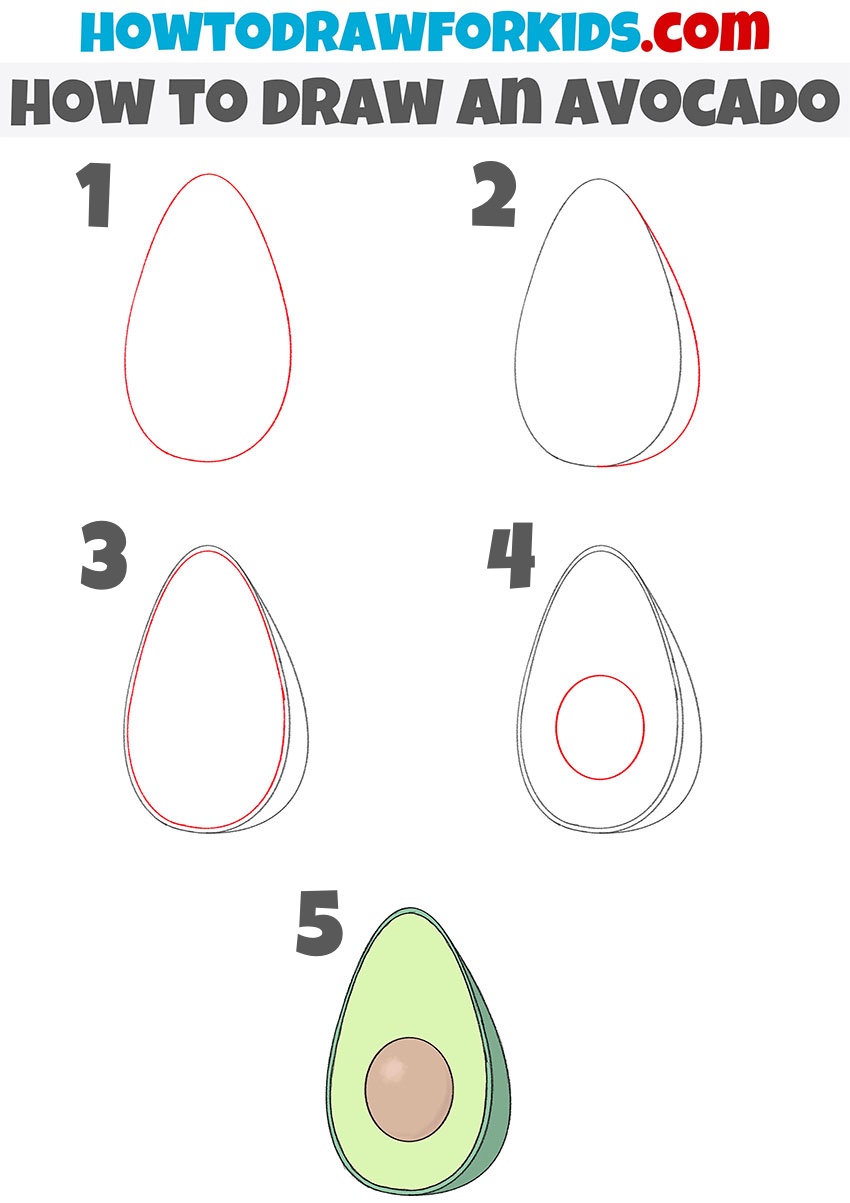
How to draw an avocado step by step
- Sketch the basic outline of the fruit.
Begin by illustrating the basic shape that defines the avocado’s form. Sketch a large, smooth outline resembling an egg, with the wider part at the bottom and the narrower point at the top. You can make the contour slightly uneven to represent the organic form of the fruit.

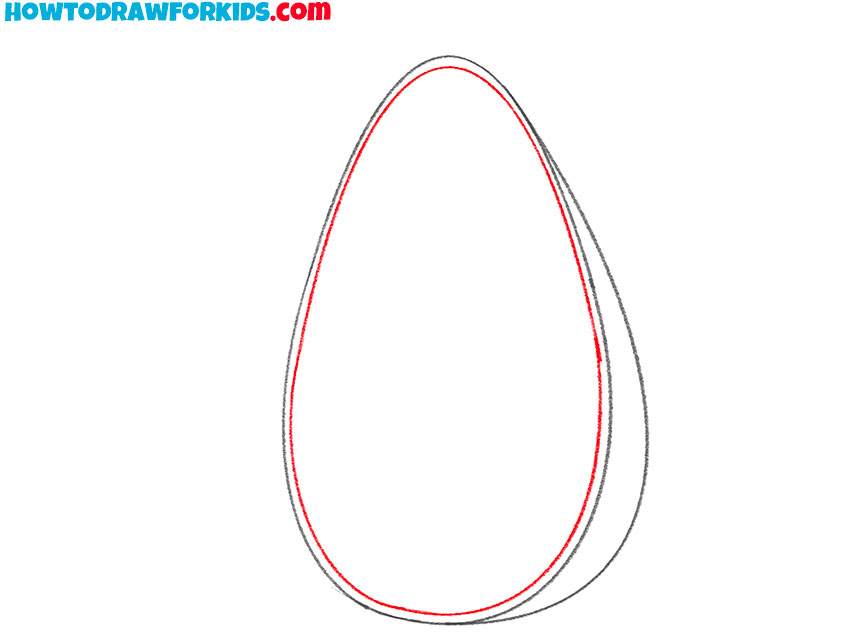
- Add the outer peel contour.
To give the avocado a more defined look, draw the outer surface visible from the side of the cut. To do this, draw a long, smooth curve going down from the top point to the bottom of the avocado. Also, you can strengthen the outer boundary, trace over your previous shape, correcting any irregularities.

- Draw the inner layer of the avocado.
Since the drawing shows an avocado cut in half, indicate the outer peel by sketching a second curved line along the existing outline. Keep this parallel to the first contour but slightly offset to create a sense of thickness. This line defines the darker outer skin that wraps around the soft inner flesh.
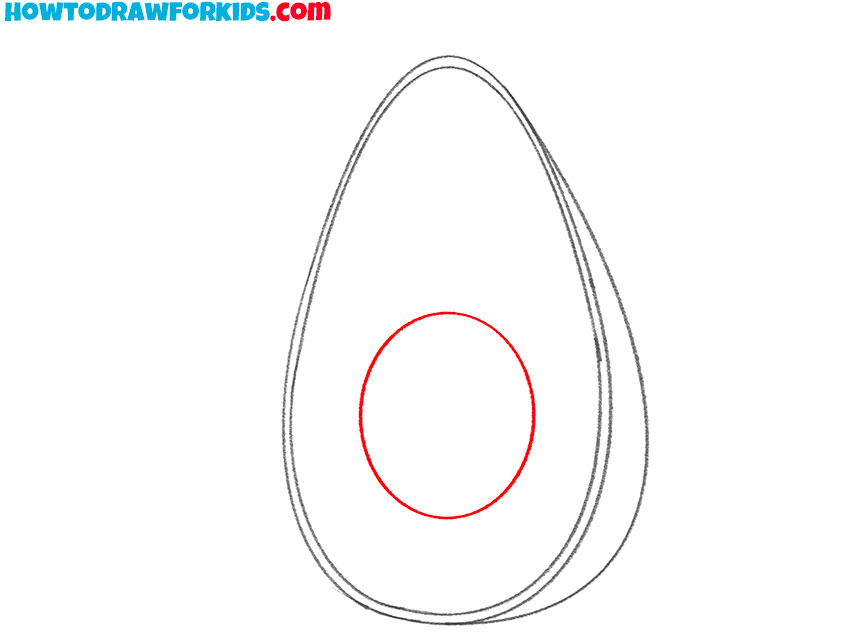
- Sketch the round avocado seed.
Now illustrate the pit that sits in the center. Draw a neat, round circle slightly below the middle of the avocado shape. You can slightly adjust the circle’s size depending on the type of avocado you imagine. Also, check the proportions before coloring.
- Add green and brown tones to the fruit.
Complete the avocado drawing by filling in the sections with appropriate colors. The outer peel can be shaded in dark green, the inner flesh in light yellow-green, and the central seed in a warm brown tone. To add some dimension, apply slightly darker tones along the bottom side.

Additional Content
And as always, I want to present a PDF version of this tutorial, where I’ve combined the main steps in a clear, simplified format for offline use. It also includes additional materials, like a coloring page, tracing worksheet, and a grid drawing worksheet. And of course, it is absolutely free to download and use offline.
Avocado Drawing Tutorial for Preschoolers
In this simple avocado drawing tutorial, you will illustrate a clean and smooth shape of a sliced fruit. The process begins with sketching an elongated oval that narrows at one end to form the general outline of the avocado half.
Next, outline the thickness of the fruit by adding a slightly curved contour along one side to show the edge of the dark green peel. Inside the main form, draw a smaller oval to represent the seed.
When the outlines are ready, apply light green to the flesh, a darker green to the peel, and a muted brown for the seed.