How to Draw a Shark
In this lesson, I have gathered five really simple methods to teach you how to draw a shark, the scourge of the seas and oceans.
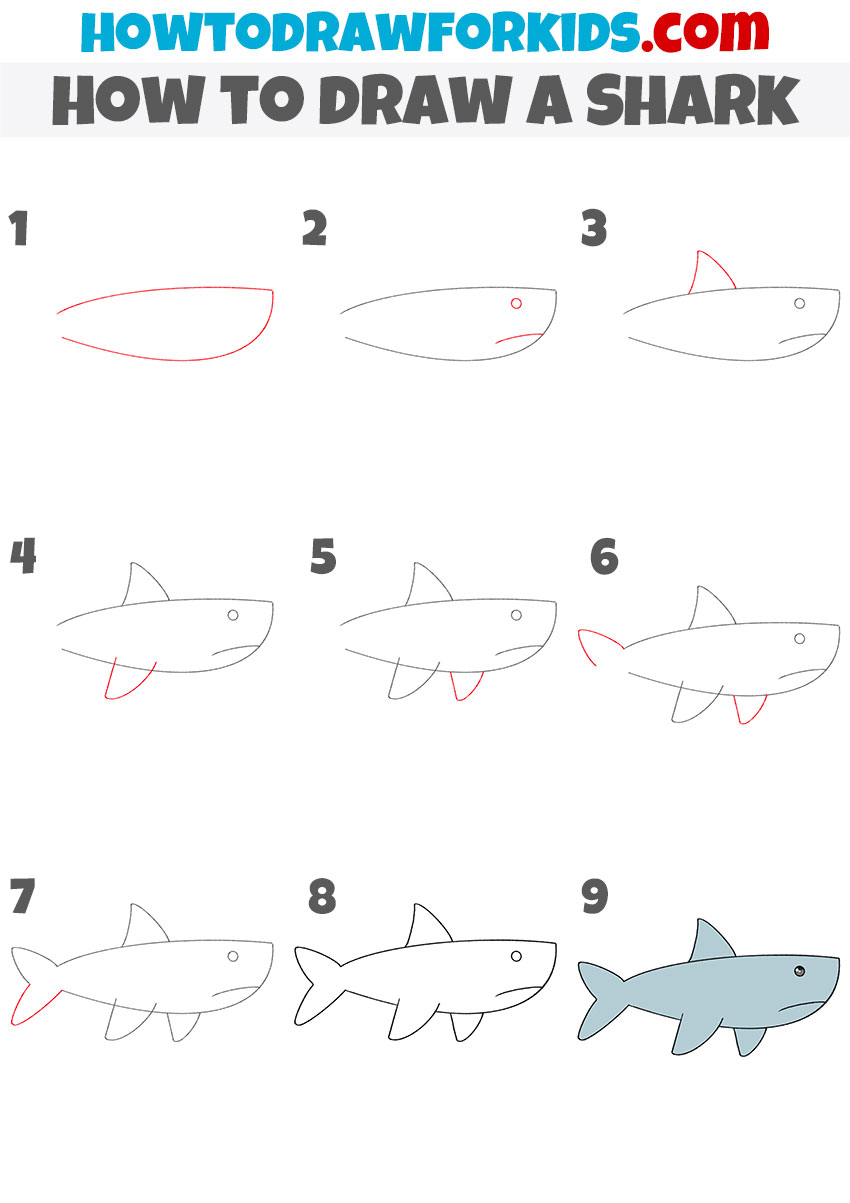
How to Draw a Shar: Introduction
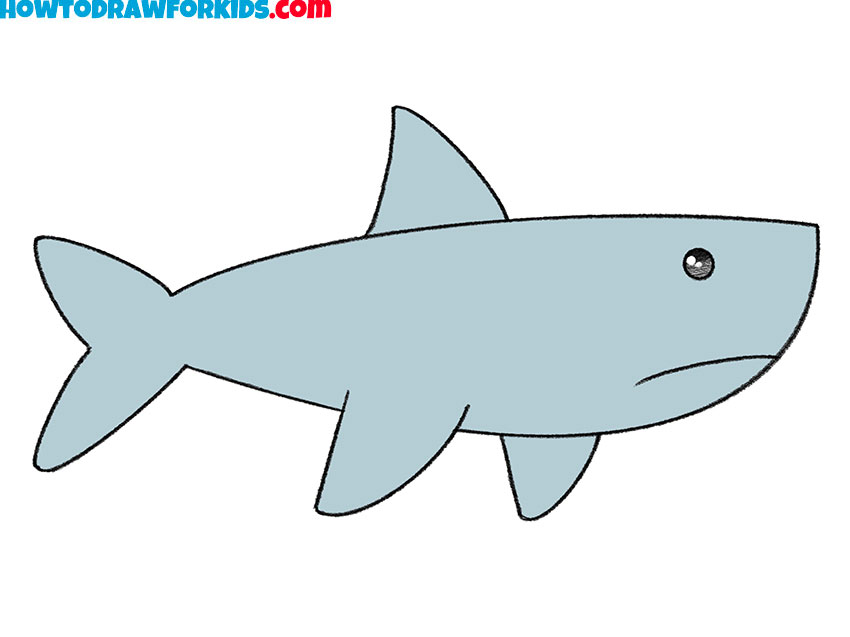
When drawing a shark, it’s important to remember that there are many different types of sharks in the world, and this lesson will guide you through the general process of drawing one.
While this guide will help you draw a typical shark, it’s worth noting that there are some more unique species, like the hammerhead shark, which have distinct features. However, the fundamental techniques you will learn here can be adapted to draw most types of sharks.
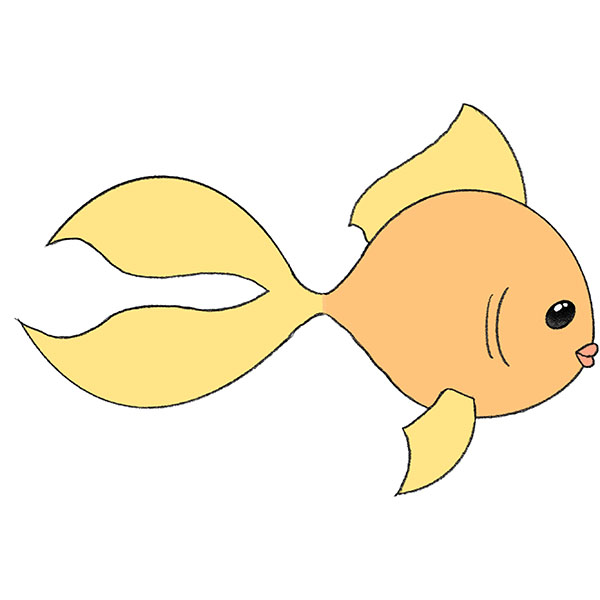
Before starting, it’s helpful to recall that I’ve previously shown you how to draw a fish. You’ll find that drawing a shark is quite similar to drawing a fish, as they share many of the same basic shapes and forms. When you begin this lesson, you’ll notice these similarities, particularly in how the body structure and fins are shaped.
There are some specific details to pay attention to. For example, sharks have a powerful, torpedo-like body that needs to be drawn with smooth lines. Their dorsal fin is the most recognizable feature, so make sure you get the shape and size right. Another key detail is the shape of the tail fin, which is asymmetrical, unlike most fish.
Shark Drawing Tutorial
Materials
- Pencil
- Paper
- Eraser
- Coloring supplies
Time needed: 35 minutes
How to Draw a Shark
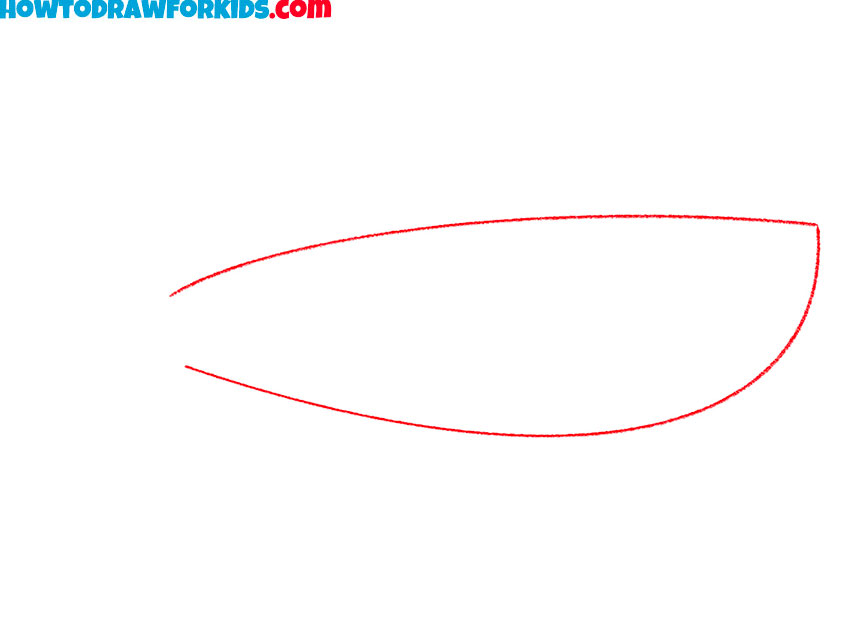
- Draw the shark’s body.
Start by sketching the main shape of the shark’s body. Use an elongated oval shape with slightly pointed ends. This will form the base for the shark’s body, with a slight curve to illustrate the recognizable shape of a swimming shark. Make sure to leave enough space for the tail, fins, and head details that will be added later.
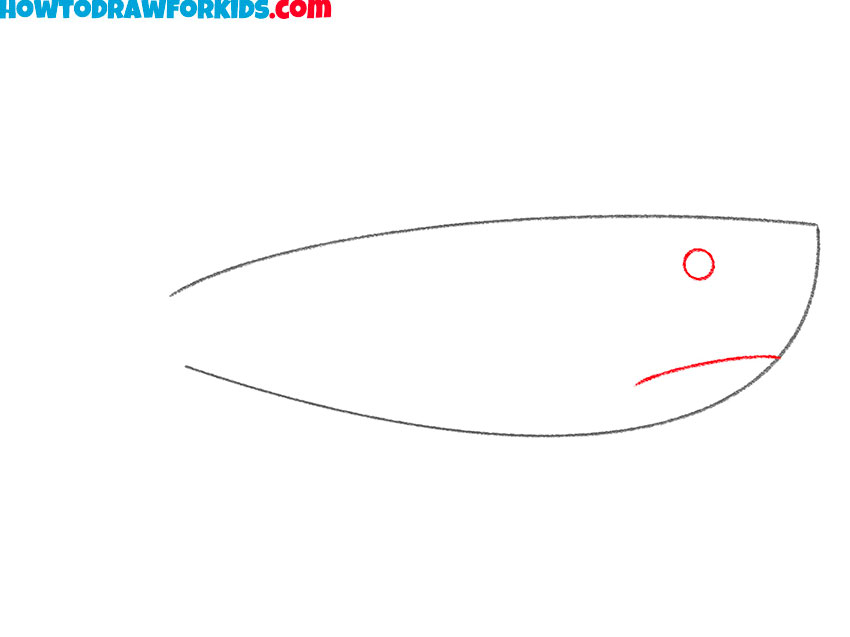
- Add the eye and mouth.
Next, draw a small circle towards the front of the body to represent the shark’s eye. Below the eye, draw a curved line for the shark’s mouth. Position the mouth slightly downward to give the shark a neutral or slightly serious expression.
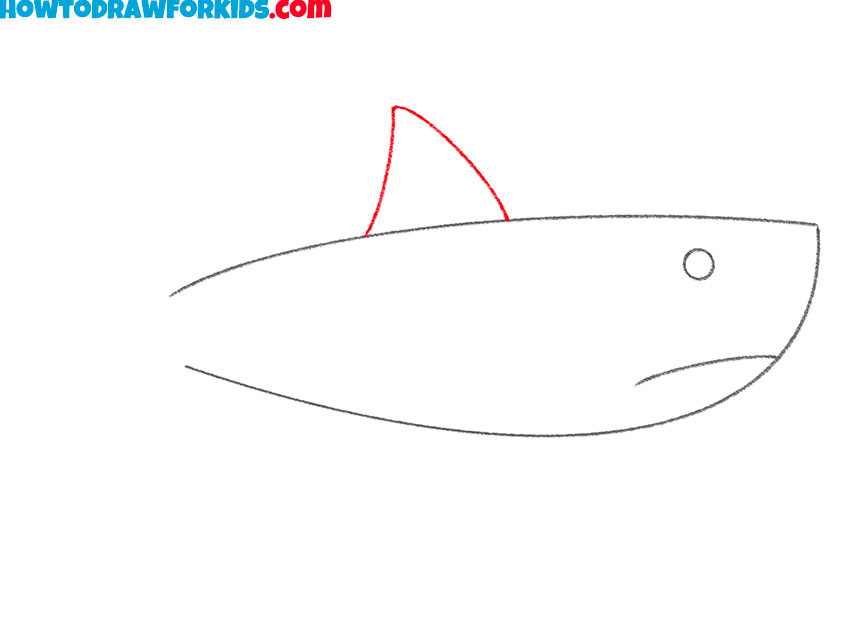
- Add the dorsal fin.
Now, add the dorsal fin on the shark’s back. Draw a triangular shape with slightly rounded edges on top of the body, closer to the head. The dorsal fin is one of the most recognizable features of a shark, so make sure to give it a prominent position.
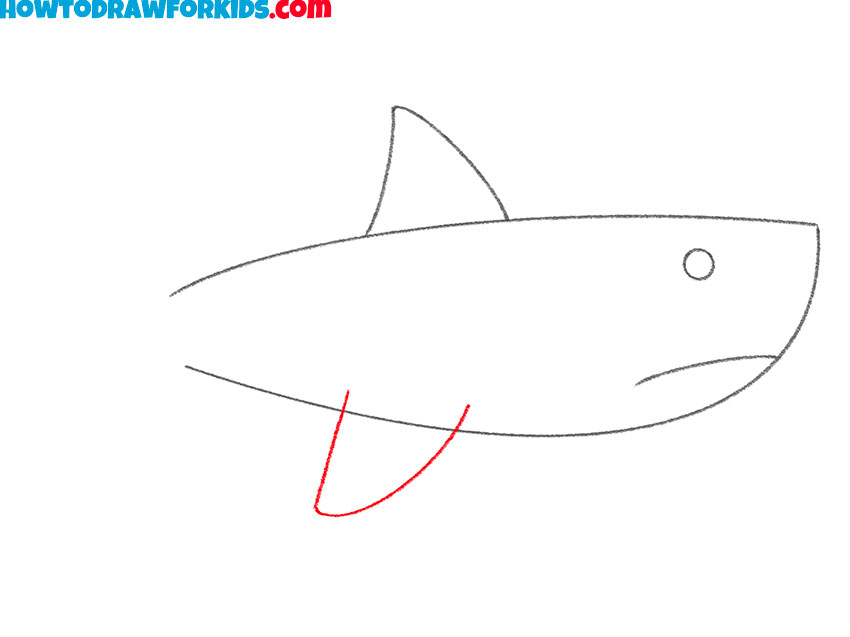
- Sketch the first pectoral fin.
Below the body, near the front, draw the first pectoral fin. This fin should be drawn with a curved, triangular shape, angling slightly backward. This fin should be the same size as the dorsal fin. You can draw it pointed or slightly rounded at the end.
- Add the second pectoral fin.
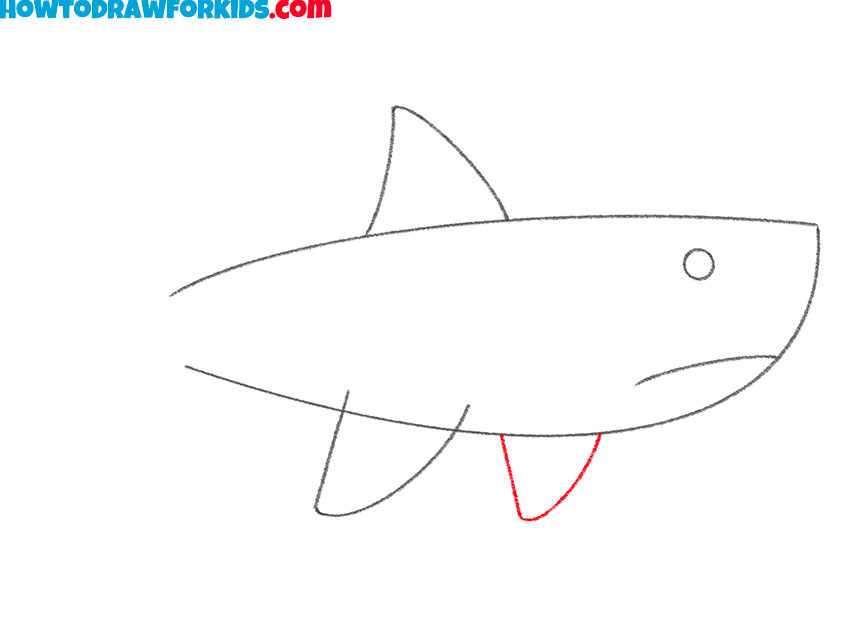
Now, draw the second pectoral fin on the opposite side of the shark’s body. Since this fin is partially hidden behind the body, only a portion of it will be visible. Draw the curved shape near the bottom of the shark’s body, similar to the first pectoral fin, but with a smaller size to show perspective.
- Sketch the top of the tail fin.
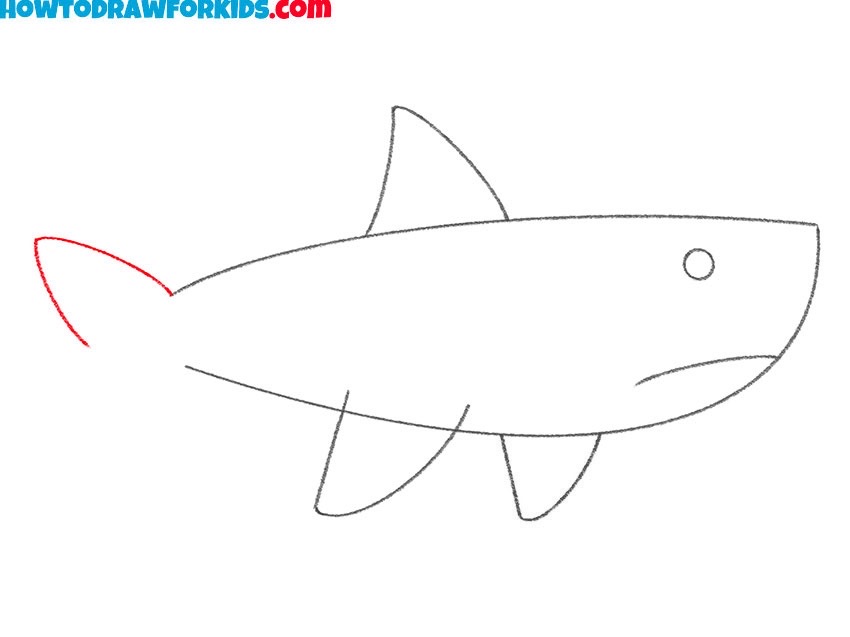
Now let’s draw the shark’s tail fin. Since this part can be somewhat challenging for beginners, we will divide it into two steps. First, continue the line of the shark’s back from the previous steps, and create a triangular shape to depict the upper part of the tail fin. This will help give the tail a more natural appearance.
- Finish sketching the tail.
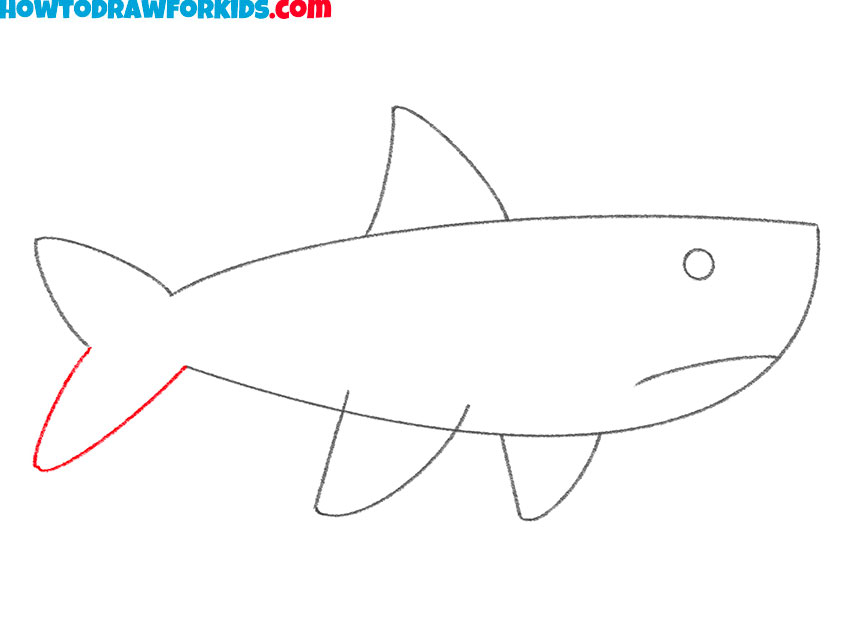
Now, continuing the line from the previous step, draw the lower part of the shark’s tail fin. Give it a similar triangular shape as the one you created for the upper part of the fin in the previous step. However, to make the tail appear more realistic, try to give it a slightly asymmetrical look.
- Refine the sketch.
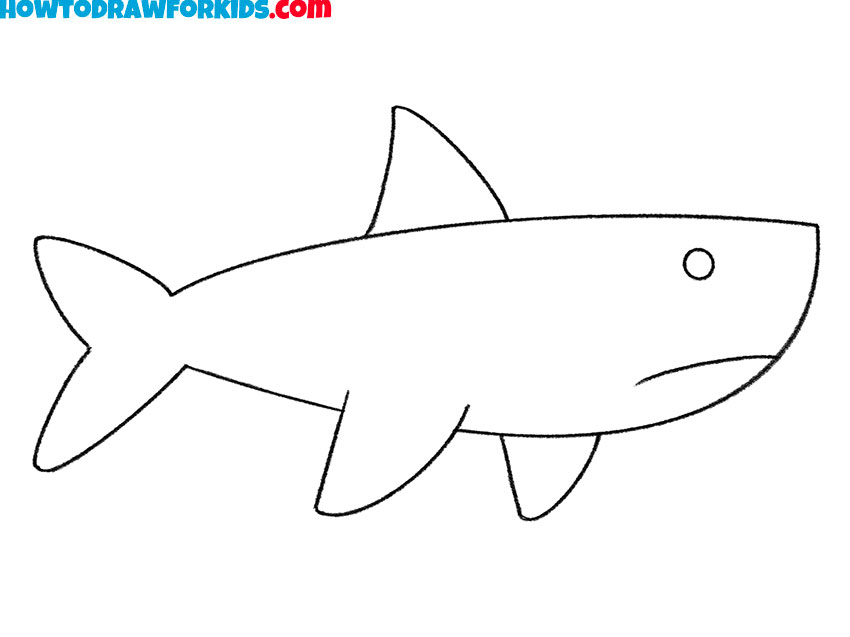
Now that all the main parts of the shark drawing are in place, go over the entire outline of the animal to refine and smooth the shapes. Make sure the fins, body, and tail are look natural and fairly realistic. Clean up any extra lines or mistakes to give the shark drawing a polished and finished look.
- Color the shark.
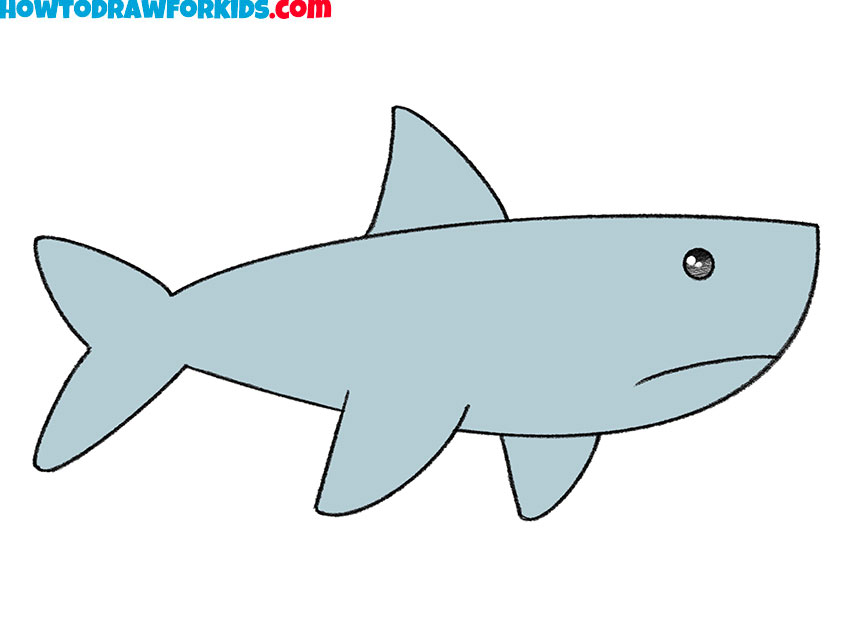
Use a light or medium gray for the body to give it a natural, realistic appearance. You can make the top of the shark slightly darker and the underside a bit lighter. If you’d like to add more detail, you can shade the fins and tail with darker tones. Additionally, leave the eye black or dark with a simple highlight inside.
Additional Content
This concludes the basic shark drawing lesson. If you found it helpful, feel free to share your thoughts about the main tutorial in the comments. You can also download the PDF version of the tutorial, which includes a step-by-step collage, a coloring page, a tracing worksheet, and grid drawing worksheets.
How to Draw a Shark: Additional Methods
After completing the basic shark drawing tutorial, you can try different approaches to adjust the style of your drawing. Whether you prefer a more realistic shark or a simpler, friendlier version, alternative methods provide various options. These methods focus on adjusting shapes, expressions, and details, giving you more ways to train your skills and create different shark drawings.
How to Draw a Smiling Shark
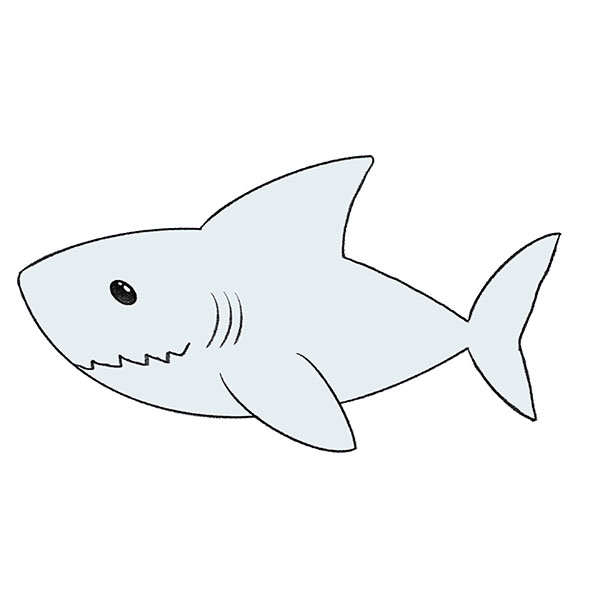
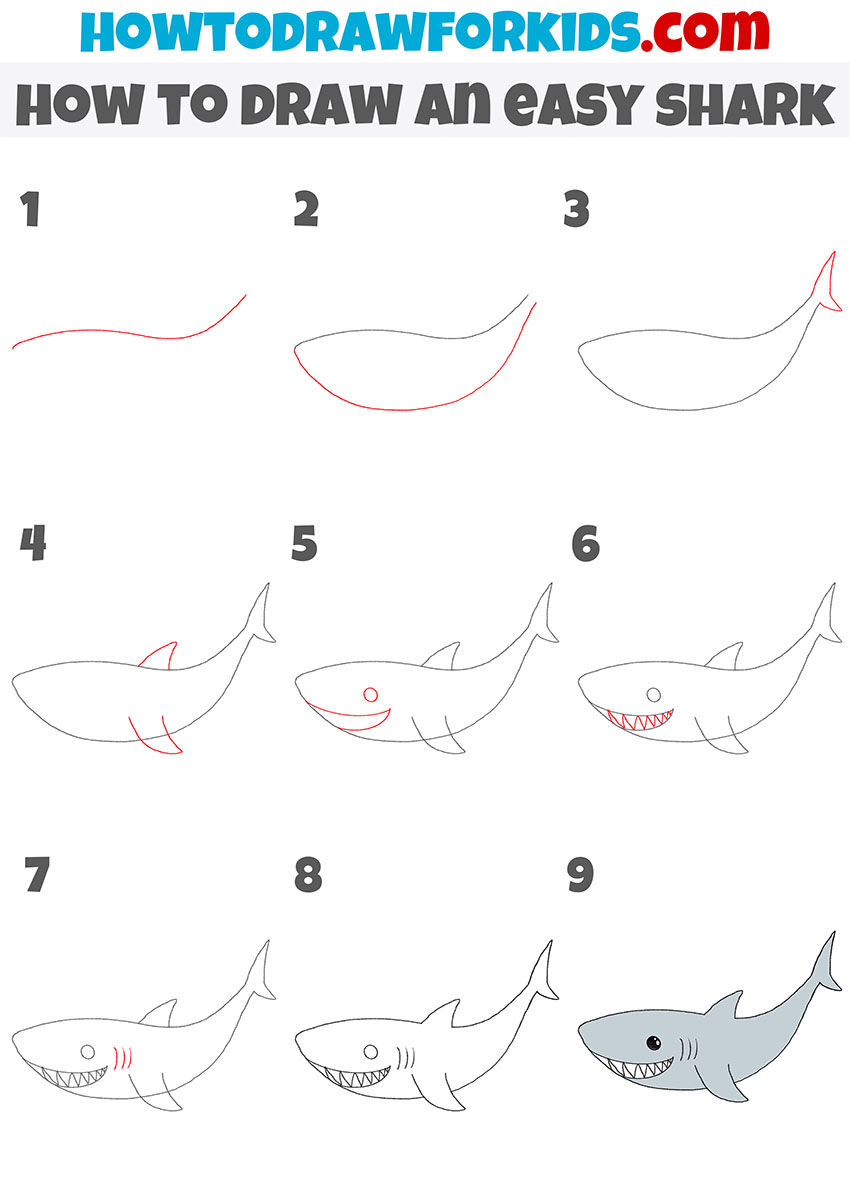
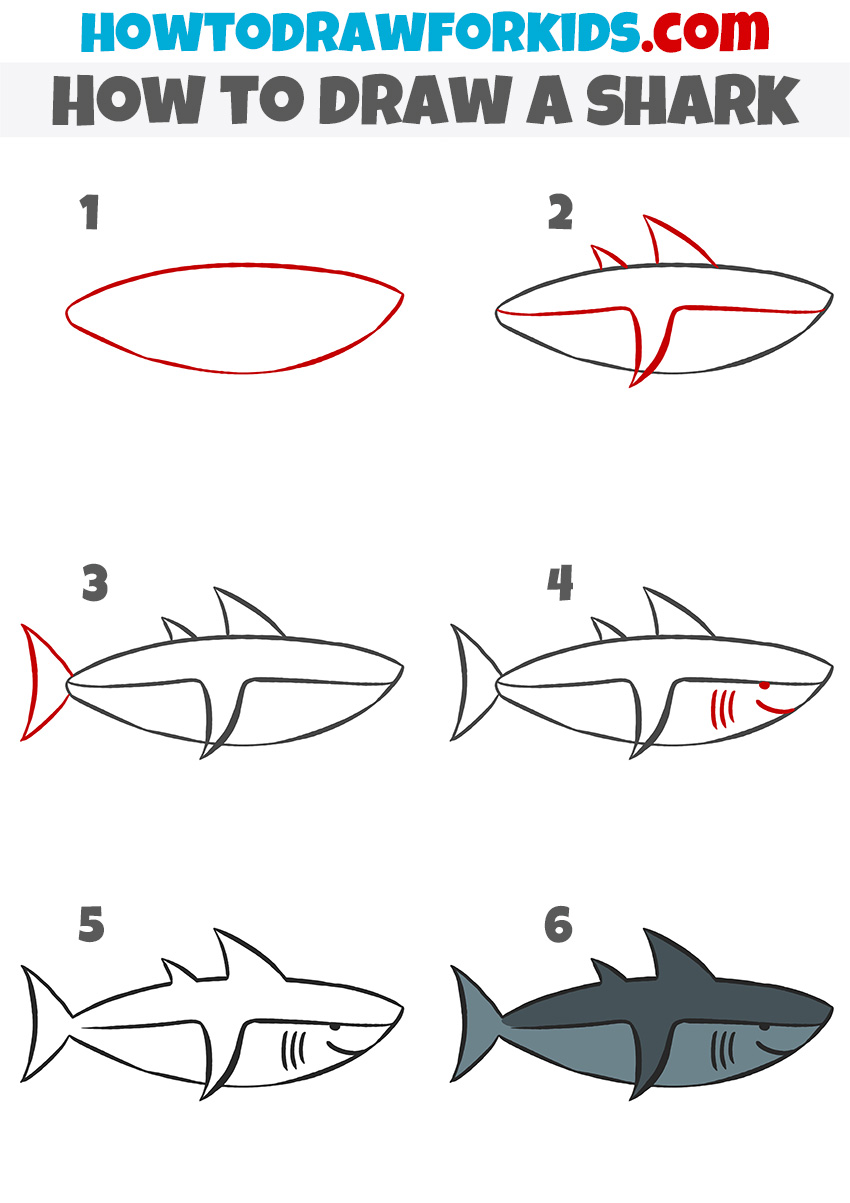
This is another alternative method of drawing a shark, featuring a technique that creates a smiling shark with a more cute appearance.
Begin by drawing a slightly curved horizontal line for the top of the shark’s body, then add a curved line below it to shape the bottom part, connecting the two lines to form a rounded body. Draw a small pointed tail at the back. Add the dorsal fin on top of the body, shaped like a smooth triangle. Include the pectoral fin at the bottom with a similar triangular shape.
Next, draw a circular eye near the front of the body, followed by a wide, curved mouth below it. Add small, triangular teeth inside the mouth to give the shark a friendly but recognizable look. Draw three short, curved lines behind the eye to indicate the gills.
Finally, refine the overall shape of your shark drawing, clean up any extra lines, and color the animal. Use shades of gray for the body and darker tones for the fins. The resulting drawing will depict a smiling, cute shark.
How to Draw a Shark for Preschoolers
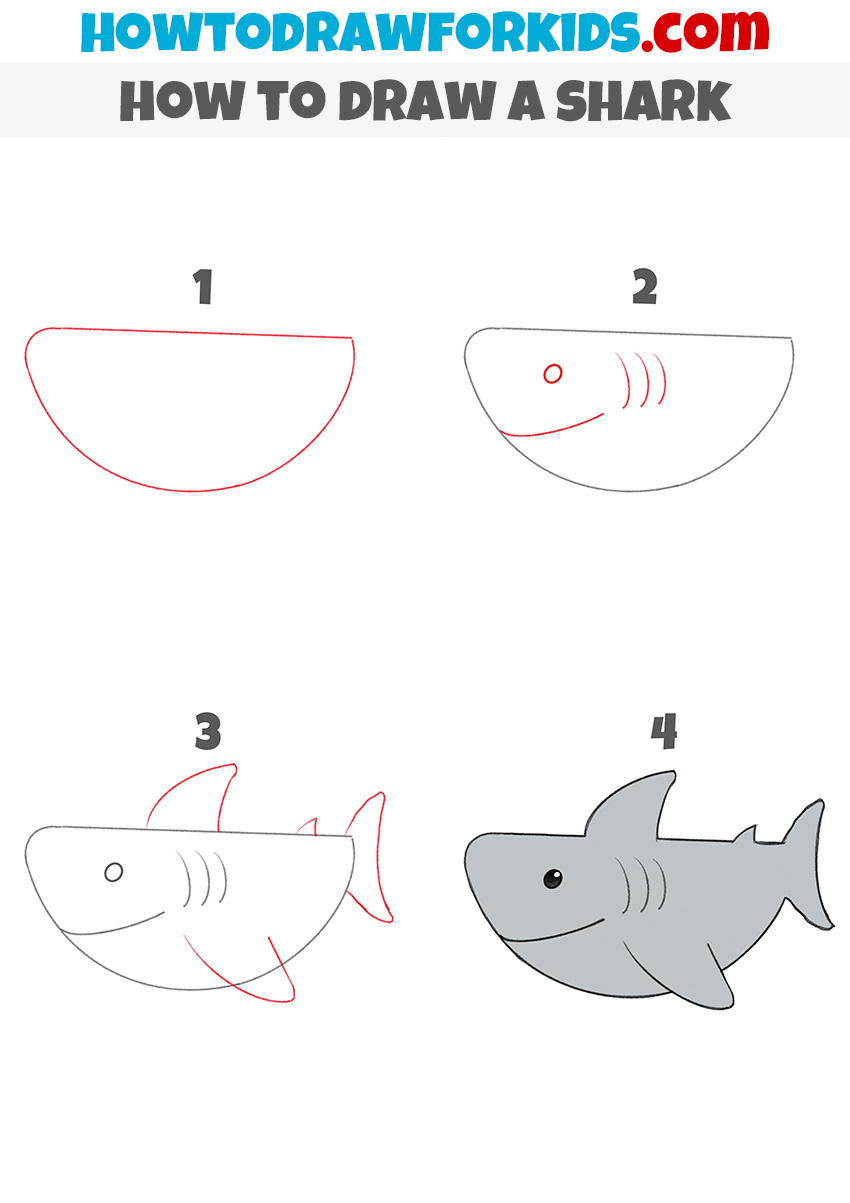
This is another alternative method of drawing a shark, and it is a simplified approach created for preschoolers. The shapes are basic, and the process is really simple, making it easy for younger children to follow along.
Start by drawing a large half-oval shape to form the main body of the shark. Next, draw a curved line near the front of the body to create the shark’s mouth. Add a small circle for the eye above the mouth. To give the shark some details, draw three short, curved lines behind the eye to represent the gills.
Now, move on to adding the fins. Draw the dorsal fin on top of the shark’s body, using a triangle shape with smooth edges. Add the pectoral fin near the bottom, again using a simple triangular shape. Then, draw the tail at the back of the shark’s body, making it pointy but with rounded edges.
Finally, fill in the drawing with a solid gray color to complete the look of the shark. You can color your shark drawing with natural shades like gray, or use more unconventional colors, such as green or purple.
Alternative Technique
Start by drawing the outline of the shark’s body using an elongated oval shape with a pointed end. Next, sketch the dorsal fin on top of the body and the pectoral and pelvic fins along the sides and bottom. Be sure to add smooth curves to make the fins look natural. After that, draw the tail fin at the rear end of the body, shaping it with a slightly curved, triangular form.
Add the shark’s mouth by drawing a curved line towards the front of the body. Include a small eye just above the mouth. Then, draw three gill slits behind the eye for added detail. Make sure to clean up any unnecessary lines and finalize the shape of the fins and tail on your shark drawing.
Finally, color in the shark with a dark gray on the top part of the body and a lighter gray on the bottom to give it a realistic look. Your shark drawing is now complete!
Realistic Method
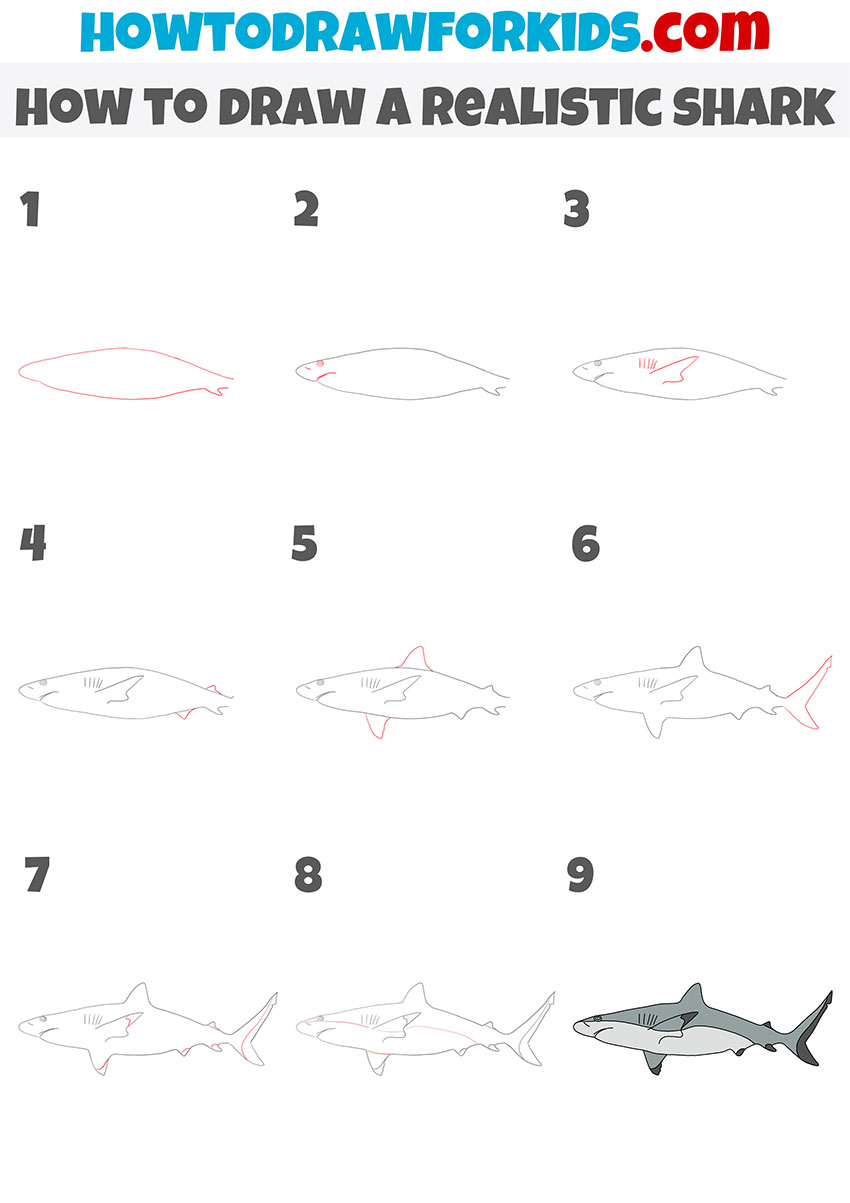
This is another alternative method of drawing a shark, and it’s a bit more realistic compared to the previous techniques. By following this guide, you will learn to draw a bit more anatomically accurate shark.
Begin by sketching the outline of the shark’s body, trying the recreate the natural curves of the body. Then, add a small eye near the front of the body, followed by a curved line for the shark’s mouth. Add gills just behind the eye to give the shark its characteristic look. Next, draw the dorsal fin, adding some angularity for realism. Draw the pectoral fin on the side of the shark’s body, and then include the pelvic fin lower down.
As you move towards the back of the shark, sketch the tail fin, paying attention to its asymmetrical shape, which is typical of sharks. Finish by refining all the details and erasing any unnecessary guidelines. Finally, color the shark using shades of gray for a more realistic appearance. Now you have a complete, realistic shark drawing!
Conclusion
This was a lesson on drawing a shark, in which I aimed to explain and demonstrate in as much detail as possible how to depict this ancient creature. To achieve this, we learned several simple and interesting methods, each offering different styles and variations.
If you enjoy drawing animals, be sure to check out my other drawing lessons in this category. For instance, I recommend taking a look at my tutorial on how to draw a dog or the step-by-step instructions for drawing a cat.
If you want to view these and many other tutorials in video format, you can find me on YouTube. Also, don’t forget to follow me on Pinterest, where I regularly share a lot of interesting content.


