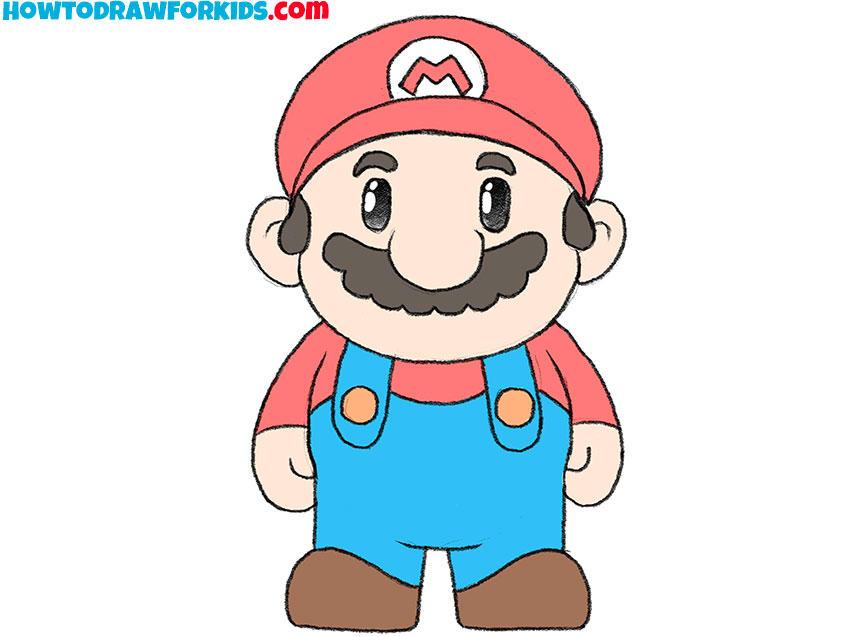
How to Draw Mario
As a true gamer, I am happy to present to you this tutorial on how to draw Mario, the legendary mustachioed character from Super Mario.
How to Draw Mario: Basic Information
In this lesson, we will learn how to draw Mario in a simple and recognizable style. To help you study the drawing process in greater detail and reinforce the knowledge gained, I have included an additional, more simplified version of the lesson below, along with a video tutorial.
Since we will be drawing a character that was originally created in a highly stylized version, it is very important to carefully follow all the specific stylistic techniques used by the creators. This will ensure the greatest possible resemblance to the original Mario design.
Mario’s exaggerated head-to-body ratio differs from realistic human figures, and learning to adjust proportions based on style is important for creating interesting characters. By drawing Mario in this cartoonish style, young artists can practice shifting away from realism to create stylized characters.
Mario’s look is iconic and instantly recognizable with just a few details – his hat, mustache, and overalls. By focusing on these limited elements, artists can learn how to create interesting characters without elaborate detailing, highlighting the importance of iconic elements in character design.
Mario Drawing Tutorial
Materials
- Pencil
- Paper
- Eraser
- Coloring supplies
Time needed: 30 minutes
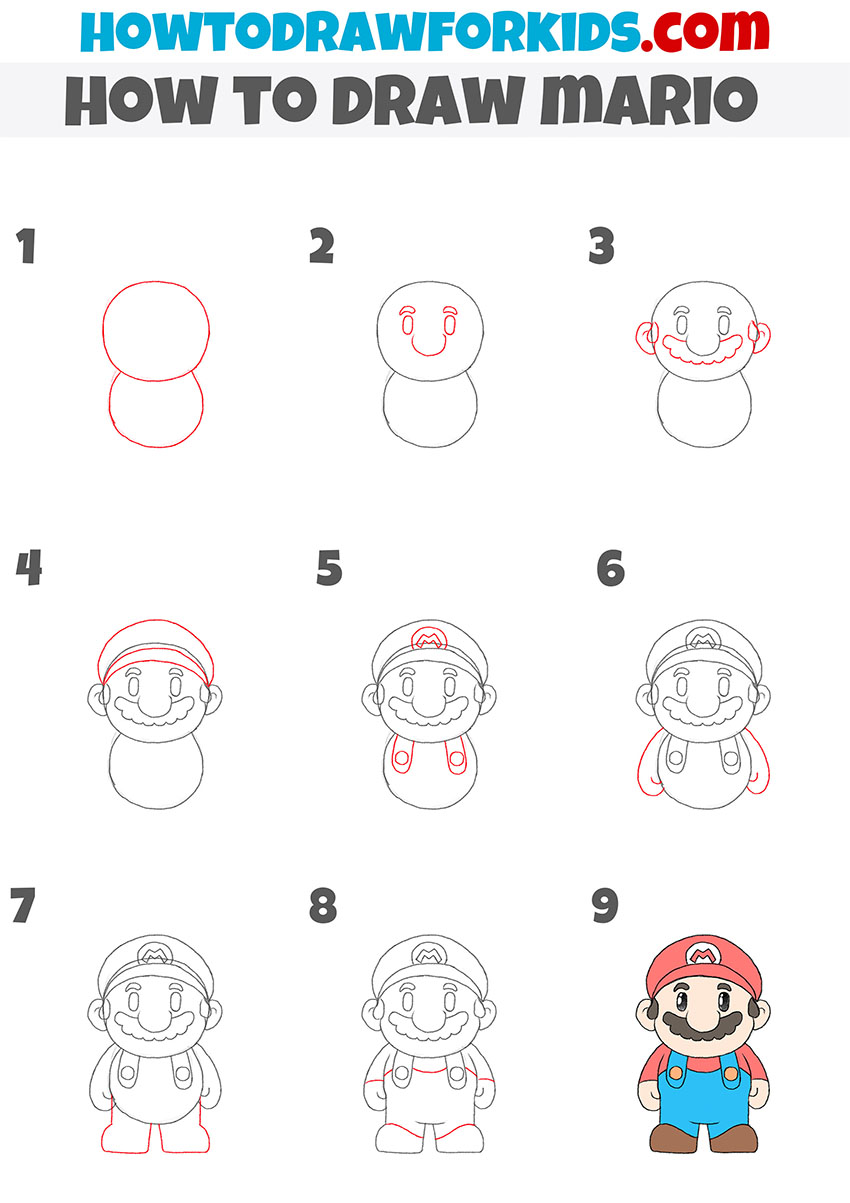
How to Draw Mario
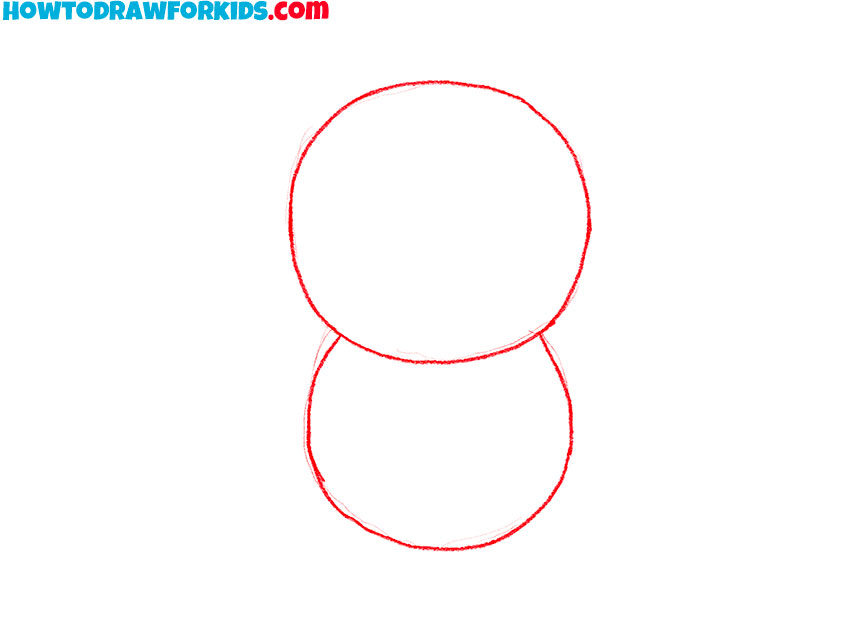
- Draw the head and body of Mario.
Begin by sketching two large ovals stacked vertically. The top oval will represent Mario’s head, while the bottom one will outline his body. The head should be slightly larger than the body to keep the proportions accurate.
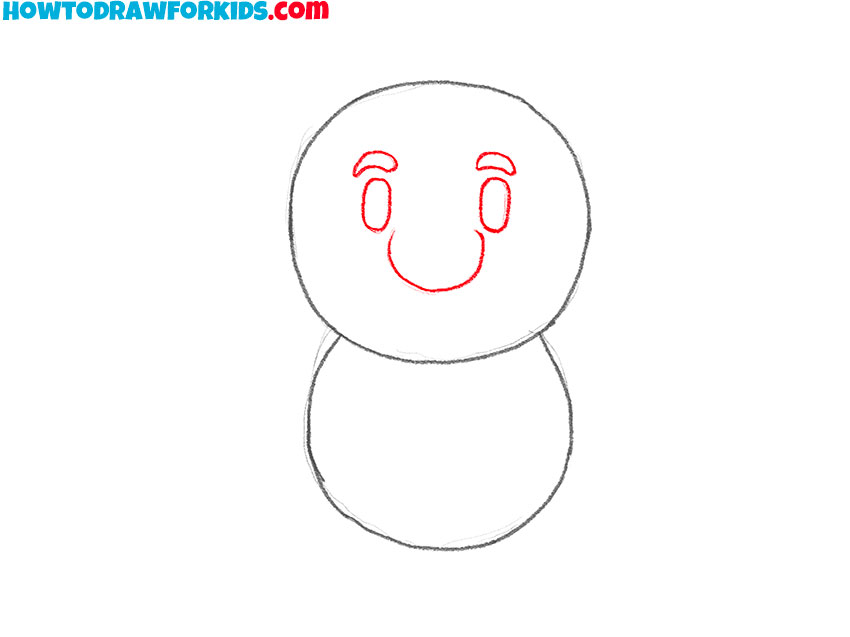
- Add the facial features of the character.
Inside the top oval, add two vertical oval shapes for Mario’s eyes, placing them just above the center of the head. Then, add a horizontal curved line in the middle of the face for the nose. Next, draw the eyebrows with a couple of simple curves above the eyes.
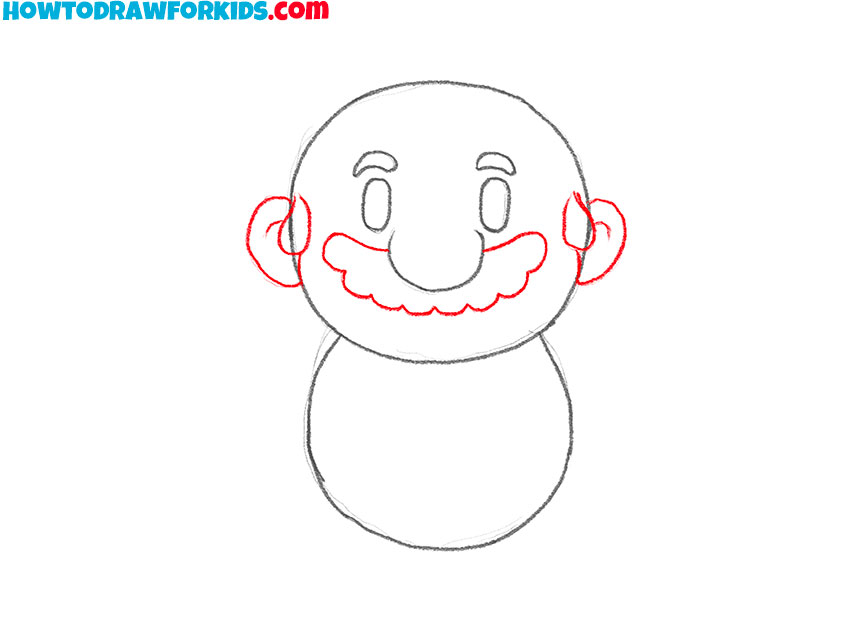
- Draw the ears and mustache.
On both sides of his head, draw small circular shapes for the ears. After that, create Mario’s iconic mustache by drawing a bumpy, curved line under his nose. The mustache should be thick and cover the lower part of his face. As you can see, your Mario is already becoming recognizable.
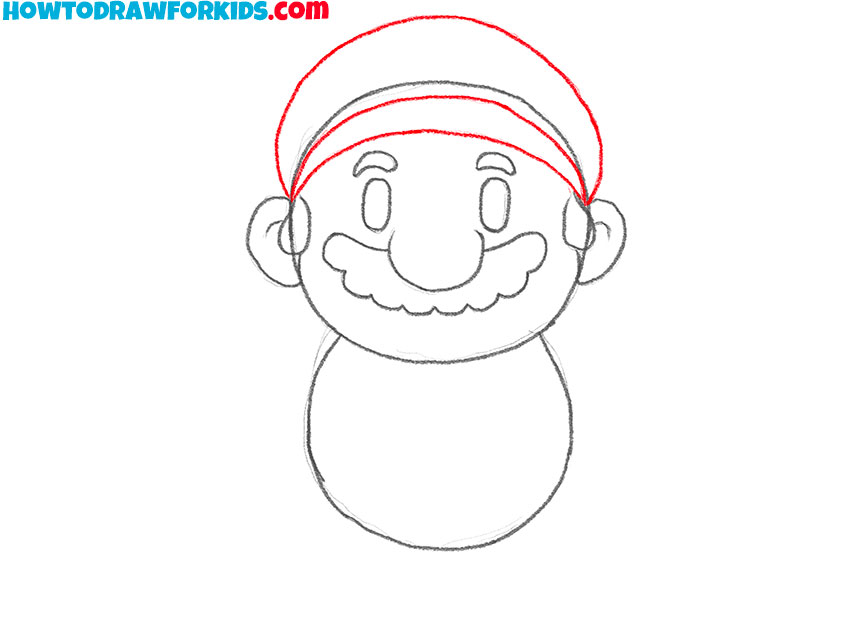
- Add the iconic cap.
Start by drawing the brim of the hat, which curves above his forehead. Then, extend a curved line upward from the brim to create the dome-shaped part of the hat. Remember to leave a space in the center of the cap for the emblem where the “M” logo will later be added.
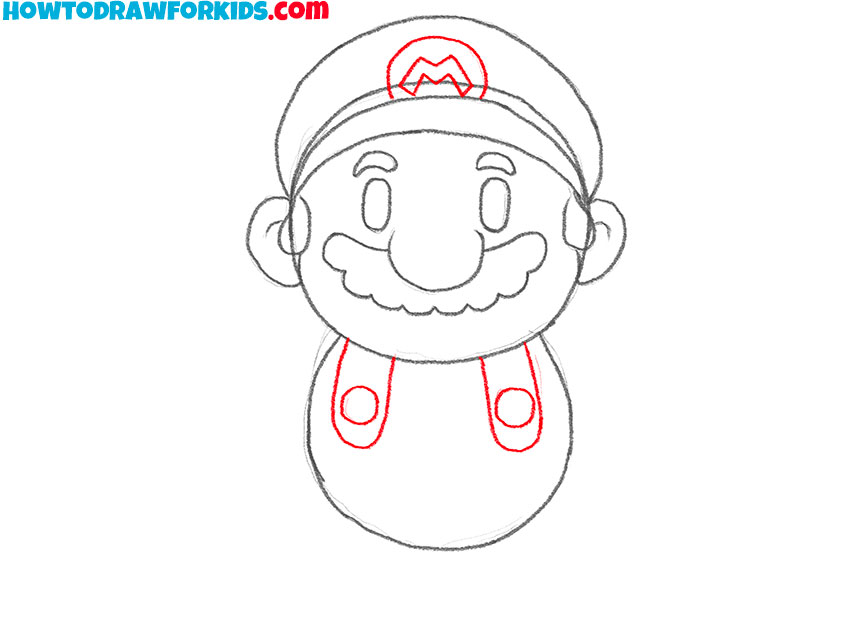
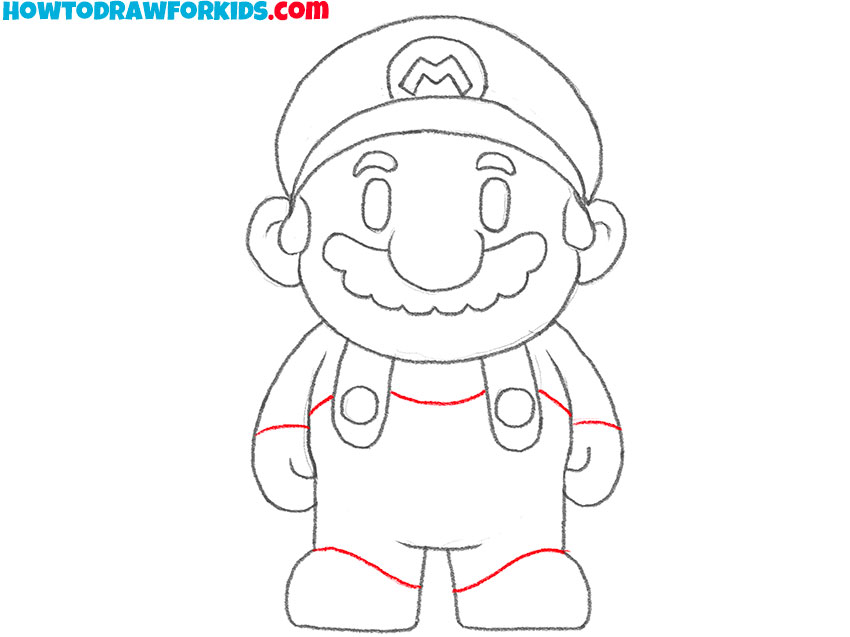
- Add the logo and straps of the overalls.
Now, refine the cap by adding the “M” logo in the center of the cap you created earlier. Afterward, move to the body. Begin drawing Mario’s overalls by sketching two straps hanging down from his shoulders. Finish the straps of the overalls by drawing buttons as two circles.
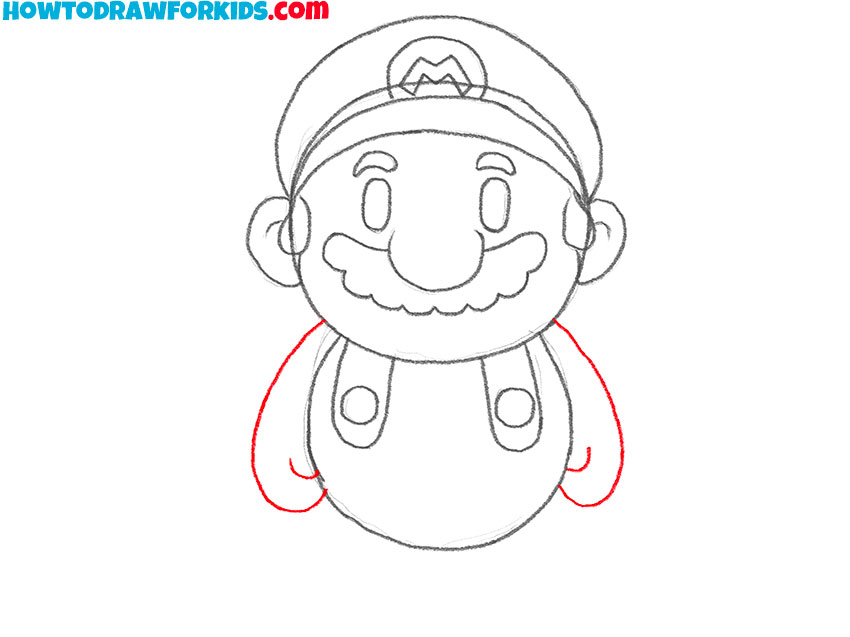
- Draw the arms.
Extend two simple, curved lines on either side of Mario’s torso for his arms. These arms should be thick and short to match, because we are drawing Mario in his iconic style. To make the arms a bit more detailed, draw the thumbs to indicate the hands.
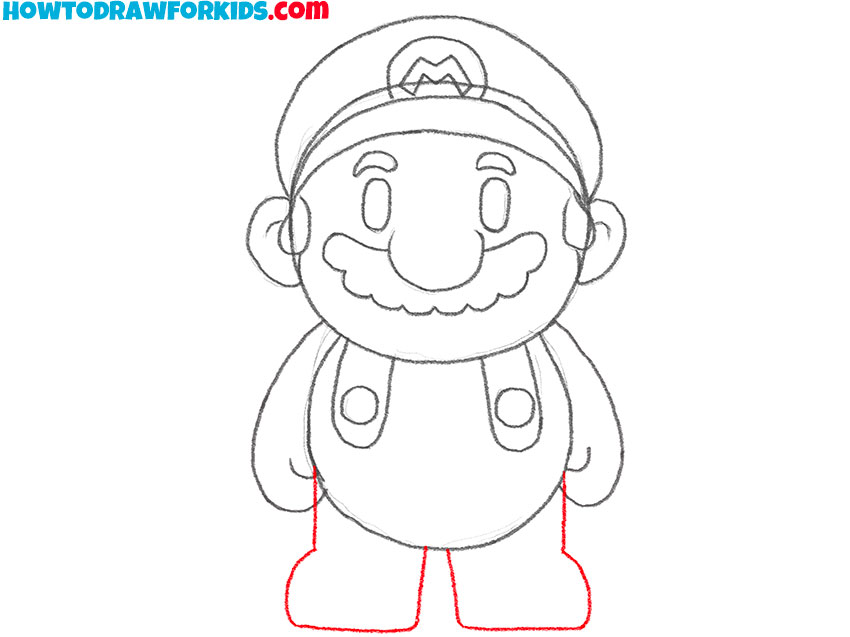
- Draw the legs.
Now it’s time to work on Mario’s lower body. For the legs, draw two wide rectangular shapes extending downward from the bottom of the body oval. To make the legs look more natural, draw the feet as simple horizontal shapes.
- Erase the guidelines and add finishing touches.
To give your Mario drawing a more polished look, use an eraser to remove the guidelines from the earlier steps. Outline his sleeves and add more definition to his boots by rounding the edges. Review your drawing of Mario for any errors and correct them if needed.
- Color Mario.
Fill in Mario’s cap and shirt with a bright red color, while his overalls should be a vivid blue. Don’t forget to color his mustache and hair a dark brown. His boots can be a light brown, buttons can be colored in orange, and his skin tone should be a light peach color.

How to Draw Mario: Video Tutorial
Additional Content
For those looking to improve their Mario sketches, I have prepared a PDF file available for free download. This document is a condensed version of this Mario drawing lesson.
While this PDF does not include the detailed steps found online, it provides additional exercises. These exercises are intended to strengthen your foundational knowledge and help refine your skills as you continue working on character illustration.
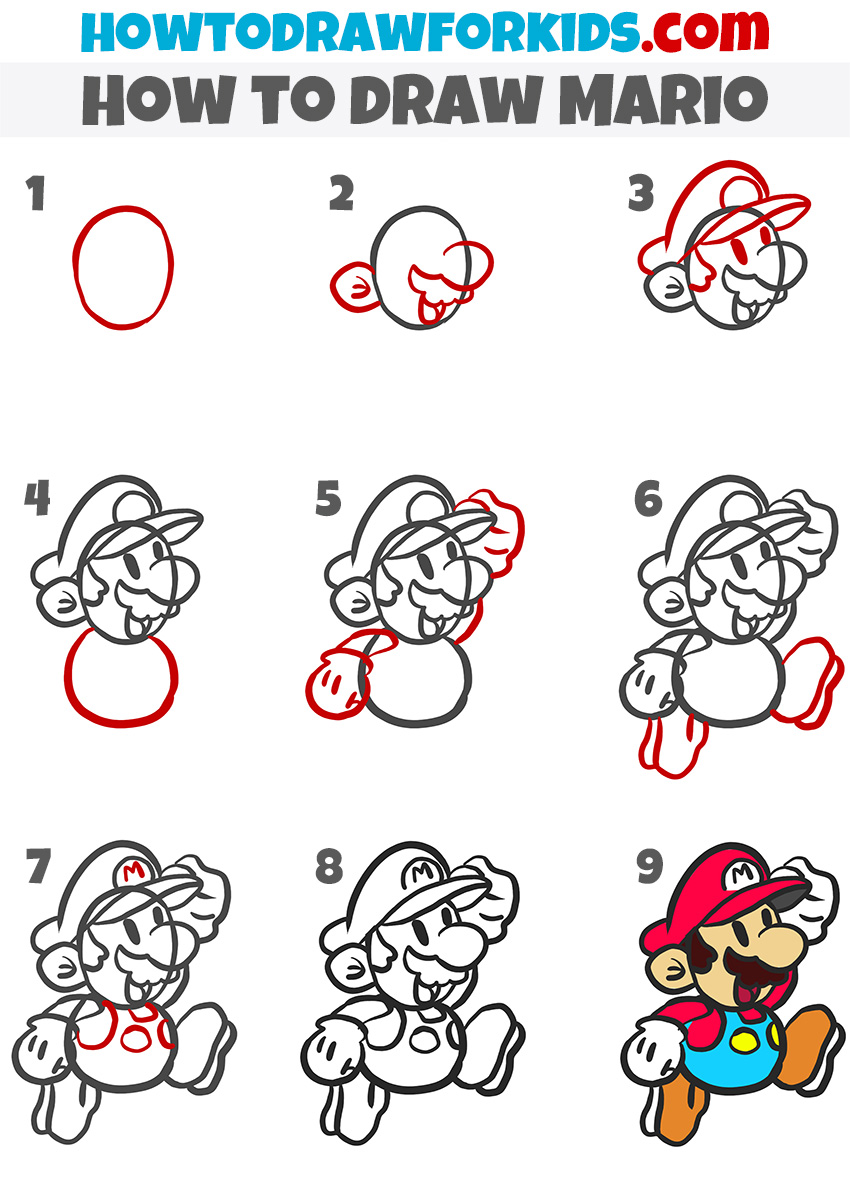
How to Draw Mario: Alternative Method
This is an additional alternative version of drawing Mario, featuring a different sequence of steps and an alternative cartoon style.
Begin by drawing the oval shape for Mario’s head. Next, add his facial features, starting with the large nose, the mustache, and his ear. Then, draw the hat on top of his head, including the curved brim and emblem space
After this, outline Mario’s round body by drawing a circle beneath the head. Add his hand raised upward, then draw the other hand near his body. Continue by drawing Mario’s legs in a running position. After finishing the basic outlines, add details to his clothing, such as the “M” on his cap, and buttons on his overalls.
Once the details are in place, refine the lines of your Mario sketch and make sure everything is clear. Finally, color the drawing using red for the cap and shirt, blue for the overalls, and brown for the shoes. You should now have an alternate version of Mario in a stylized, dynamic pose.
Conclusion
This concludes the tutorial on how to draw Mario. You can find more drawing tutorials on my website, where various instructions are available, ranging from drawing faces to everyday objects. Each tutorial is created to provide new exercises to help you improve your drawing skills.
If you found the video version of this Mario tutorial helpful, consider subscribing to my YouTube channel for other video tutorials. Additionally, you can follow me on Pinterest for more content, including extra drawing guides. Feedback and suggestions for future tutorials are welcome, and you can share them in the comments section below.