How to Draw Deer Antlers
In this post, I will tell you about how to draw antlers. This will be a rather unusual lesson, but you will draw some very cool art. By following the detailed steps in this tutorial, you have successfully learned how to create a realistic and intricate depiction of deer antlers.
How to Draw Deer Antlers: Basic Information
Welcome to this drawing lesson on how to draw deer antlers. The way antlers are drawn can significantly differ depending on whether they are depicted on the animal or separately. When drawing antlers on a deer, it’s essential to consider their placement and how they integrate with the deer’s head and body. In contrast, drawing antlers separately allows for a focus on their intricate details and structure.
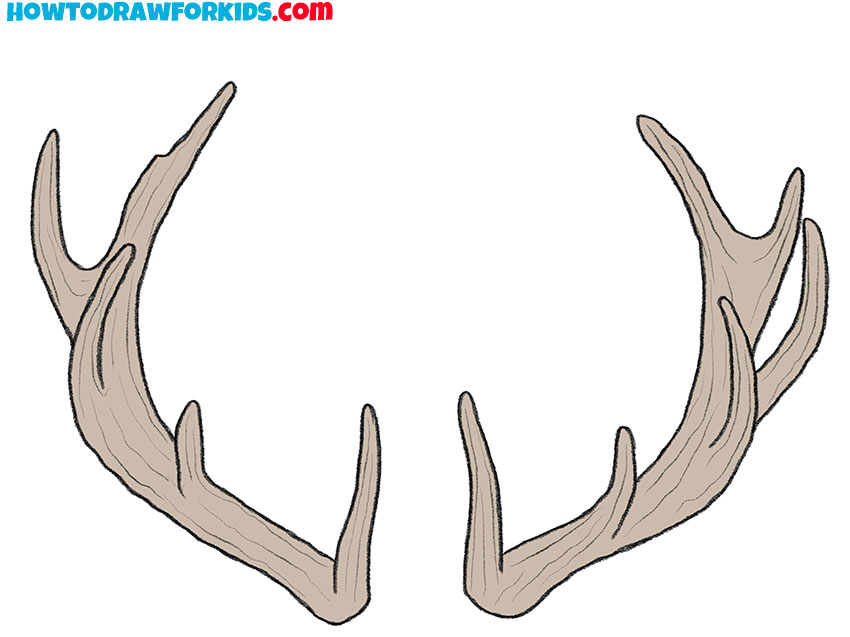
Deer antlers have a distinctive branched shape, resembling old, dry trees. Each tine, or branch, must be placed carefully to reflect the natural growth and symmetry of real antlers. Attention to detail in the placement of these small branches ensures a realistic and lifelike drawing.
Another crucial aspect of drawing deer antlers is capturing their unique bone texture. The surface of antlers is not smooth but rather has a rough, textured appearance. This texture is a result of the antler’s bone structure.
By the end of this lesson, you will have a comprehensive understanding of how to draw deer antlers with all their intricate details.
Deer Antlers Drawing Tutorial
Materials
- Pencil
- Paper
- Eraser
- Coloring supplies
Time needed: 25 minutes
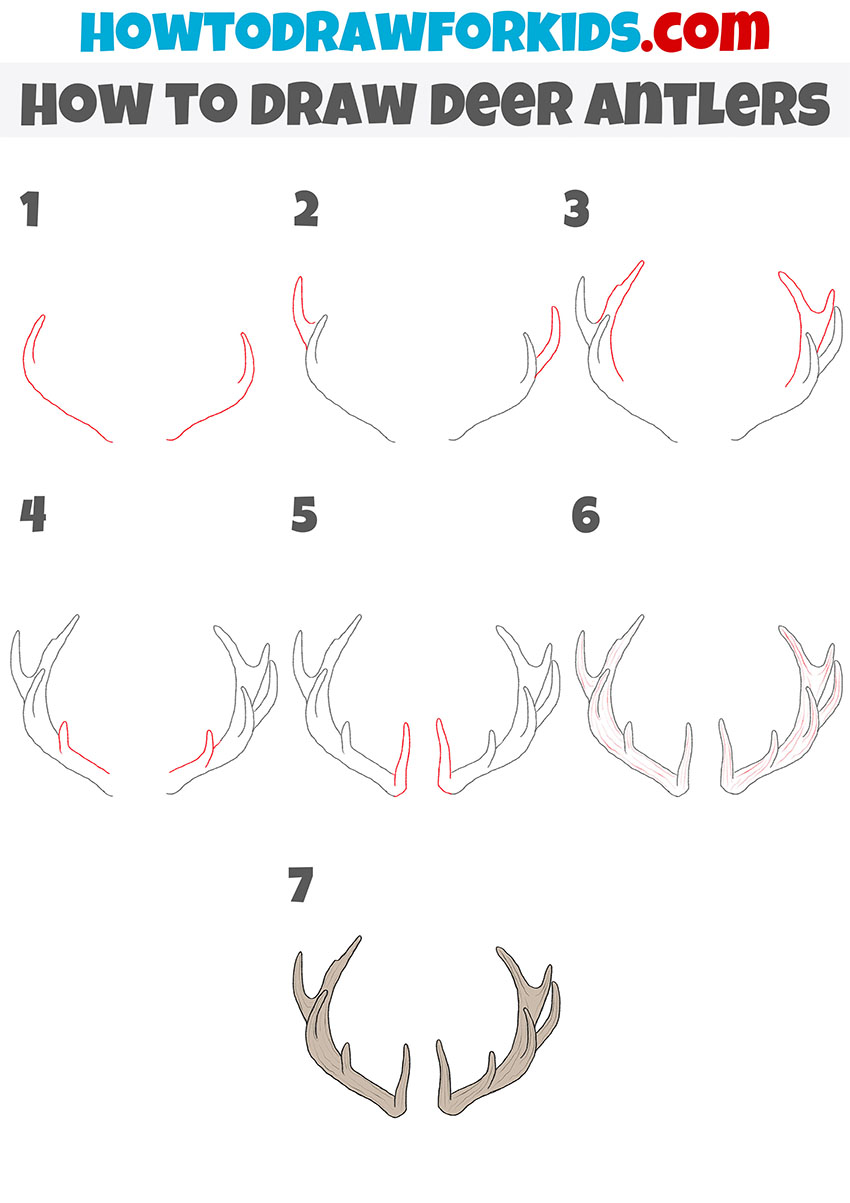
How to Draw Deer Antlers
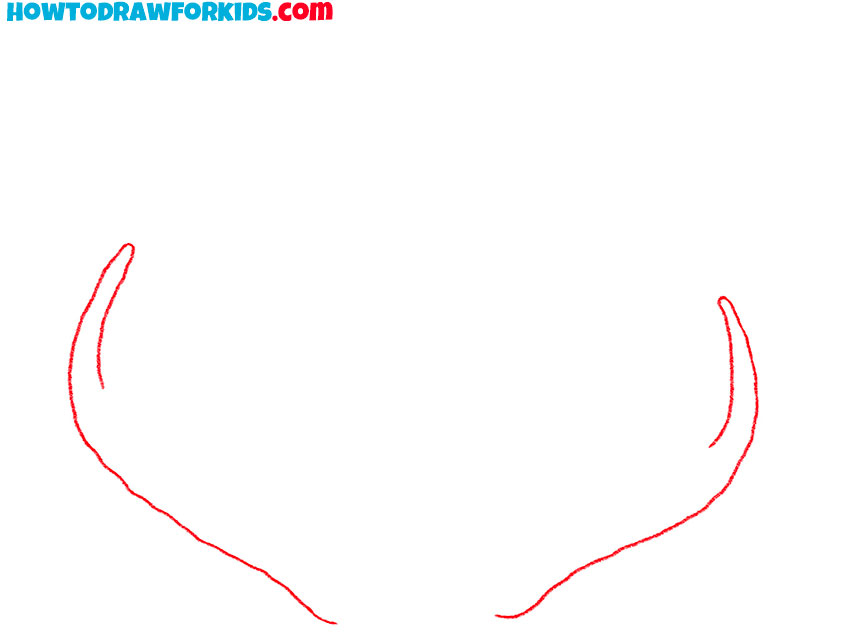
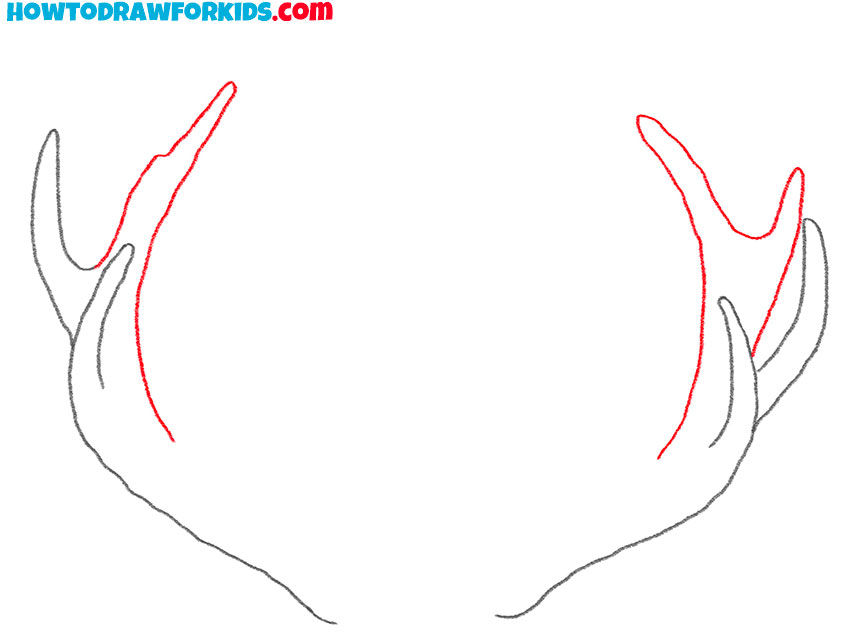
- Draw the main outline of the antlers.
Begin by drawing the basic outline of the antlers. Use light, smooth strokes to sketch two curved lines extending outward from a central point at the bottom. These lines should curve gently upwards, forming the main branches of the antlers. Focus on achieving symmetry between the two sides.
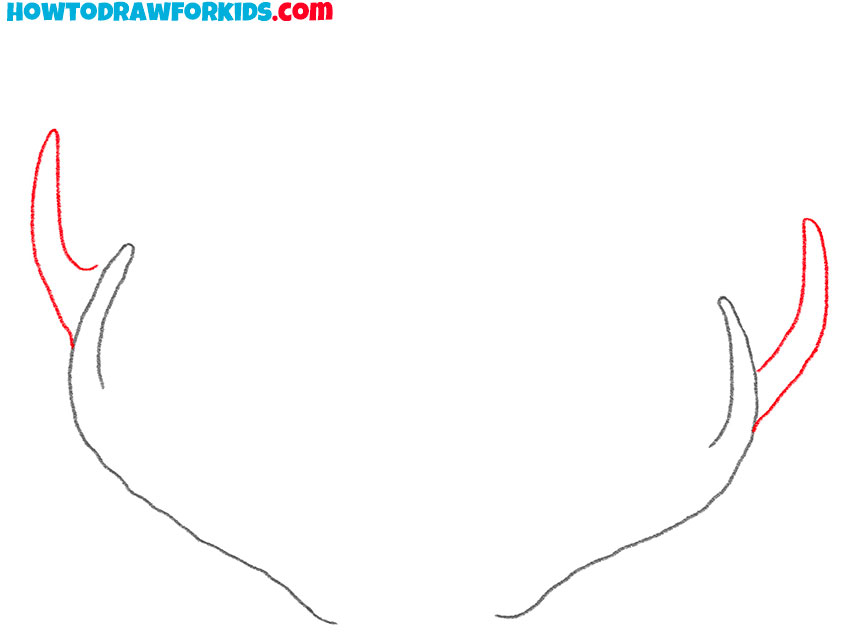
- Add the top processes.
Next, add the first set of tines, or smaller branches, to the main structure. Start by extending short, curved lines from the top portions of the main branches. These lines should angle slightly upwards and outward, mimicking the natural growth pattern of deer antlers.
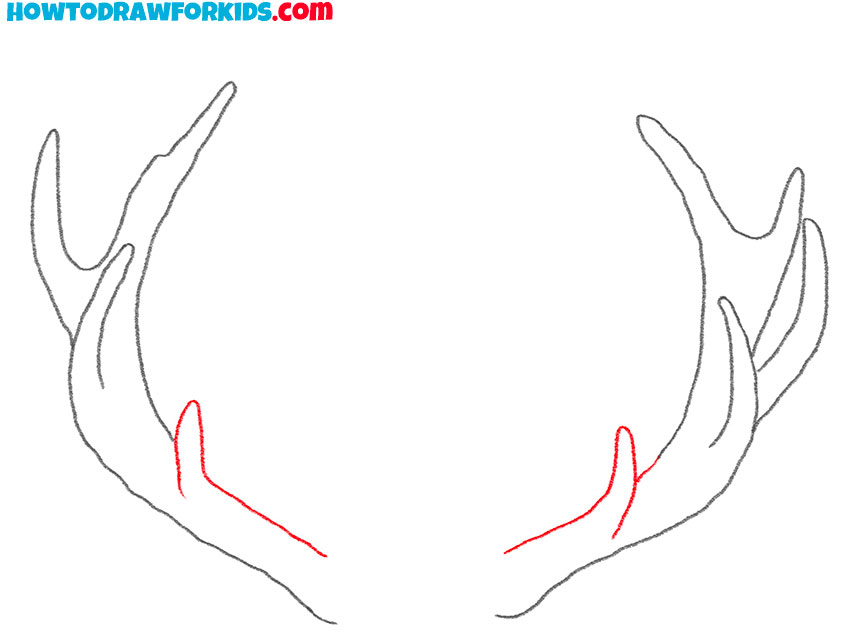
- Depict the large shoots.
Begin by drawing additional branches emerging from the mid-sections of the main branches. These new tines should vary in length and angle, adding complexity and natural variation to the antlers. Use smooth, controlled strokes to create these extensions.
- Sketch out the bottom shoots.
Now, focus on enhancing the lower sections of the antlers. Add small, curved lines extending from the lower parts of the main branches, creating additional tines. These should be shorter and less prominent than those higher up, reflecting the natural structure of antlers.
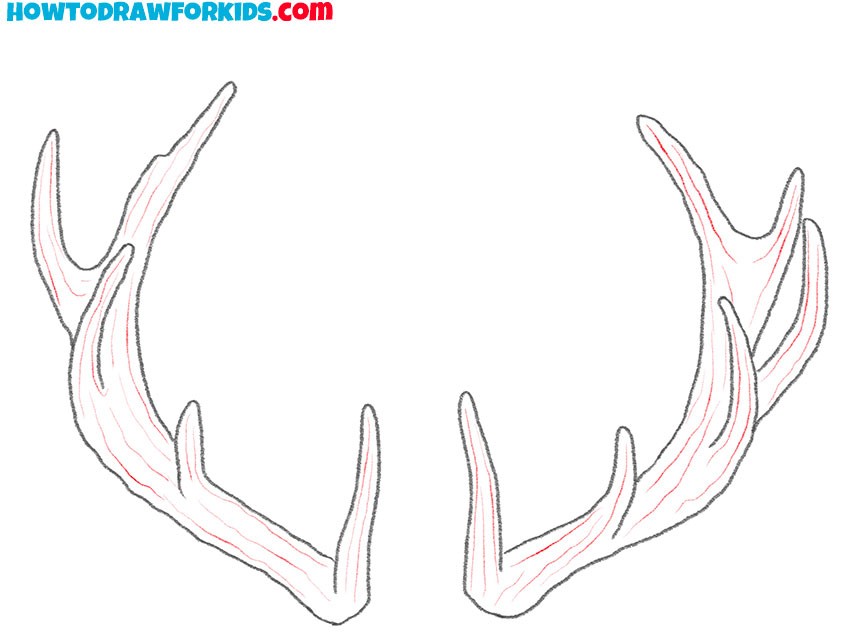
- Draw shoots that are located in the center.
In this step, focus on drawing the large central spines of the horns, which are the main features of the antlers. Begin by extending the central branches upward, making them slightly thicker and more prominent than the surrounding tines.

- Add texture.
Add additional texture to the antlers by using light, short strokes to create a sense of roughness and natural variation. This will give the antlers a more lifelike appearance. Pay close attention to the details, ensuring that each tine and branch looks distinct and well-integrated into the overall structure.
- Color the antlers.
Finally, add shading and coloring to complete your drawing. Use a light brown color to fill in the antlers, applying even, smooth strokes to create a consistent base color. Then, use a slightly darker shade to add depth and dimension, focusing on the areas where the tines and branches overlap or where shadows naturally fall.
Additional Content
This lesson on how to draw deer antlers is complemented by an accessible PDF file that includes a concise version of the tutorial. This PDF is designed to provide a streamlined learning experience, making it easy to follow along with the steps outlined in the guide. Additionally, the PDF contains tracing templates and drawing grids to aid in the practice of drawing by cells. These features are particularly useful for beginners, as they help break down the drawing process into manageable sections, ensuring a structured and systematic approach to learning.
One of the key benefits of this PDF file is its offline usability. Once downloaded, you can access the complete lesson and practice drawing antlers without needing an Internet connection. This is especially advantageous for situations where connectivity may be limited or unavailable, such as during travel or in locations with poor internet access.
Common Mistakes
- Lack of Symmetry: One common mistake when drawing antlers is failing to maintain symmetry between the two sides. While natural antlers can have slight asymmetries, significant differences can make the drawing look unbalanced. To correct this, start by lightly sketching a central guideline and ensure that each tine and branch on one side has a corresponding part on the other side. Use a ruler or a grid to help maintain equal distances and angles.
- Uniform Branching: Another mistake is making the tines and branches too uniform in length and spacing. Real antlers have a natural variation in the size and placement of branches. To correct this, study reference images of real deer antlers and note the irregularities. Incorporate these variations into your drawing by making some tines longer or shorter and spacing them unevenly. This will give your antlers a more natural and realistic appearance.
- Smooth Texture: Drawing antlers with a smooth texture can make them look unrealistic, as real antlers have a rough, bone-like surface. To correct this, add texture by using short, light strokes to create a rough, uneven surface. You can also use cross-hatching or stippling techniques to add depth and texture. Paying attention to the natural grooves and ridges in real antlers will help you replicate their texture more accurately.
- Incorrect Proportions: Incorrect proportions between the main beams and the tines can also detract from the realism of your drawing. If the tines are too thick or thin compared to the main beams, the antlers may look disproportionate. To correct this, start with a rough sketch that includes all parts of the antlers, and then refine the proportions as you go. Use reference images to gauge the relative thickness and length of the main beams and tines, adjusting your drawing as needed to achieve the correct proportions.
Conclusion
By following the step-by-step instructions, you have learned how to create a realistic and detailed representation of antlers. This process not only helps improve your drawing skills but also enhances your understanding of natural forms and structures.
i hope you enjoyed this tutorial and found it helpful. To stay updated with more drawing lessons and creative content, consider subscribing to the social media channels. For more in-depth tutorials and resources, be sure to visit my website regularly.

Thank you
Here’s my antler
Hey
Here is my picture