How to Draw Earth
This tutorial includes two very simple step-by-step guides to teach you how to draw Earth, our shared home, in an easy-to-follow way.
How to Draw Earth: Introduction
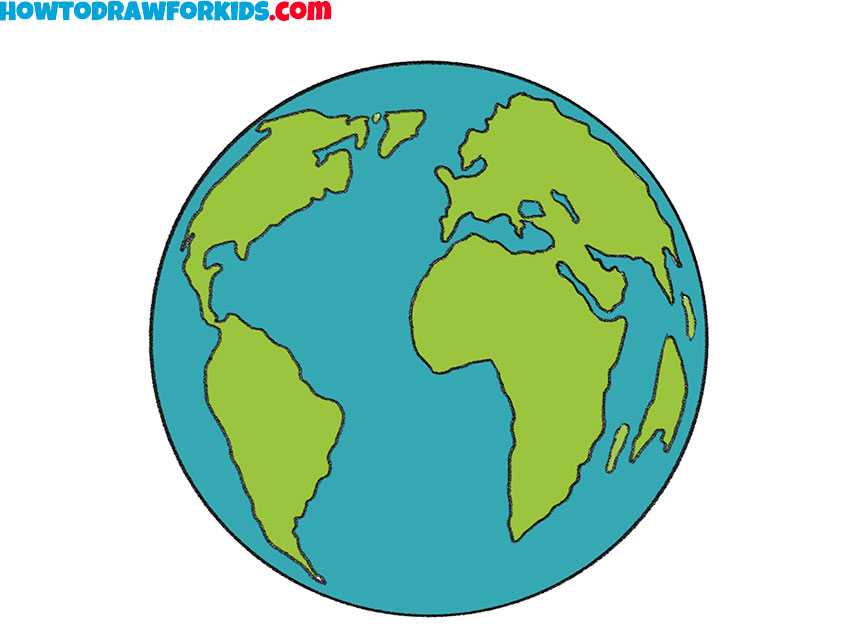
Planet Earth is a large sphere with visible features such as mountains, oceans, and green and yellow areas. This forms one of the most recognizable images of our planet, which will be the focus of this lesson on how to draw Planet Earth.
We will avoid unnecessary details and focus on depicting the most basic and important features of Earth’s appearance. Small rivers or fine textures will not be included; instead, we will focus on drawing only the largest and most prominent areas to ensure the image is easily recognizable.
However, you can choose to make your Planet Eart drawing more detailed. To do this, you can add smaller features such as seas, rivers, and mountains, or even include clouds on top of the Earth’s surface texture to improve the final result.
This lesson on how to draw Earth can also be useful for creating drawings of other planets. To adapt the lesson, simply change the blue-green texture of Earth to another color, such as red for Mars or a different texture for other planets.
Earth Drawing Tutorial
Materials
- Pencil
- Paper
- Eraser
- Coloring supplies
Time needed: 35 minutes
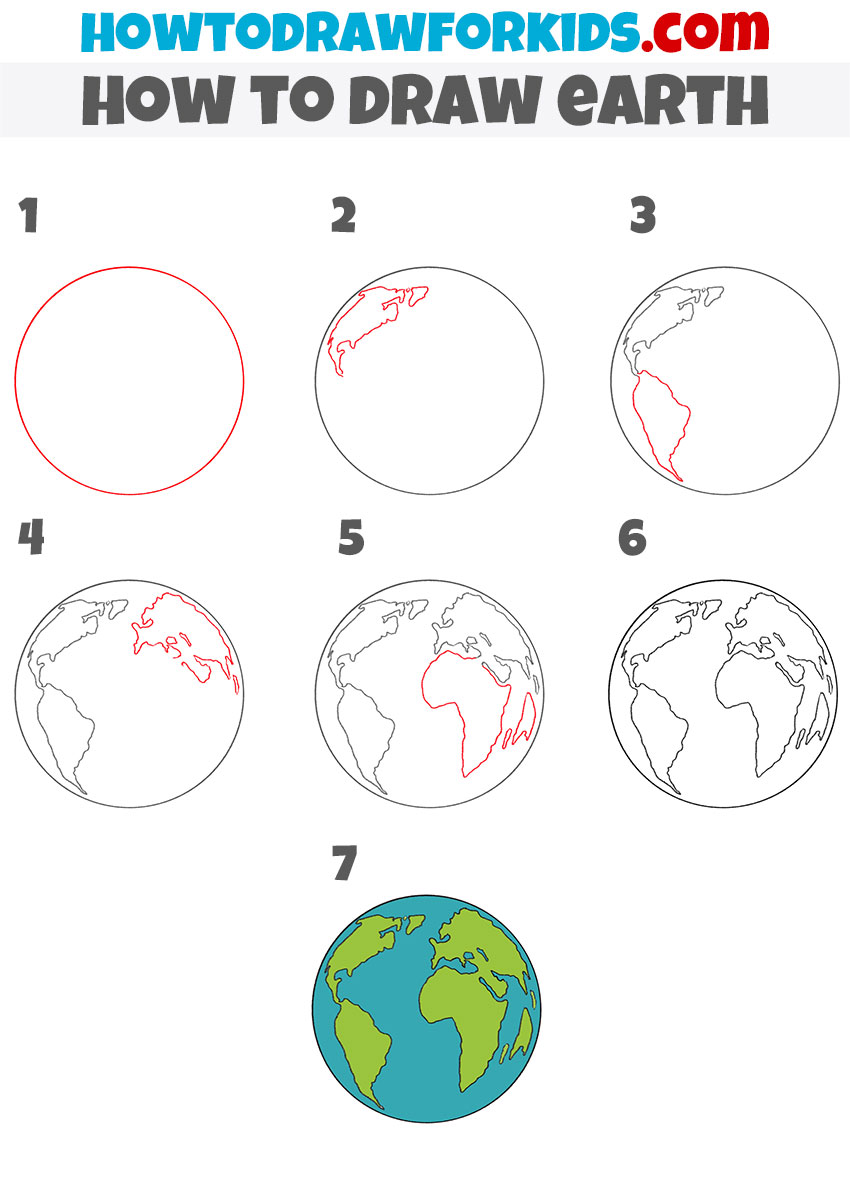
How to Draw Earth
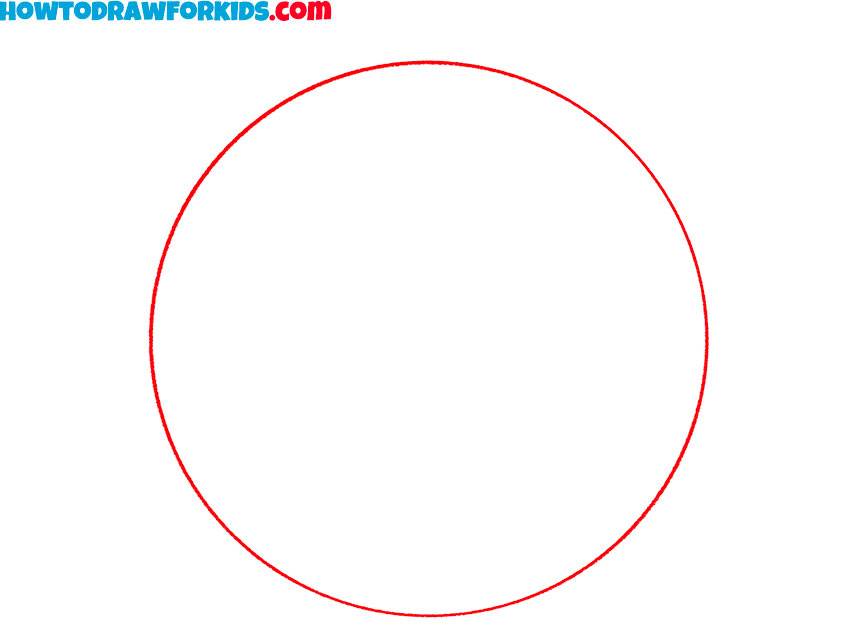
- Draw the basic outline of Earth.
Start by drawing a large circle to represent the shape of Planet Earth. Use a compass or draw it freehand to create a smooth and even outline. This circle forms the foundation of your planet drawing and represents the spherical shape of Earth.
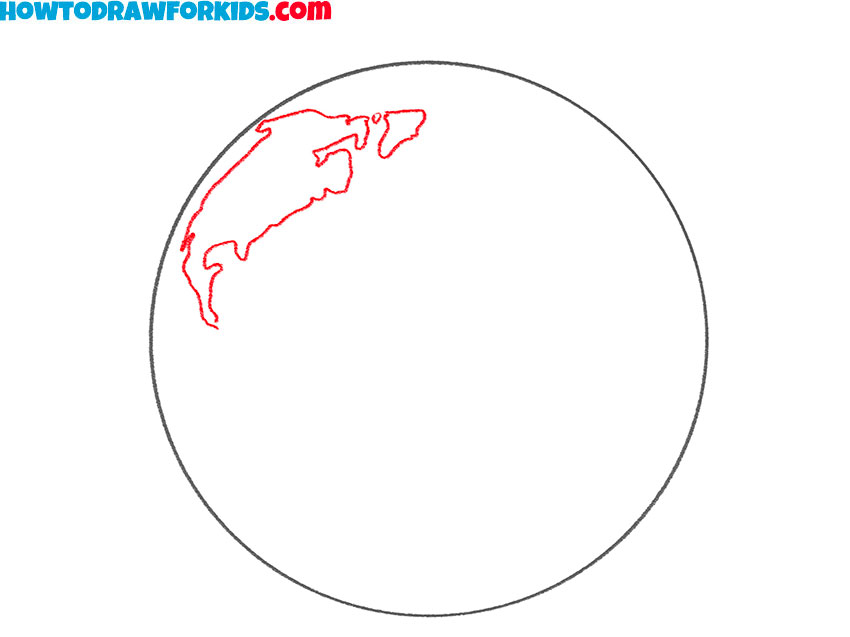
- Add North America.
In this step, draw the shape of North America in the upper left portion of the circle. Start with a wavy line to depict the western coastline, followed by the eastern side. Focus on keeping the overall shape simple and recognizable, avoiding too many details.
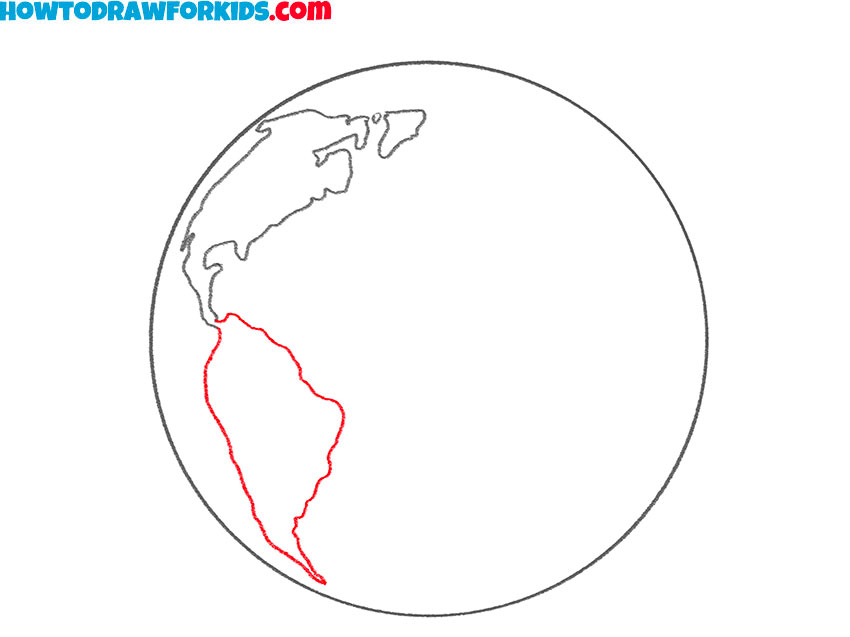
- Sketch South America.
Extend your drawing by adding South America below North America. Use curved and sloping lines to sketch the distinctive shape of this continent. Place it so it aligns with North America while leaving space for the surrounding oceans. Like before, keep the shapes simple and easy to identify.
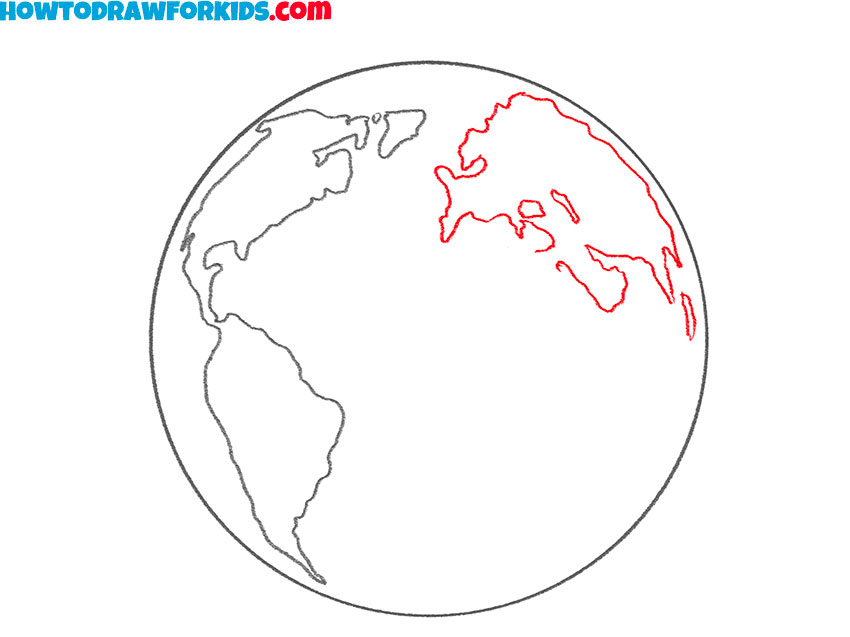
- Sketch Europe and Asia.
Move to the top-right side of the circle to add Europe and Asia. Draw Europe first, focusing on the smaller landmass, then extend your lines to form Asia, which occupies a larger area. Use wavy lines to crewate the general shapes of these continents.
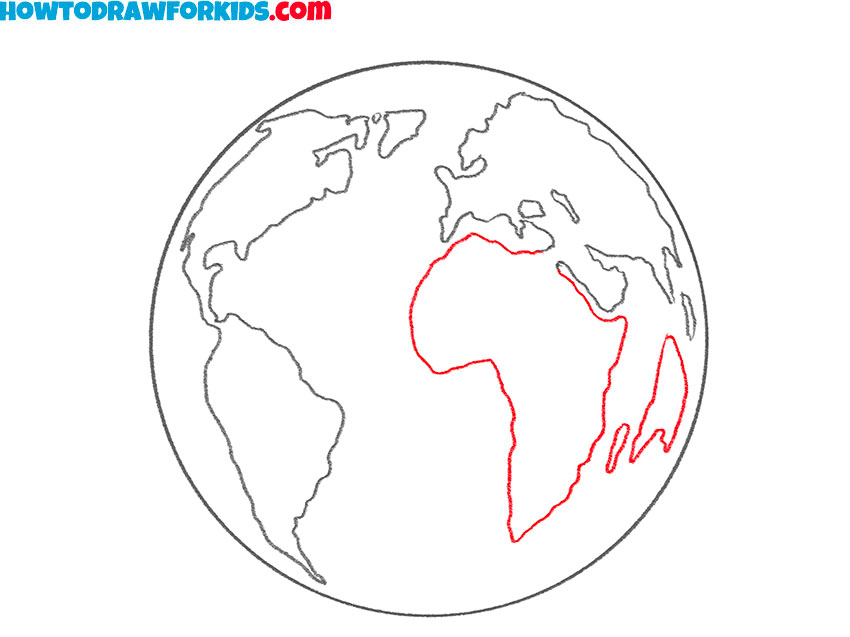
- Sketch the outline of Africa.
Continue drawing the continents, adding Africa below Europe and to the right of South America. Sketch the outline using smooth, curved lines to illustrate its iconic shape. Ensure Africa’s position connects it properly with Europe and the adjacent oceans.
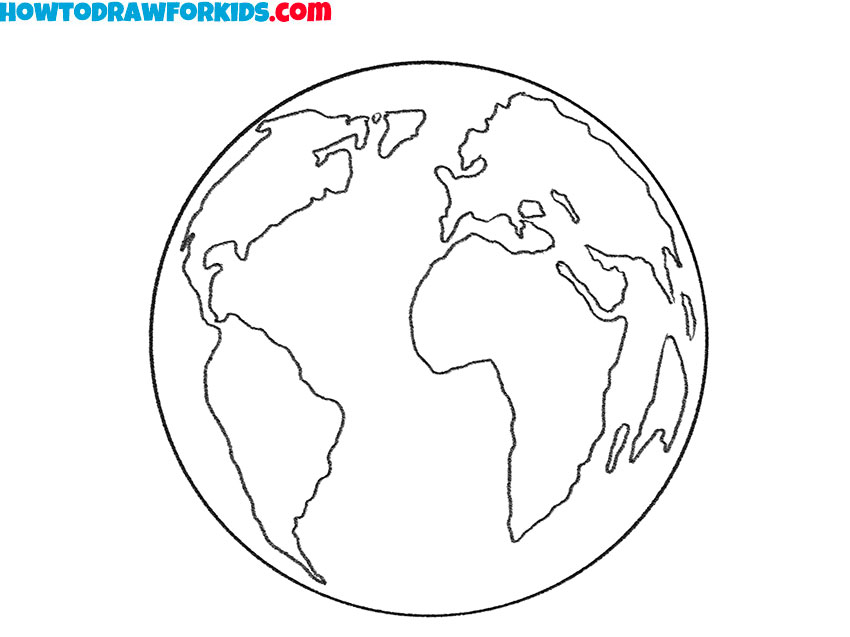
- Finalize the drawing of Planet Earth.
Review the drawing of Planet Earth and refine the shapes of all the continents. Add missing details and smooth out any rough or uneven lines. Adjust the placement of continents if needed to make the drawing look more finished.
- Add colors to finish your Earth drawing.
Use green for the landmasses to represent continents and blue for the oceans to depict water. To make the drawing of Earth look more realistic, add colors for the snowy places and deserts. You can also use shading to improve the three-dimensional look of the globe.

Additional Content
I have prepared a PDF file that provides a step-by-step guide on how to draw Earth. It is designed for viewing on a computer, tablet, or for printing if needed.
This file is intended to be convenient for use anywhere. Whether at home or while traveling, it serves as a reference for improving drawing skills. It is available for download and can be shared as needed.
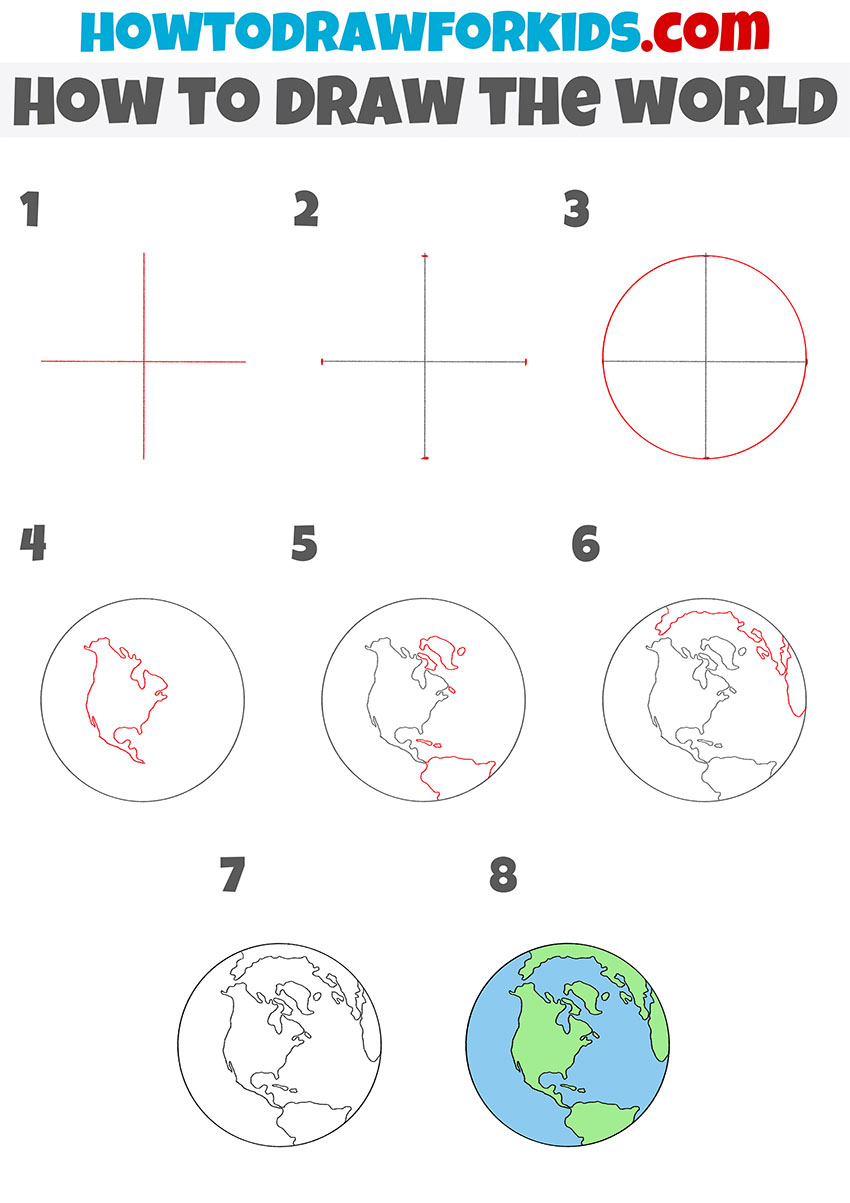
How to Draw Earth: Alternative Technique
The basic Planet Earth drawing tutorial is completed, and it’s time try your skills in sketching another world, but with a different method. The main difference between this tutorial and the first one is that this one includes preliminary guidelines in the form of a cross before drawing the circle. This helps to position the continents more accurately. Additionally, the arrangement of the landmasses differs slightly, with more emphasis on North America and the surrounding areas.
To start drawing the world, begin by sketching a vertical and horizontal guideline that intersects in the middle. This will help with proportions. Draw a large circle using these guidelines as reference points. Next, outline the shape of North America on the left side of the circle. Keep the lines simple and recognizable. Add South America below, connecting it smoothly to North America.
Continue by sketching the upper landmasses. Add details to the northern regions. Complete the outlines of all landmasses, checking their placement. Once the drawing is finalized, erase any unnecessary guidelines. Finally, color the world by shading the landmasses in green and the water areas in blue. The tutorial on how to draw the world is complete.
Conclusion
This lesson covered how to draw Planet Earth. Two simple techniques were used to recreate its appearance on paper. The drawing can be made more complex or stylized by drawing trees or other elements to the surface.
To learn how to draw other objects, visit other categories to further improve your skills. Additionally, follow on social media to stay updated on new lessons.

thank you! my science teacher Quit and i wanted to make him a picture.
That’s thoughtful, Aubree. Making a drawing as a gift is a great idea.
Thanks! I used this for my harmony day poster for school
Nice use of it, Ben. It’s always good to hear the tutorials help with school projects too.