How to Draw The Lorax
This tutorial will show you how to draw the Lorax, a small mustached creature who speaks for the trees, using two simple step-by-step methods.

How to Draw Lorax: Introduction
In this tutorial, you’ll learn how to draw the Lorax – one of the most recognizable and unusual characters from a popular cartoon based on the book by Dr. Seuss. The story is set in a future world and carries a clear message about environmental care.
This tutorial will show you how to draw the Lorax using two simple step-by-step methods, each highlighting different features of the character while helping you improve your ability to draw stylized and unique cartoon figures.
The Lorax is a short, fluffy creature with a large yellow mustache, thick eyebrows, and a memorable body. In many ways, the character resembles the Grinch, especially in terms of body structure and fur texture, so some of the techniques used in my Grinch drawing tutorial can also be applied here.
This lesson is also a good opportunity to practice drawing human-like proportions, as the Lorax generally follows the same basic principles used in drawing a person. The combination of facial features, fur details, and body shape will help reinforce your character drawing skills on an example of a creature that’s both simple and memorable.
Lorax Drawing Tutorial
Materials
- Pencil
- Paper
- Eraser
- Coloring supplies
Time needed: 35 minutes
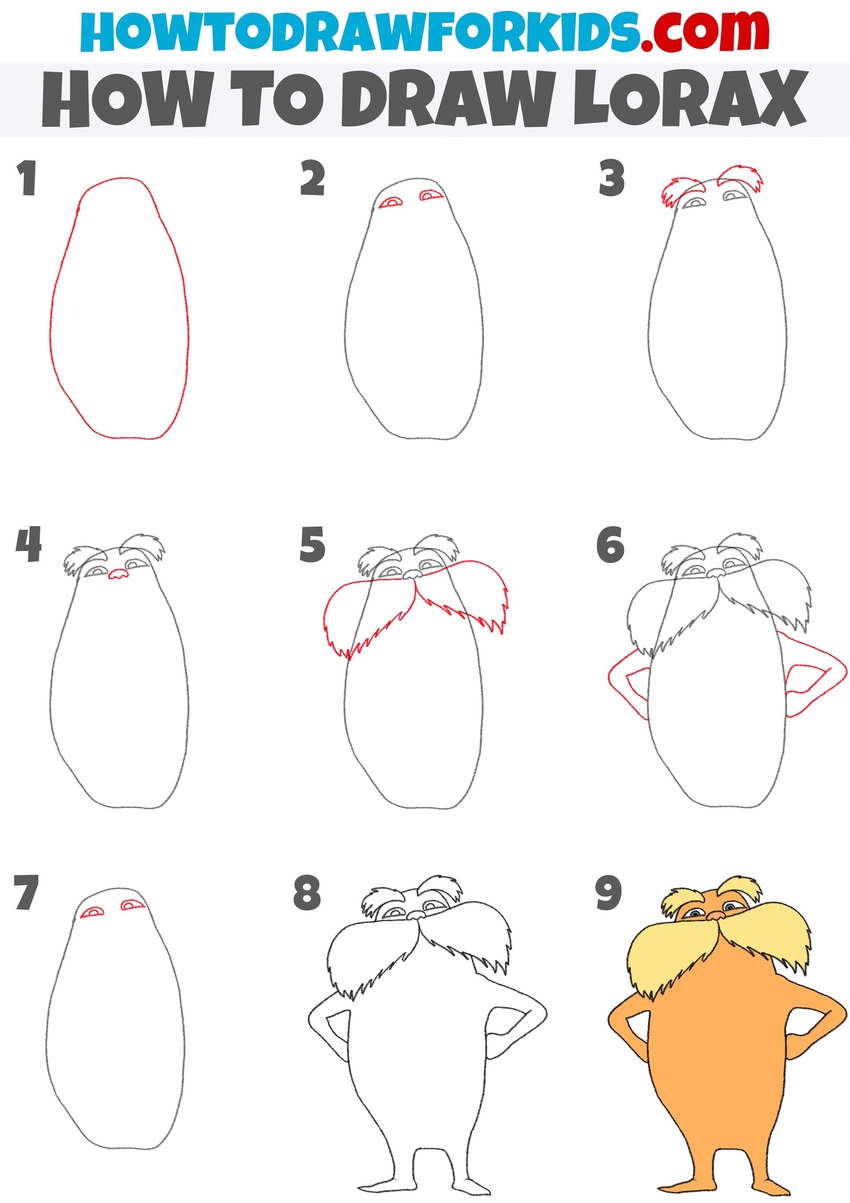
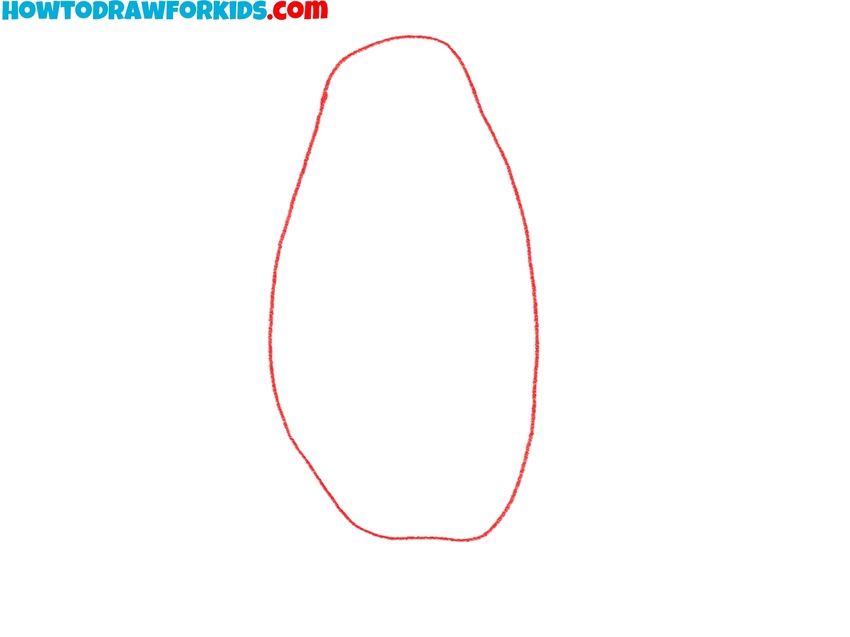
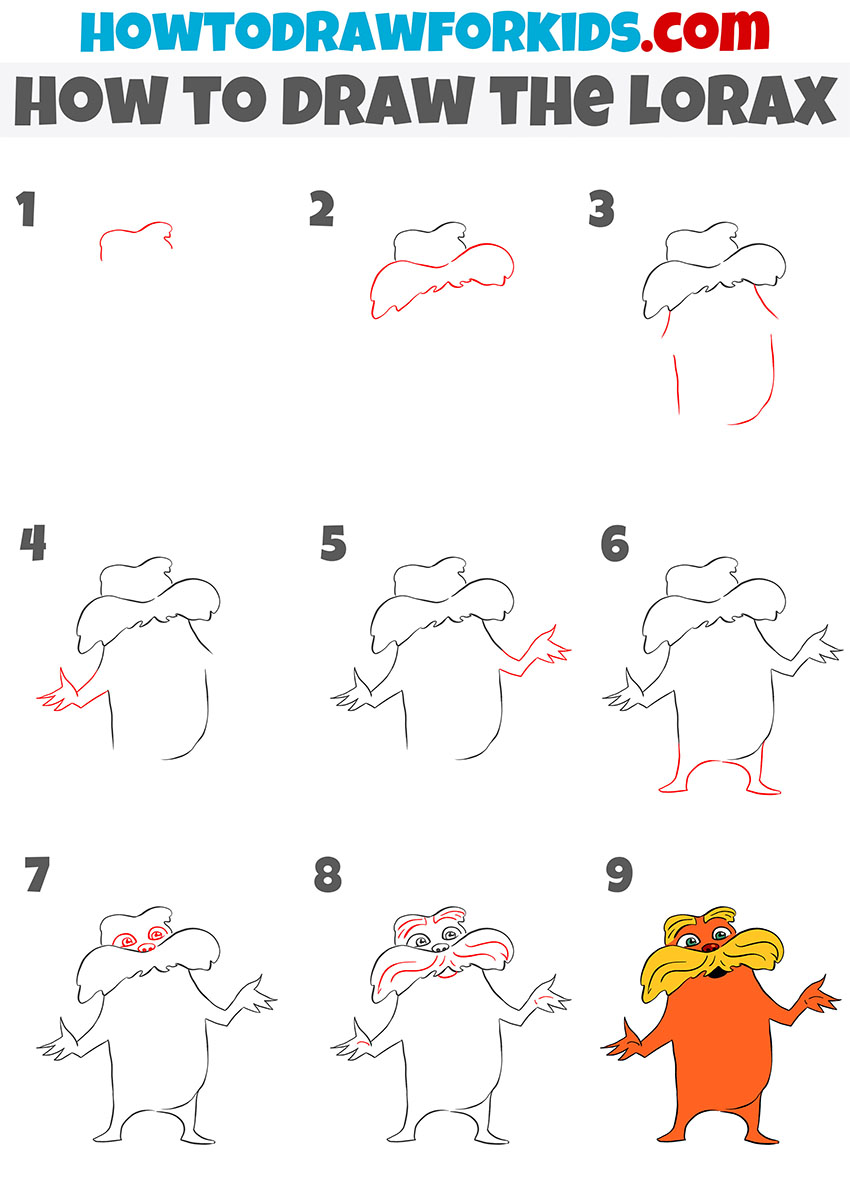
How to Draw Lorax
- Create the Lorax’s body form.
Sketch the main outline of the Lorax’s body. Use a tall, rounded oval shape that’s slightly narrower at the top and wider at the bottom. You can draw the outline with a smooth line for a cleaner style, or use a slightly jagged, uneven line to illustrate the texture of fur.
- Draw the Lorax’s eyes and pupils.
Inside the top third of the body, sketch two small ovals for the eyes. After that, draw the pupils inside the eyes using two small circles. The direction of the pupils determines where the Lorax is looking – center for a neutral gaze, to the sides for a turned look, or upward/downward for a thoughtful or sad expression.

- Add the fluffy eyebrows.
Above the eyes, add large bushy eyebrows using short, jagged lines to mimic fur. These are one of his most recognizable features of the character. You can adjust the angle or position of the eyebrows to change the emotion. Raised brows give a surprised or thoughtful look, while lower ones show seriousness.

- Sketch the nose under the eyes.
Draw a rounded, bean-like nose just under and between the eyes. First, draw the upper edger of the nose as a small curve. Then, draw the bottom edge of the nose and create the middle point and wings with a smooth W shape.

- Sketch the signature mustache.
Now sketch the large mustache that spreads outward from under the nose. Use a series of curved, jagged lines to show its fluffy texture. This feature dominates the face, so take time to make it look polished and symmetrical. You can vary the shape of the mustache.

- Draw the Lorax’s bent arms with hands.
Draw the arms of Lorax bent and resting on the hips using long, smooth lines. The hands should be simple and the fingers can be shown separately or as a single shape depending on style. You can change the pose for variation. For example, raise one arm with a pointing hand or cross both arms.

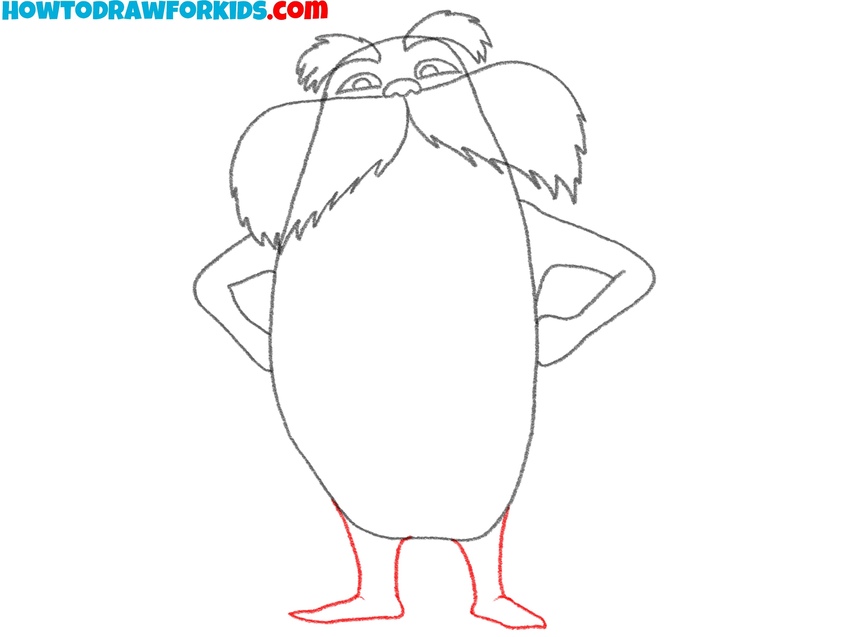
- Add the legs and feet.
Next, sketch two small legs extending from the bottom of the body. The legs should be short and slightly apart, with small simplified feet. For variety, adjust the pose – space the legs wider, draw one leg slightly forward, or bend one knee for a stepping pose.
- Finalize shapes and edges.
Detail the textured areas like the eyebrows and mustache with extra jagged strokes. This is the time to adjust any lines and body parts. Add small details like lines beneath the eyes for expression or slight curves to show fur direction. Also, it’s time to erase the guidelines from your Lorax drawing.

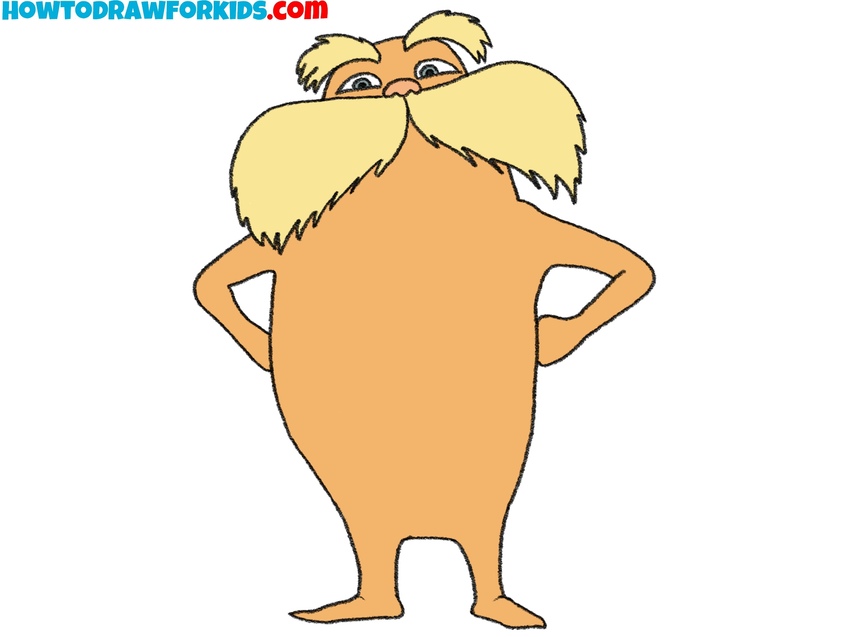
- Add color to the Lorax.
To paint your Lorax drawing, use orange for the body and arms, and yellow for the mustache and eyebrows. Standard versions of the Lorax use these colors, but you can try variations. Change the background color to reflect different scenes – green for a forest, blue for sky, or even gray for a more serious tone.
Alternative Lorax Drawing Tutorial
The steps in this version are organized to begin with facial features. The arms and fingers are drawn with more exaggerated gestures, and the legs have a spread stance. The entire illustration is slightly more simplified.
First, sketch the eyebrows using a fluffy curved shape, then draw the large, wide mustache below them. Extend simple lines for the sides and curve the bottom line to close the torso. Draw the arms next, with hands stretched outward and fingers spread, using jagged lines to show fur texture.
Add the feet with small flared curves. Draw the eyes below the eyebrows and place the nose between them. Complete the face by adding the mouth and detailing the mustache. Color the entire Lorax drawing using orange for the body and yellow for the facial hair.
Conclusion
Many of the drawing tutorials on my website are broad in focus, teaching how to draw animals, people, or basic drawing skills. In addition to those, I’ve also created many highly specific tutorials, such as this one on how to draw the Lorax.
In my experience as a drawing instructor, this combination works well for helping artists in their learning process – they develop fundamental skills while also improving through drawing characters they enjoy and find interesting.
If you’re also interested in drawing various characters like the Lorax and others, be sure to check out other categories on my site. And don’t forget to share this tutorial with your friends so they can learn how to draw the Lorax too.