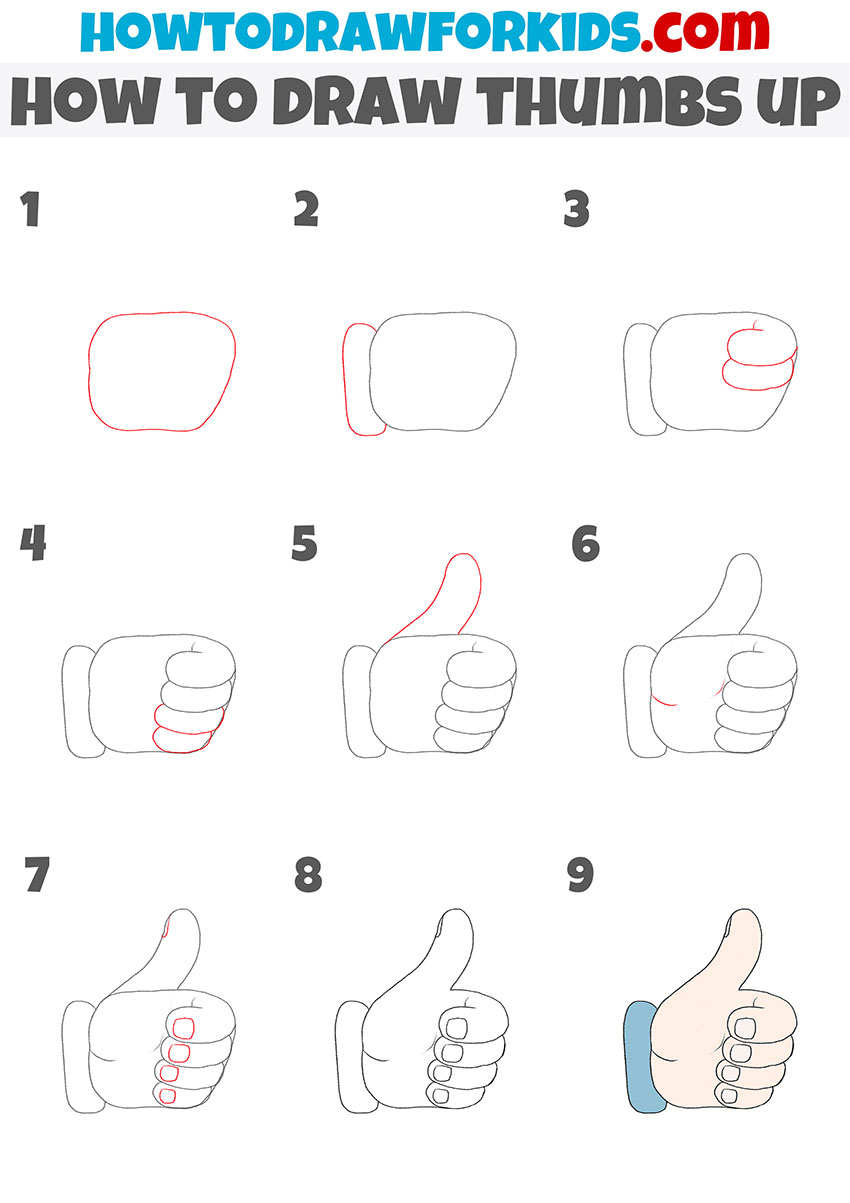
How to Draw Thumbs Up
In this drawing lesson, you will learn how to draw thumbs up. This lesson will help you improve your artistic skills.

I suggest you complete an interesting and very useful drawing lesson, in which I will tell you how to draw thumbs up step by step. The gesture shown in this drawing is one of the most popular, so you can use the skills learned in this lesson to draw many of your other paintings.
The gesture in which the thumb is raised up means approval, consent, a sign of good mood or good luck. When you show this gesture, it may mean that you are all right. The thumbs up drawn in this tutorial has a positive meaning, so with the help of this symbol you can complement your various drawings or comics if you want to depict a sign of approval.
You can also draw any person or character that will show this gesture. This lesson does not have too complex elements, so you can easily cope with it.
Materials
- Pencil
- Paper
- Eraser
- Coloring supplies
Time needed: 25 minutes
How to Draw Thumbs Up
- Draw the outlines of the palm.
In order to complete this step, you will need to depict the figure using a curved line.

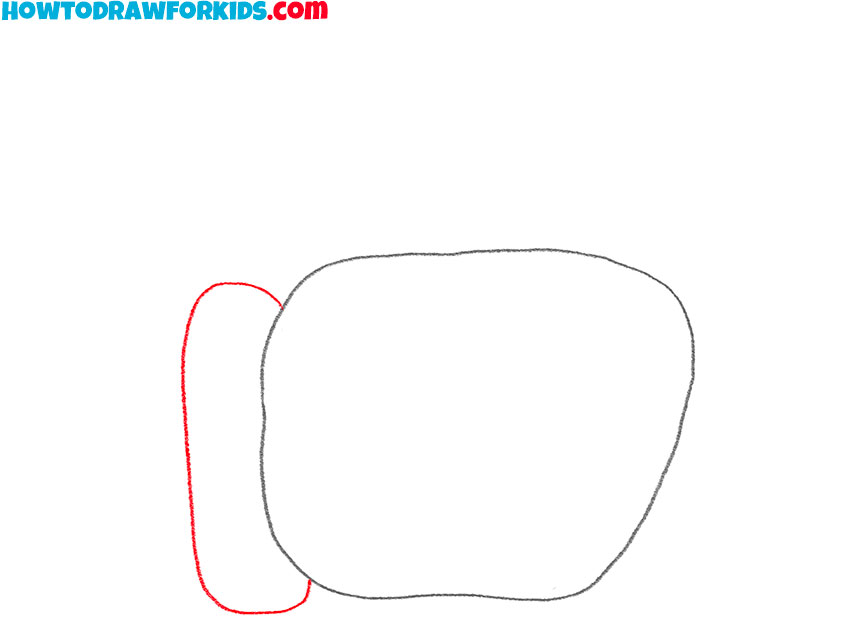
- Sketch out the sleeve.
On the left side of the previously drawn shape, draw one curved line, as shown in the figure.
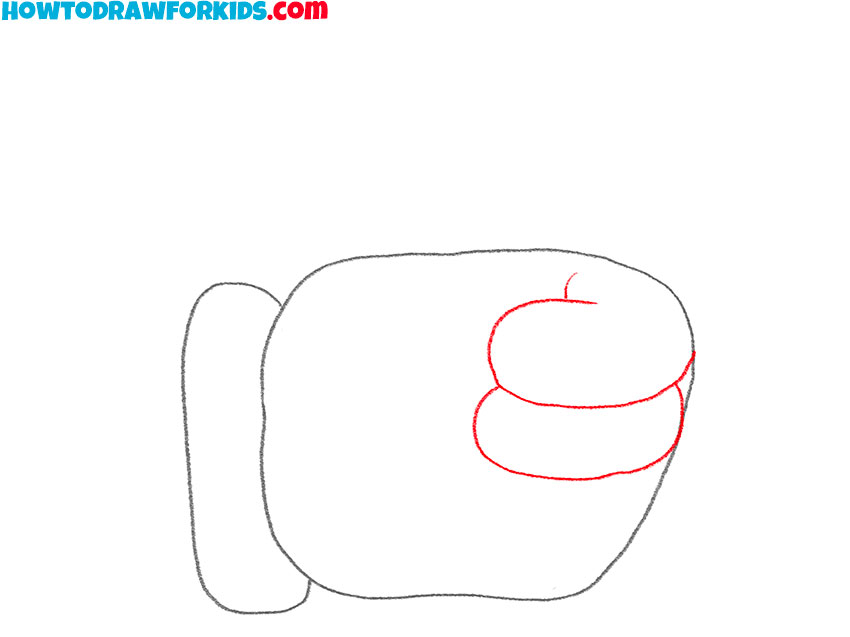
- Add two bent fingers.
In the upper right part of the palm, draw two fingers using curved lines and an incomplete oval.
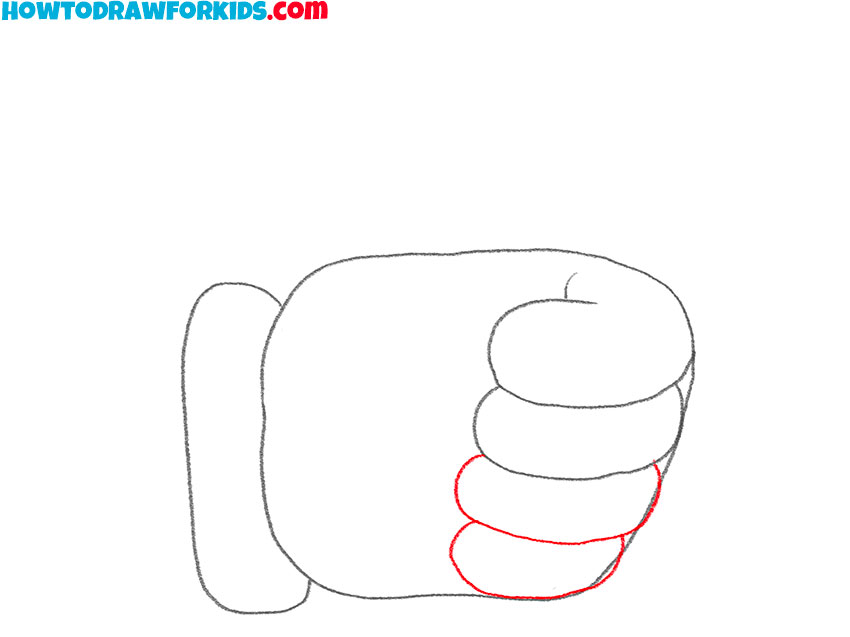
- Sketch out two more fingers.
Below the two drawn fingers, draw two more fingers in the form of incomplete ovals.
- Depict the outlines of the thumb raised up.
Above the drawn outline of the palm, draw the thumb in the form of a long, curved line.

- Make the drawing more realistic.
To make the drawing look voluminous, draw a thin, curved lines across the palm of the hand.

- Draw the nails on the hand.
On each finger, depict the nails using curved lines of varying lengths.

- Correct inaccuracies.
To prepare the drawing for coloring, remove extra lines from it with the eraser.

- Color the thumbs up.
Choose any color for the drawing.
I remind you that you can download the PDF file that I have prepared especially for your convenience. This file contains a short version of this lesson and has additional useful training materials. Download this file so as not to lose it and return to this lesson at any time convenient for you.