How to Draw the Stanley Cup
Follow this easy guide on how to draw the Stanley Cup to sketch a simplified version of the legendary hockey award using simple lines.

How to Draw the Stanley Cup: Introduction
The Stanley Cup is one of the most recognizable trophies in professional sports, known for its tall, tiered structure and distinctive bowl on top. In this tutorial on how to draw the Stanley Cup, we’ll go through a simplified version that keeps the major features while making it easier to sketch step by step.
Getting the symmetry right is one of the main challenges. Each section should curve slightly but evenly, and all the stacked rings should match in height and width. It helps to measure one section and repeat that spacing as you move down the drawing.
The bowl at the top sits above a narrow stem, which is shaped with ridges that resemble folds or engraved details. Make sure the top part of the Cup looks proportionally smaller than the base.
with different versions of the Cup, you could also stylize it with extra details like ribbons or a spotlight. This version stays close to the classic form.
Stanley Cup Drawing Tutorial
Materials
- Pencil
- Paper
- Eraser
- Coloring supplies
Time needed: 30 minutes
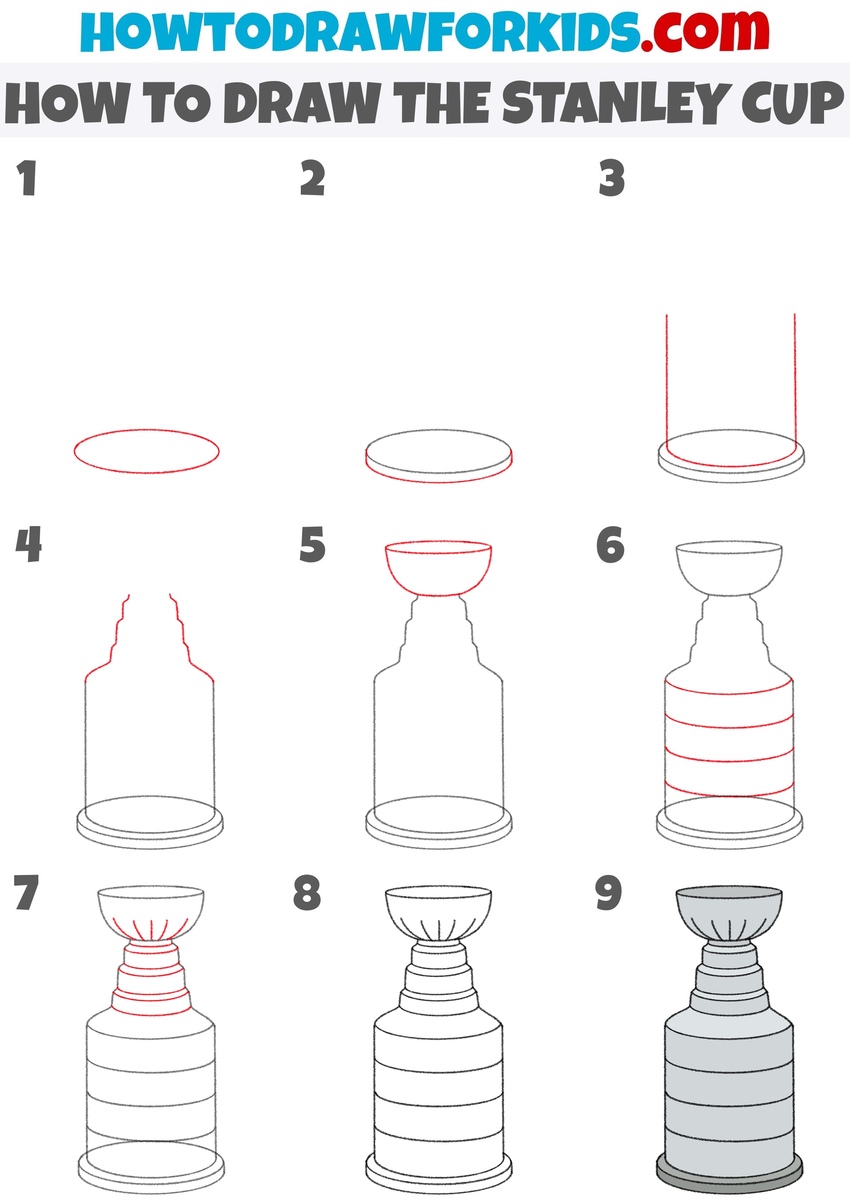
How to Draw the Stanley Cup
- Start drawing the base of the Stanley Cup.
Sketch a wide, horizontal oval near the bottom of the page. This will form the base of the Stanley Cup. The oval should be fairly flat, as it represents the bottom platform seen in perspective. Make sure your shape is symmetrical, with the sides curving smoothly.

- Add thickness to the trophy base.
To make the award base look three-dimensional, draw a curved line that follows the outline of the oval from the previous step. This line creates the side edge of the stand. The distance between this line and the oval should be slightly larger in the center and smaller at the edges to create a sense of perspective.

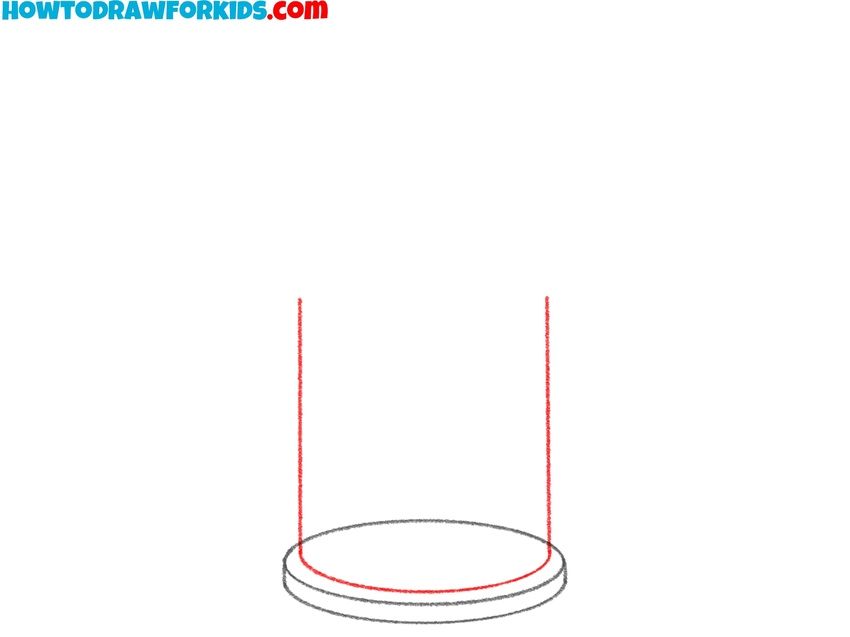
- Draw the Stanley Cup side edges.
Draw another similar curve to illustrate the bottom edge of the column. Next, extend two straight vertical lines upward from the sides of the base to define the height of the trophy’s cylindrical body. These lines should be perfectly parallel and have the same length.
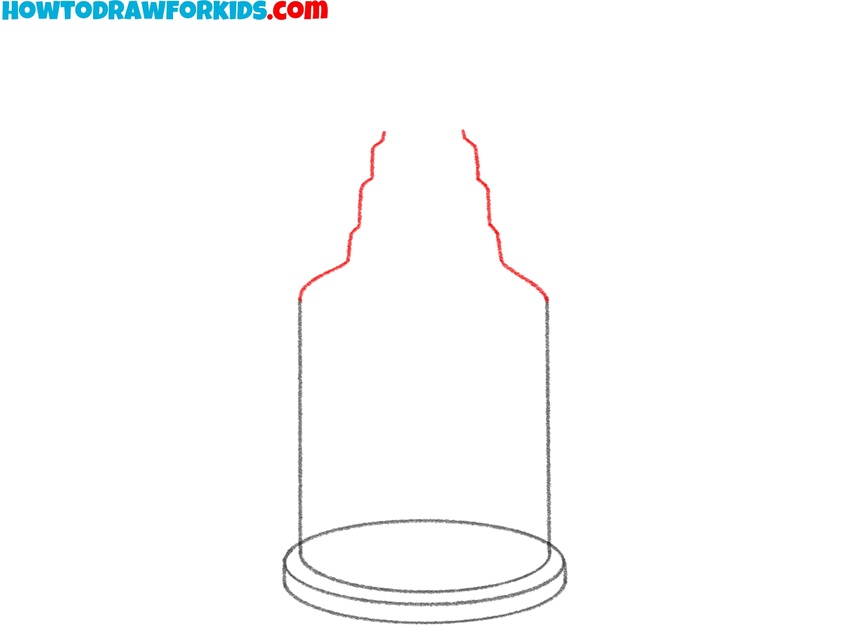
- Illustrate the sloping neck.
Continue the trophy’s outline by adding the sloped and stepped upper contour above the vertical lines from the previous step. Start from the top of each vertical line and draw a series of small inward notches or curves to represent the stepped narrowing of the cup’s neck.
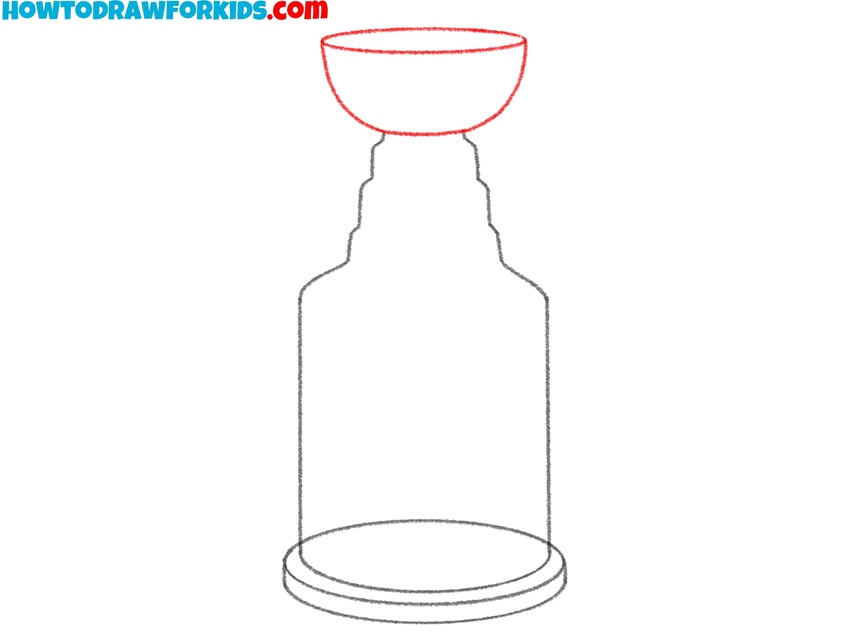
- Sketch the bowl at the top.
Draw a wide, shallow bowl shape at the top of the cup. First, sketch a curved line at the top of the fugure you drew earlier. Then add an oval above to complete the bowl shape. This part represents the iconic bowl where the names of champions have been engraved over the years.
- Divide the column into segments.
Now draw four evenly spaced horizontal lines across the cylindrical portion of the cup to represent the stacked ring sections of the Stanley Cup’s body. These lines wrap around the trophy’s curved form, so draw them as slightly curved ellipses.

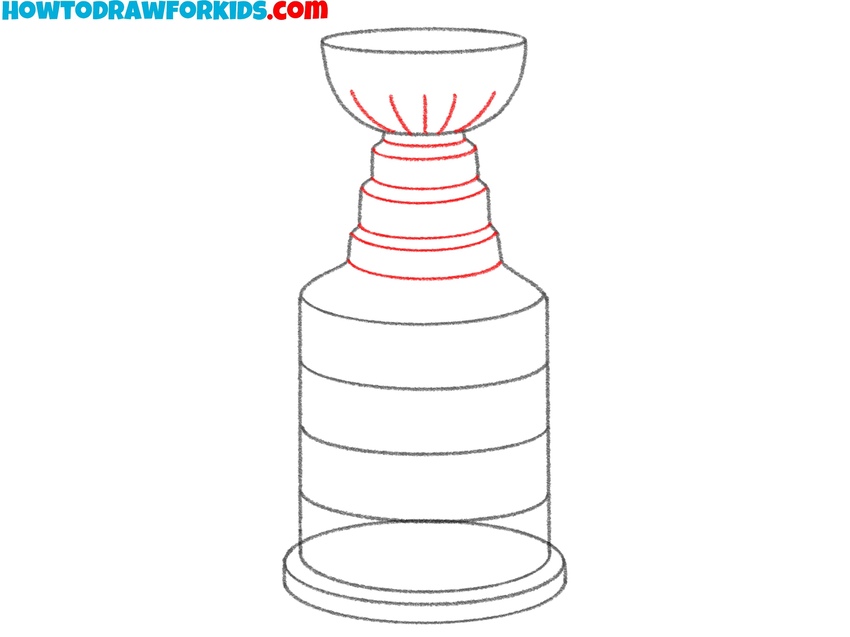
- Detail the top of the trophy.
Add five or six narrow vertical lines inside the bowl shape, fanning out slightly from the center. After that, draw a series of horizontal, slightly curved lines to give the stepped part of the Stanley Cup a more realistic and three-dimensional look.
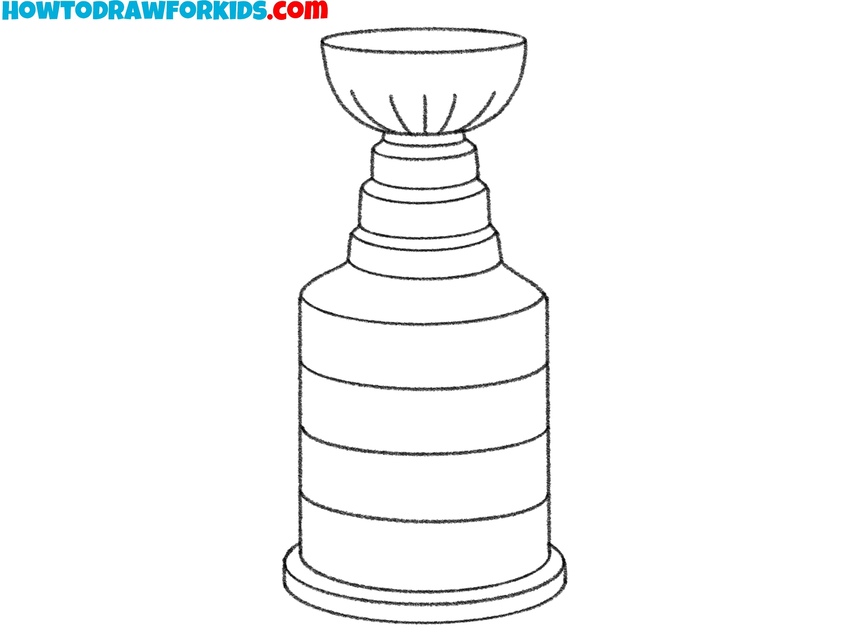
- Finalize the outlines of the trophy.
Carefully trace over the entire drawing of the Stanley Cup with a darker pencil or pen. Strengthen the outline of the bowl, the body, and the base. Clean up construction lines to keep the drawing clear and polished. You should now clearly see the silhouette of the Stanley Cup, complete with tiers, base, and bowl.
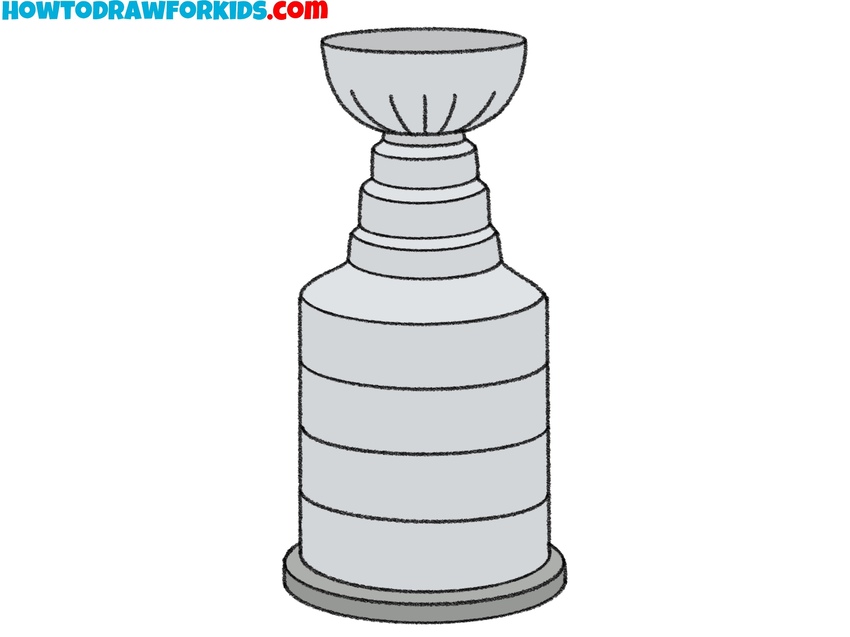
- Color your Stanley Cup drawing.
Paint your drawing of the Stanley Cup with the help of cool shades of gray and silver to reflect its real-world metal surface. Make the edges facing to the side a little darker, and the edges facing up a little lighter. Use a darker gray for the base. For a more realistic look, you can add shadows and highlights.
Conclusion
This was a tutorial on how to draw the Stanley Cup and it is based on simple shapes and structures. This guide will help you build a strong foundation for your drawing skills.
By drawing the Stanley Cup step by step, you practiced symmetry, proportion, and perspective – key elements in understanding how to structure complex objects from basic forms. Working with stacked cylindrical shapes and curved lines also strengthens your ability to visualize and draw three-dimensional objects in a clean and consistent way.
If you’d like to continue practicing with other iconic objects, consider visiting the trophy drawing tutorial or try the hockey stick drawing tutorial to pair it with the Stanley Cup.
Also, you can try my tutorial on how to draw a hockey player, to boost your person sketching skills and add more hockey themed tutorials to your sketchbook.
To keep up with new lessons, make sure to follow on Pinterest where printable worksheets are posted regularly, and subscribe to the YouTube channel for full-length video tutorials.