How to Draw Tigger
I’ve always loved Winnie the Pooh and the characters from this good fairy tale, I hope you do too, since now we’ll learn how to draw Tigger.
In this lesson, I want to show you how to draw Tigger. This is everyone’s favorite character from the cartoon about Winnie the Pooh. The tiger is cheerful, agile, and energetic. This character is constantly on the move and loves to bounce.
The Tigger has many fans. After the release of the cartoon, the image of the Tigger could be seen on various objects, and toys appeared in the image of this character.
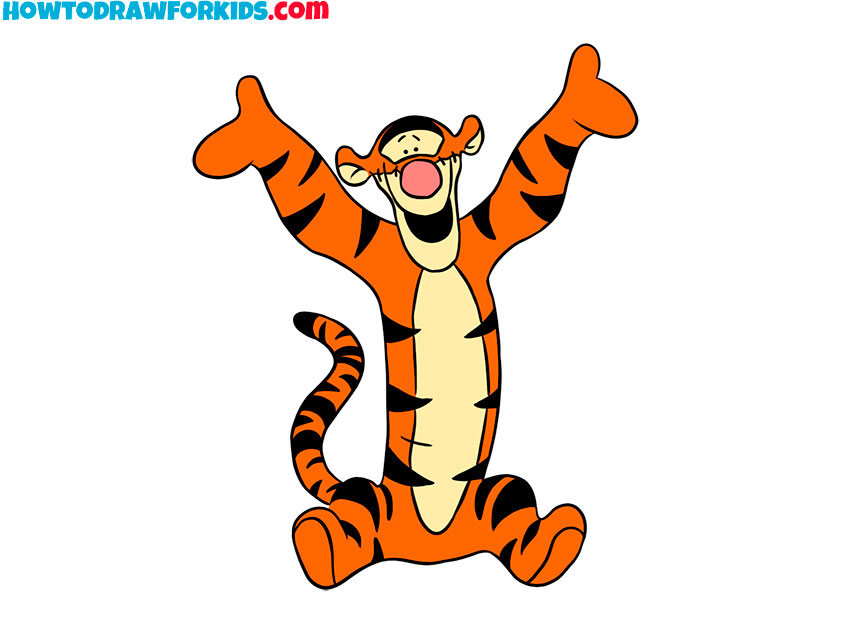
In the picture, the Tigger raised its paws up and smiles. This cute character looks very funny. Try to correctly depict the emotions of the Tiger in your drawing. During the lesson, be careful and attentive, use small tips to get a good result.
Materials
- Pencil
- Paper
- Eraser
- Coloring supplies
Time needed: 30 minutes
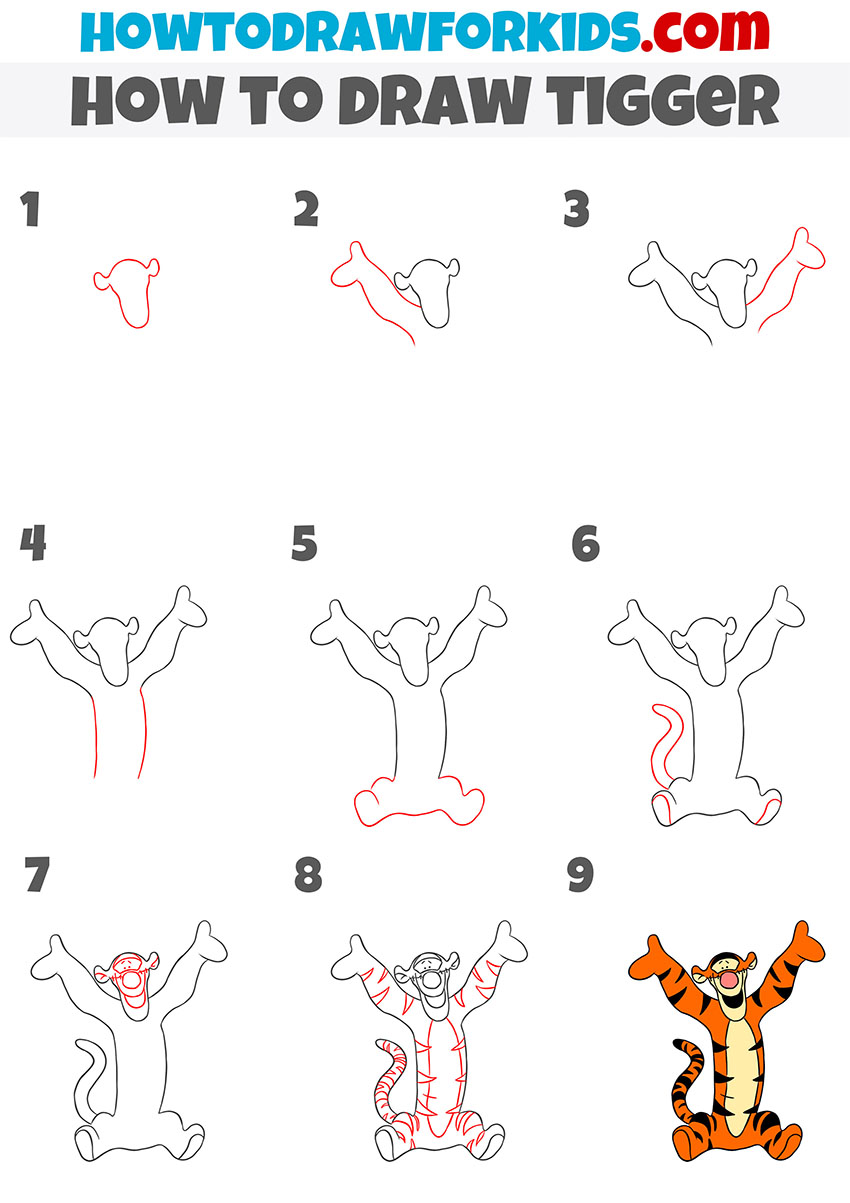
How to draw Tigger step by step
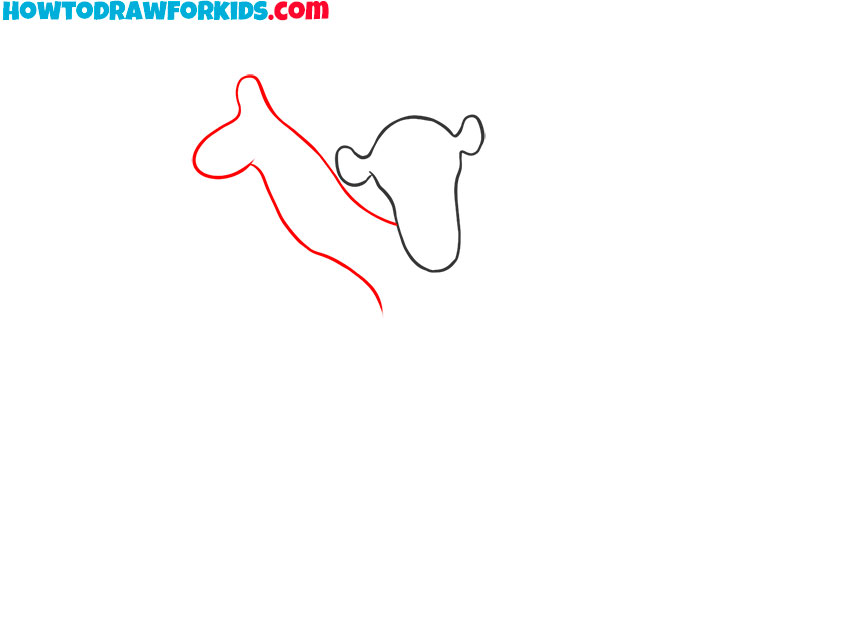
- Sketch Tigger’s basic head shape.
Draw a rounded peanut-like head for Tigger, narrower at the bottom where the muzzle will be located at the next steps. Add two small semicircle ears on the sides, keeping them level with each other. Keep lines smooth and continuous; the character design is built from soft curves.

- Sketch the lifted arm and paw.
On the left side, draw a lifted arm that rises diagonally and ends in a rounded paw. Keep the arm thick at the shoulder and a touch thinner toward the wrist. Don’t forget that this is a toy, and the hands, like the other parts, should have an appropriate appearance.
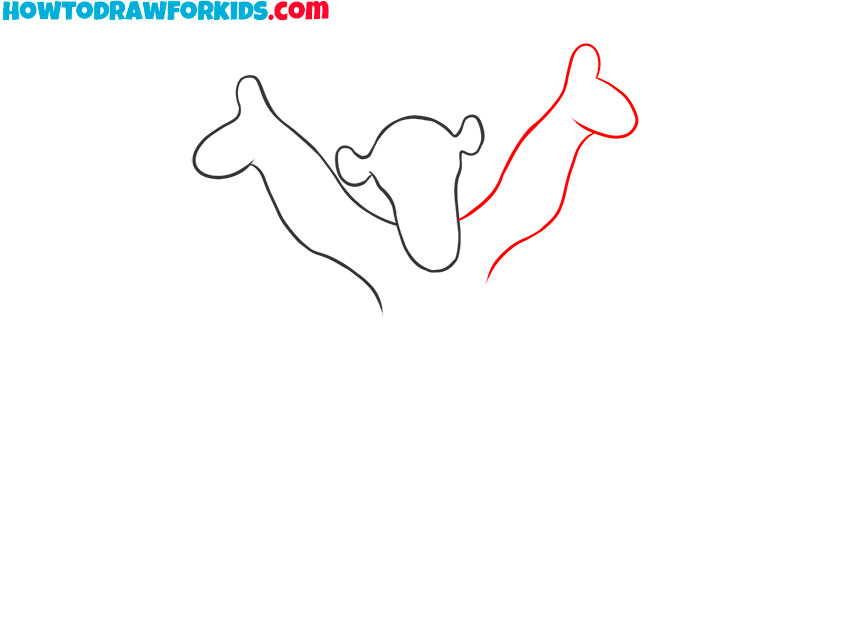
- Draw Tigger’s second raised arm.
On the right side of the head, illustrate another raised arm, matching the angle and thickness of the left. Let the upper arm emerge from behind the head, ending again in a simple paw shape with a rounded thumb area. Make sure the arms sit at the same height.
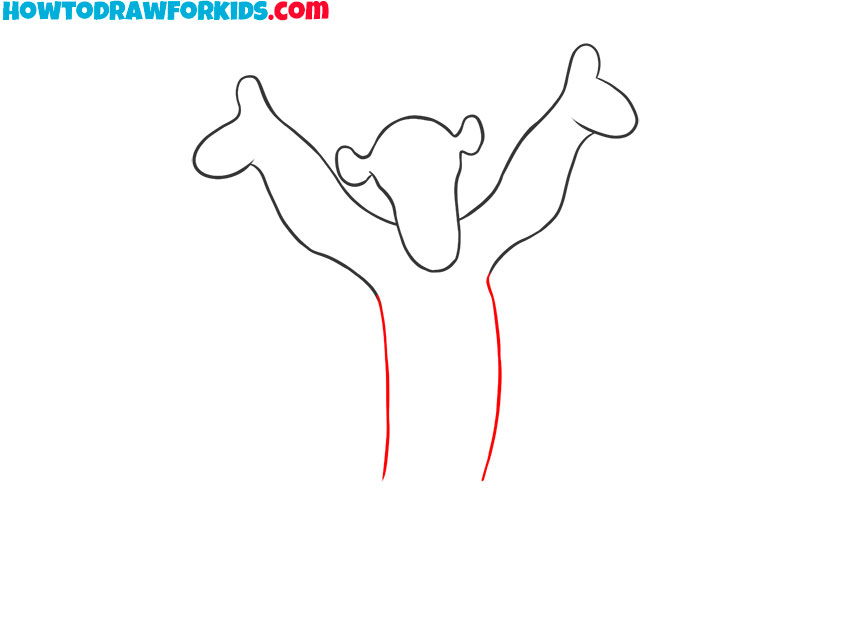
- Outline the tall torso shape.
Now move slightly lower and sketch the left and right edges of the torso. The torso shape should be narrower at the waist.
- Draw the legs of Tigger.
Sketch two bent legs that extend forward from the bottom of the torso. Each leg can be drawn as an L-shaped curve with a thick calf and a simple, padded foot. Ensure both feet are similar in size and sit on the same level line.
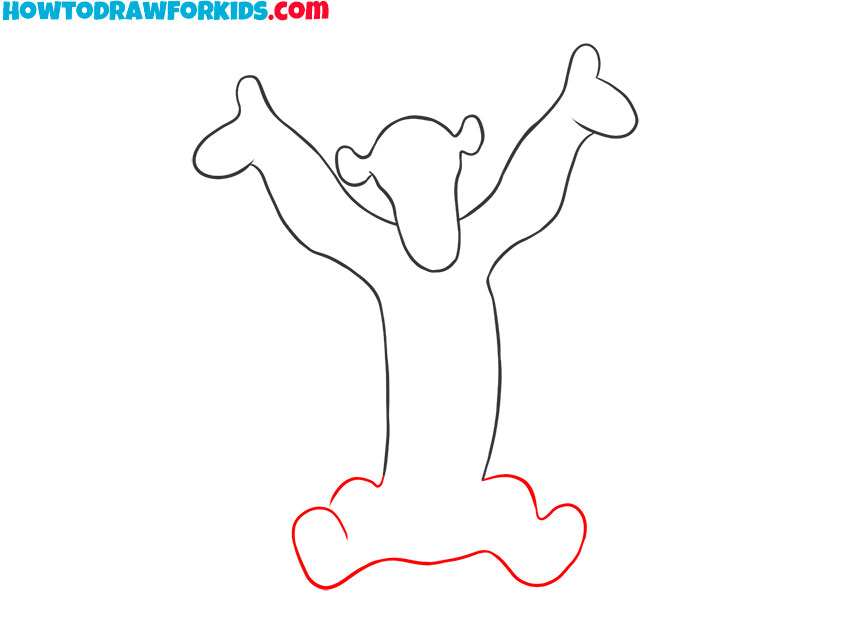
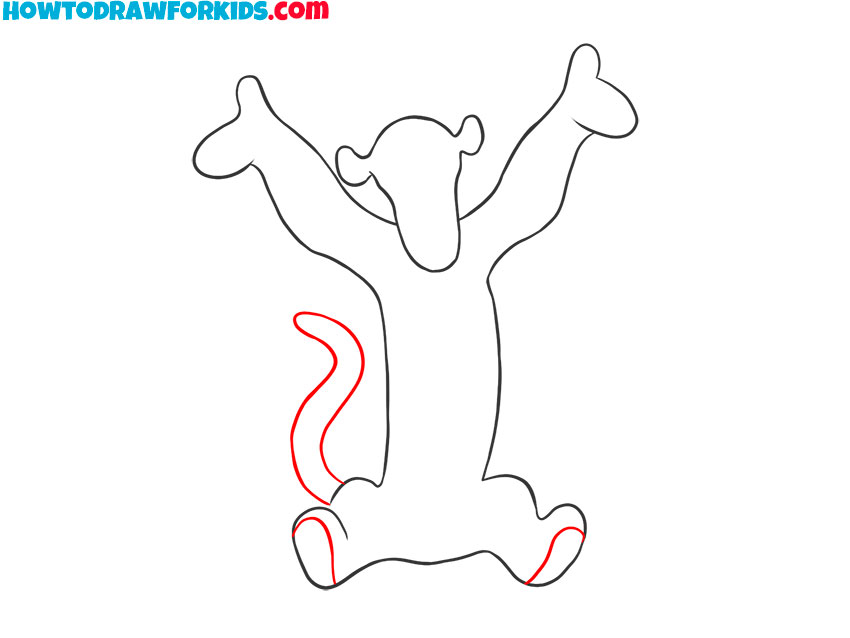
- Sketch the tail and mark paw pads.
Complete the silhouette with a tail and cleaner edges. From the left side of the body, illustrate a long, flexible tail that curves upward in an S-shape and ends in a rounded tip. This tail is similar to the one as in the cat tail drawing tutorial. Then, mark simple ovals on the bottom of each foot.
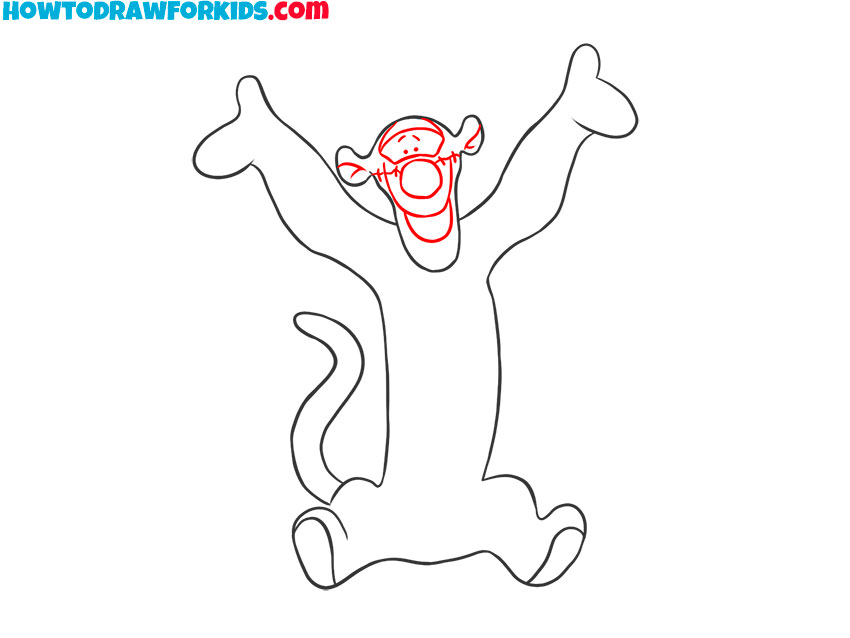
- Add Tigger’s face features.
Inside the head, draw in detail the face and oval muzzle of Tigger. Add a wide oval nose centered high on the muzzle, a smiling mouth opening beneath it, and small cheek lines that reach toward the corners. Place two oval eyes above the muzzle with tiny pupils. Add inner ear curves and short eyebrow arcs.
- Erase guides and add tiger stripes.
Remove any construction marks. With a clean surface, illustrate Tigger’s stripes: short tapered triangles and broken bands along the arms, sides of the torso, tail, and legs. Vary length and angle, keeping them denser near the extremities and leaving the belly panel free of stripes. You can also add a few seam lines on the paws and small whisker dots on the muzzle.

- Color Tigger with orange and cream tones.
Fill the fur with a bright orange, coloring the belly, muzzle, and inner ears a light cream, and make the nose pink. Color the stripes deep black and the pupils dark, leaving small white highlights. You can add slightly darker orange along the outer edges of arms and tail to give the sketch some dimensions.

Tigger is ready! I hope you had a good time and gained useful skills. At the end of the lesson, I want to remind you that, by tradition, I have prepared for your convenience a short version of this lesson in the form of a PDF file. Download this file and use it anytime.