How to Draw an Orc
This tutorial will tell and show you how to draw an orc for kids. The lesson will be extremely simple, and understandable for children.
This guide will be useful for children primarily in that it will allow them to understand how to draw anthropomorphic creatures that are different from humans.
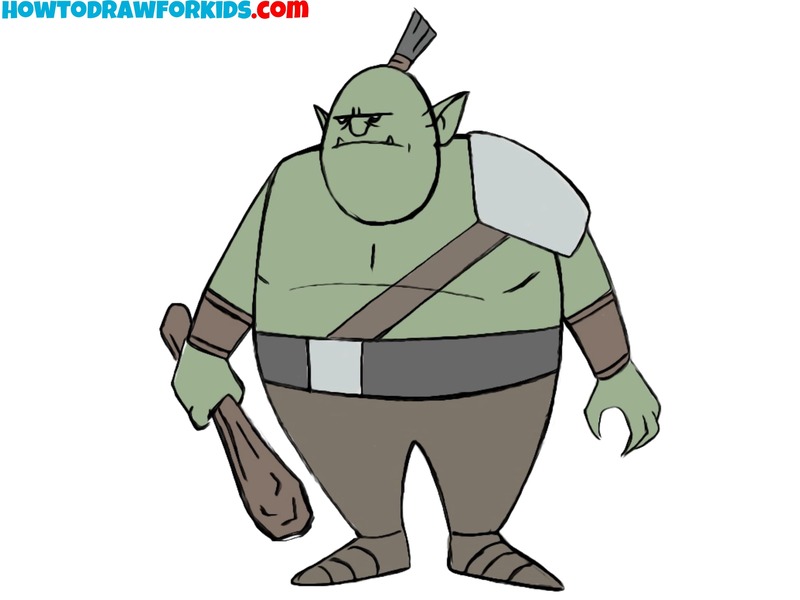
How to Draw an Orc: Introduction
Orcs are creatures in fairy tales of the peoples of Western Europe and in contemporary works of the genre of fantasy. Orcs are very similar to goblins and are among the “standard” creature types in fantasy.
Drawing orcs, like other fantasy characters and creatures, helps not only to improve skills in the fine arts, but also to develop imagination.
As you can see, there are quite a lot of small details on the orc’s body. If drawing all of them is difficult, then you can draw an orc without them.
So, if all the art supplies are ready, then it’s time to start the lesson.
Orc Drawing Tutorial
Materials
- Pencil
- Paper
- Eraser
- Coloring supplies
Time needed: 40 minutes
How to Draw an Orc for Kids
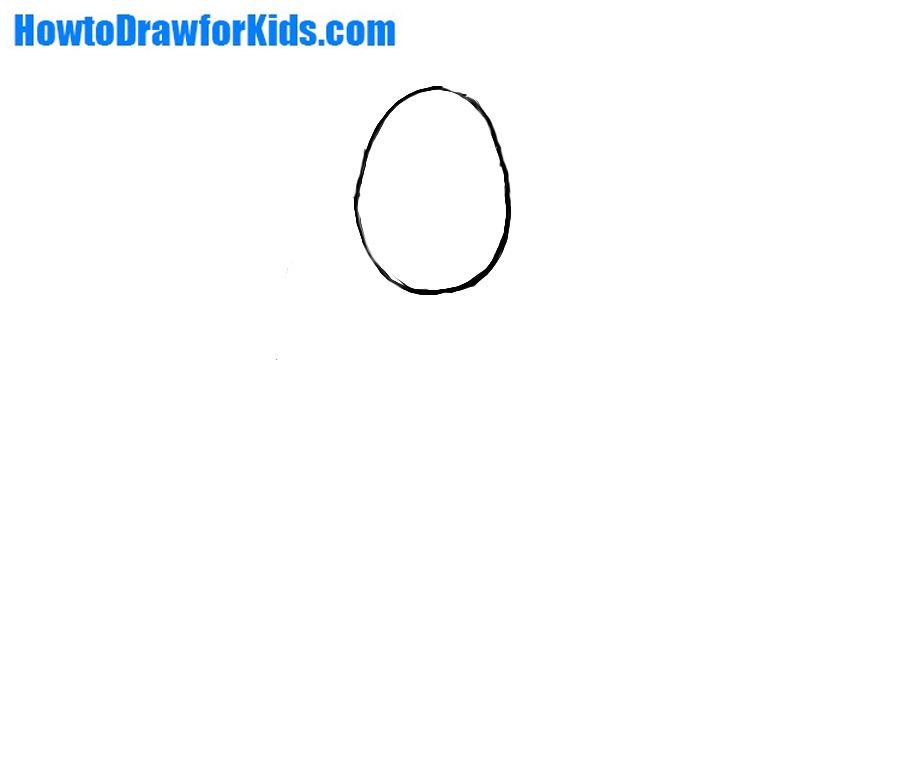
- Sketch the head of the orc.
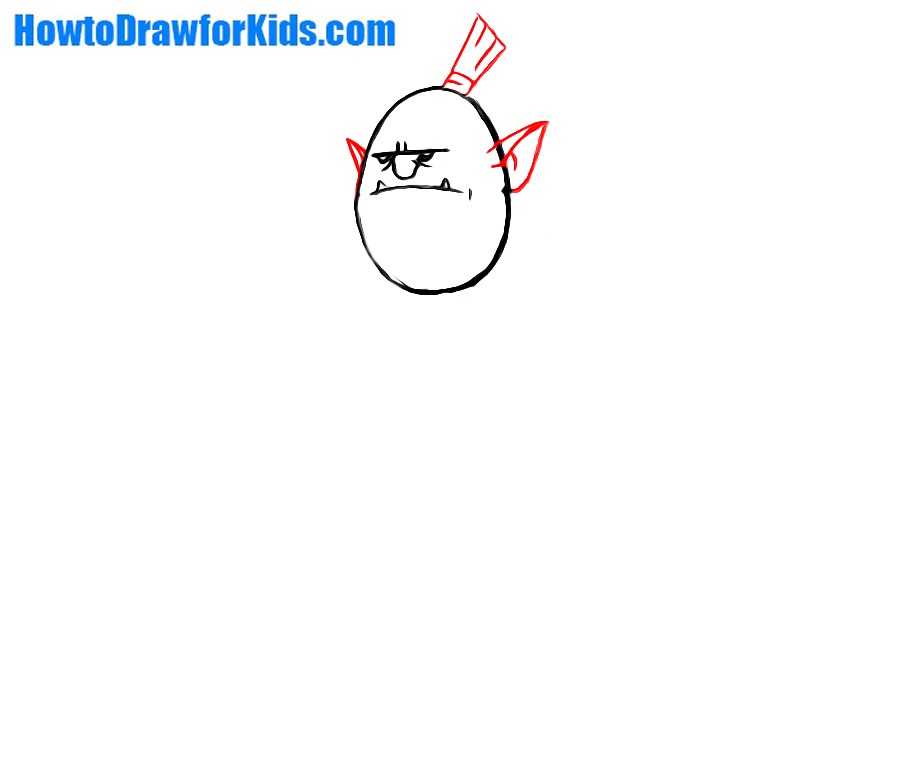
Begin by sketching an oval shape that will serve as the head of your orc. This oval should be slightly elongated vertically, resembling an egg. Position it in the upper center of your drawing area to leave room for the orc’s body and limbs.
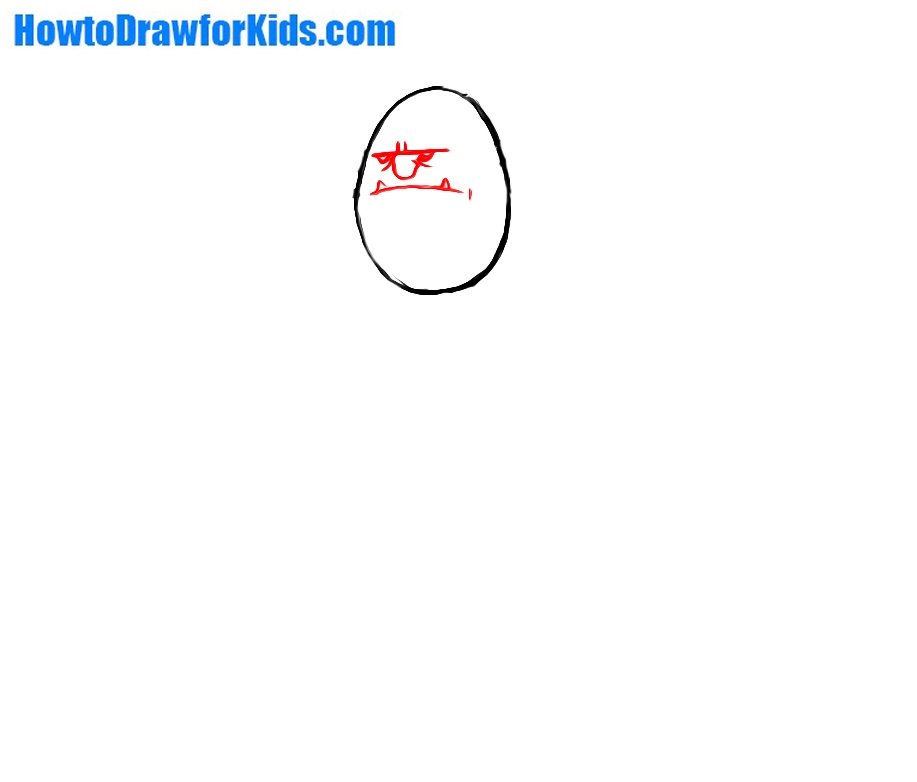
- Draw the facial features.
Sketch out the frown eyes, nose, mouth, and protruding fangs. Start with the eyes, placing two small, slightly tilted ovals near the upper middle of the head. Below the eyes, sketch a small, flat nose. Then, draw a wide, curved mouth to give your orc a menacing expression.
- Draw the ears and hair.
Add pointed ears on each side of the orc’s head. These should be triangular with the tips pointing slightly upward. Next, sketch the orc’s hair by drawing a vertical angular geometric shape at the top of the head and adding a few horizontal lines to indicate the decoration.
- Illustrate the torso of the orc.
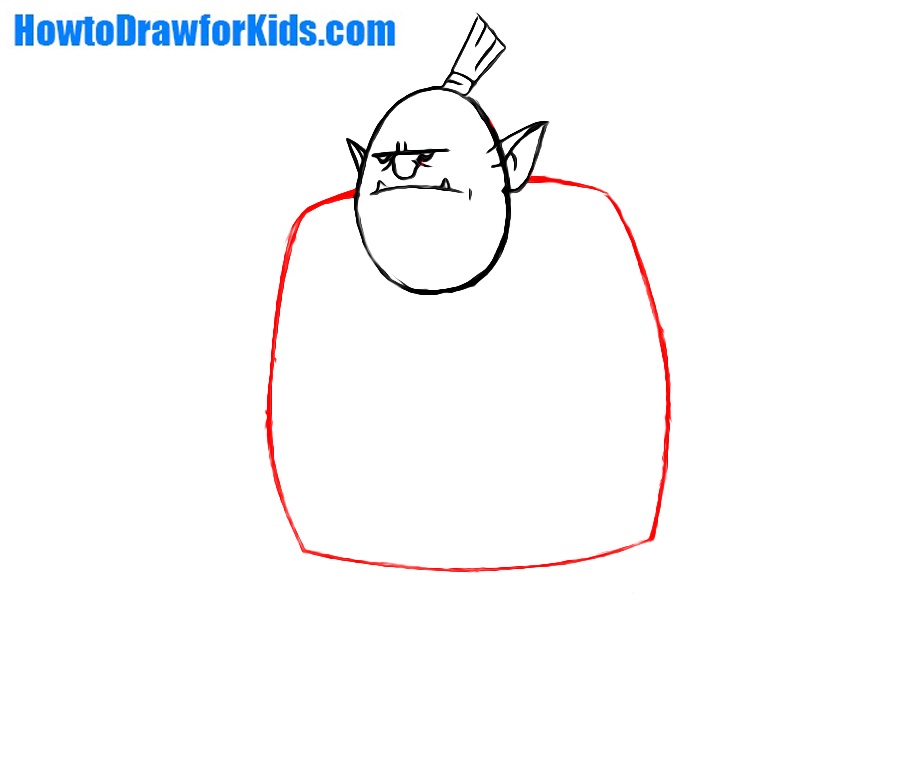
Now, move on to the orc’s body. Draw a large, rectangular shape beneath the head, slightly wider at the bottom to represent the torso. This shape should be noticeably larger than the head. The orc’s body should appear broad and muscular.
- Sketch the creatures arms.
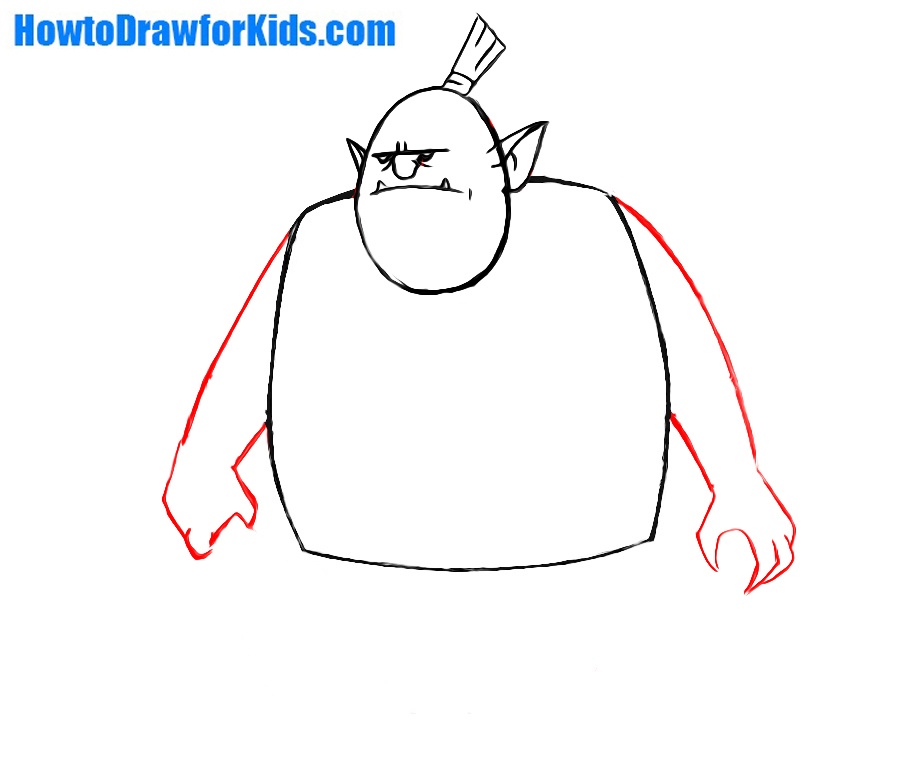
Sketch the orc’s arms by extending two curved lines from the sides of the torso. These lines should bend outward slightly at the elbows and taper towards the wrists. At the end of each arm, draw simple geometric shapes to represent the hands.
- Draw the legs of the monster.
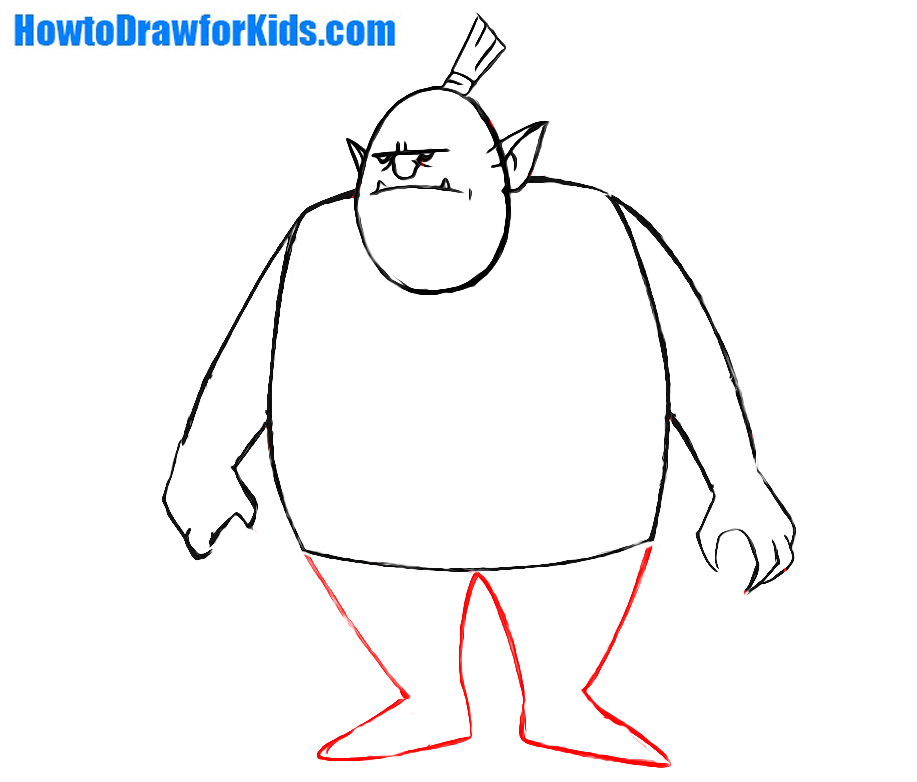
From the bottom of the torso, extend slightly curved lines downward, slightly spreading apart. These lines should form the orc’s legs. Draw the feet with simple, flat shapes to ground your orc. The legs should be thick and short.
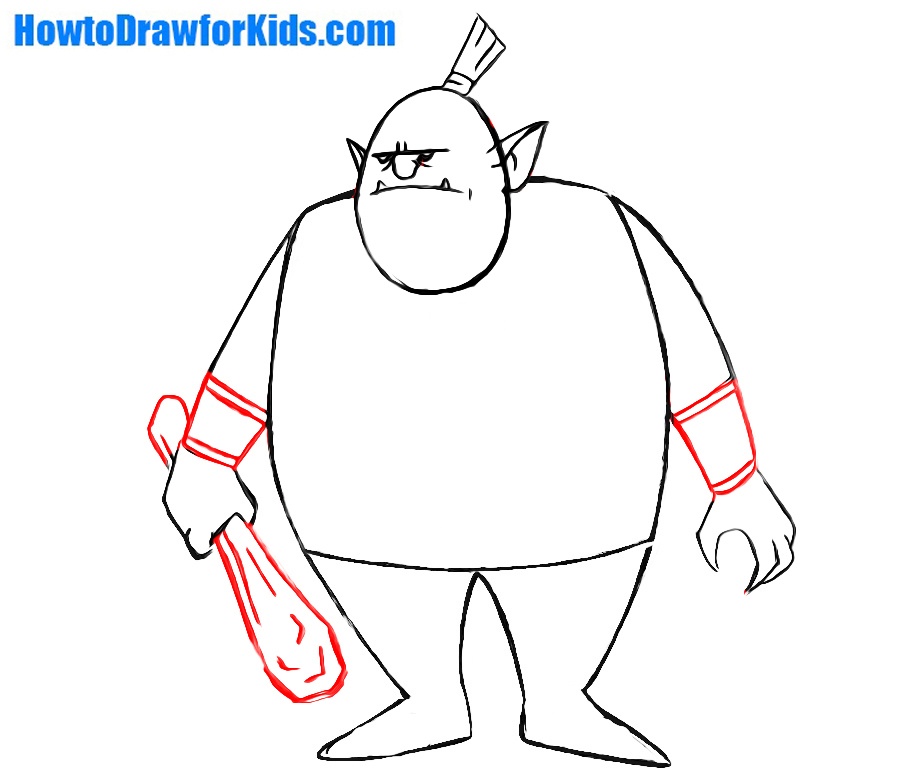
- Add the bracers and club.
Improve your orc’s appearance by adding armor details. Start with a wrist guard on the arms, drawing short lines around the wrist. Then, sketch the club in the arm. To make the club look more realistic, you can add texture to the thickened end. You can replace the club with another weapon, such as a sword or axe.
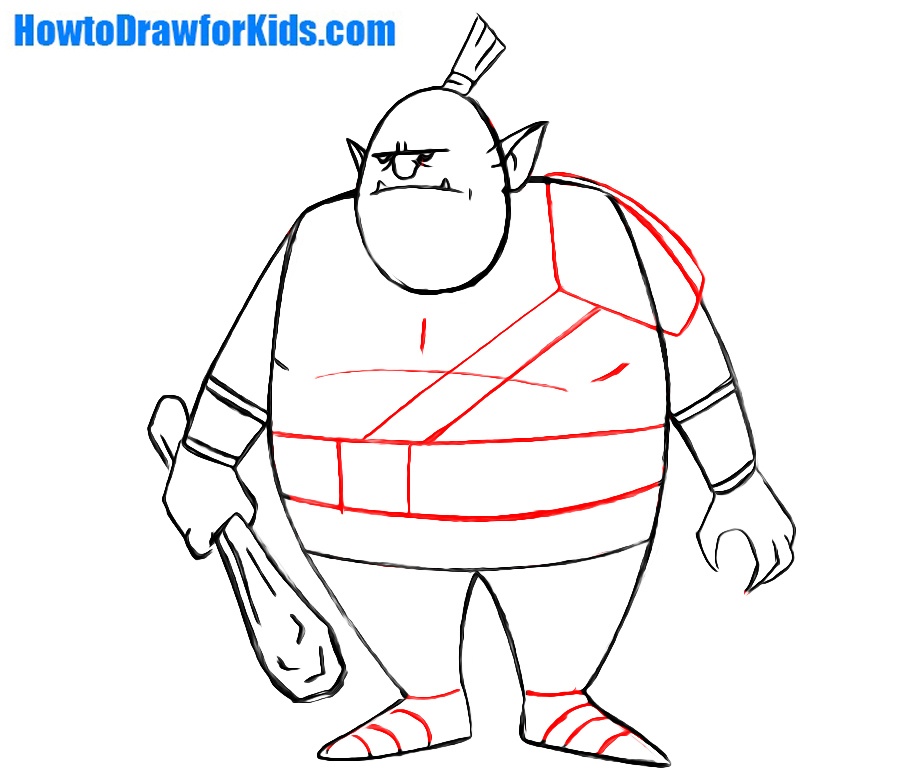
- Add some details to the costume.
Draw the orc’s clothing by adding a series of lines across the torso and legs. Start with a belt around the waist, drawing a horizontal line with a buckle in the center. Then, add a few straps or sashes crossing the torso diagonally. Then, sketch a simple shoulder pad on one side, just above the arm.
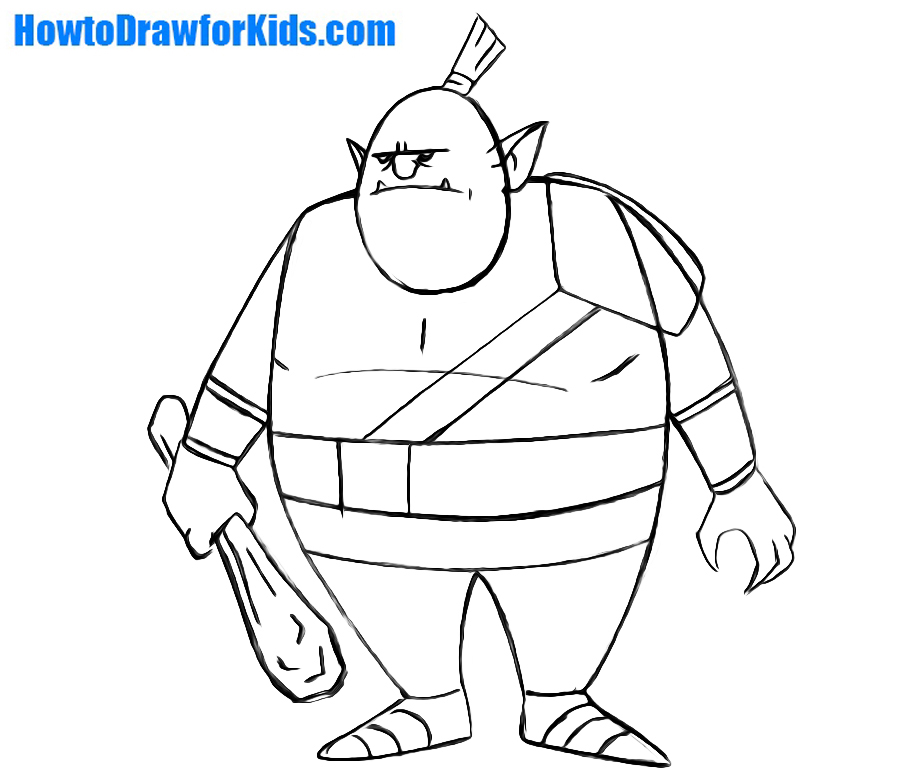
- Erase the guidelines from your sketch.
Go over your orc drawing, refining the lines and adding any additional details. Clean up any unnecessary lines from earlier steps and sharpen the outlines. Add texture to the armor and clothing with short, quick strokes. you can improve the facial features and expression, making the orc look more fierce.
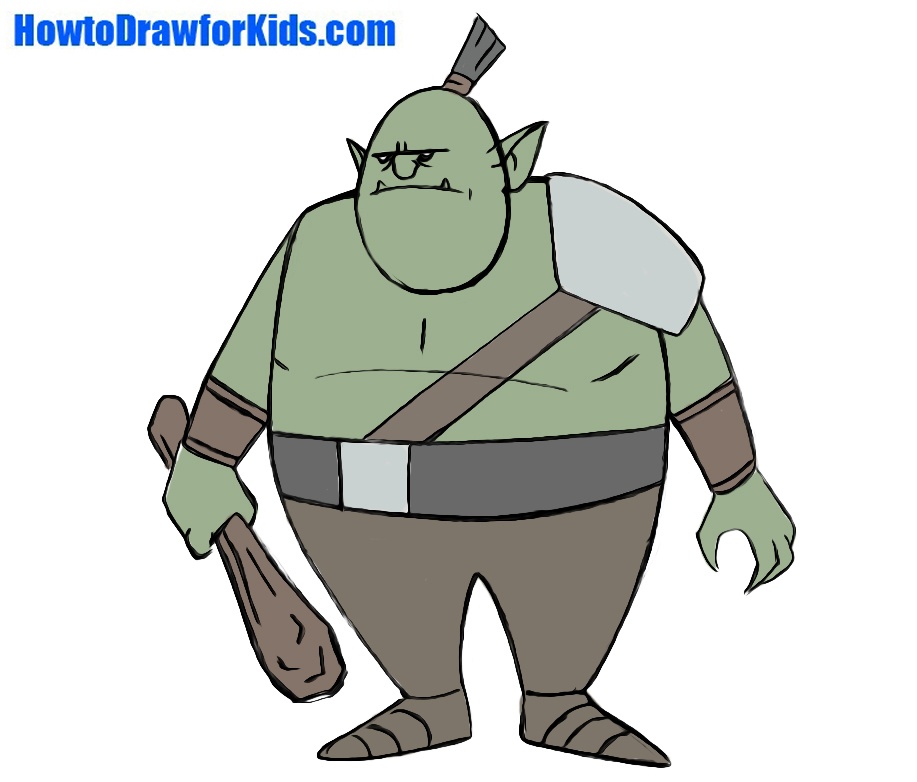
- Add looks to the orc drawing.
Use green for the skin. You can vary the shades to add highlights to the skin. Color the armor with dark, metallic tones, and use brown or grey for the clothing. You are free to add shading to give your orc a three-dimensional appearance. Your orc is now complete.
How to Draw an Orc: Video Tutorial
Improve Your Orc Artwork
So, orc drawing tutorial has come to an end, and it’s time to tell you how you can make your artwork even better and how to improve your artistic skills.
- Try to make your drawing of an orc more voluminous and detailed. To do this, add shadows and highlights to your drawing.
- Add additional elements to your drawing. These could be rings, tattoos, additional elements of armor, as I wrote above.
- Add other characters or environments. You can draw a knight fighting your drawn orc against the backdrop of an ominous cave.
- Add some movement to your orc artwork. Try drawing him running, swinging a baton, or doing other movements.
All these activities will help you deepen your drawing skills. Practice as often as possible, and one day you will realize how easy it is for you to draw fantasy characters.
Additional Materials
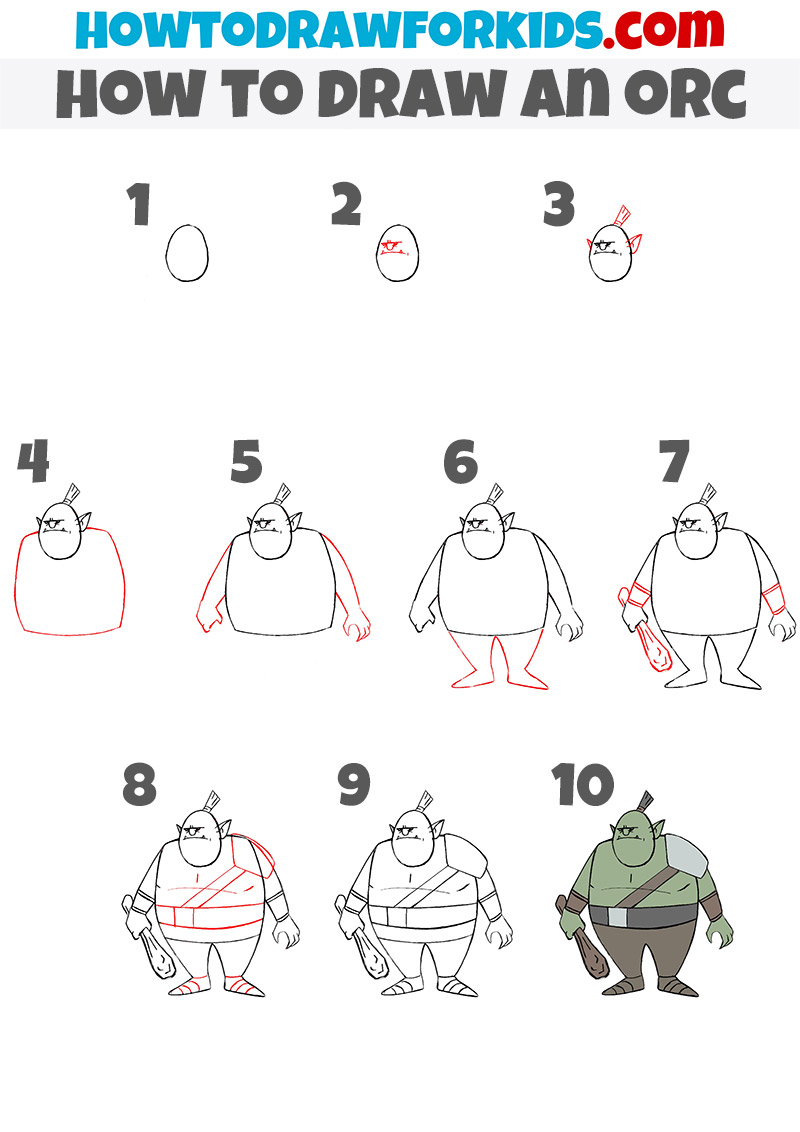
We have come to the end of the orc drawing lesson. As always, here I am posting a shortened version of the instructrion, which is easy to save to your device, publish as an image on social networks, and use at any time.
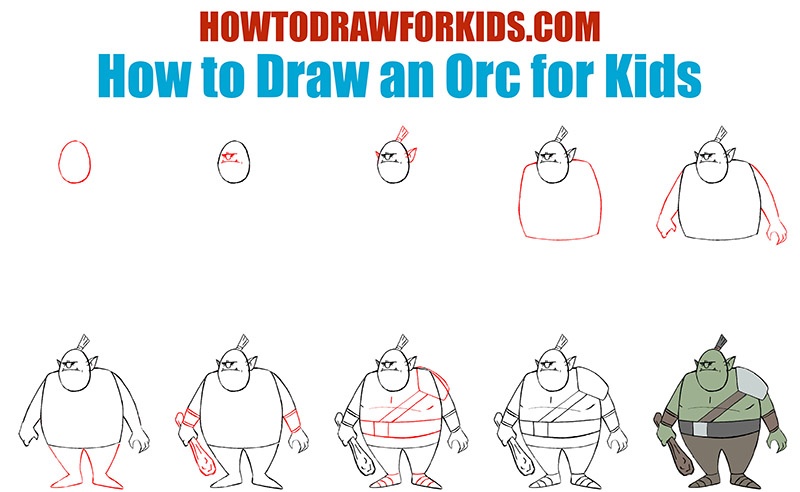
And of course, the PDF version of this drawing lesson. In it, you will find the tutorial itself, a coloring book, a tracing worksheet, and a grid drawing worksheet.
Conclusion
This drawing lesson was very simple, like all the other drawing lessons on my site. I really hope that using the steps above you will get a nice orc drawing.
Don’t forget also about the tricks that I wrote about above. Try to practice often and draw as many fantasy monsters drawings as possible, and you will definitely be able to learn how to draw fantasy creatures like a real professional.
By the way, do not forget that I have a page on Pinterest and I am waiting for your subscriptions there.

Great drawing tutorial! Now i know how to draw an orc.
Can you please create Skeksis Tutorial for Kid Fantasy drawing Beginner so kids could learn to draw a Skeksis from the Dark Crystal on December 22, 2024?