How to Draw a Muffin
Learn how to draw a muffin in five easy steps, from sketching its shape to adding realistic details and colors, for a delicious-looking final illustration.

How to Draw a Muffing: Introduction
In this step by step drawing instruction, I will show you how to draw a muffin for kids using five super simple stages.
Drawing a muffin encourages young artists to think about its shape, texture, and color in a relatable way. The muffin’s rounded top and distinct cup provide opportunities to practice shading and detailing, stimulating the artist’s imagination
The tutorial’s flexibility allows for modifications at each stage, motivate artists to experiment with different toppings, textures, and colors.
For this muffin drawing tutorial we will need a standard artist set – a simple pencil, an eraser, colored pencils (or felt-tip pens).
Muffin Drawing Tutorial
Time needed: 30 minutes
How to Draw a Muffin
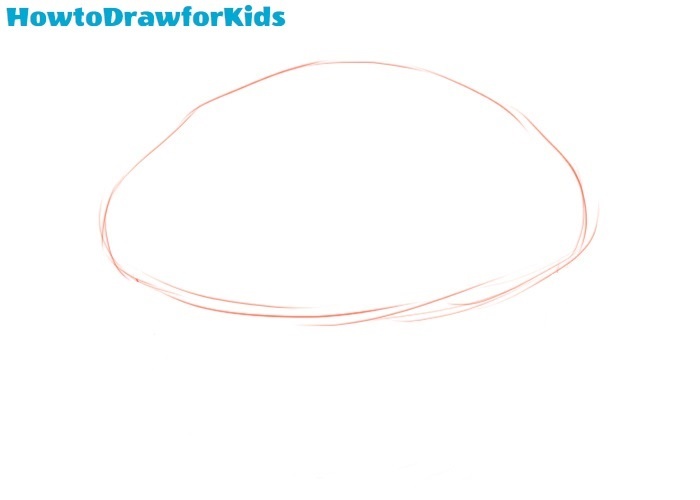
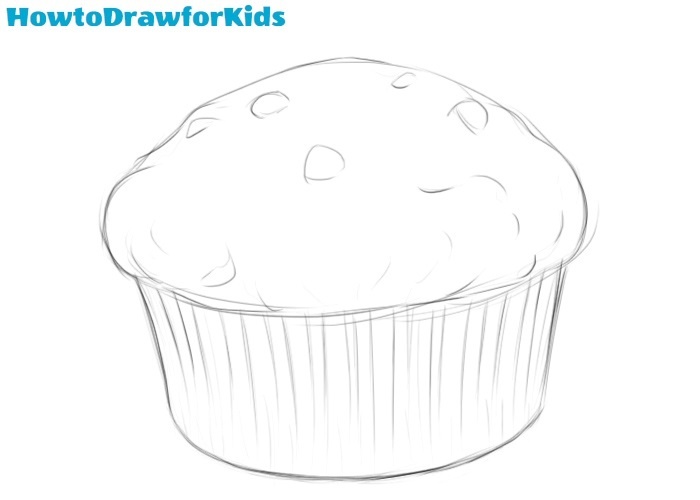
- Draw the muffin’s top.
Start by sketching the muffin’s rounded top. Begin with a loose oval shape, keeping in mind that the top of a muffin isn’t perfectly symmetrical. Make sure to include gentle curves to mimic the natural, risen look of a baked muffin.
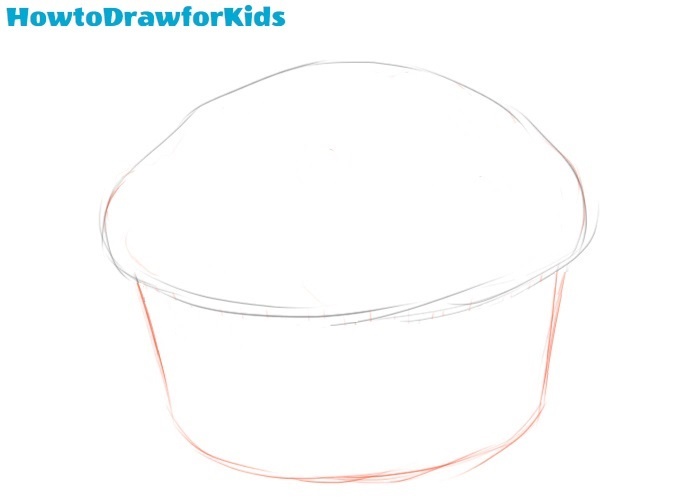
- Draw the cup.
From the bottom of the rounded top, draw two slightly tapered lines downward, curving outward at the bottom to form the base of the muffin’s cup. This cup should have a fluted appearance, indicating the muffin is held by a paper liner.
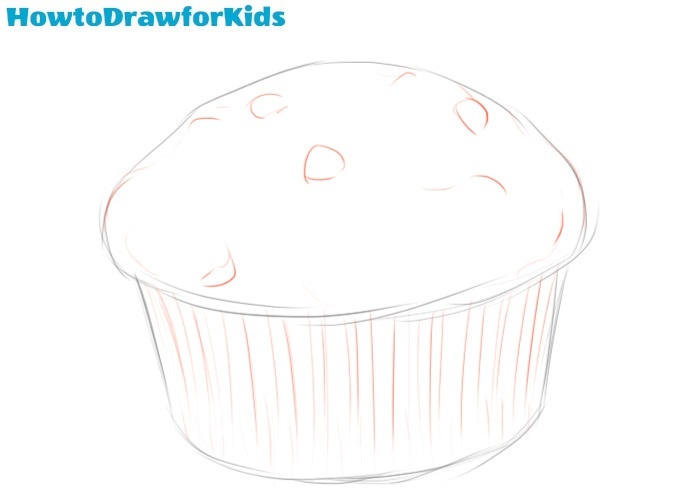
- Detail the top and cup.
On the muffin’s top, sketch irregularly shaped dots and lumps to represent chocolate chips or berries. Vary their sizes and placement to reflect a natural look. For the cup, draw vertical lines along its length, spaced evenly apart, to emulate the pleated pattern of a paper liner.
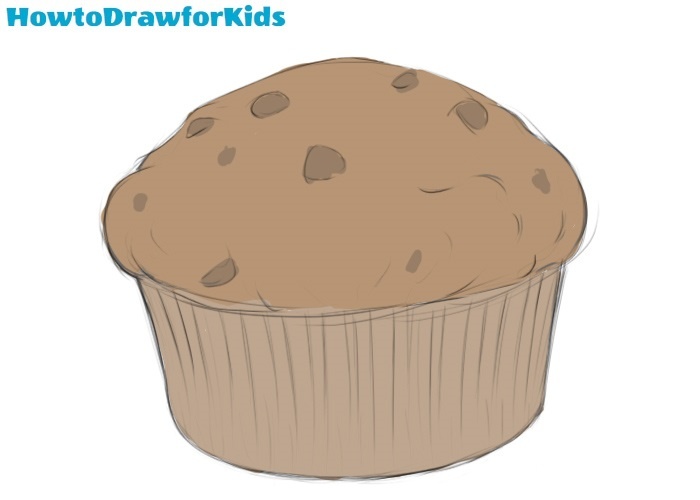
- Review and refine the sketch.
Improve the vertical lines on the cup, making them more distinct while retaining their organic look. Smooth out the outline of the muffin’s top, eliminating any rough or uneven edges. This refinement stage prepares the drawing for its final touch: coloring.
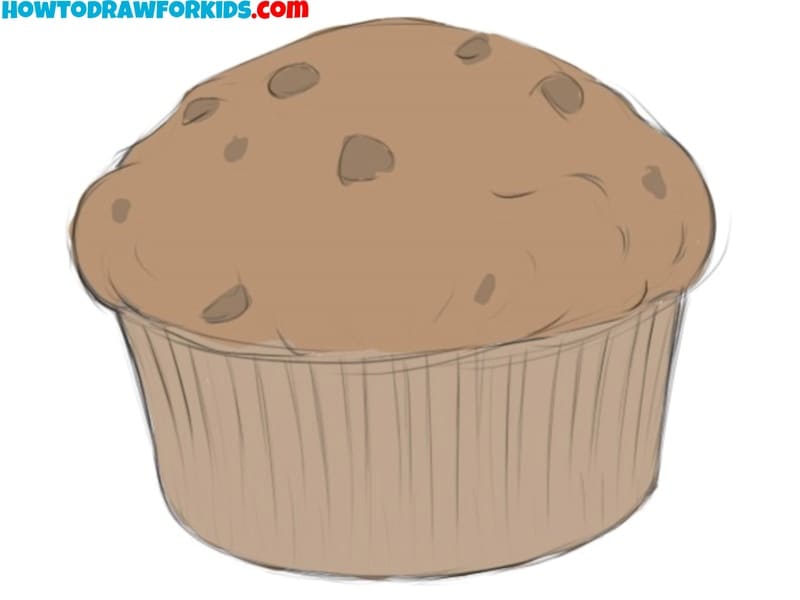
- Finish the muffin drawing.
Start by filling in the muffin’s top with a warm brown or golden hue, leaving room for individual dots or chips to stand out. Color these details in a darker brown or red, indicating chocolate chips or berries. For the cup, choose a lighter brown or tan, reflecting the color of a paper liner.
Conclusion
To give the muffin drawing a more voluminous and realistic look, try to add some shadows. You can also illustrate the cast shadow under the muffin to “land” it on the surface.

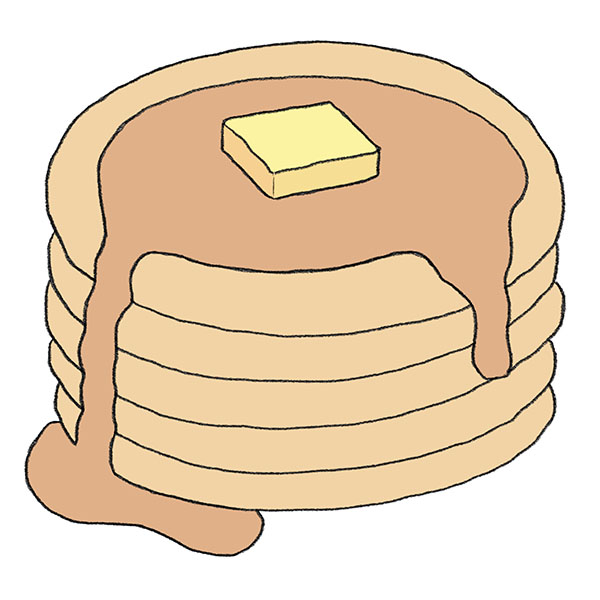
you should draw pandcake!!!!!!!!! and do the pandcake art challenge
Good idea, Bob. I already have a lesson on how to draw a pancake.