How to Draw a Coat
Now, I will show a detailed guide on how to draw a coat. At the end of the tutorial, I will also share tips on how to make your drawing more unique.
How to Draw a Coat: Basic Information
A coat as a piece of clothing appeared a long time ago, and is one of the most popular types of clothing for the cold season.
In fine art, coats can often be found in paintings of the 19th century, and this is not surprising, because this was the main type of warm clothing in those days. And of course, all the great artists of the old era knew perfectly well how to draw a coat, and showed it in their artworks.
By drawing a person in a coat, we can give him a more classic and discreet look. In addition, taking into account the above, it is imperative for a young artist to know how to draw a coat if he wants to recreate, for example, the aesthetics of the 19th or early 20th century.
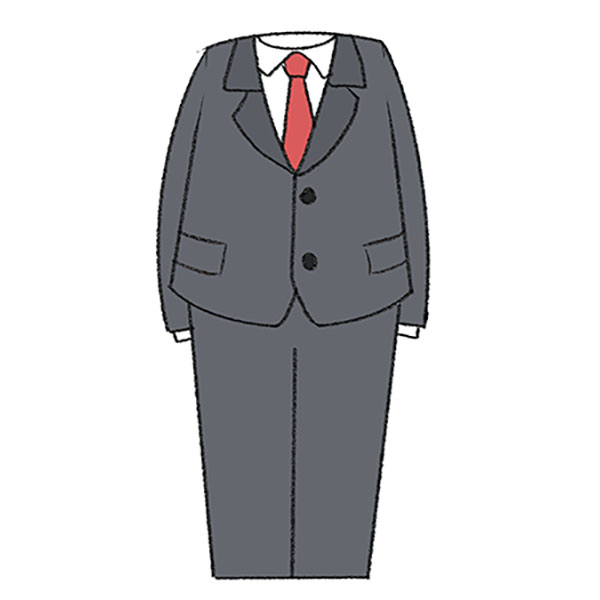
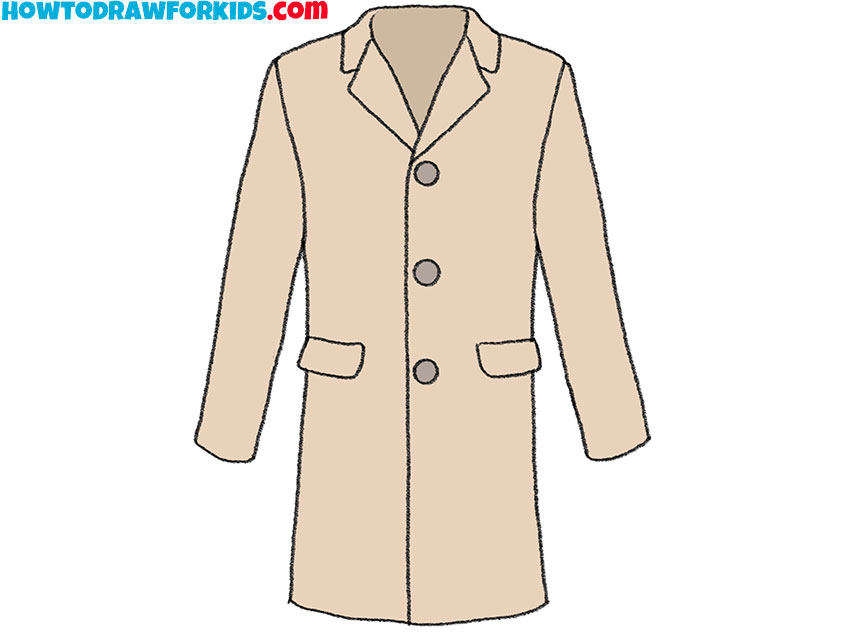
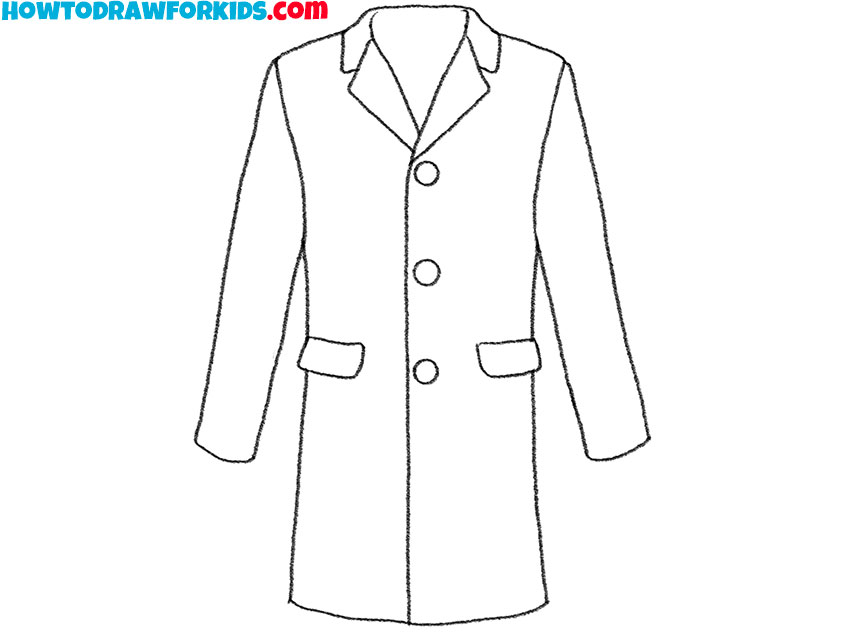
The picture shows a classic coat model. The coat in our drawing lesson has pockets and fastens with buttons. For coloring, you can use the same color that is suggested in the instructions or any other color at your discretion.
As you work, carefully draw all the lines that are marked in red and maintain symmetry. Now I will ask you to prepare your art supplies, and you can get to work. I wish you a great job with this creative task.
Coat Drawing Tutorial
Materials
- Pencil
- Paper
- Eraser
- Coloring supplies (beige or dark colors)
Time needed: 45 minutes
How to Draw a Coat
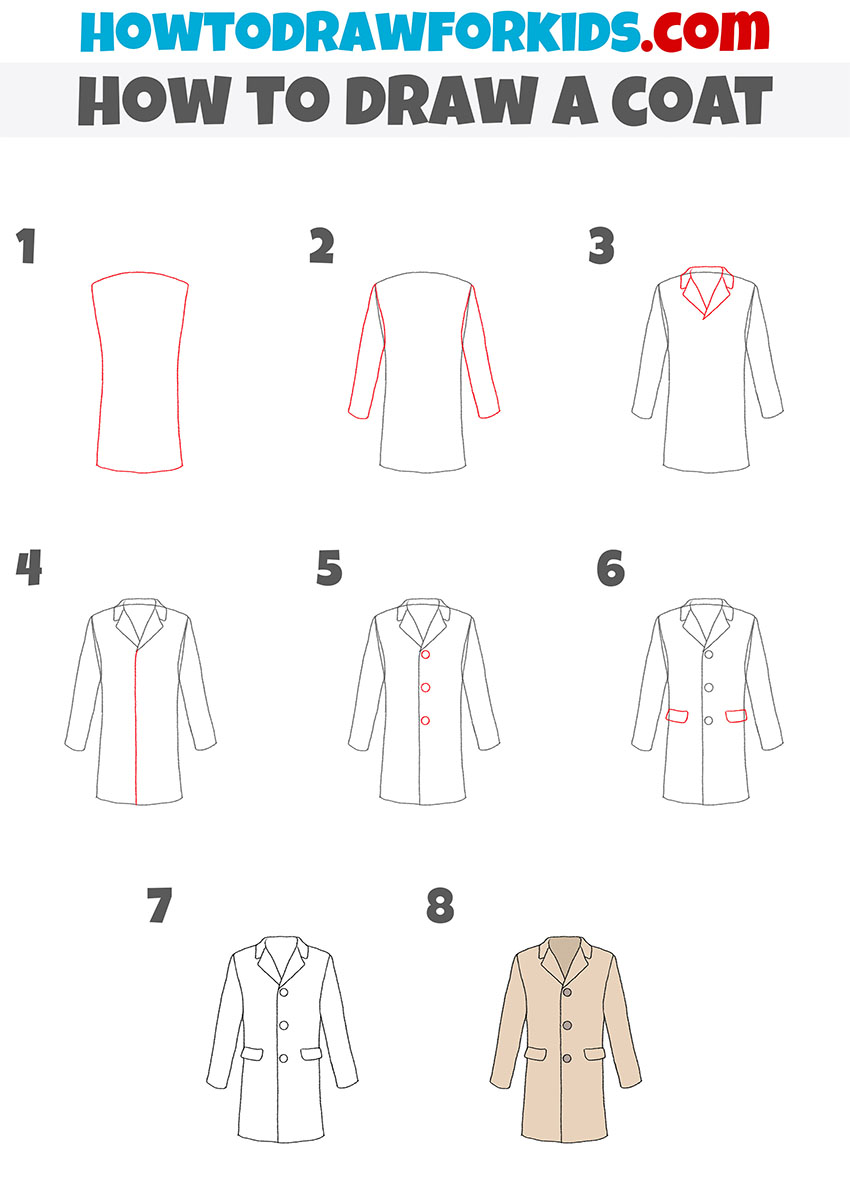
- Sketch the base of the coat.
Create a tall, rectangular shape with slight inward curves on both sides, making it narrower at the waist and wider at the shoulders and hem. This basic shape will serve as the foundation for the coat, so ensure the proportions are balanced.

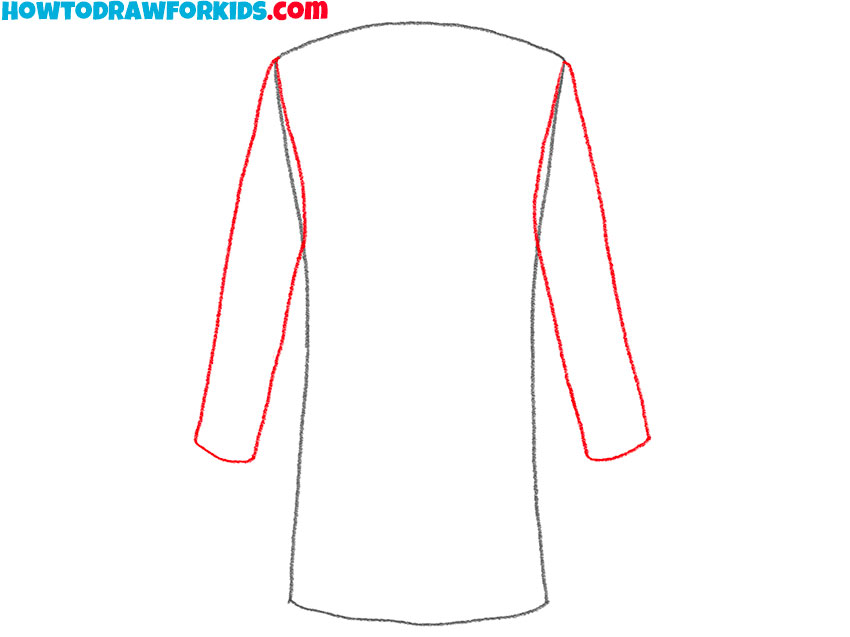
- Draw the sleeves of the coat.
Begin each sleeve at the shoulder line, ensuring they are symmetrical and proportional to the coat’s body. The sleeves should be slightly tapered, narrowing towards the wrist. Pay attention to the angles and curves to make the sleeves look natural.
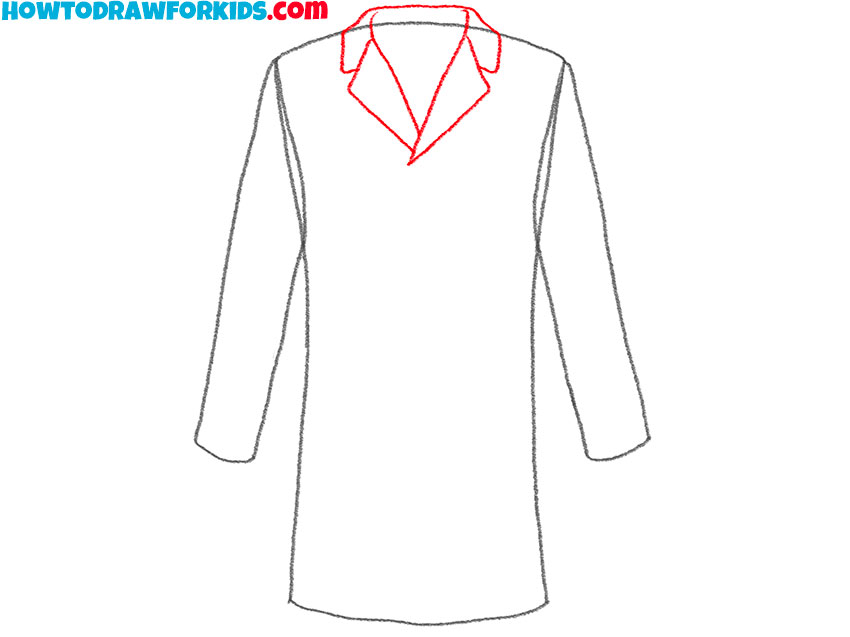
- Add the collar to the coat drawing.
Start by drawing a V-shaped neckline at the top center of the coat. Then, draw the lapels extending downwards from the neckline, creating two triangular shapes on each side of the coat. Make sure the lapels are symmetrical and aligned with the coat’s opening.
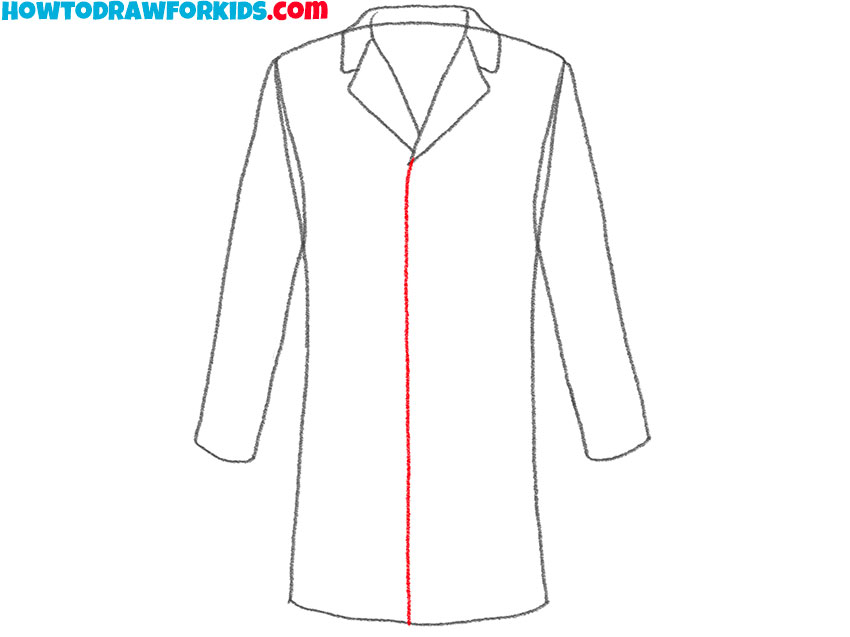
- Sketcg the front slit of the coat.
Draw a straight line from the collar to the bottom of the coat. The location of this line may depend on whether the coat is single-breasted or double-breasted. The line does not have to be perfectly straight, so it is better to draw it without the help of a ruler.
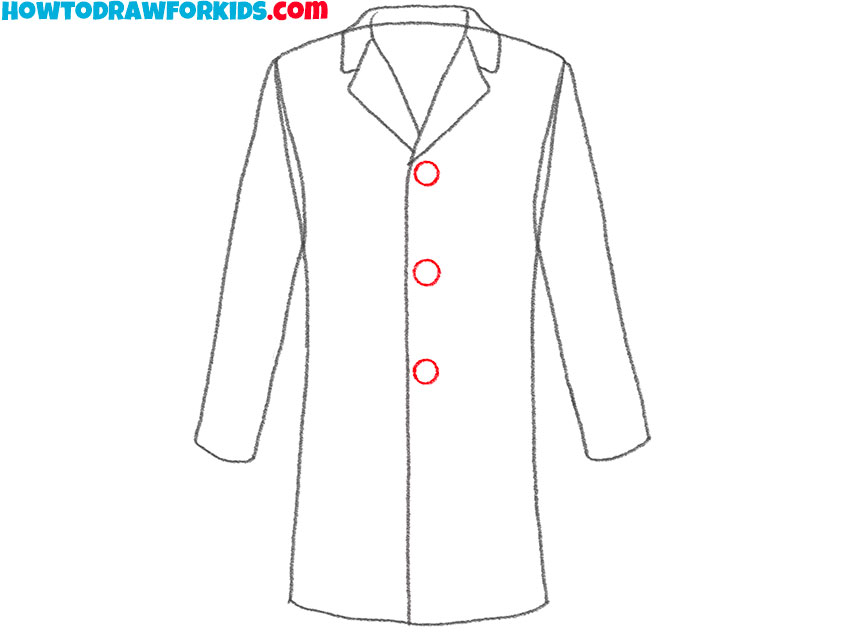
- Illustrate the buttons of the coat.
Draw three small circles vertically aligned along the right side of the coat’s opening. The buttons should be evenly spaced and proportional to the coat’s size. The number of buttons may vary. You can draw a coat with two or four buttons or even two rows of buttons.
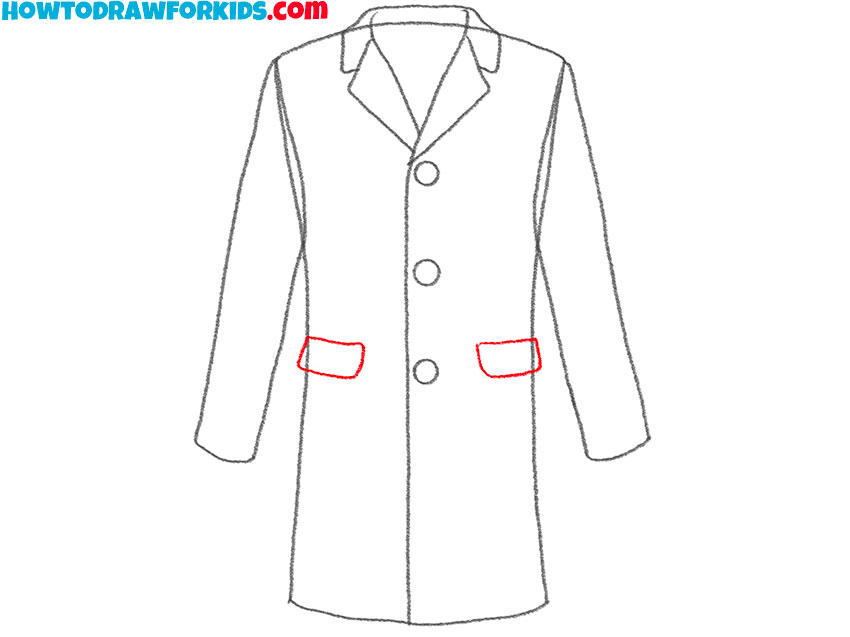
- Add the pockets.
Draw the pockets on each side of the coat. Start by drawing two horizontal lines on each side of the coat’s body, slightly below the waistline. Then, add small rectangles beneath these lines to represent the pocket flaps. You can sketch an additional pocket to the chest of the coat.
- Remove the guidelines from your coat sketch.
Carefully erase the guidelines leaving clean parts of the coat drawing. You can draw creases and folds along the sleeves, body, and lapels to represent the natural flow of the fabric. Also you can add shading to areas where shadows would naturally fall.
- Color the coat drawing.
Choose a color for your coat and fill in the body, sleeves, collar, lapels, and pockets. You can choose classic colors such as black, gray or beige, or more unusual ones such as pink or bright yellow. Don’t forget to color the buttons and any other details to make your coat drawing vibrant and lifelike.

Additional Content
I hope you have a great coat drawing. If you remember all the drawing steps, you can easily illustrate a person wearing such a coat if necessary. You can practice further and sketch a few more drawings by slightly changing the style of the coat.
Imagine yourself as a clothing designer. Be sure to download the PDF file, which contains quick instructions and additional practice materials needed to complete this lesson.
Final Touches
This coat drawing lesson is complete, but there’s more to learn. In the steps above, I’ve outlined the basic principles of drawing a coat in eight simple steps. With the knowledge gained from this guide, you can elevate your skills to the next level.
You are unlikely to just sketch a coat hanging in the air (you won’t, right?). Using this lesson, try to draw a man standing on a winter street wearing a coat.
When drawing things like clothing, you need to be able to sketch fabric in motion, so try drawing a man in a coat in different poses to get the hang of drawing a coat (or jacket) in motion. Add some folds in the right places to make your coat artwork more convincing.
Or kale the coat drawing more interesting by including a detailed background. Try drawing a winter street scene with snow-covered trees, streetlights, and buildings to place the coat in a realistic setting.
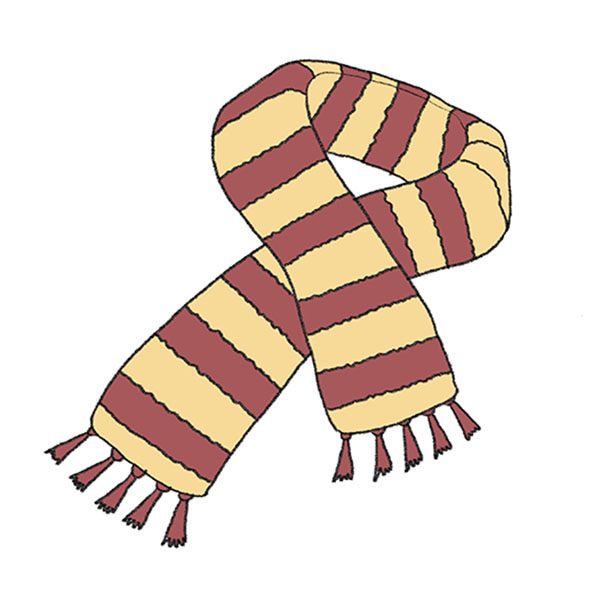
Make the drawing more interesting by adding accessories to the coat. Draw a scarf, gloves, and a hat to complement the winter theme and add more layers to the outfit.
Use a variety of colors to make the coat stand out. Try different shades and patterns, such as plaids or herringbone, to give the coat a unique and fashionable look.
Incorporate intricate details such as buttons, zippers, or embroidery. This will make the coat look more realistic and showcase your attention to detail.
Draw the coat in different weather conditions. For instance, add raindrops and wet textures for a rainy scene or windblown effects for a windy day to add atmosphere and realism.
Turn the drawing into a fashion sketch by adding annotations and fabric swatches. Label different parts of the coat, such as the type of collar or pocket design, to give it a professional look.
How to Draw a Coat: Conclusion
As you may have noticed, drawing a coat is quite simple. The art of drawing is built from mastering really easy, fundamental elements like this. By starting with easy tasks and building up your skills, you can gradually become more proficient and confident in your drawing abilities.
By following the eight simple steps outlined in this drawing guide, and incorporating the tips provided at the end, you can definitely learn how to draw clothes without any difficulty. Practice regularly, pay attention to details, and soon you’ll find yourself able to sketch various types of clothing with ease and precision.