How to Draw Kenny
If you were looking for a way to draw Kenny from South Park, then you are in the right place. I’ll help you create the iconic image of this funny guy in a few very simple, illustrated steps.

How to Draw Kenny: Basic Information
With my guide on how to draw Kenny, you’ll illustrate the silent yet memorable character from the streets of South Park. Kenny’s unique hood and expression are vital for recognizing his character. This tutorial helps you understand how small details and distinctive features define a character’s identity, teaching you to create recognizable and unique characters in your own art.
When drawing Kenny, pay special attention to the oversized hood and how it shapes his face, which is a unique aspect of his character. Kenny’s proportions are exaggerated with a large head and small body. This tutorial helps you explore different proportions, boosting your ability to create various character styles, from realistic to cartoonish.
Kenny’s design simplifies human anatomy into basic shapes. Practicing with such simplified forms can help you understand and draw more complex anatomical structures with greater ease and accuracy, building a strong foundation for cartoon figure drawing.
At the very end of this tutorial I’ll tell you how to draw Kenny in different environments. This exercise helps you think about how characters interact with their environments. Practicing this can improve your ability to place characters seamlessly into various settings.
Kenny Drawing Tutorial
Materials
- Pencil
- Paper
- Eraser
- Coloring supplies
Time needed: 30 minutes
How to Draw Kenny Step-by-Step
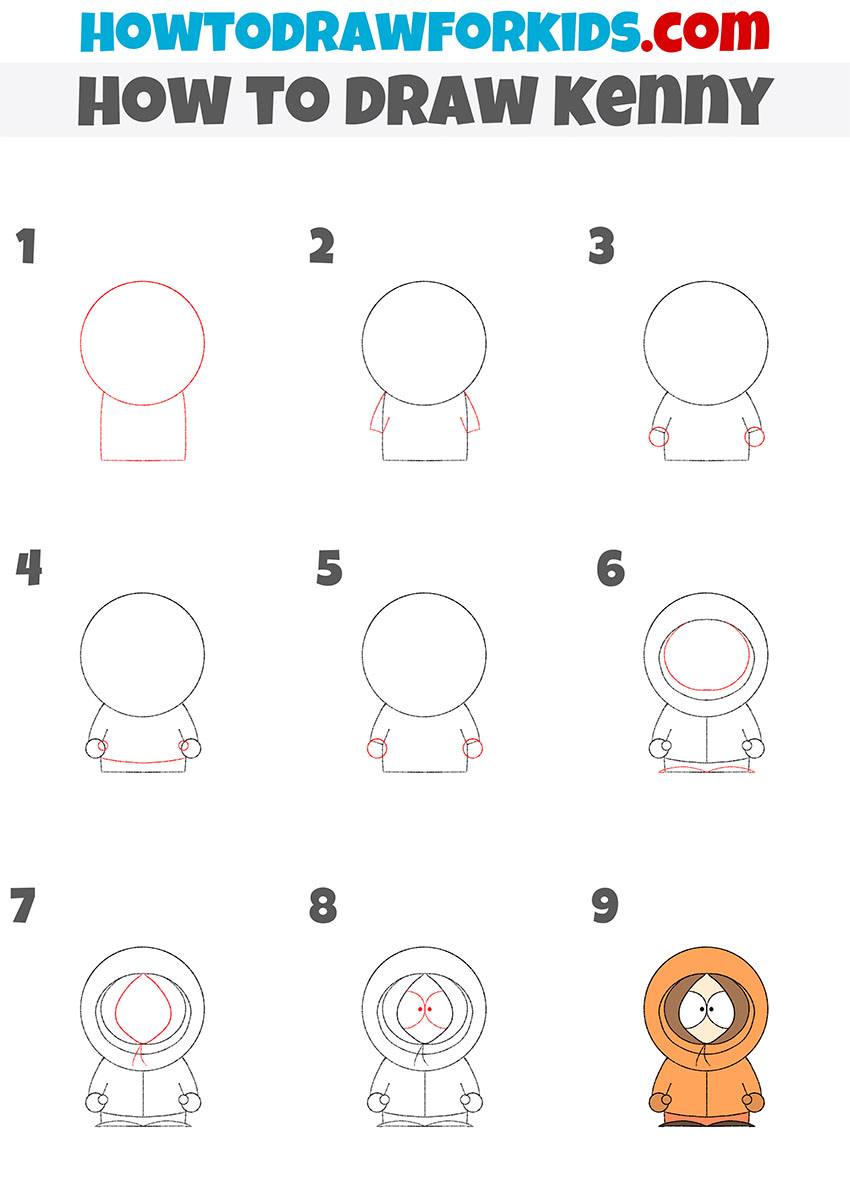
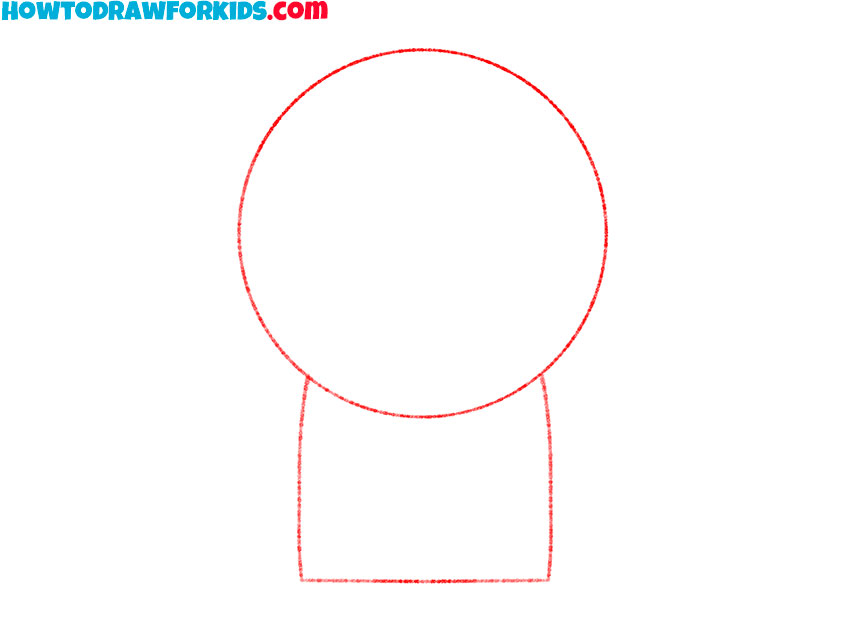
- Draw the head and torso of Kenny McCormick
In the first step of drawing Kenny from South Park, you start by sketching a large circle for his head and a smaller rectangular shape beneath it for his body. The head should dominate the figure, characteristic of South Park’s design, where heads are often oversized compared to bodies.
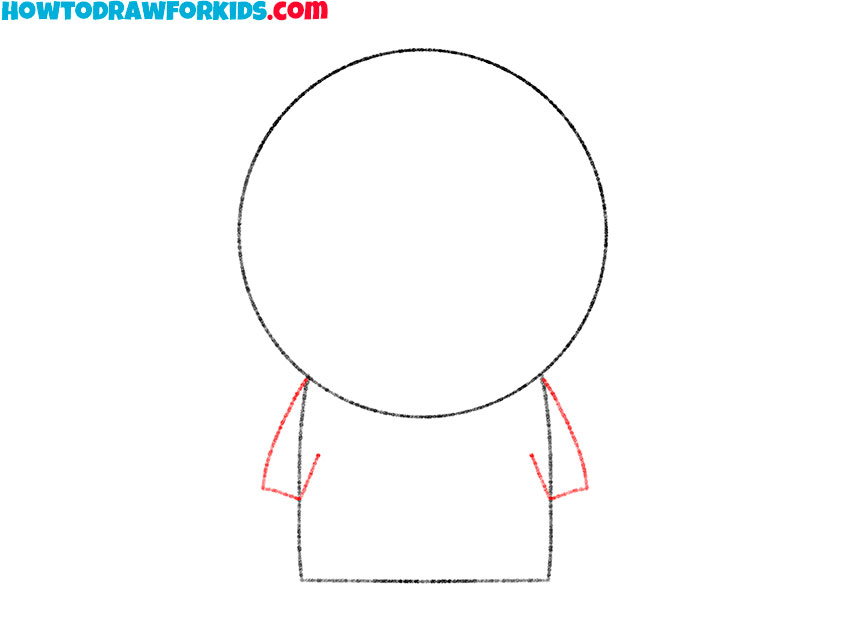
- Draw Kenny’s arms.
Start by adding two small, rectangular shapes on each side of the rectangular body. These rectangles should point downward and slightly outward, giving the impression of his arms hanging at his sides. As we draw a character in cartoon style, the arms should be really small.
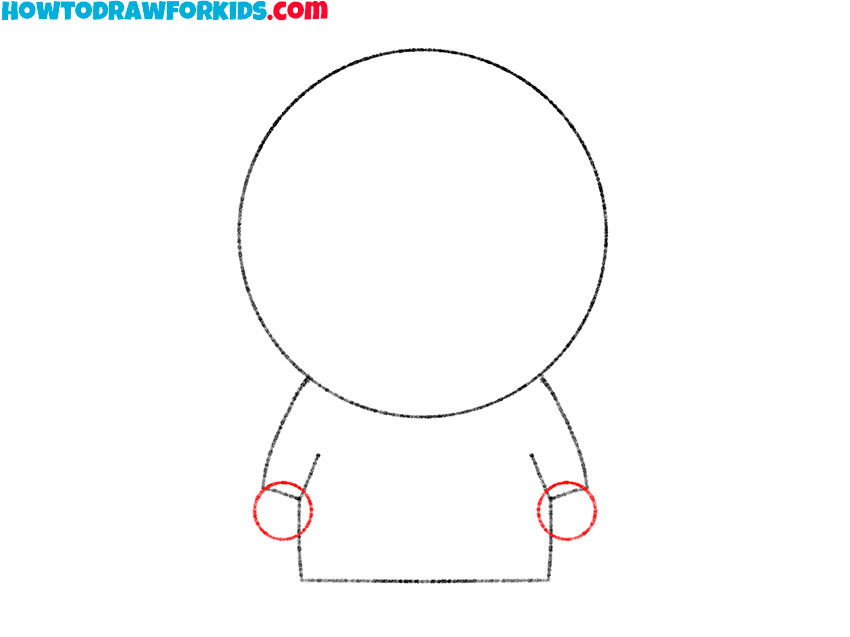
- Sketch the mittens of Kenny.
For this step, add small circles at the ends of the triangular shapes to represent Kenny’s hands. Ensure that the hands are in the shape of perfect circles of the same size. The hands in South Park characters are often minimalistic, with little detail.
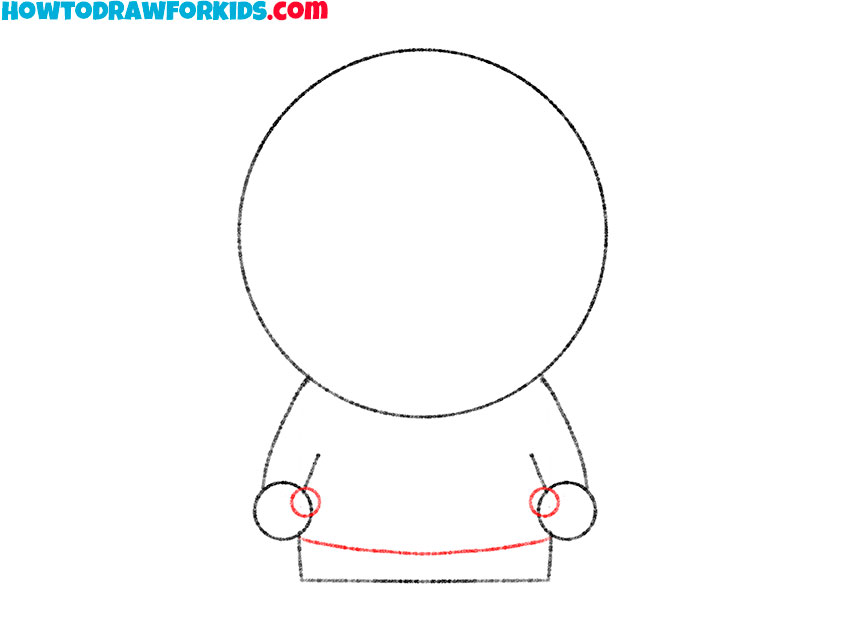
- Add the thumbs and the outline of the jacket.
Now, it’s time to refine the body shape by adding details to Kenny’s coat. Draw a curved line connecting the bottom corners of the rectangle, suggesting the hem of the coat. This line should be slightly curved upward in the middle to indicate the natural drape of the fabric.
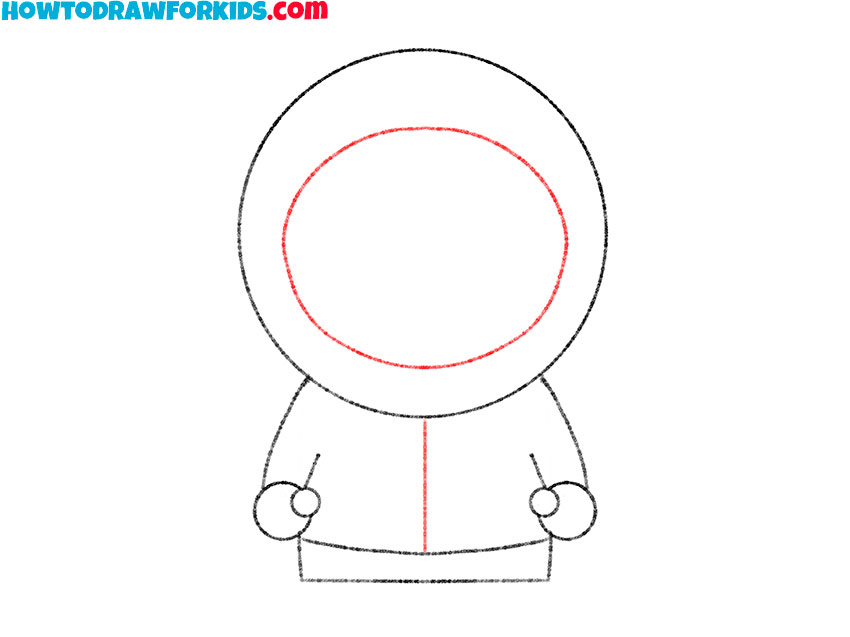
- Illustrate the inner outline of the hood.
Draw the outline of Kenny’s hood by adding an oval shape inside the head. The hood is a significant element of Kenny’s design, encapsulating his head and giving him his iconic appearance. Don’t forget the longitudinal line on the front of Kenny’s jacket as well.
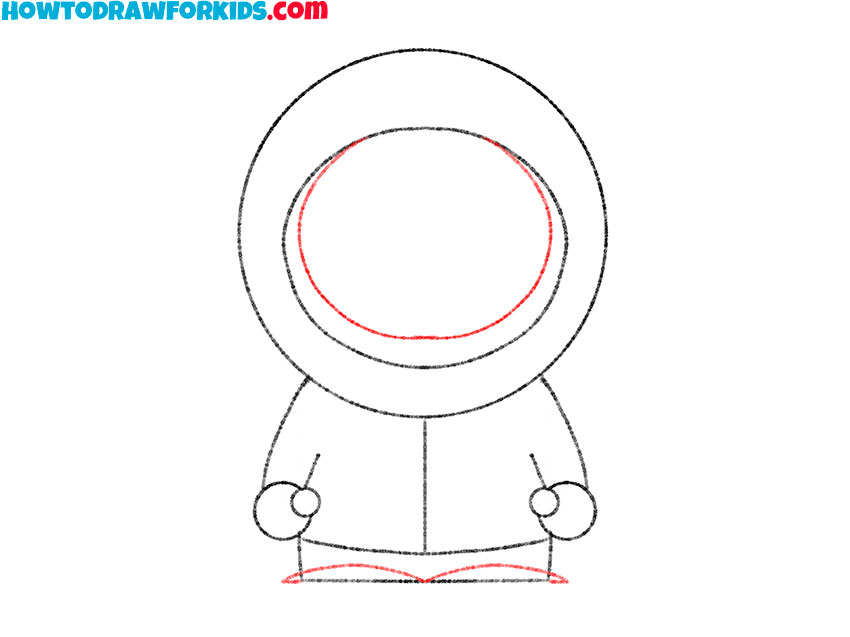
- Draw Kenny’s shoes and the outline of the hood.
At the base of the torso, sketch two curved lines to illustrate the shoes. The shoes should be really flat. Inside the outline of the hood, add an additional line to signify the inner fold. The fold of the hood has no upper edge and looks like a crescent.
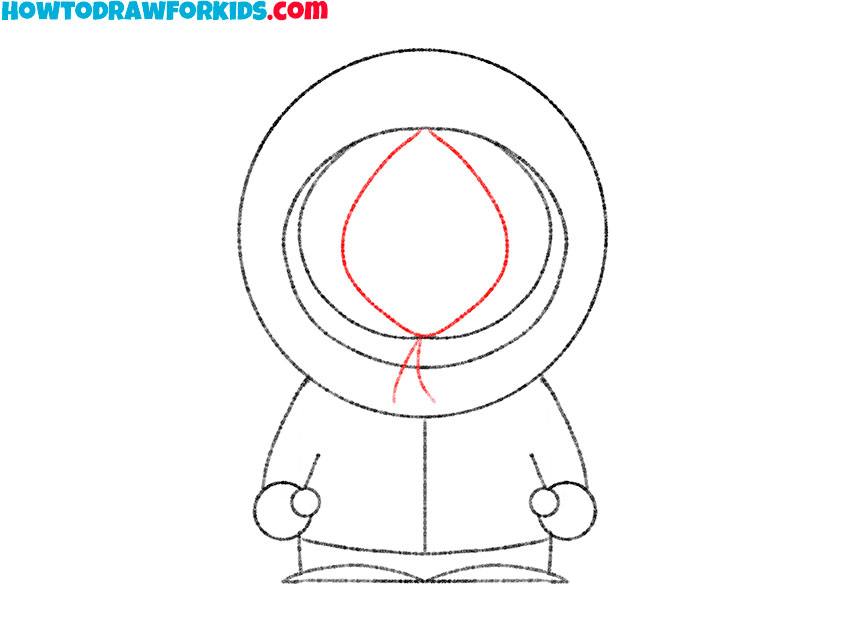
- Detail the hood of Kenny McCormick.
Inside the hood, draw an inner oval that follows the shape of the outer oval but is slightly smaller. This inner oval will represent the face opening of the hood. Then, add simple, curved lines from the bottom of the inner oval to represent the hood laces.
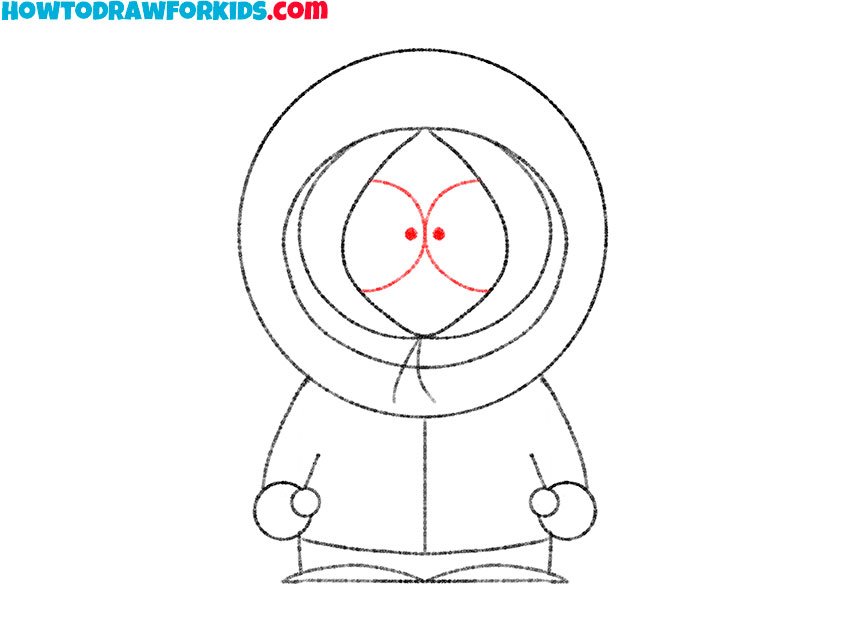
- Draw Kenny’s eyes.
Now, add Kenny’s facial features. Inside the inner oval, draw the eyes as two large rounded shapes. These eyes should be close together, almost touching in the middle. Add small circles within the eyes to represent pupils, making sure they are looking straight ahead.
- Color the artwork.
So, color Kenny using his signature orange for the hoodie, brown for the gloves, and white for the eyes. Be precise with the coloring to keep the clean, bold look. The final touches make your drawing finished, closely resembling the original character from South Park.

Additional Content
So, here I’ve put together a free PDF file with a concise version of my Kenny drawing guide. Moreover, this downloadable resource ensures that you can enjoy drawing Kenny anytime, even when offline.
Additionally, it’s a handy reference to practice your skills or to guide you through the drawing steps once more.
How to Draw Kenny in Different Environments
Draw a snowy winter scene with snow-covered trees and snowflakes falling. Add a few snow mounds and footprints to suggest that Kenny has been walking through the snow. The sky can be a pale gray or light blue, indicating a cold, overcast day. This setting complements Kenny’s warm clothing and can make the overall atmosphere of the drawing more interesting.
Or create an urban street background with buildings, sidewalks, and street lamps. Include some storefronts or windows with light reflections. Adding a few pedestrians or cars in the distance can give a sense of a bustling city. This urban environment can highlight the contrast between Kenny’s simple design and the detailed background.
Depict a classroom interior with desks, a chalkboard, and educational posters on the walls. Place Kenny near a desk or the chalkboard, perhaps holding a book or pencil. Or illustrate a playground with equipment such as swings, slides, and a sandbox.
Common Mistakes
Paying attention to these errors can make the difference between a good drawing and a great one. Here’s a list of common pitfalls to avoid:
- Ensure that the proportions of Kenny’s head to his body are accurate; an oversized head or body can distort the overall appearance.
- Avoid making the arms too long or too short; they should be just the right length to maintain the character’s iconic look.
- Remember not to place the eyes too close together or too far apart; they should be centered within the face area for a balanced Kenny drawing.
- Watch out for the placement of the mitten’s thumbs; they should face towards Kenny’s body to reflect a natural hand position.
- Be careful not to overlook the curvature of the hood; it should mirror the shape of Kenny’s head closely for a snug fit.
While drawing Kenny, these common errors can be easily overlooked but are essential for a polished result. Furthermore, by keeping these tips in mind, you’ll be able to draw Kenny with confidence and improve with each attempt.
Moreover, as you continue to practice, you’ll find that these mistakes become less frequent, and your ability to create a classic Kenny drawing will grow.
Conclusion
As we conclude this lesson, I hope you improvement in your Kenny drawing skills. Moreover, it’s been rewarding to guide you through each step, and I trust that you can now draw Kenny with a newfound confidence.
Don’t forget to check out the other lessons on my website for more “South Park” character drawings.
Furthermore, for regular updates and more tips and tricks, don’t hesitate to follow me on social media. It’s a great way to stay connected and informed about new drawing tutorials that can expand your repertoire.