How to Draw a Ball
There are countless types of balls in the world, but this lesson on how to draw a ball gives the basics for sketching any of them.

How to Draw a Ball: Introduction
Now you will learn how to draw a ball. This lesson is especially for you if you love sports and play team games. But even if you are not passionate about sports, you will still have a pleasant time and enjoy the creative process.
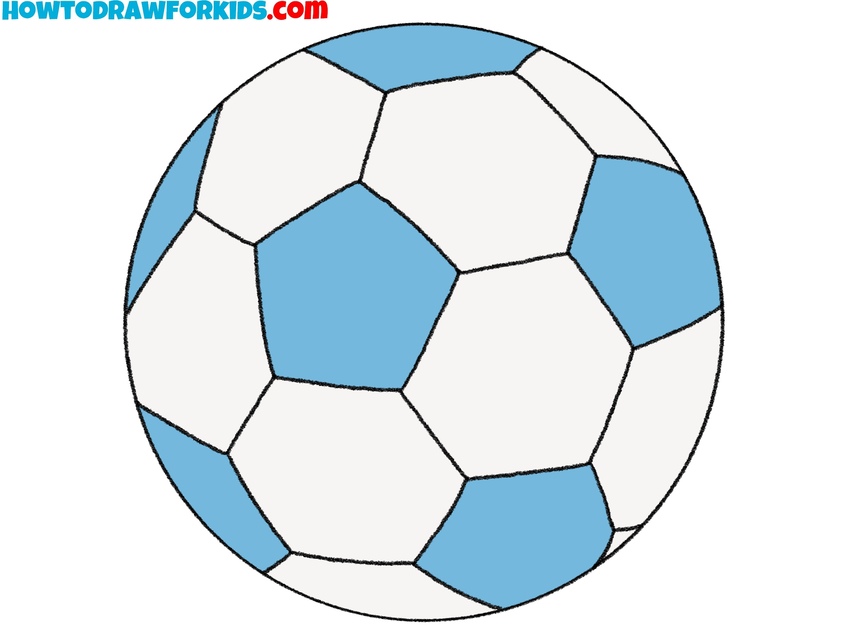
In the picture, you can see a soccer ball, which is traditionally made in black and white. The ball consists of individual pieces of leather that are securely stitched together. Each black piece is in the shape of a pentagon and each white piece is in the shape of a hexagon.
In this lesson, you will need to be able to make straight lines, because all the elements of the ball are made up of short, straight lines. It is also very important to draw an even circle for the outer contour of the ball. During the lesson, be patient and accurate, then you will get an excellent result.
Ball Drawing Tutorial
Materials
- Pencil
- Paper
- Eraser
- Coloring supplies
- Compass (optional)
Time needed: 15 minutes
How to Draw a Ball
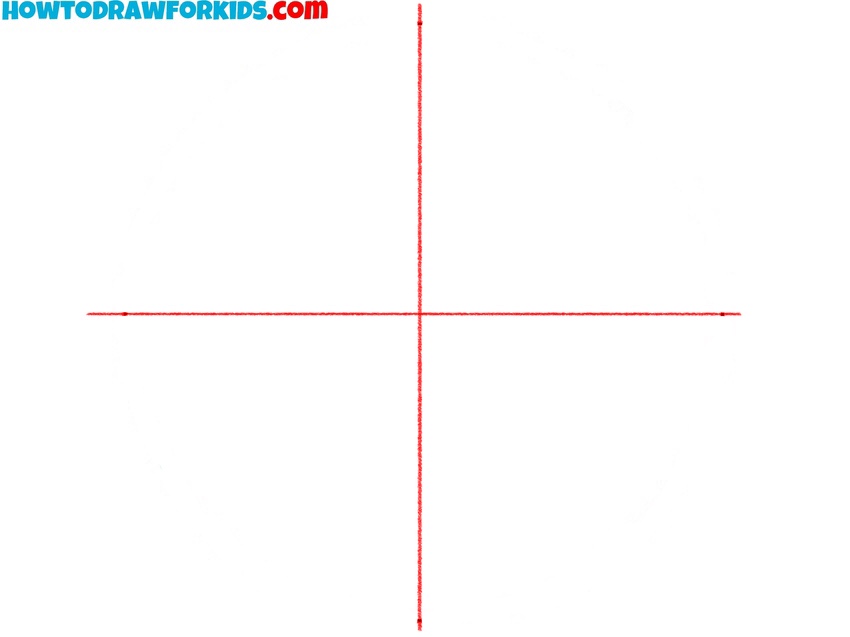
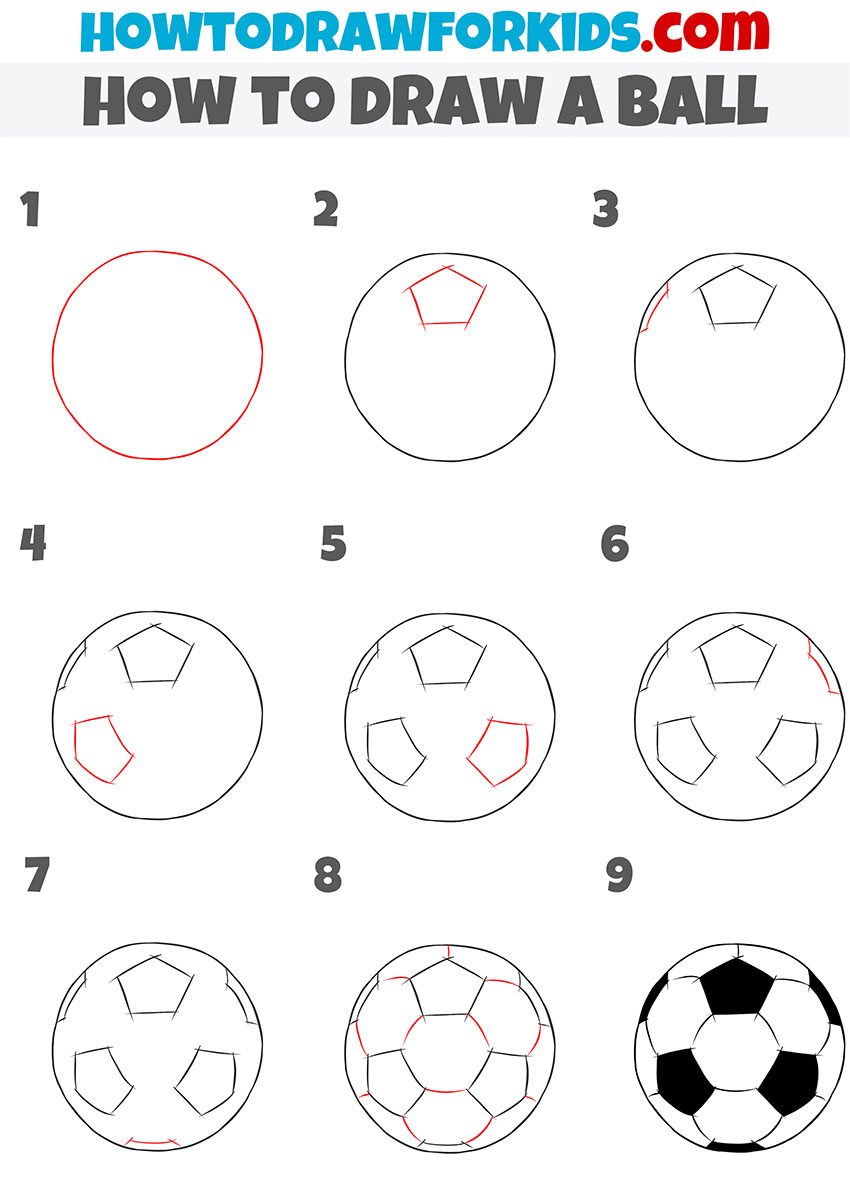
- Sketch the basic cross lines.
To make sure the ball looks even and properly rounded, it helps to build the drawing on a simple framework. Sketch a straight vertical line and then add a horizontal line crossing it at the center, creating a cross shape. Keep your pencil strokes light, as these lines are only for construction and will later be erased.
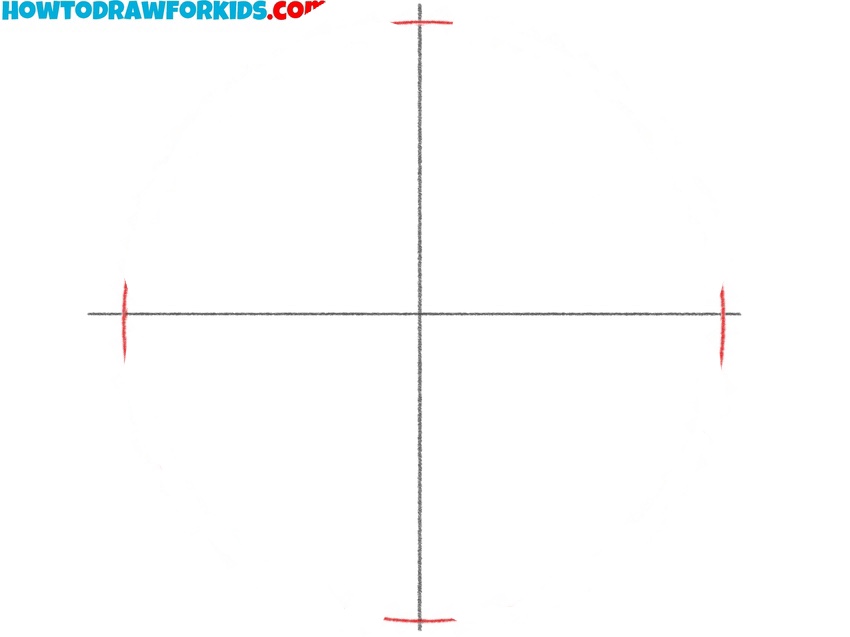
- Add boundary marks for the circle.
Decide how large you want the ball to be and mark the endpoints of your cross to set the boundaries of the circle. Small marks at the top, bottom, and sides of the cross will help guide your hand when you sketch the curve. Add these marks on the same distance from the central point.
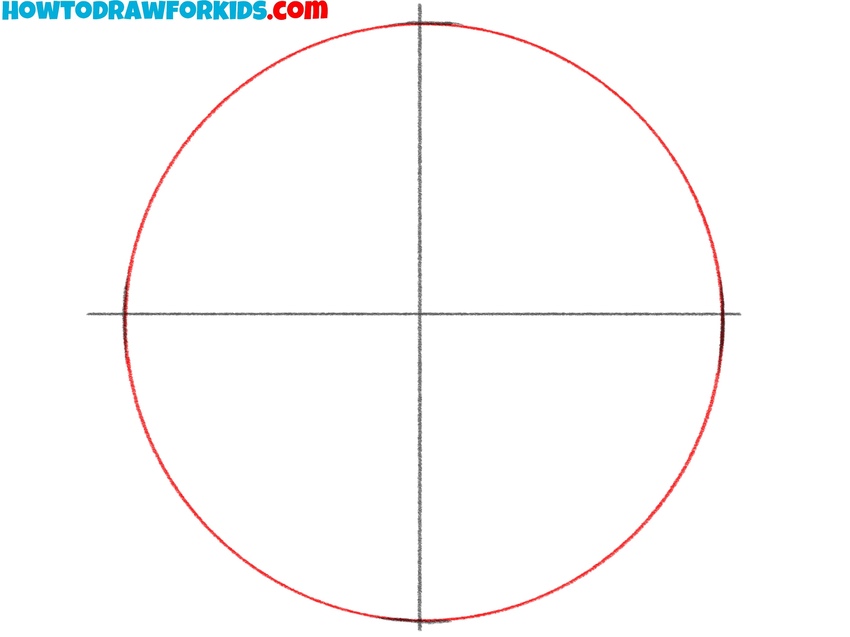
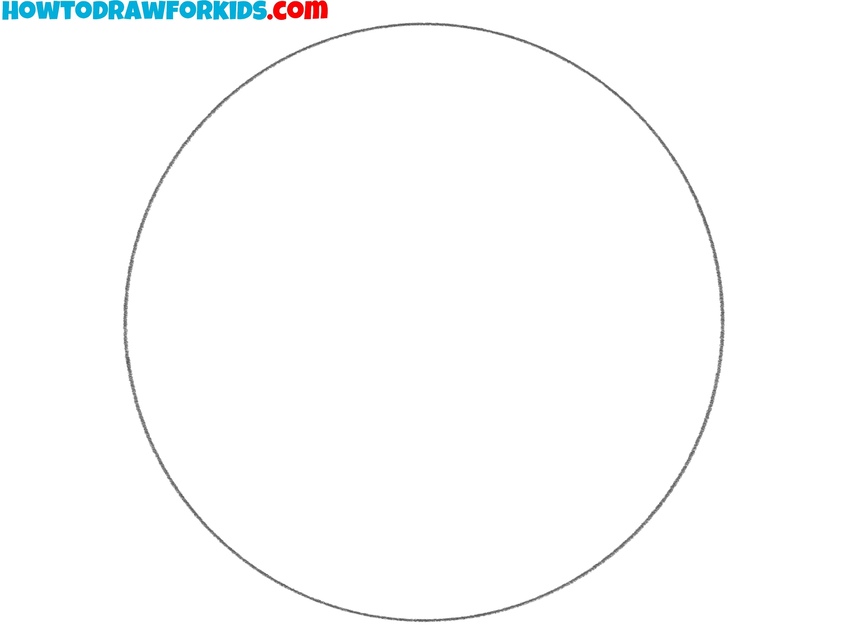
- Connect the edge marks with a curve.
Using the guide marks, carefully draw a circle around the cross. This circle forms the outer edge of the ball. Try to make it as round as possible. If you notice any flat spots or angles, gently curve them out with another light stroke. Remember that the ball will look more natural once other details are added.
- Erase the inner guides.
Erase the cross from the middle, leaving just the smooth circle outline. At this stage, the ball is reduced to its basic shape. This is important because keeping guide lines can make it confusing when you start adding the inner patterns. Work carefully with your eraser to avoid flattening the circle edges.
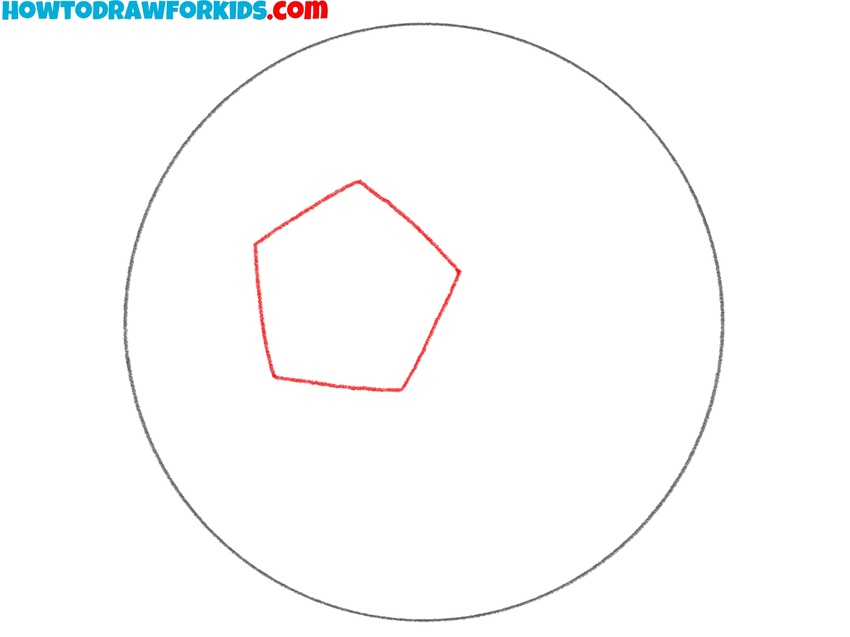
- Draw the center pentagon of the ball.
Every soccer ball design begins with one central shape, usually a pentagon. Place this in the middle of the circle to anchor the rest of the pattern. Draw a five-sided figure with roughly equal sides. If one side looks much longer than the others, adjust it now since this shape sets the tone for all the surrounding pieces.
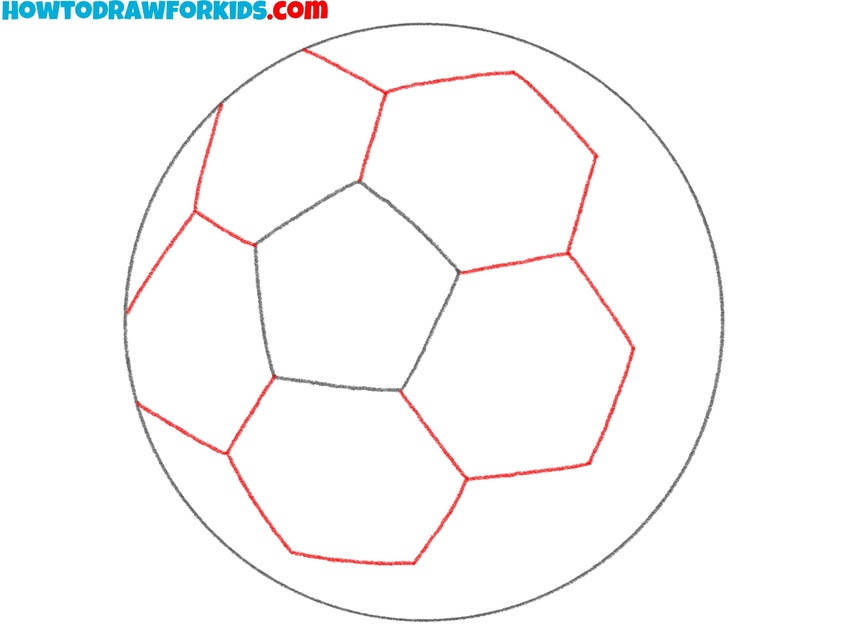
- Sketch more panels around the pentagon.
Extend the pattern by adding shapes around the central pentagon. These panels are typically also pentagons, and they connect edge to edge with the first pentagon. Follow the curve of the ball as you draw them so the design feels three-dimensional rather than flat.
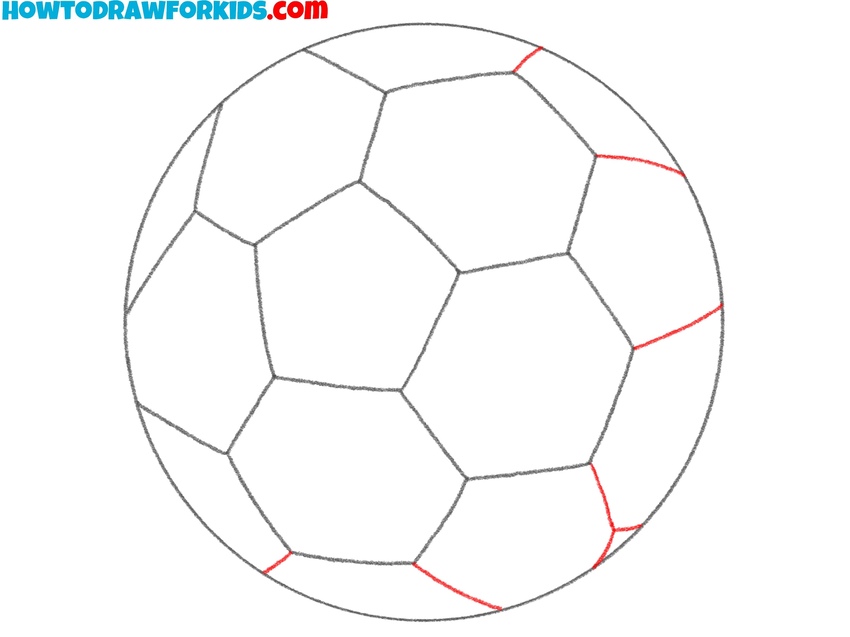
- Draw the last panel shapes of the ball.
Continue drawing more panels until the circle is filled. Each section should connect smoothly with its neighbors, leaving no gaps. As you add the final shapes near the edges of the ball, allow them to appear slightly narrower or curved to convey perspective.
- Fill the shapes with contrasting tones.
The last step is to shade the panels to give the ball its distinctive appearance. Classic soccer balls have alternating dark and light patches, so fill in every other shape to create the familiar pattern. You can use black, or choose another color like blue to keep it brighter or use a completely different color scheme.
Bonus: Simple Ball Drawing Tutorial
This tutorial shows a completely different sequence and style, and to sketch it, outline the overall circular shape without any additional guidelines. Once the circle is established, add a pentagon in the center to guide the placement of the surrounding panels.
Carefully sketch more polygons around it, making sure the edges connect correctly. Continue adding panels to distribute the pattern across the surface. Outline the connecting lines and adjust them if needed.
After the main pattern is in place, add shading or fill some sections with black to match the familiar soccer ball look. Using a ruler or lightly drawn guidelines can help maintain accuracy.
Conclusion
If you want to practice further, the football drawing tutorial will help you work with an oval shape and patterns that require careful placement of curved lines. The basketball drawing tutorial is another good option, where you can focus on drawing evenly arcs across the ball’s surface to create a realistic design. Both subjects are useful for training accuracy and for learning how small details can completely change how an object is recognized.
You can also try the volleyball drawing tutorial, where the sketch intersecting curved lines that create a more complex pattern. This will help you practice dividing a circular form into sections, keeping the drawing circular and authentic.
Share your work once you finish, by showing it to friends, teachers, or in the comments in my social media pages. Writing your thoughts about the process can also help you notice where you improved and where you still want to practice more. Returning to new step-by-step lessons regularly will give you steady progress and introduce you to a wide variety of subjects, from simple objects to more detailed characters and scenes.