

How to Draw a Bat for Halloween
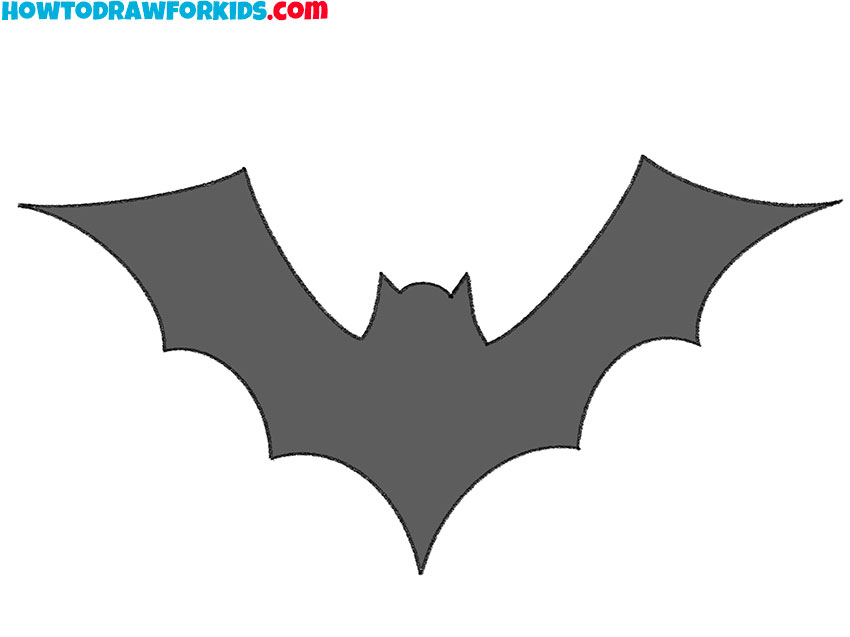
Today I will tell you how to draw a bat for Halloween. These will be two drawing lessons with some differences that I will tell you about.
I will tell you about all the fundamentally important steps in this tutorial and show you how to draw it correctly, without mistakes. I have also prepared a free PDF for you with several pictures that will help you draw a bat for Halloween a little differently.
Prepare to Draw a Bat for Halloween
A bat is one of the most common Halloween symbols, and its silhouette works well for decorations, cards, and simple holiday drawings. If you want to learn how to draw a bat for Halloween, this tutorial will show you two different methods.
The first method uses simple geometric shapes. The second method is based on guidelines and straight lines. Both versions help you create a clear bat silhouette, but they approach the shape in different ways.
A Halloween bat may look very simple because it does not require many details or complex shadows. At the same time, symmetry is especially important here. If one wing is too wide or the lines go in different directions, the mistake becomes noticeable right away.
Try both methods and choose the one that works better for you. After that, you can use your bat drawing for Halloween cards, decorations, background scenes, or extra practice with symmetrical shapes.
Materials
- Pencil
- Paper
- Eraser
- Coloring supplies
Steps for Drawing a Bat for Halloween
Time needed: 30 minutes
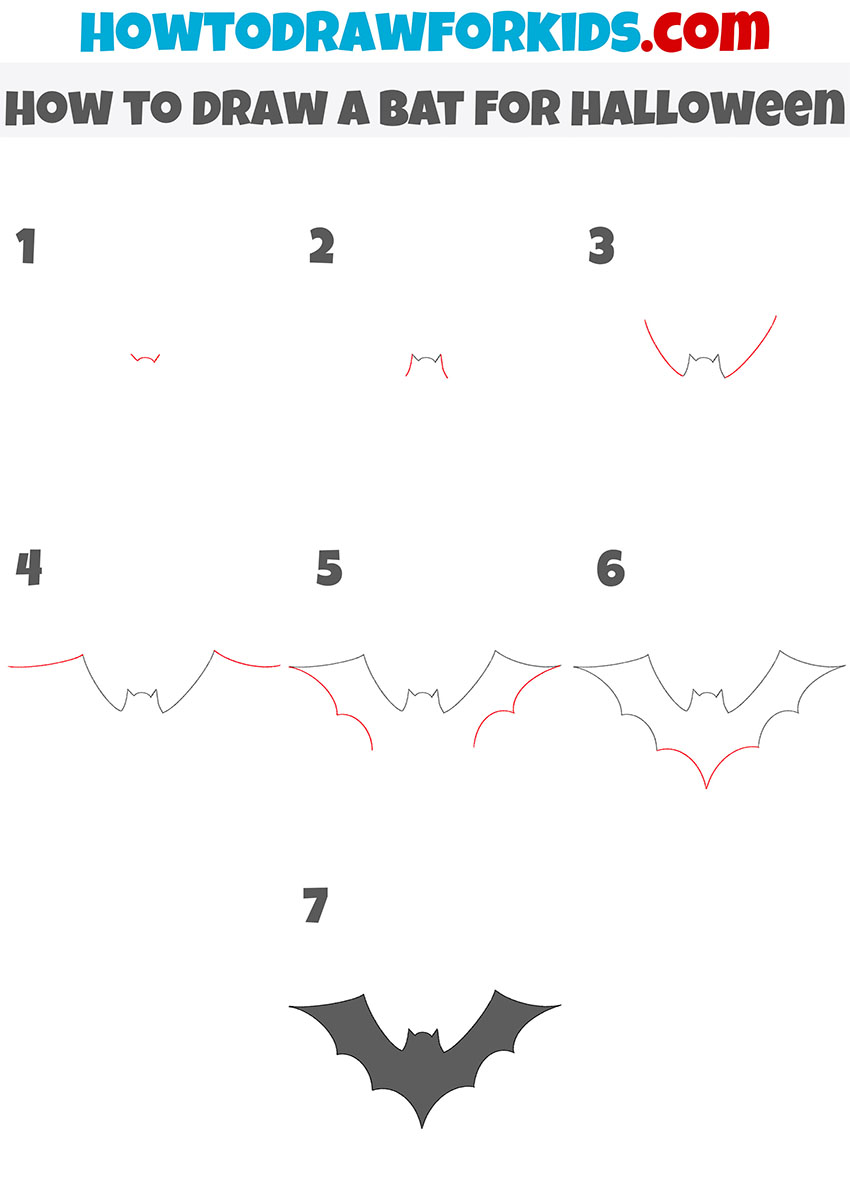
How to Draw a Bat for Halloween
- Draw the top of the head.
First, draw a rounded shape and two small diagonal lines like in our example. This is not the very top part of the drawing, place it in the center of the sheet of paper or just below.

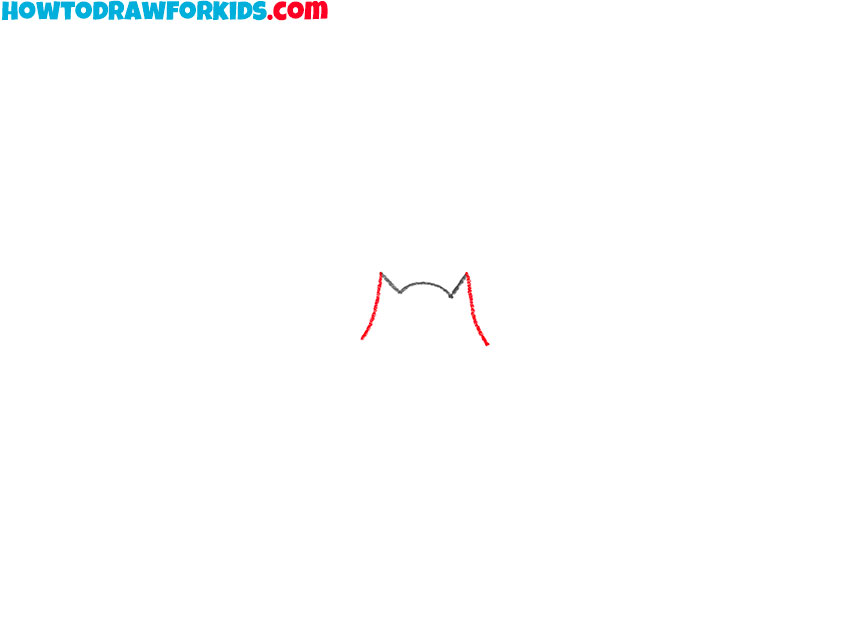
- Add the sides of the head.
Depict two more long, smooth lines to form the outline of the head and pointed ears. The completed figure should expand slightly at the bottom. It should already look like a bat’s head.
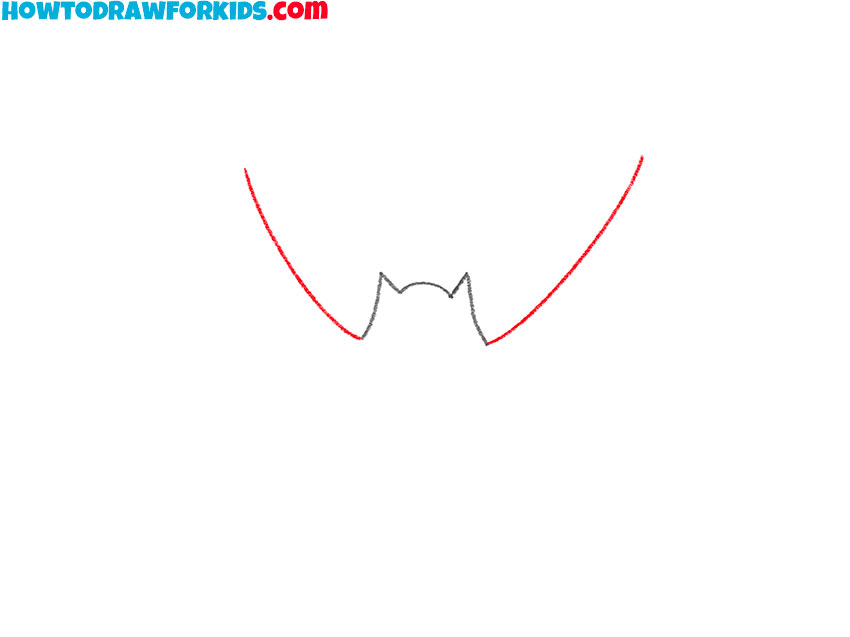
- Start drawing the wings.
I hope you left enough space because now we are starting to draw the large bat wings. So, draw two smooth vertical lines like in our example. It should be much higher than the top of the head and ears.
- Depict the top outline of the wings.
Bats have very large wings. We have to indicate this even if we are painting a Halloween decoration. Add two more smooth, curved horizontal lines. Each line should be at least 2 times wider than the body.
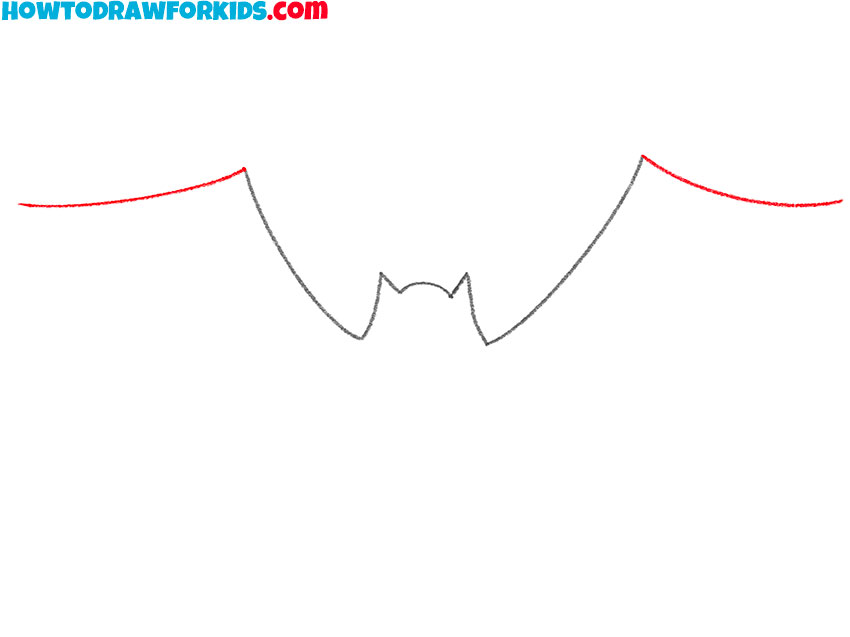
- Sketch out the sides of the wings.
This is the last step of drawing bat wings. Draw curved lines that are shaped like the letter M.
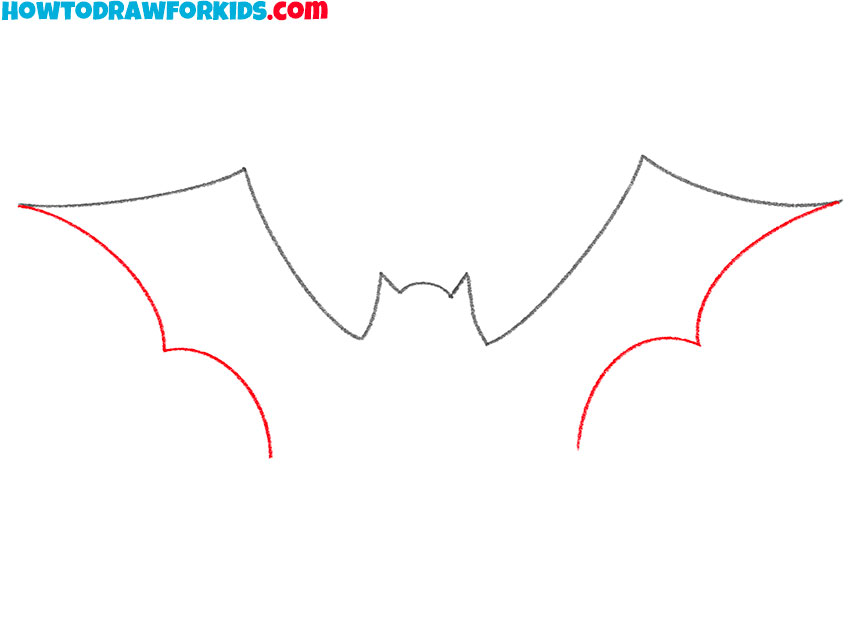
- Draw the lower part of the torso.
Close the outline of our bat and draw the tail and back of the torso. This should also be formed by two curved lines. The resulting angle should approximately coincide with the center of the head.
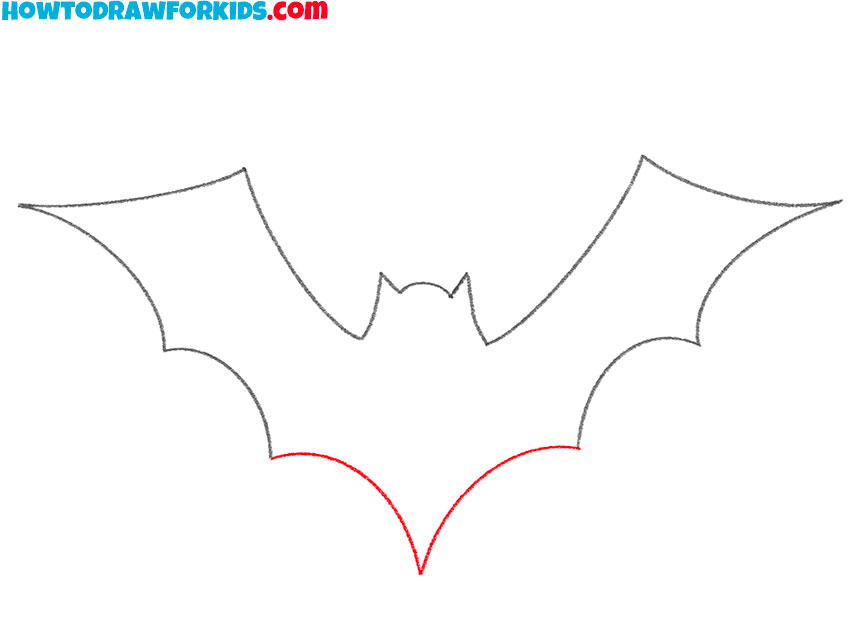
- Color the drawing.
Most often, such Halloween decorations are completely black or dark gray. Use these colors or any others depending on your imagination.
Additional Content
This PDF has several files that will help you draw a bat in several different ways. You will also find a ready-made silhouette there for coloring. Save this file so that you can always draw this even without the Internet.
Alternative Way to Draw Halloween Bat
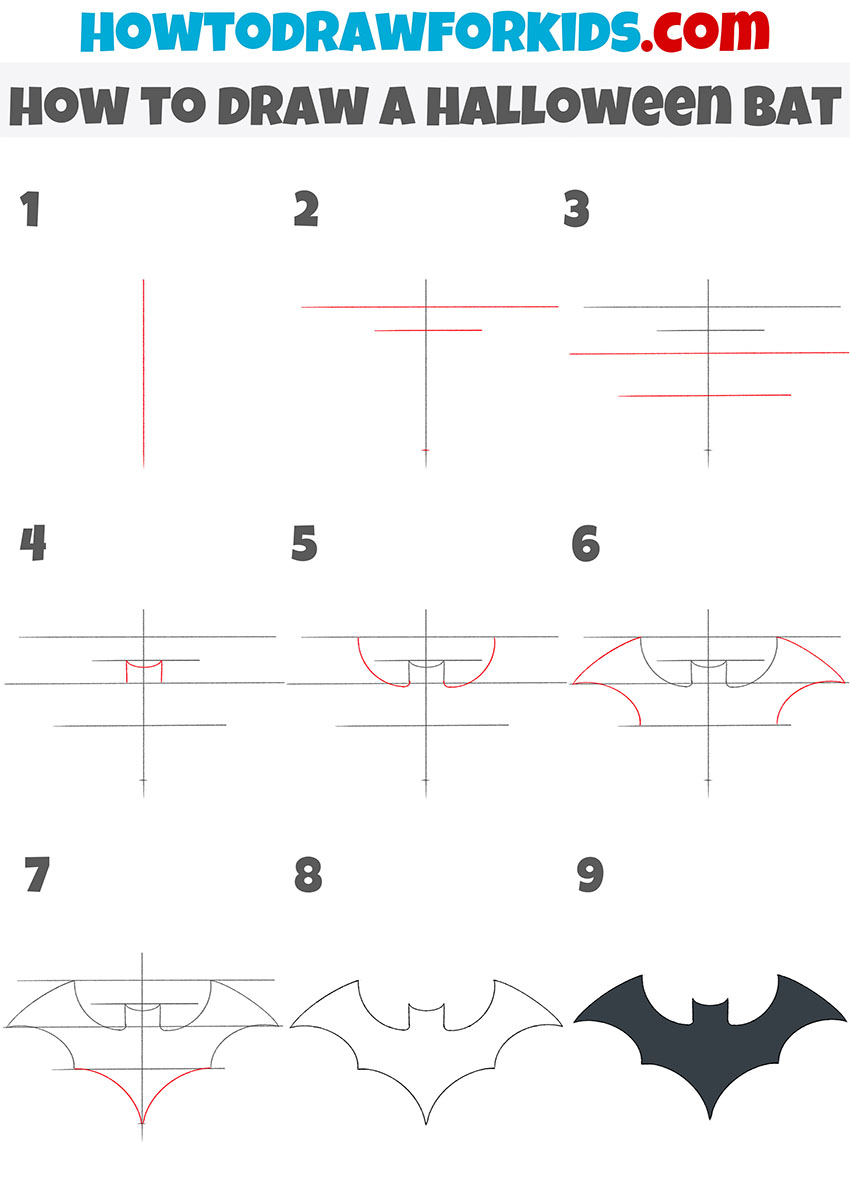
There is another alternative way of drawing. You can use this method if you want to put maximum emphasis on symmetry and straight lines.
The first steps of this guide are incredibly important. If you draw the lines of the first steps correctly, you will surely get an excellent result.
When you start drawing lines, I recommend looking at the last steps so you understand what the lines are for.
Each of them specifies the exact location and size of the body parts of our bat. Try to do without a ruler. However, remember that the lines must be very straight and precise.
Conclusion
I hope you enjoyed drawing this Halloween bat and are happy with the result. If something didn’t turn out quite the way you wanted, don’t worry – try drawing it again or experiment with a different method to see which one works best for you.
If you have any questions or would like to share your drawing, feel free to leave a comment below. And don’t forget to visit my website for more drawing lessons and new tutorials.

draw a flying fish