How to Draw an Allosaurus
In this drawing lesson, I will tell you how to draw an Allosaurus step by step. This drawing lesson will be very interesting and exciting.
This is another great drawing lesson dedicated to depicting various dinosaurs and with the help of this instruction you will learn how to draw an Allosaurus step by step. This simple lesson consists of nine steps, each of which has a detailed description. You can easily complete this task, even if you are an aspiring artist or a child, and if you still have very little drawing experience.
Allosaurus was one of the most feared carnivorous dinosaurs of the Jurassic period. The long tail of the Allosaurus consisted of almost 50 vertebrae. He helped maintain balance and deftly maneuver while running. Thanks to the flexible and powerful tail, the Allosaurus could sharply change direction and turn in different directions, chasing prey. In order to support the body weight of a large Allosaurus, its hind limbs were very strong. There were three supporting fingers on the legs, which carried the weight of the lizard. Two more fingers were turned back and were not used for movement. The Allosaurus skull had unusual paired ridges that gradually turned into horns. Allosaurus was a very large predator, so every day he needed a lot of meat.
By learning how to draw an Allosaurus with this simple tutorial, you will be able to depict it in a natural landscape, as well as complement your drawing with images of other types of dinosaurs. I think that you already want to get started on this lesson as soon as possible. You can prepare the art supplies you need right now, and then carefully follow this lesson step by step and enjoy the creative process.
Materials
- Pencil
- Paper
- Eraser
- Coloring supplies
Time needed: 30 minutes
How to Draw an Allosaurus
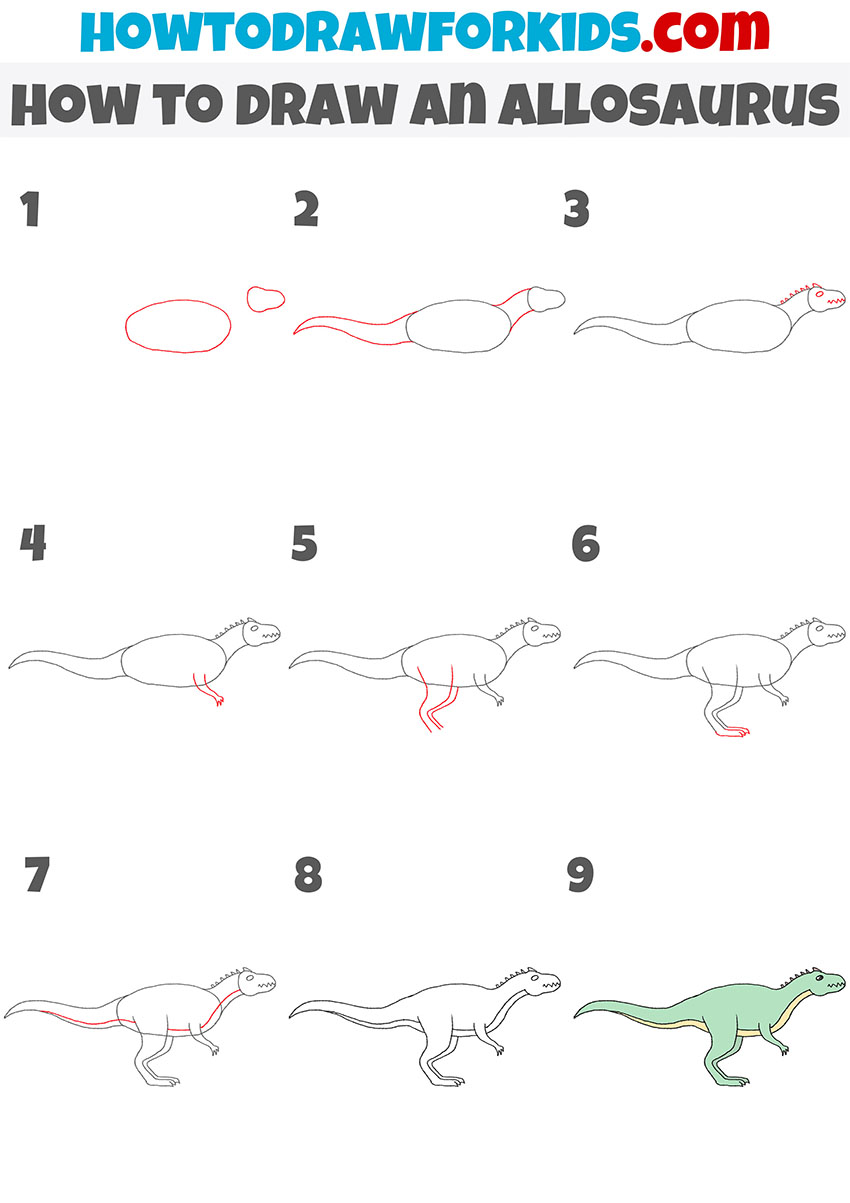
- Draw the outlines of the head and torso of the Allosaurus.
Depict the body of the Allosaurus as a large oval, and also add the head using a curved line.

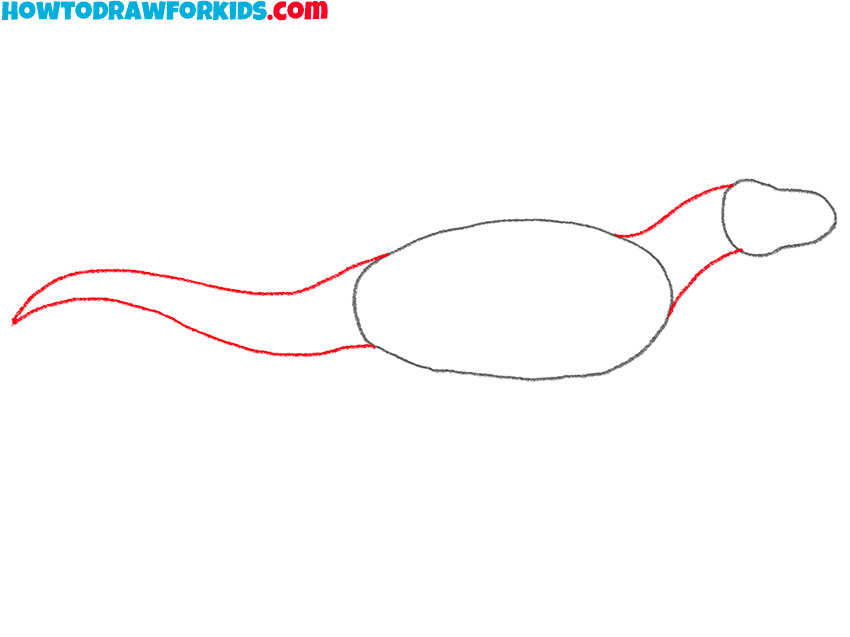
- Depict the tail and neck of the Allosaurus.
Now you need to connect the drawn shapes with curved lines and draw the pointed tail.
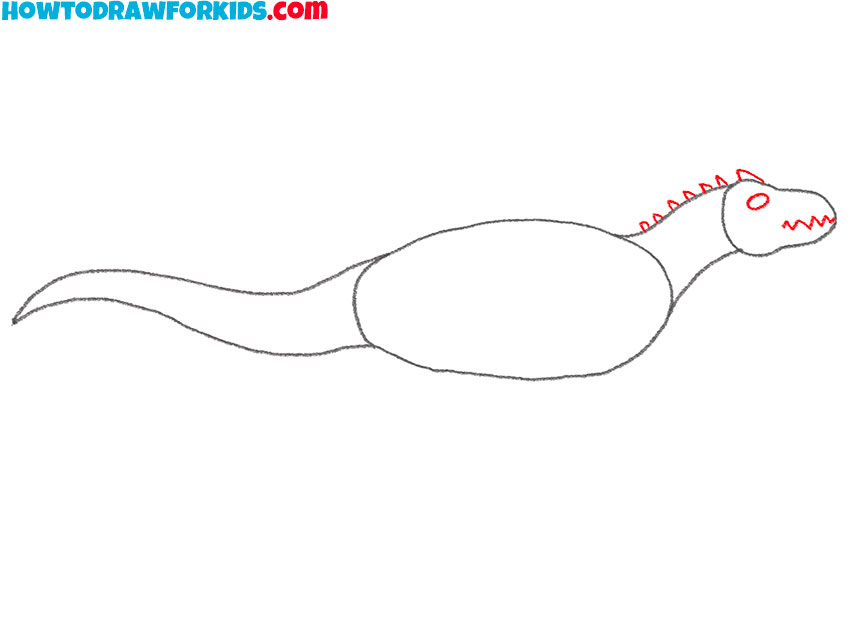
- Add the scales and facial features of the Allosaurus.
Sketch out the eye and mouth, using a zigzag and an oval, add elements on the neck and head.
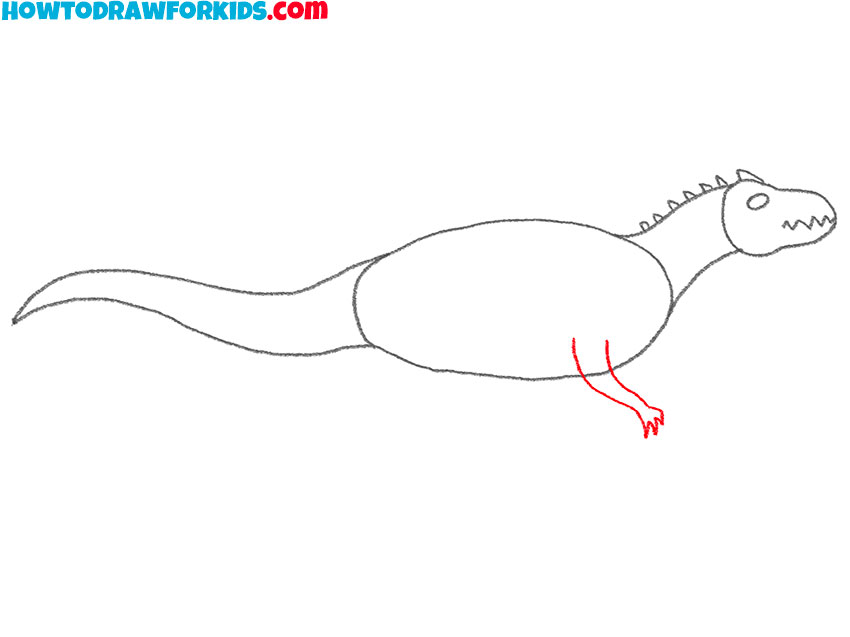
- Draw the front paw of the Allosaurus.
At the bottom of the Allosaurus’s torso, draw one paw with pointed fingers using a curved line.
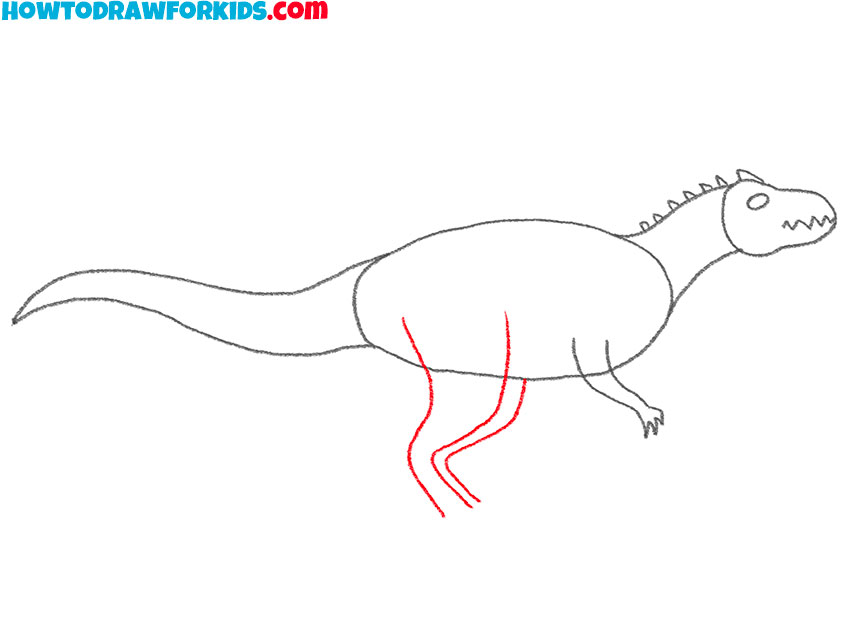
- Sketch out the upper parts of the hind limbs of the Allosaurus.
To start drawing the hind legs of the Allosaurus, add some curved lines of varying lengths.
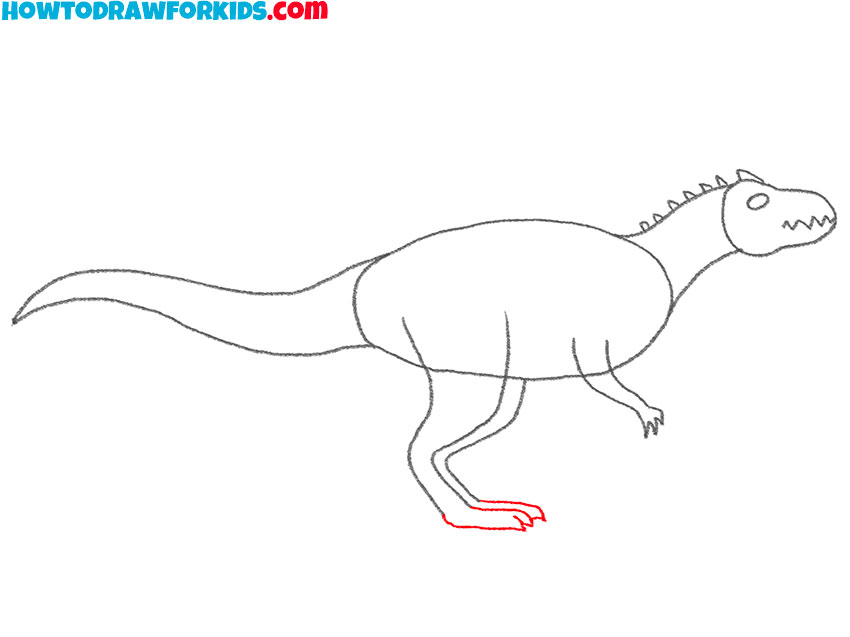
- Finish drawing the hind legs of the Allosaurus.
Now you need to add the feet and toes of the Allosaurus using curved lines.
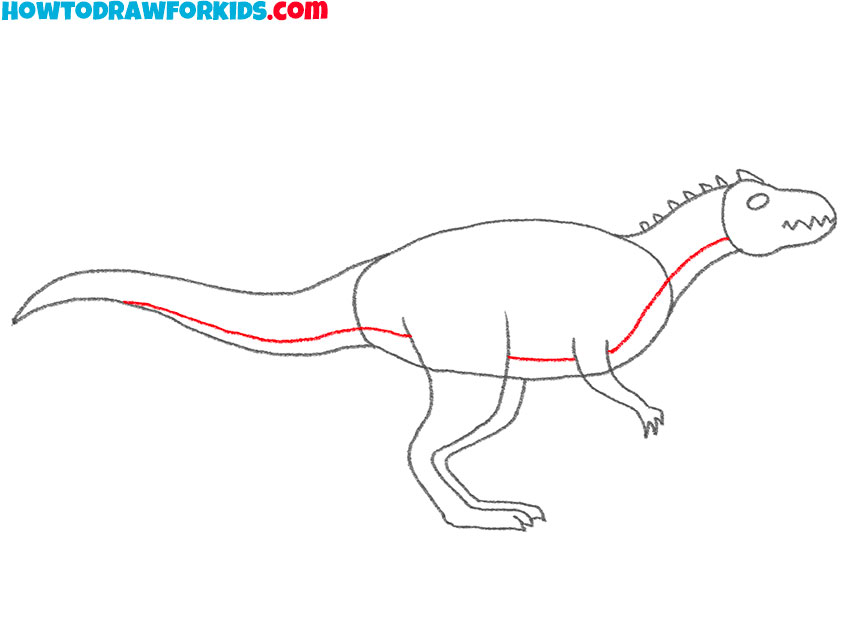
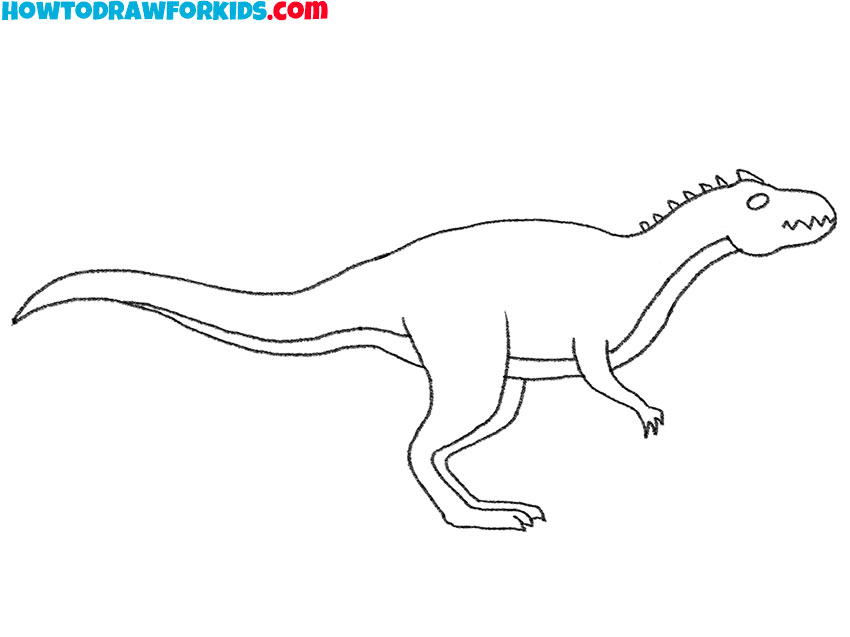
- Add an element on the body of the allosaurus.
Draw curved lines on the neck, chest, belly, and tail of the Allosaurus as shown.
- Correct inaccuracies.
Now you can use the eraser to remove extra lines and prepare the drawing for coloring.
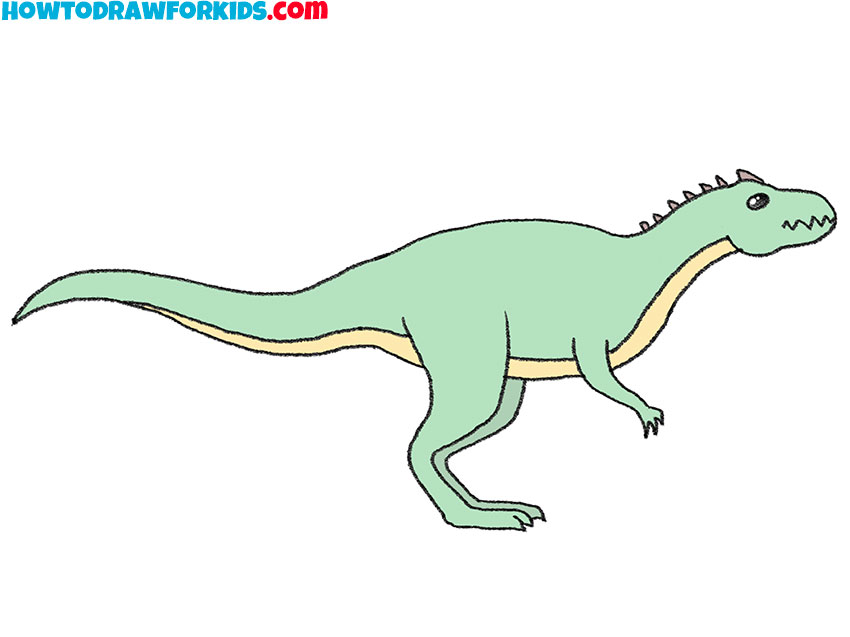
- Color the drawing.
To color the allosaurus, use green, yellow, gray, and also black.
You can tell in the comments about your impressions of this lesson and share it with your friends. For your convenience, I have prepared a PDF file that contains all the useful information from this lesson, as well as additional practice materials that will help you develop your artistic abilities. You can download this file right now, so you don’t lose it in the future, and return to this tutorial even without an internet connection.