How to Draw a Tunnel
In this drawing lesson, you will learn how to draw a tunnel step by step. This simple drawing lesson consists of nine steps.
I bring to your attention this fascinating and unusual drawing lesson, in which I will tell and show you how to draw a tunnel step by step. This lesson will help you greatly improve your artistic skills, as it will help you practice drawing various geometric shapes. If necessary, you can use a ruler to draw straight lines.
The tunnel is a horizontal or inclined underground structure, the length of which is much greater than the width and height. This structure is intended for transport purposes, water passage, laying urban utility networks or locating industrial enterprises. Tunnels on communication routes serve as a means to overcome various kinds of obstacles or to develop a path underground. Special tunnels, such as wildlife crossings, are built to allow wildlife to cross man-made barriers safely. Tunnels can be connected together to form tunnel networks.
By learning how to draw a tunnel with this simple tutorial, you will be able to paint a beautiful picture with this image in the future. First, you need to draw a frame to make your painting look neater. You can also optionally add images of cars or other objects in the tunnel. If you are ready to start drawing, then you can prepare art supplies right now, and then start this lesson, carefully following my recommendations.
Materials
- Pencil
- Paper
- Eraser
- Coloring supplies
Time needed: 30 minutes
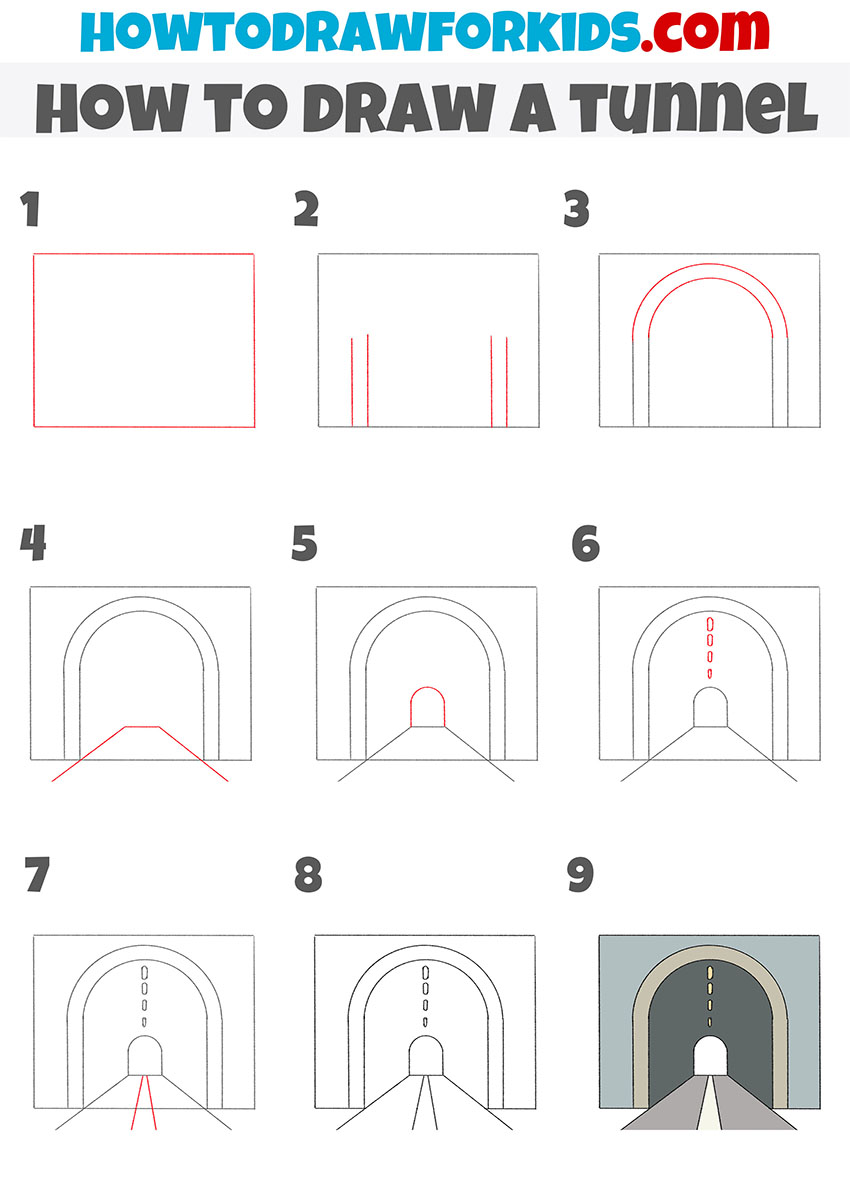
How to Draw a Tunnel
- Draw the frame.
To draw the frame, you need to draw a rectangle using four straight lines.

- Add the side edges of the tunnel entrance.
To complete this step, you need to draw four straight vertical parallel lines.

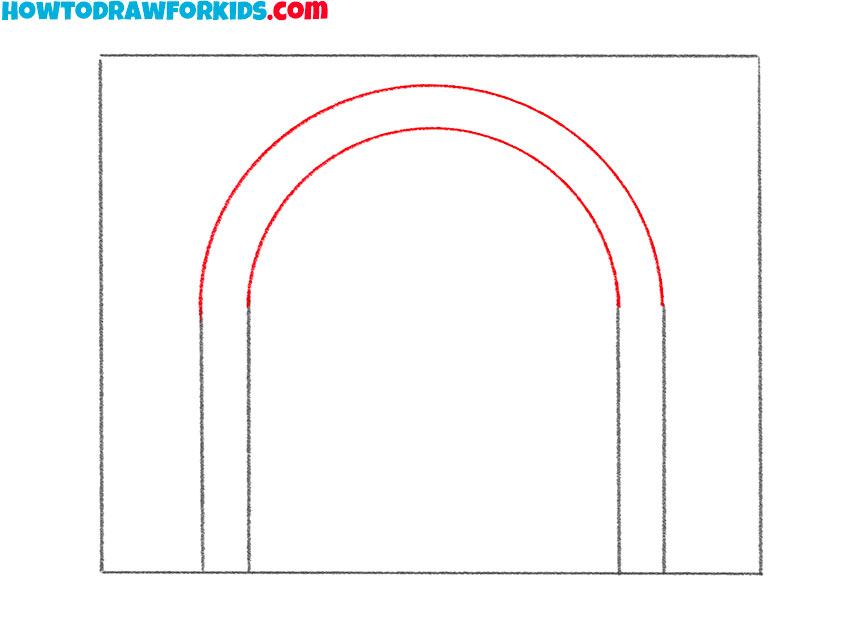
- Sketch out the tunnel entrance arch.
Using two arcs of different sizes, connect the previously drawn straight lines together.
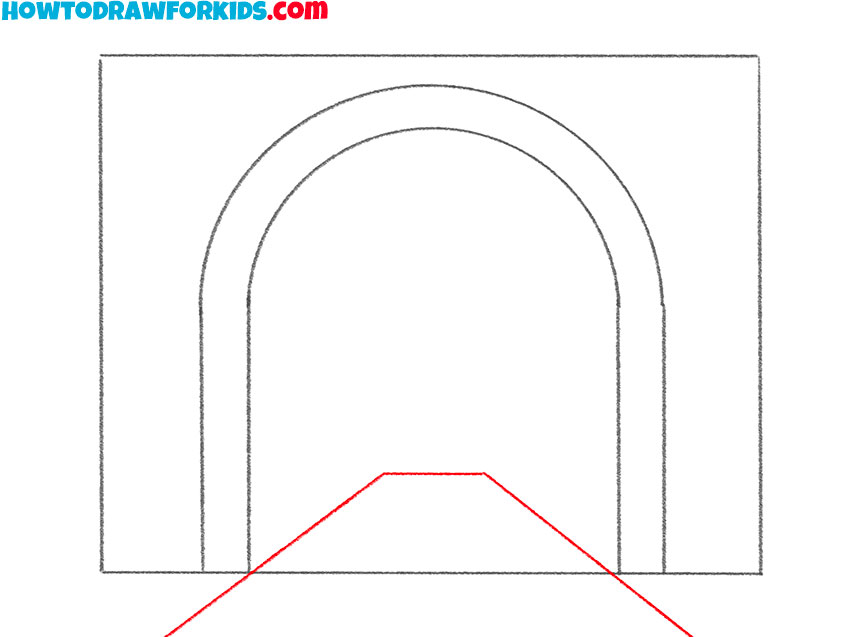
- Depict the road leading into the tunnel.
You need to draw two slanted lines and connect them with a horizontal line.
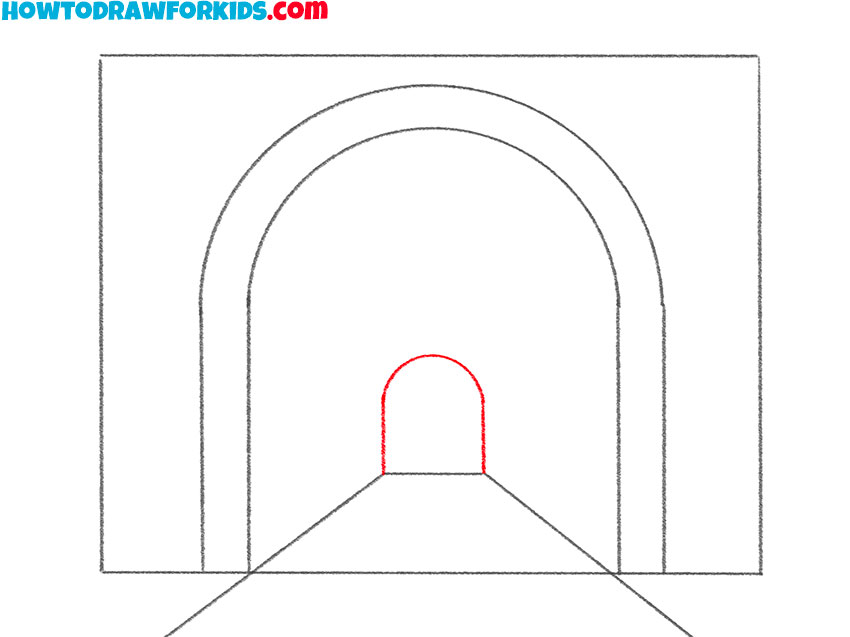
- Draw the outline of the exit from the tunnel.
To draw another arch, you need to add an arc and straight lines above the horizontal line.
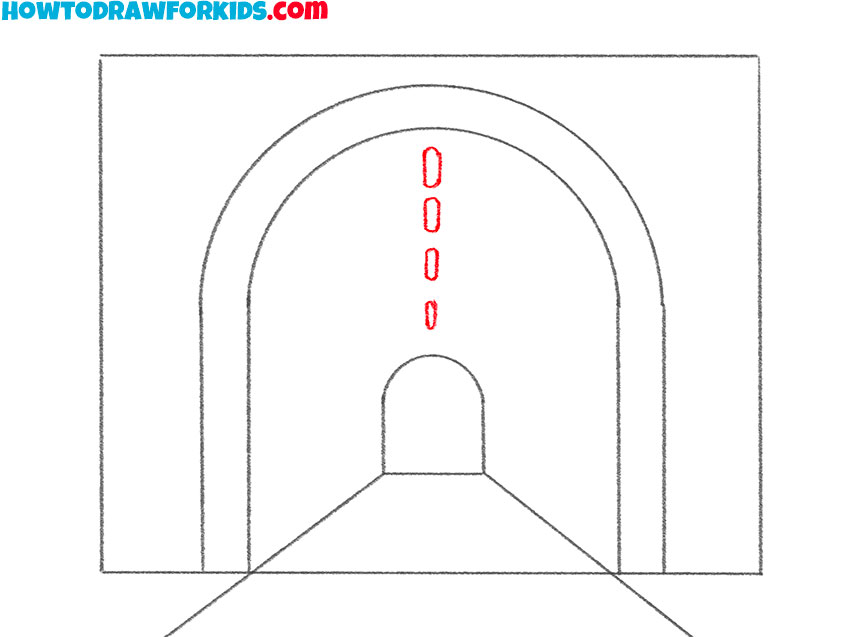
- Add the light sources in the tunnel.
Above the previously drawn arch, depict four shapes of different sizes using rounded lines.
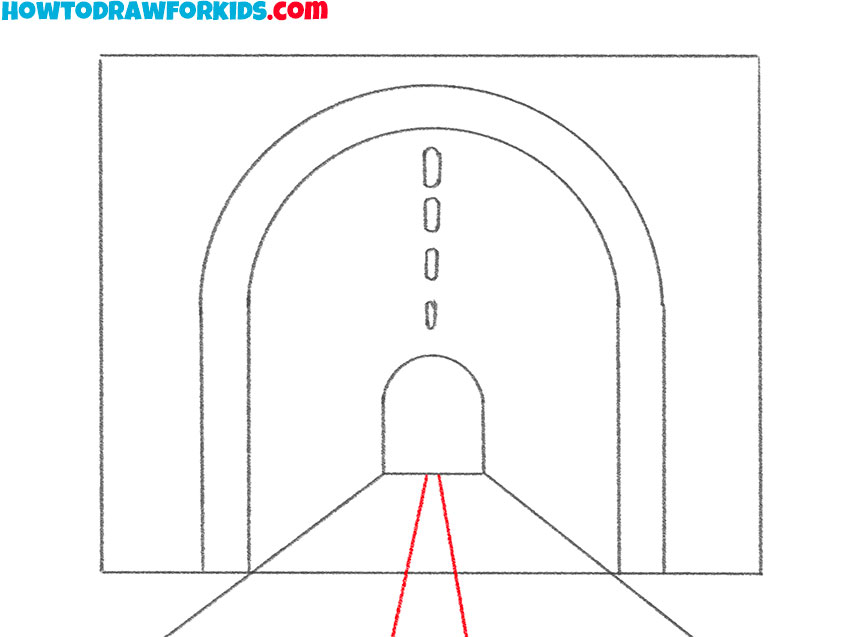
- Depict a line on the road to the tunnel.
To complete this step, you need to draw two straight, slightly slanted lines of the same length.
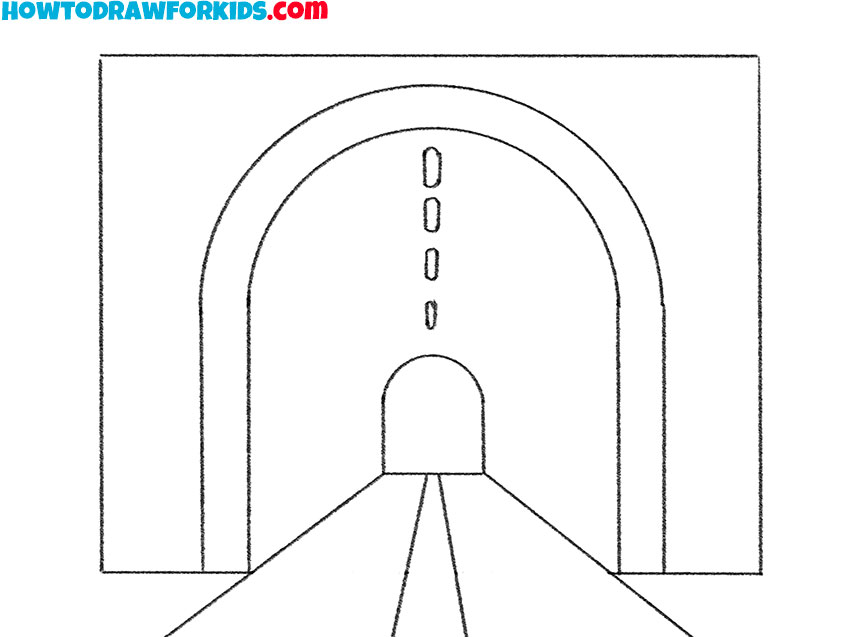
- Correct inaccuracies.
Now you can take the eraser and remove the extra lines.
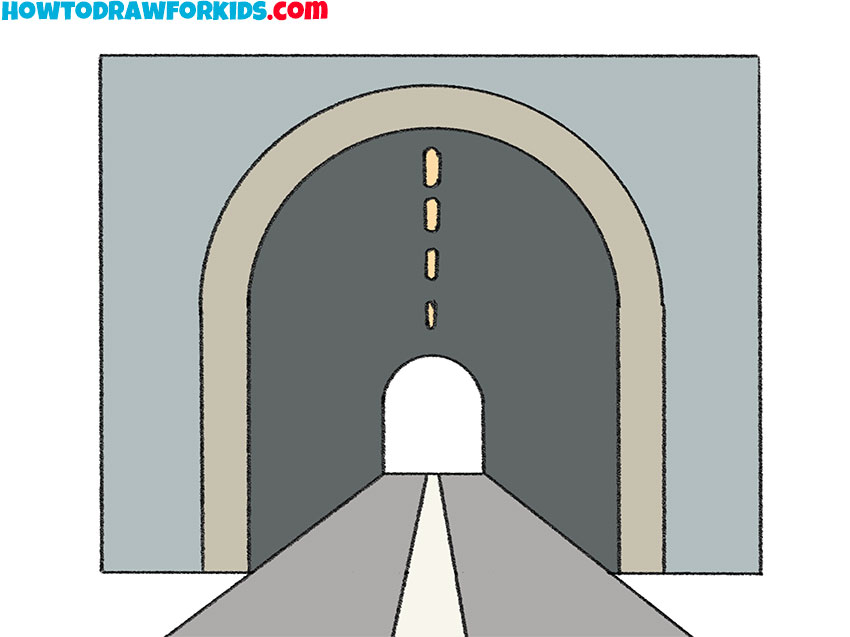
- Color the drawing.
To color the tunnel, you should use yellow, brown, and various shades of gray.
For your convenience, I have prepared a PDF file that contains all the useful information from this lesson, as well as additional practice materials that will help you develop your artistic abilities. You can download this file right now, so you don’t lose it in the future, and return to this tutorial even without an internet connection.


Excellent instructions for a novice beginner with no talent. Thanks