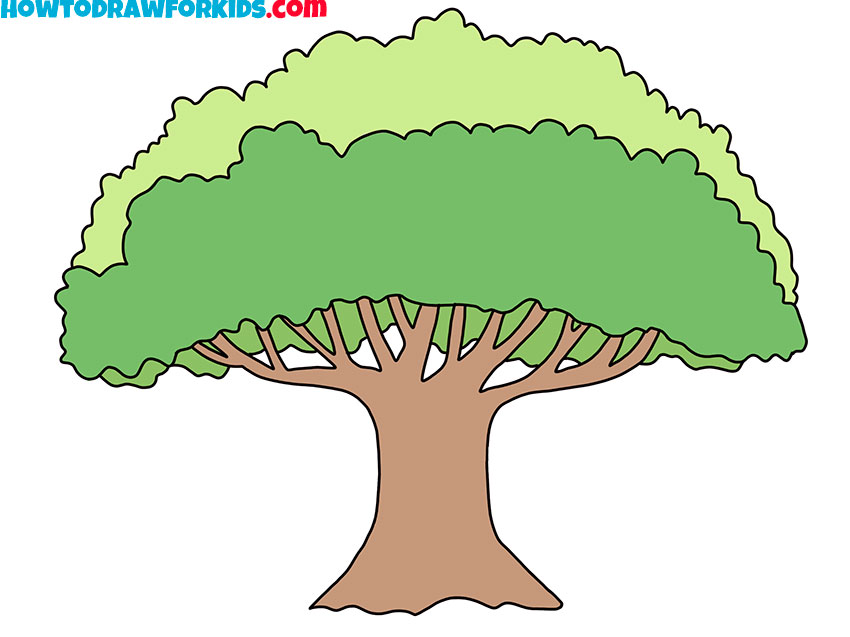
How to Draw a Big Tree
Nature is beautiful in all its glory and creates many different types of trees. This tutorial will show you how to draw a large tree capturing all its features.
Prepare to Draw a Big Tree
Drawing a big tree is mainly about arranging the trunk and branches so the crown has a strong base. Unlike the main tree drawing tutorial, this version gives more attention to the wide spread of the branches and the larger mass of foliage.
The trunk should look thick enough to support the crown, but it does not need to be perfectly straight. Slight differences between the left and right sides usually make the tree look more natural.
The hardest part is leaving enough room around the branches before the crown is added. If the branches are placed too close together, the upper part of the tree may look cramped.
Big Tree Drawing Tutorial
- Pencil
- Paper
- Eraser
- Coloring supplies (brown and green)
Time needed: 30 minutes
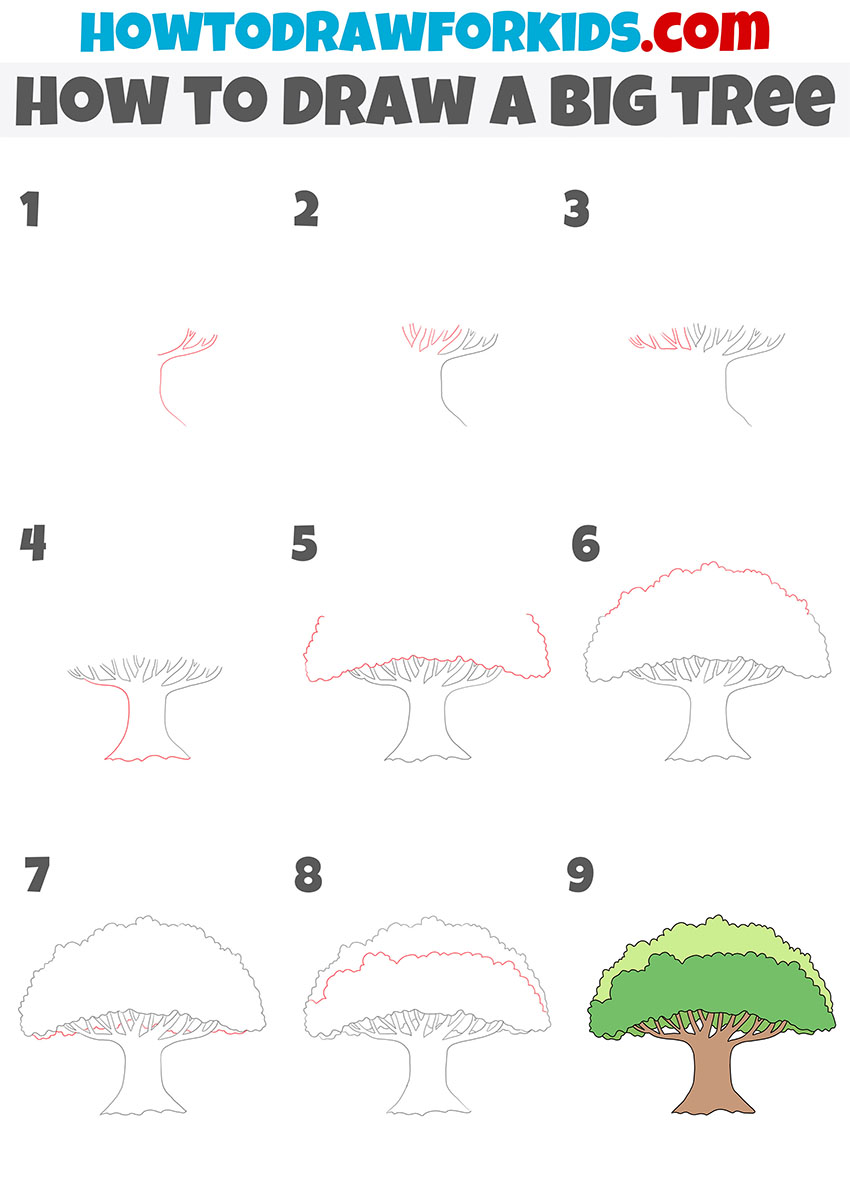
How to draw a big tree step by step
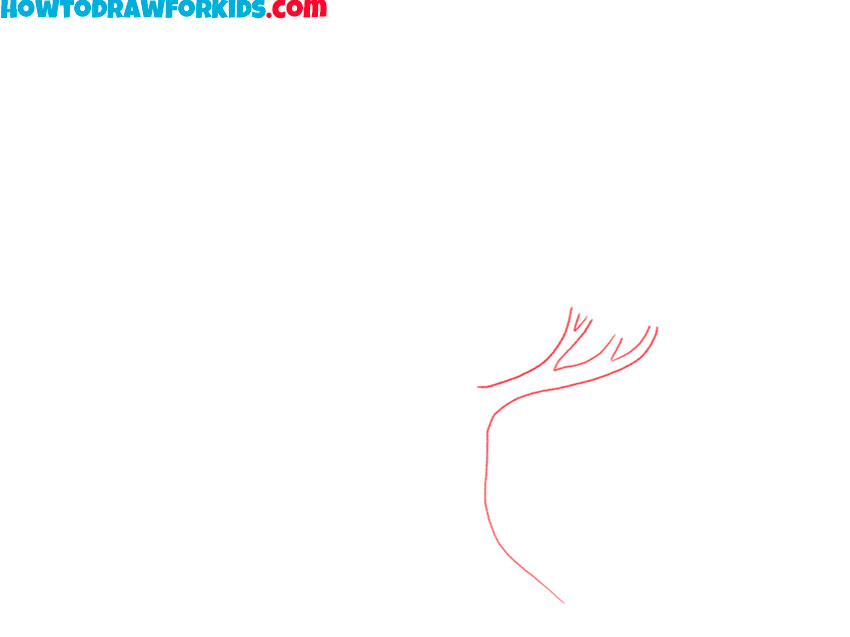
- Draw the first side of the tree trunk.
Sketch the right edge of the big tree trunk with a long curved line. Split its upper end into several branches, using shorter lines that spread outward in different directions.
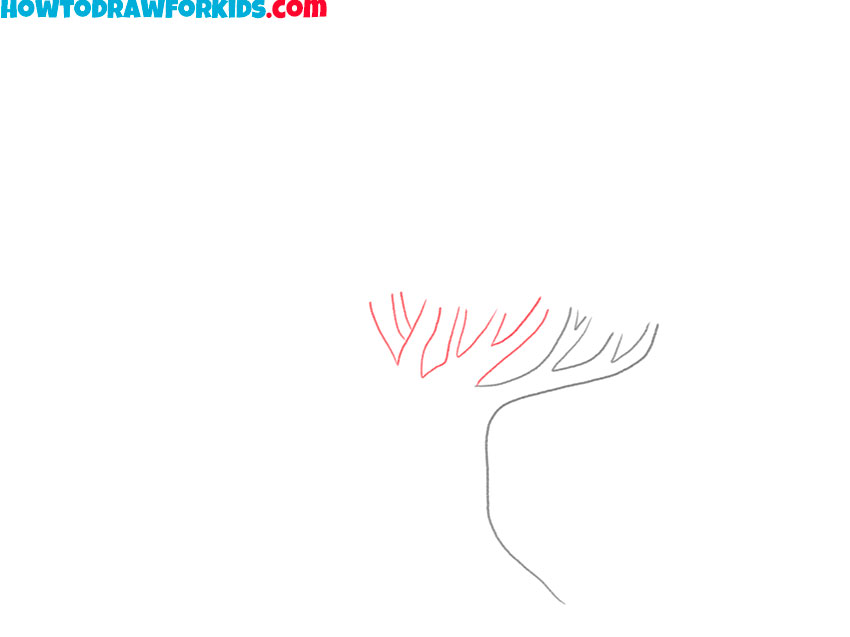
- Add more branches to the big tree.
Extend several curved lines upward and to the right. Leave open spaces between the branches so each fork remains clear when the tree crown is added later.
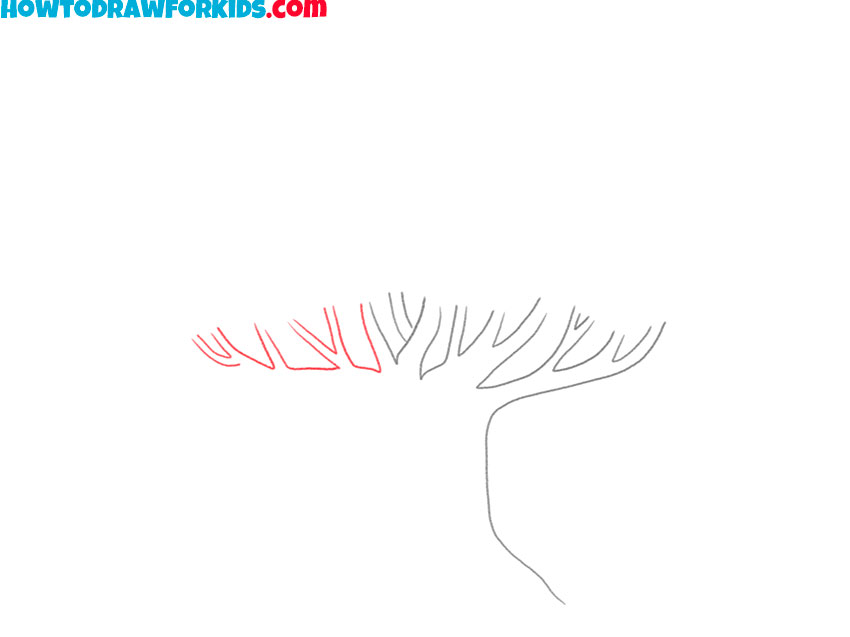
- Sketch the branches on the left.
Add the remaining tree branches on the left side. Start each line near the center of the trunk and direct it outward, creating several natural forks between the larger limbs.
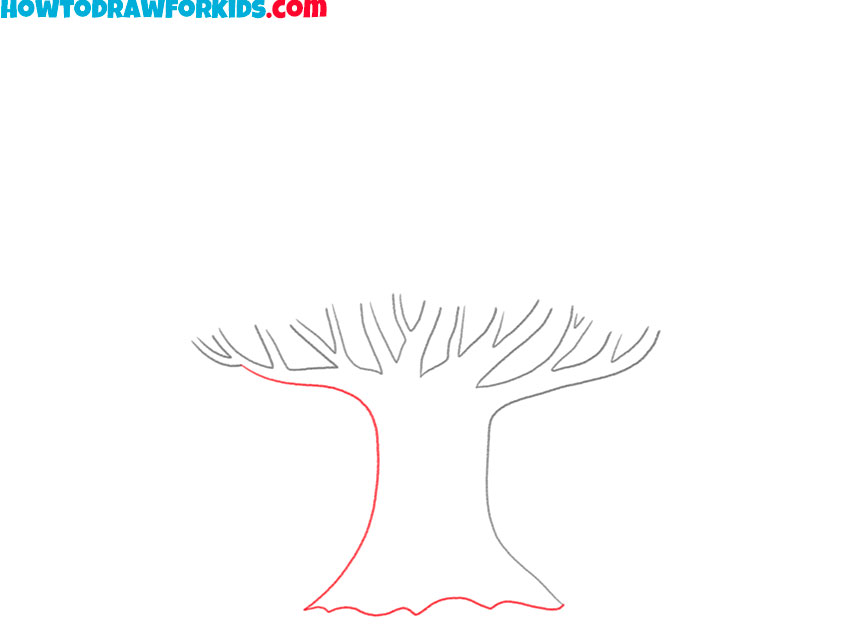
- Complete the large tree trunk.
Draw a long curved line down from the left branch to form the other side of the trunk. Widen the lower part slightly so the tree appears firmly connected to the ground.
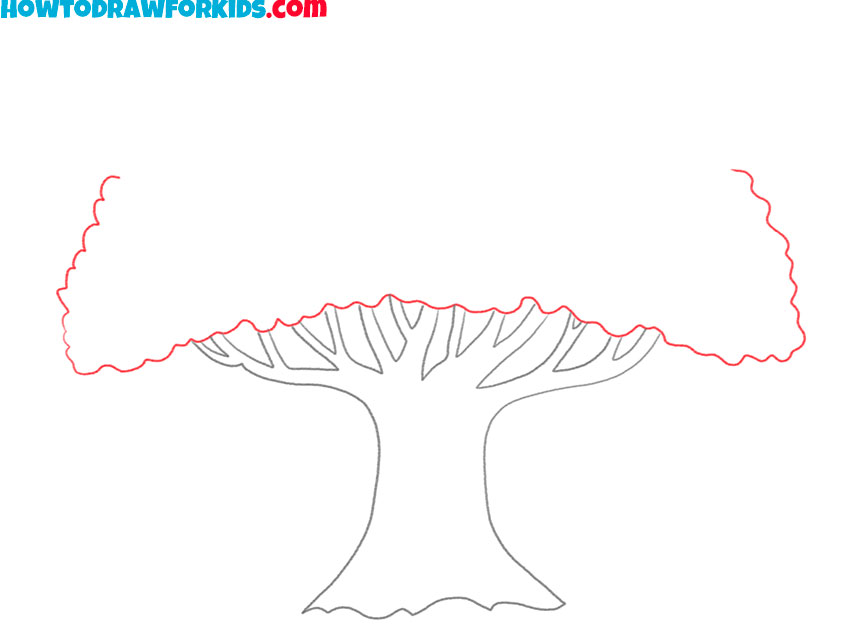
- Begin outlining the big tree crown.
Draw a long wavy line above the branches to begin the crown. Use several gentle curves of different sizes instead of one smooth arc, following the spread of the limbs below.
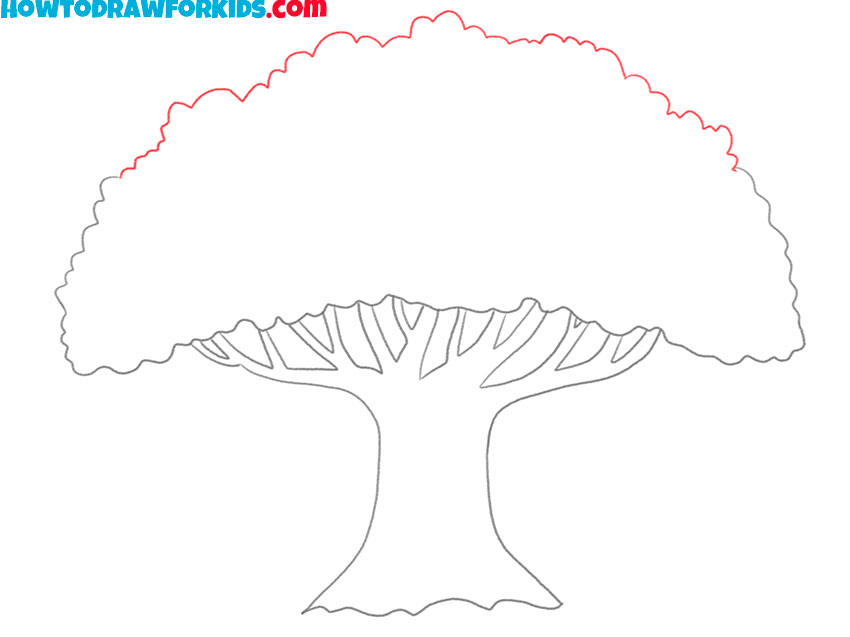
- Finish the outline of the tree crown.
Continue the wavy outline down each side and connect its ends beneath the branches. Change the size of the curves so the foliage does not look stiff or perfectly even.
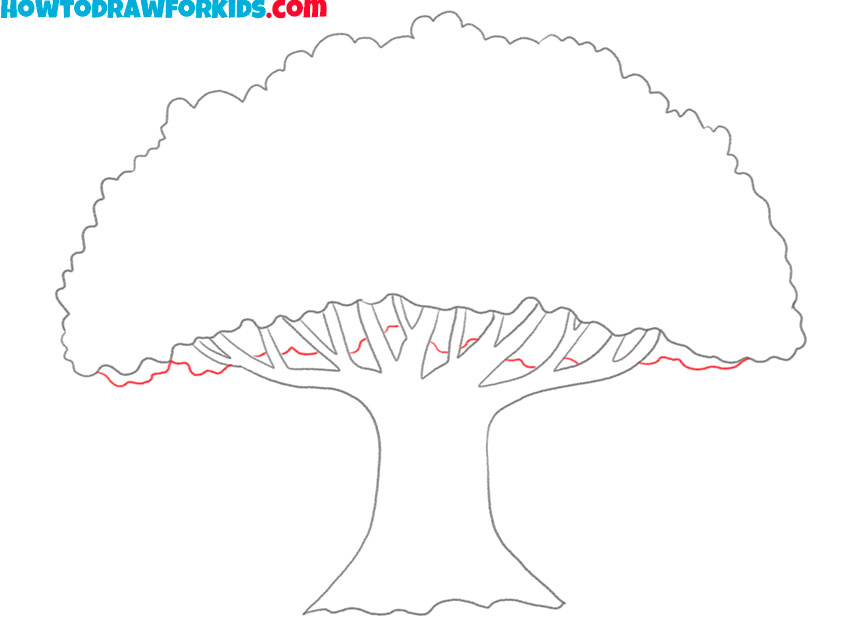
- Add foliage behind the branches.
Draw short wavy sections beneath the outer crown and between the branches. These lines show groups of leaves behind the limbs and fill the open spaces without hiding the branch structure.
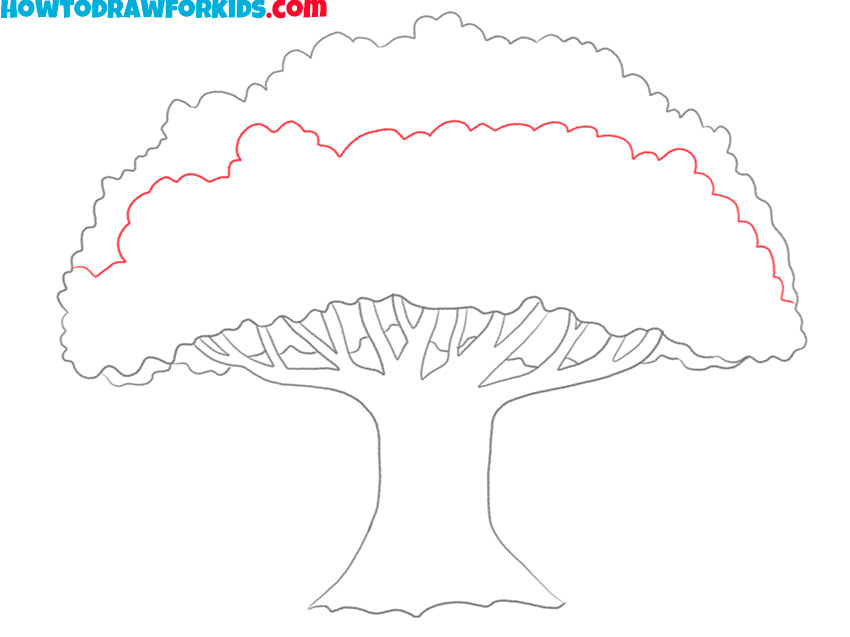
- Divide the crown into leafy sections.
Add several wavy lines inside the crown to separate the foliage into smaller groups. Place these lines near the main branches, leaving open areas between them.
- Color the big tree drawing.
Color the trunk and branches brown. Use green for the crown, changing the shade slightly between the leafy sections if you want to separate them more clearly.
Big Tree Drawing Printables
The PDF includes a shorter version of the drawing steps and additional pages for practice.
Conclusion
The main challenge in this drawing is placing the branches before enclosing them with the crown. When the limbs spread outward from the trunk, the tree looks larger without requiring many small details.
You can change the outer edge of the foliage without changing the construction underneath. A wider crown makes the tree appear older, and an uneven outline usually looks more natural than a perfectly symmetrical one.
For a closer look at the lower part, try drawing a tree trunk with more attention to its base and bark. You can also practice drawing a tree branch separately before adding it to a larger scene.
A different crown shape can change the whole tree. The oak tree drawing tutorial is a useful next choice because its heavy branches and uneven foliage require a different arrangement of the same basic forms.