How to Draw a Blueberry
This tutorial on how to draw a blueberry demonstrates two methods and shows that even simple forms can be enjoyable to draw.

How to Draw a Blueberry: Introduction
In this tutorial, I want to show you how to draw a blueberry. This is a very tasty and healthy berry. Blueberries are used for the prevention and treatment of various diseases, as well as an excellent delicacy. Various dishes are prepared from blueberries – jam, compote, jelly, and other sweet desserts. Blueberries are also added to baked goods.
Blueberries grow on a low bush in the northern regions. The berries are round, dark blue in color, but due to the bluish bloom, the berries seem lighter. On the front of the berries, there is a small protruding part where the seeds are located. In the picture, you can see three blueberries and some leaves. This is not difficult at all to repeat.
This tutorial consists of a few simple steps that any child or aspiring artist can easily follow. I am sure you will like this tutorial and enjoy the creative process.
Blueberry Drawing Tutorial
Materials
- Pencil
- Paper
- Eraser
- Coloring supplies
Time needed: 20 minutes
How to Draw a Blueberry
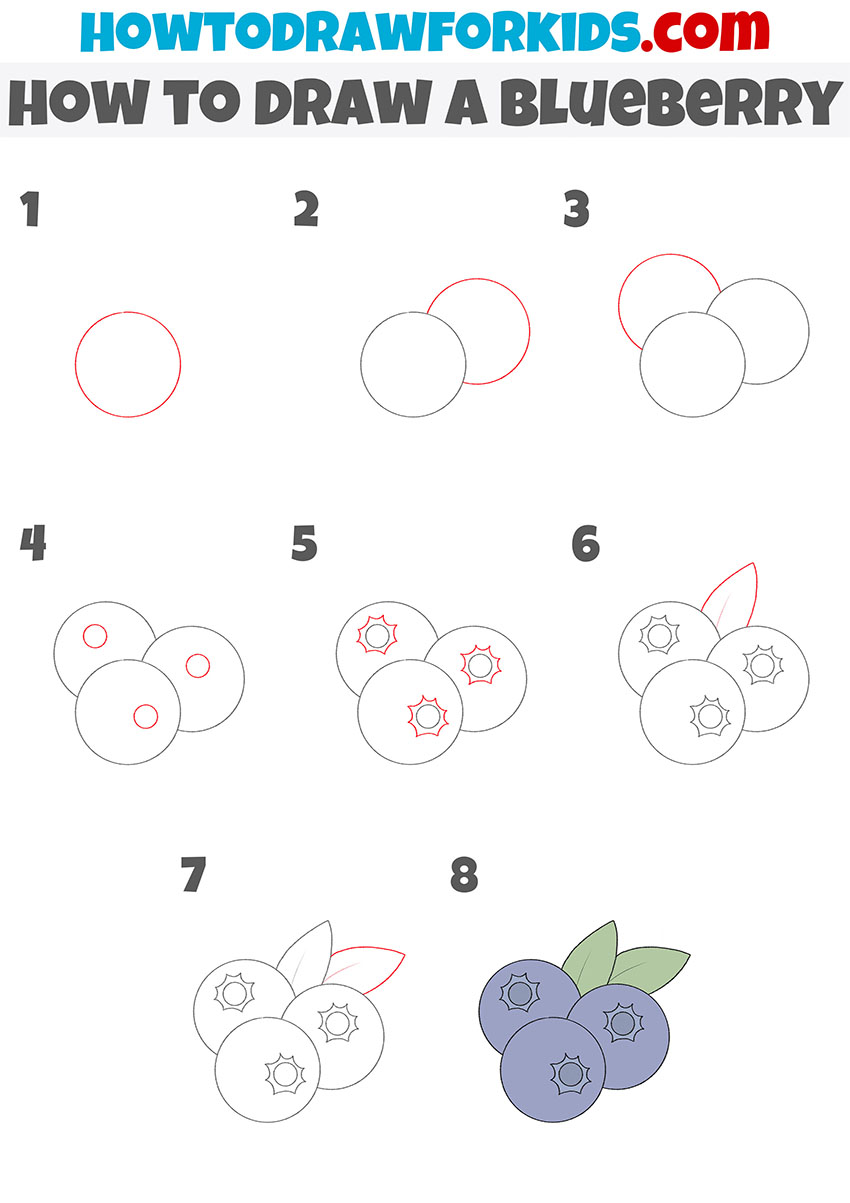
- Sketch the first berry.
The best way to draw a blueberry is to sketch one berry as the base of the composition. Sketch a simple circle, keeping your lines really light. I always advise to rotate your paper while sketching so your hand follows a comfortable arc.

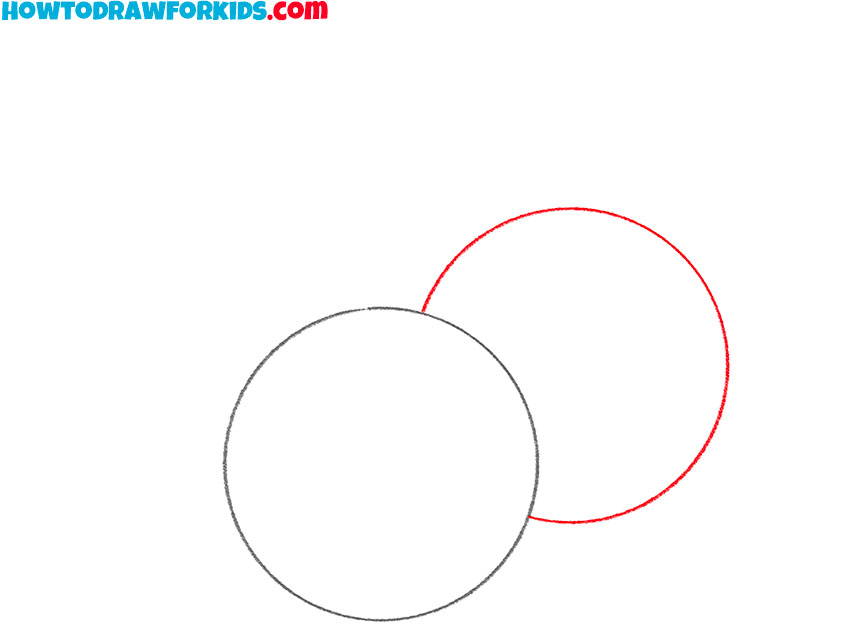
- Draw the next blueberry.
Since blueberries usually appear in small clusters, draw another circle slightly overlapping the first. Keep the size close to the first berry, but let there be a small difference so the drawing feels natural. A gentle overlap will give the cluster more realistic look.
- Draw another blueberry.
To complete the group, add a third circle overlapping the first two. This creates a triangular arrangement, which makes the cluster look more authentic. Try not to place the new circle directly in line with the others. Instead, shift it slightly upward or sideways so the composition feels more natural.

- Mark the centers of the berries.
Every blueberry has a small indentation at the top, which makes them recognizable. Draw a small circle inside each berry, positioning them slightly off-center to match the way the berries face. These inner circles act as central parts for details you’ll add later.

- Draw star-shaped calyx.
The most distinctive feature of a blueberry is the calyx, a small star-like shape at the top. Around each inner circle, sketch five or six short jagged points, connecting them in a star pattern. Don’t worry if they’re not perfectly even, slight irregularity makes them look more realistic.

- Draw a leaf behind the berries.
To give the cluster a natural surrounding, add a simple leaf behind the berries. Sketch a pointed oval shape emerging from the gap between two circles. Leaves will make your drawing look more complete. Draw the central vein and additional lines on the leaf.

- Add the second leaf.
Since leaves usually grow in pairs or small groups, sketch another leaf next to the first one. Angle it differently so the drawing doesn’t feel too symmetrical. Use the same pointed oval shape. Adding this second leaf creates a more complete composition and makes the cluster look like it’s part of a plant.

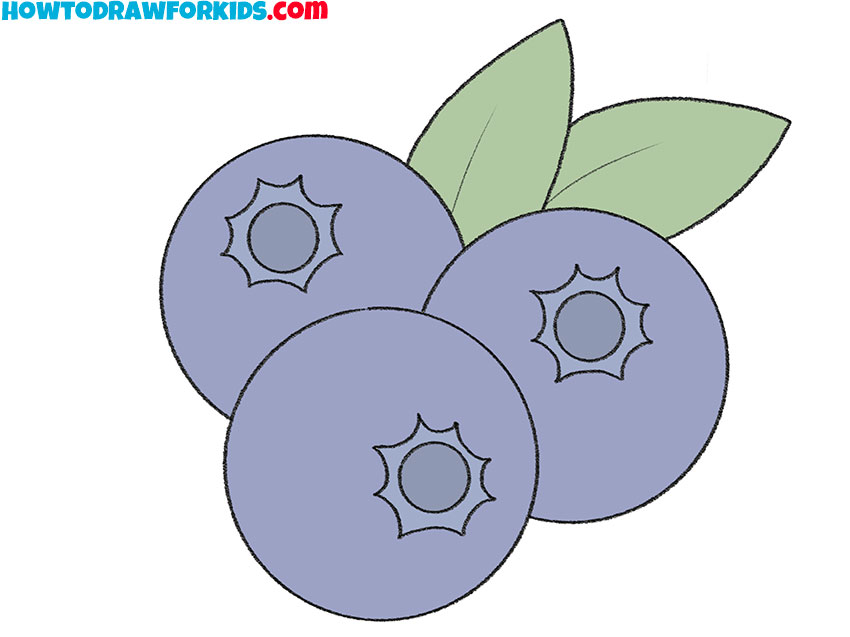
- Paint the berries and leaves.
At this stage, your outline is complete, and adding color will make your blueberry drawing look more realistic. Shade the berries with a deep blue or blue-violet. You can leave small highlights. For the calyx, use a slightly darker shade. Color the leaves with a medium green.
How to Draw a Blueberry: Video Tutorial
Additional Content
For your convenience, I have prepared a PDF that contains a short version of this tutorial and additional helpful tools. Download this file and complete the lesson any time you want to get creative.
Easy Blueberry Drawing Tutorial
To draw a blueberry, it is important to first create the overall placement of the fruit to avoid uneven spacing later. Outline one large circle, then add a second overlapping circle to the side, followed by a third to complete the group.
Inside each blueberry, draw a smaller circle to mark the blossom end, then add short zigzag-like lines around these to show the natural detail of the fruit. This small element helps distinguish the blueberry from a simple round shape. Sketch a short curved line to add a leaf, then draw another leaf to complete the cluster.
Check that the circles remain even, as irregular outlines can make the fruit look wrong. Once the main forms are complete, erase overlapping lines and clean up the contour. For coloring, fill the berries with a dark blue or purple shade and the leaves with green.

Conclusion
For more drawing practice, see the cherry drawing tutorial to study other types of fruits, or the strawberry drawing tutorial to try another small berry with different textures and details.
Share your results, write your thoughts in the comments, and come back for more step-by-step lessons.