How to Draw Vision
Learn how to draw Vision in a fun, chibi style with this kid-friendly tutorial. We’ll break down each step, making it easy for young artists to follow along and develop their skills. This guide is all about bringing superhero flair into simple drawings, ensuring a creative and rewarding experience that ends with your own chibi Vision masterpiece.
How to Draw Vision: Basic Information
Unlock the secrets of drawing one of the most enigmatic Avengers with our how to draw Vision lesson. This tutorial will guide you through a series of simple, yet effective steps to capture Vision’s chibi form. With my easy method, you’ll learn how to sketch his distinct features, from the Mind Stone on his forehead to the details of his cape.
This lesson was crafted to empower my readers to draw Vision with ease and confidence, using shapes and lines that work together to bring this synthetic hero to life. In this drawing, we’ll pay special attention to Vision’s unique characteristics.
His calm yet powerful eyes, the subtle contours of his cape, and the iconic color palette that makes him instantly recognizable. I’ve designed this lesson to help you understand not only the how but also the why behind each stroke, ensuring that your rendition of Vision is both accurate and full of personality.
By the end of this artistic journey, you’ll not only know how to draw Vision, but you’ll also appreciate the subtle complexities that make him such a beloved character. So, grab your pencils, and let’s give life to Vision on your sketchpad. Your skills will grow with every line, and soon you’ll be creating Avengers-worthy art all on your own.
Vision Drawing Tutorial
Materials
- Pencil
- Paper
- Eraser
- Coloring supplies
Time needed: 30 minutes
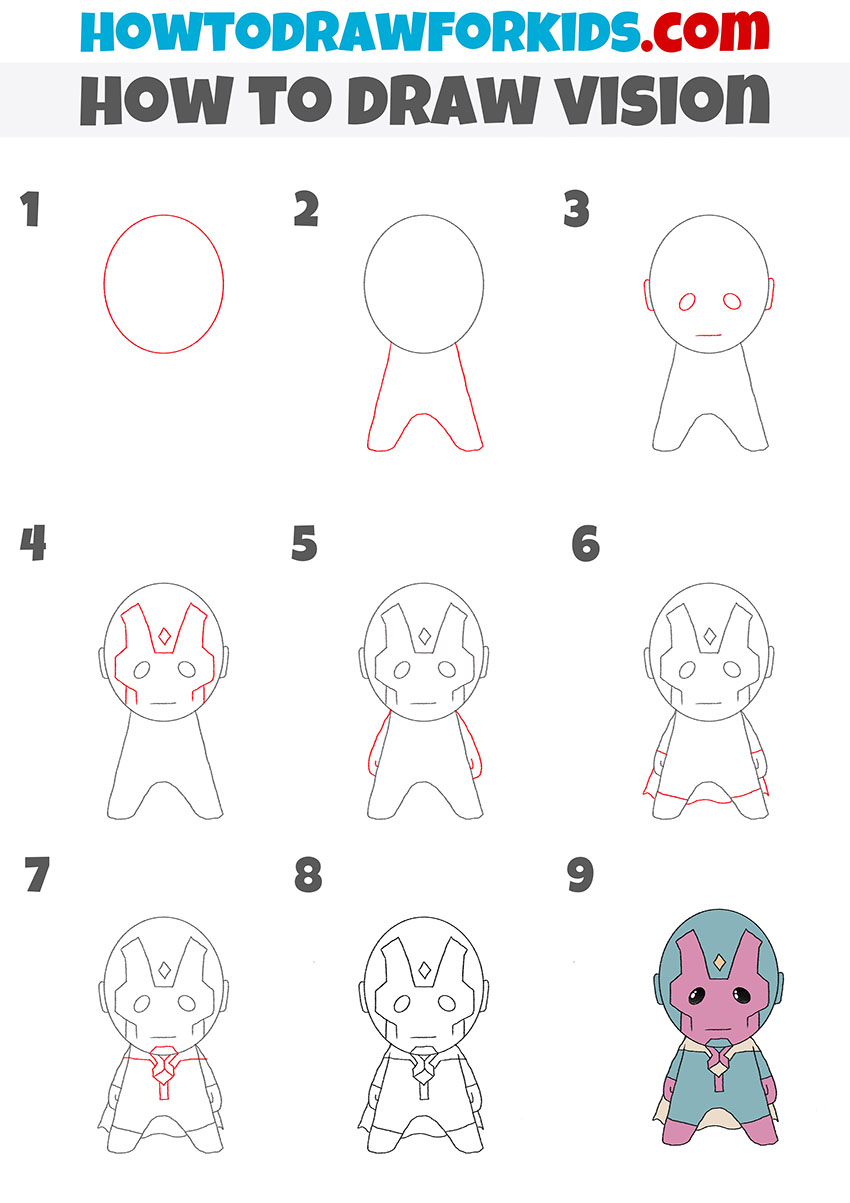
How to Draw Vision
- Draw the Vision’s head.
To complete this simple step, you need to draw one oval. The oval should be located in the center of the sheet of paper – in the future this will be the character’s head. In a cartoon style, the head can be much larger than the body.

- Add the outline of Vision’s torso.
In this tutorial I decided to simplify the basic parts of the body as much as possible, so the torso and legs are formed by one simple figure. To avoid mistakes, correlate the length and width of this figure with the contour of the head.

- Depict the facial features and ears.
It should look like the outline of a face without any emotion. The lower edges of the eyes and ears should coincide, with the eyes being much smaller and angled.

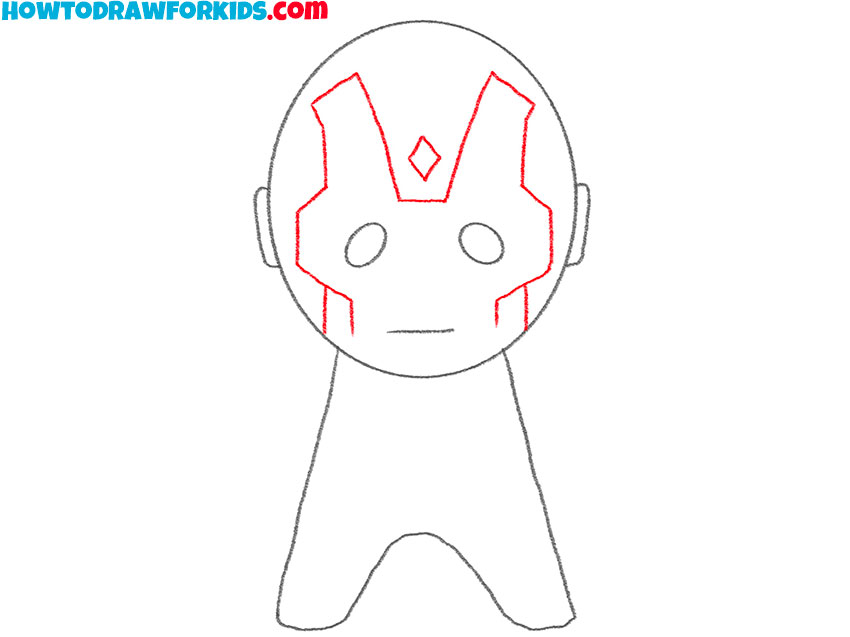
- Add details.
Start drawing it with the long shapes above the eyes. Then add the side ridges and draw the bottom of the face outline. Finally, draw a diamond shape in the center of the forehead.
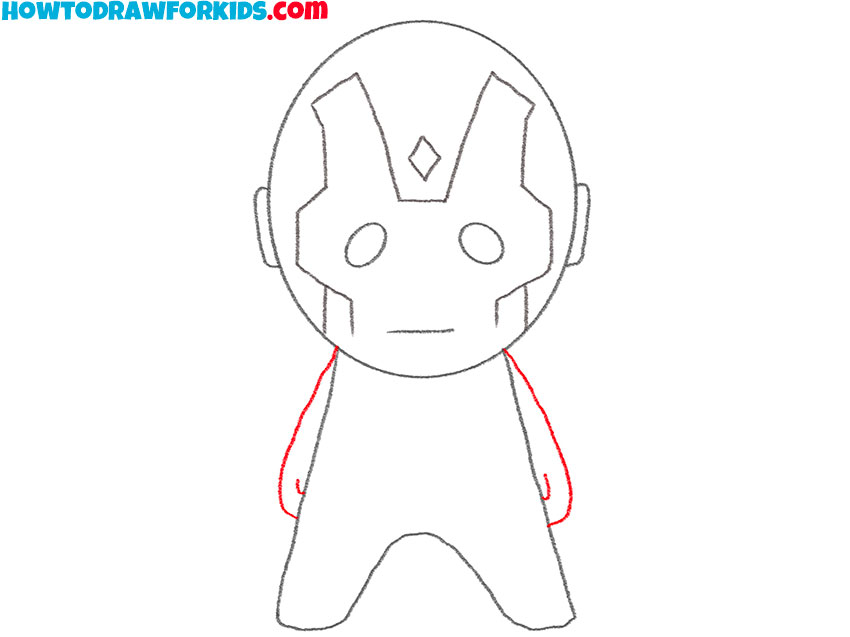
- Sketch out the character’s arms.
Using curved lines, add two symmetrical arms to the sides of the torso. The arms are completely similar to human arms; here we cannot notice that we are drawing a robot.
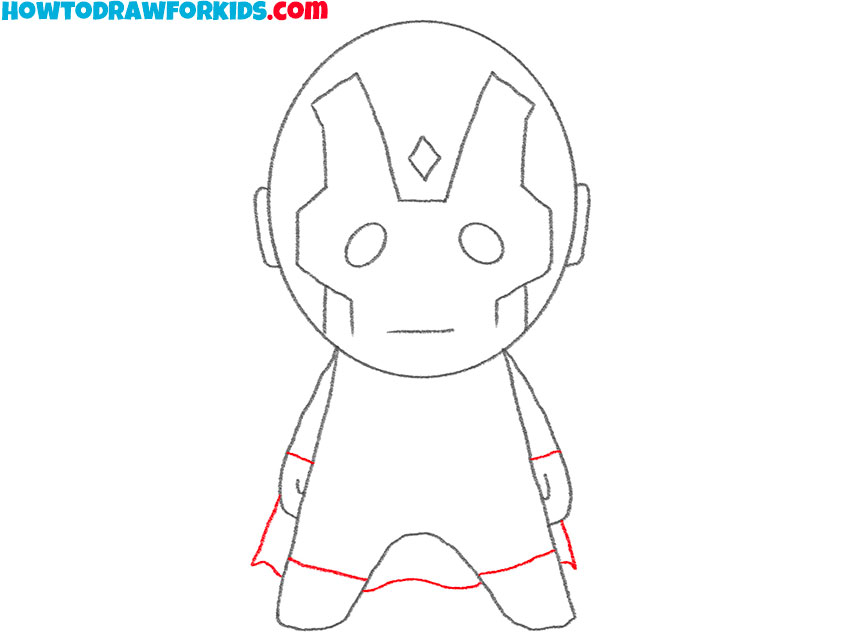
- Add the elements of the costume.
Depict straight lines on the arms and legs, and draw the cloak with curved lines. The contours of the shoes must be located slightly higher than the bottom edge of the superhero cape.
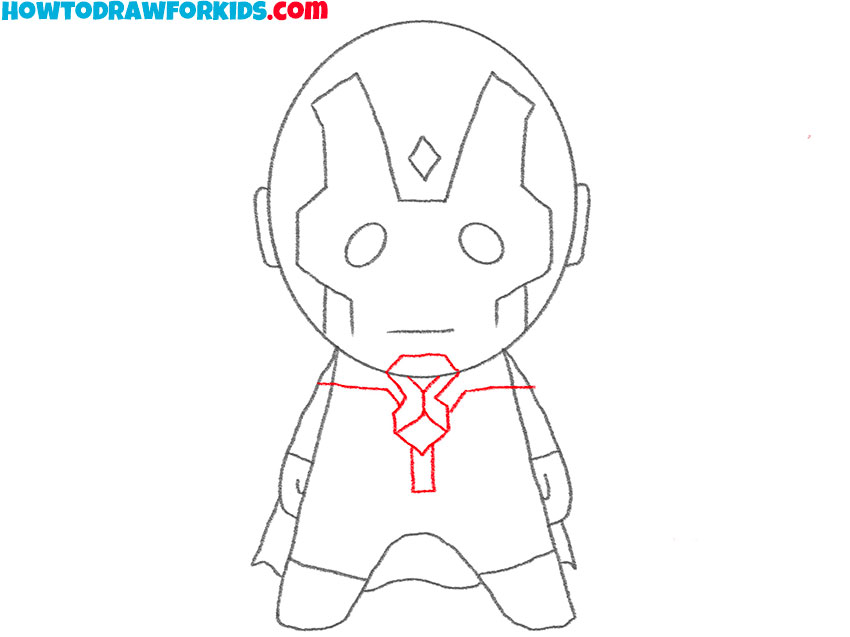
- Add the rest of the elements.
On the head and torso add some straight and curved lines as shown. To avoid confusion with this step, first draw a diamond shape in the center of Vision’s chest, then add two rectangles on the sides and connect this shape to the jawline. At the end of the step, draw a shape below the mouth and a T-shape line on the torso.
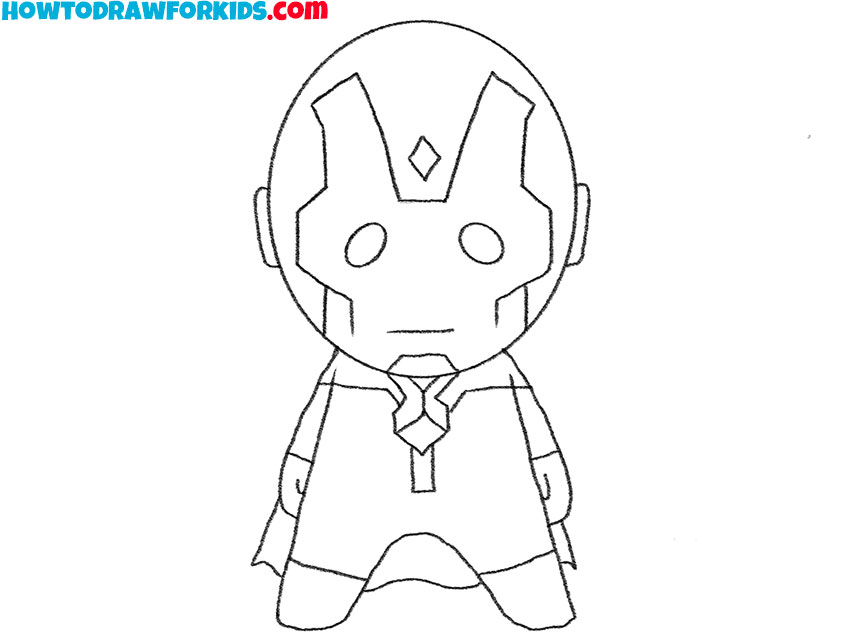
- Correct inaccuracies.
Use the eraser to remove any unnecessary guidelines. This lesson is full of symmetrical shapes and straight lines. Check this again before you start coloring.
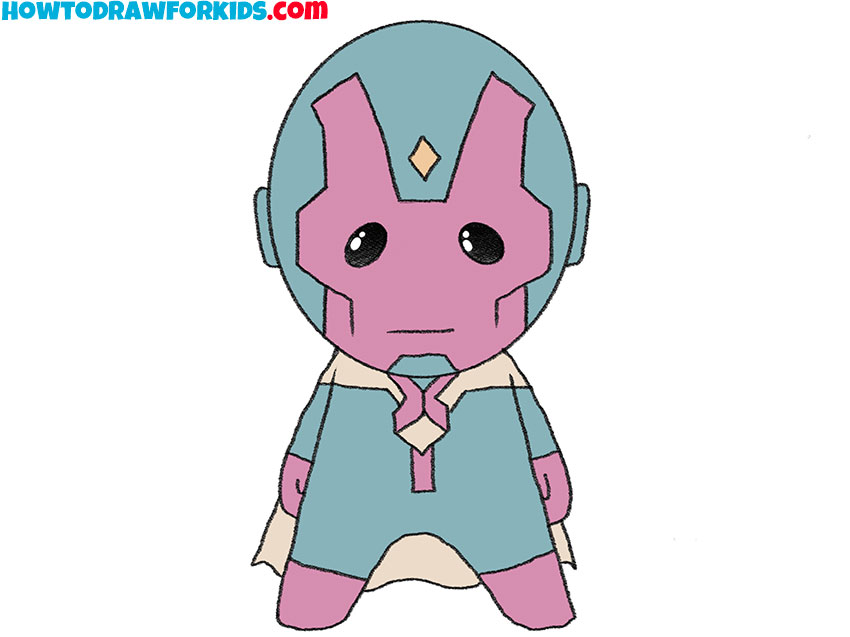
- Color the drawing.
Soft colors are one of the keys to the success of this lesson. Vision generally doesn’t look too bright despite his red and green color combination. Of course, it is necessary to leave white highlights in the contours of the eyes.
Additional Content
To enhance your drawing journey, a free PDF file of this lesson on how to sketch Vision is now available. This compact version offers the convenience of practicing anywhere, anytime, even without an internet connection.
The PDF is designed to be a handy reference, ensuring that the fun of drawing doesn’t stop when the screen turns off. Download it now and let your artistic adventures continue beyond the classroom and into the world.
Guide to Avoiding Common Sketch Mistakes
In our artistic journey to sketch Vision, you’ve all done an amazing job! But like any superhero mission, sometimes we encounter a few bumps along the way. Let’s chat about some common mistakes we might make while drawing, so next time, we can dodge them like Vision phasing through walls!
- Forgetting the Proportions: Remember, chibi characters have big heads and smaller bodies. Keep that in mind to maintain the adorable chibi look!
- Overlooking the Details: Vision has some pretty cool details, like the gem on his forehead. Don’t miss out on these; they make your drawing stand out.
- Getting the Pose Wrong: Sometimes, we might depict Vision standing too stiff. Try to add a little action or movement to bring him to life.
- Coloring Outside the Lines: When adding color, try to stay neat. It makes your drawing look cleaner and more professional.
Remember, every artist makes mistakes, and that’s totally okay! It’s all part of learning and becoming better. Next time you draw, think of these tips as your superhero gadgets, ready to help you create an even more amazing piece of art. Before you know it, you’ll be drawing Vision (and all your favorite characters) like a pro!
Conclusion
You’ve successfully drawn Vision in his cutest form, and it’s truly a masterpiece. But why stop there when there are endless possibilities to unleash your creativity? My website offers tutorials that span from the enchanting details of Ladybug to the intricate process of drawing human figures.
Don’t forget to follow me on social media for the latest news and to join a community passionate about art. Your journey as an artist is just beginning, and I’m excited to see where your talent and imagination will lead you. Let’s continue to make art that inspires and delights, one drawing at a time!