How to Draw a Carnation
Learn how to draw a carnation with this easy step-by-step guide made for kids and beginners who want to improve flower drawing skills.

How to Draw a Carnation: Introduction
Carnations have a ruffled, layered appearance that might look complicated at first glance, but in this tutorial I’ll show the simplest way to draw a carnation. To draw this beautiful flower we will use smooth lines and simple wavy forms to get a recognizable plant on our papers.
The most important part is keeping the edge of each petal slightly jagged but controlled. To draw a carnation with this method, don’t make the jagged shapes too sharp – use rounded arcs to keep the form smooth and authentic. Each petal should follow the curve of the layer and connect naturally to the next without sharp breaks. Use repeated small arcs to form a rhythm.
Keep the outer petal edges uneven, but not messy. The shape should be symmetrical and look like a circle with wavy outlines. At the same time, don’t overcomplicate them with too many jagged points. Keeping the rhythm steady is more important than adding detail.
To change the look, you can draw the carnation at a slight tilt, make the stem longer or shorter, or place it among other flowers. You can also add more rows for a more full version or keep it minimal with fewer outer petals. Some carnations are very dense, while others are more open
Carnation Drawing Tutorial
Materials
- Pencil
- Paper
- Eraser
- Coloring supplies
Time needed: 30 minutes
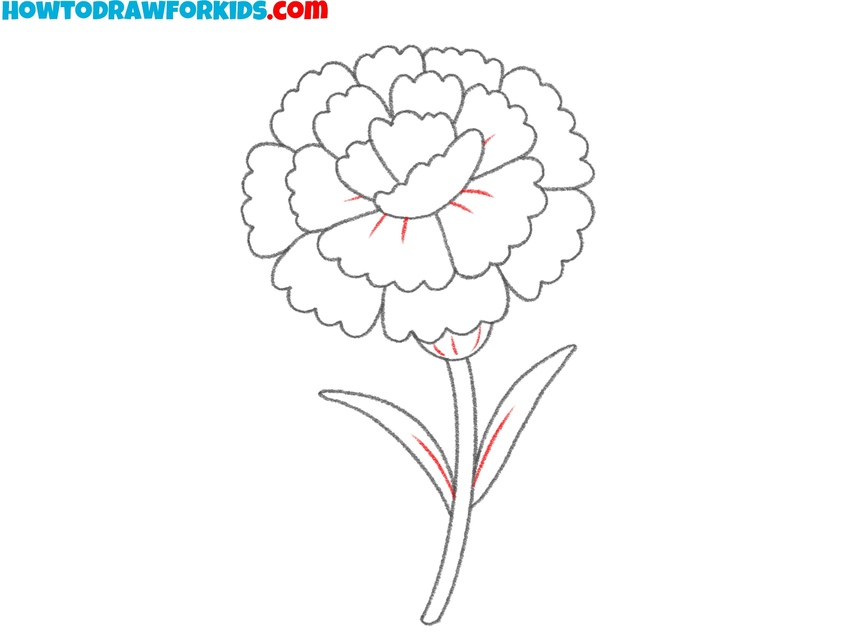
How to Draw a Carnation
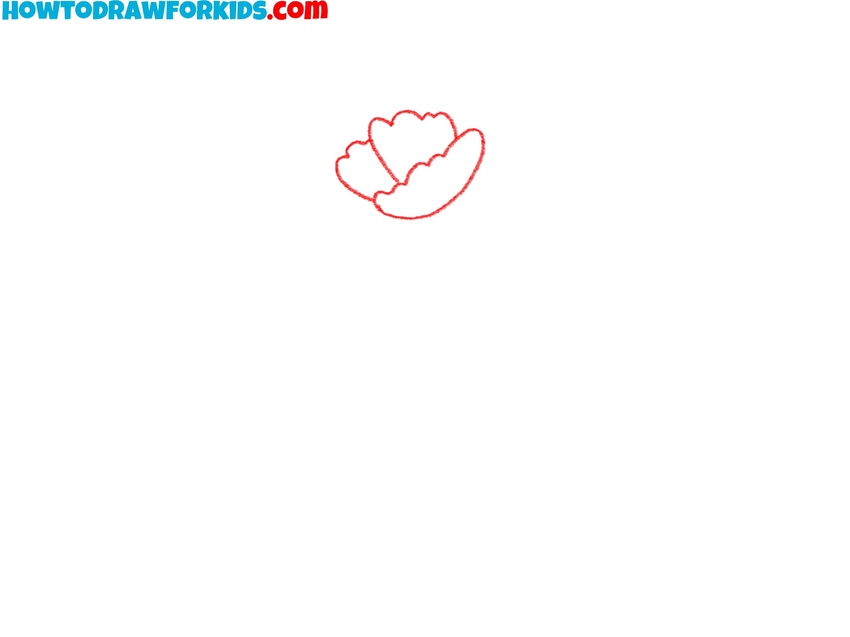
- Sketch the flower’s central petals.
To draw a carnation, start creating the bloom. Draw three ruffled petal shapes near the center of your page. The shapes don’t need to be perfect – some unevenness in the petal edges helps the flower look more natural. These central petals will form the innermost part of the flower.
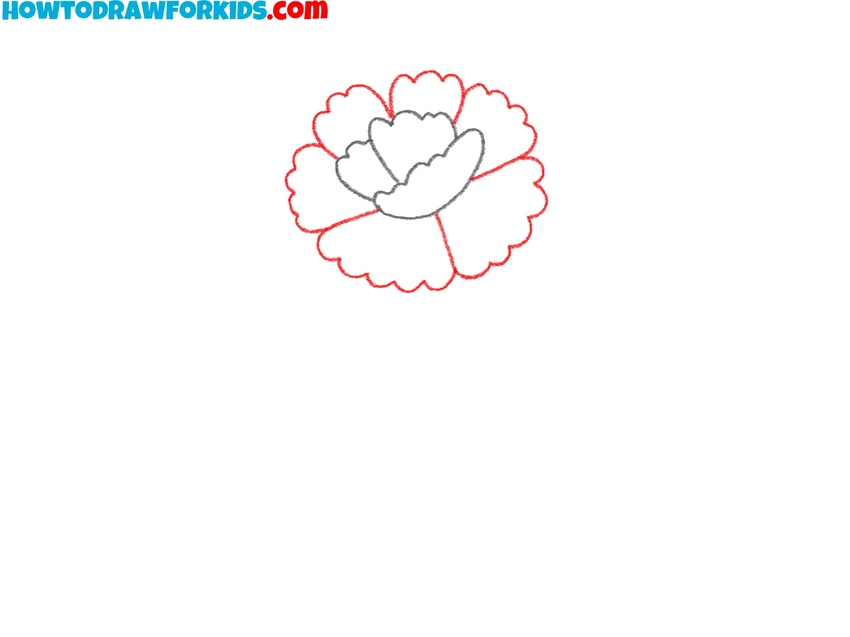
- Add the second petal layer.
Now begin building out the bloom by drawing a second layer of ruffled petals around the center. These petals should be larger than the first group and continue the same wavy, uneven outline style. Each petal can be drawn as a curved shape with a jagged outer edge. Try to vary the shapes slightly to keep the natural feel.
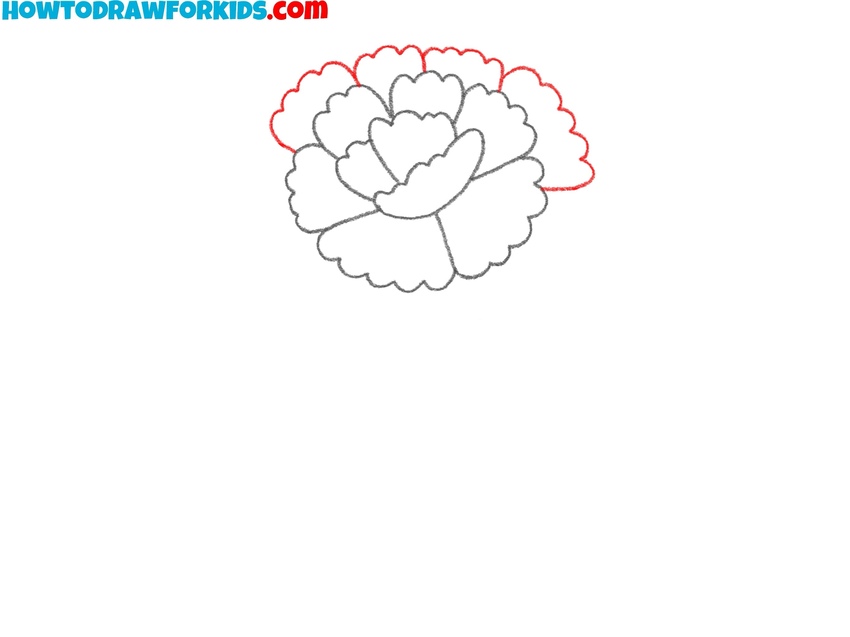
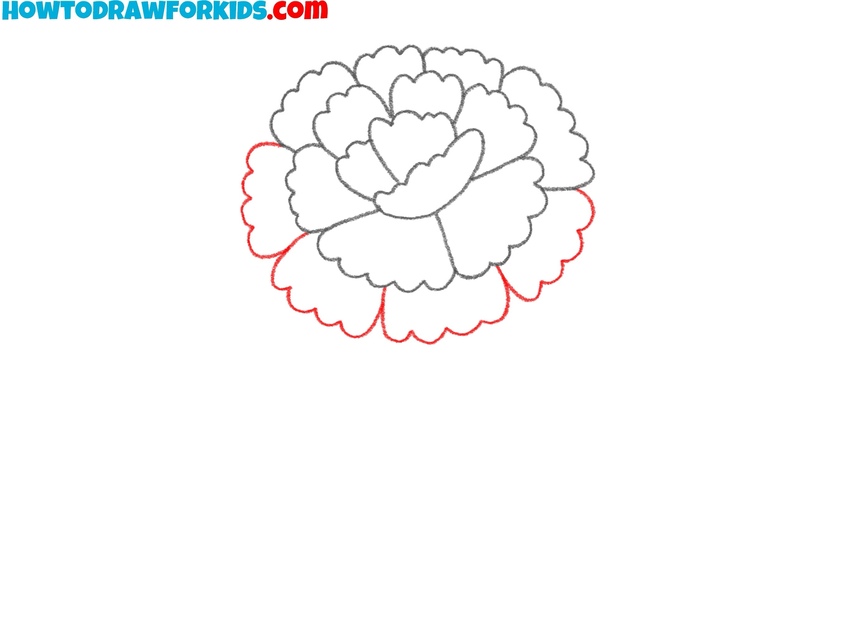
- Start drawing the outer layer.
Expand the bloom further by adding more petals around the second layer, and create a half of the outer layer. Use the same wavy, wavy lines to create petal edges, and space them around the existing structure. These petals also can vary in length and angle – some may be a bit longer and curve outward more.
- Complete the outer flower shape.
Complete the outer edges of the carnation by adding the second half of the outer ring. These petals should continue the same jagged edge style and follow the arc of the flower to round out the form. With this final set of outer petals, the carnation’s flower head is now complete.
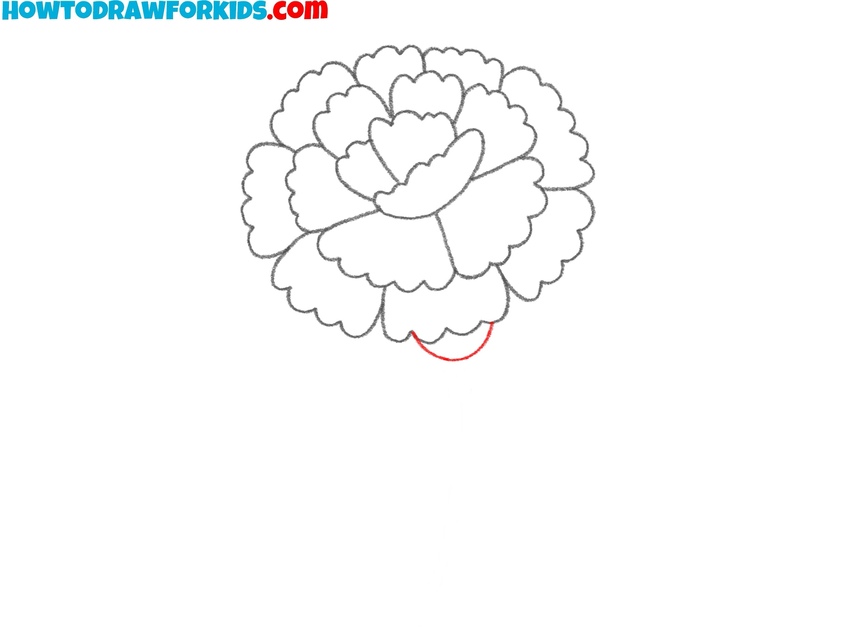
- Sketch the calyx under the petals.
Now add the small base shape that connects the bloom to the stem. This is a rounded, cup-like form directly beneath the bottom petals. It should look like a smooth green support structure, called the calyx, which holds the layers of petals together.
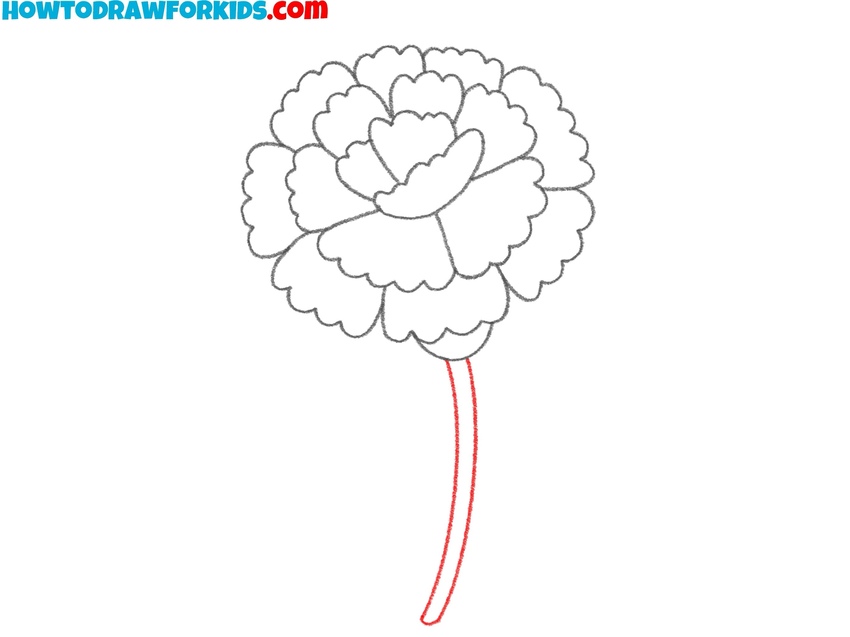
- Draw the carnation’s stem.
Extend a long and slightly curved vertical line downward from the center of the calyx to draw the carnation’s stem. Then add a parallel line next to it and connect both lines at the bottom with a short curve to complete the stem’s form. Keep the lines smooth and even in width.
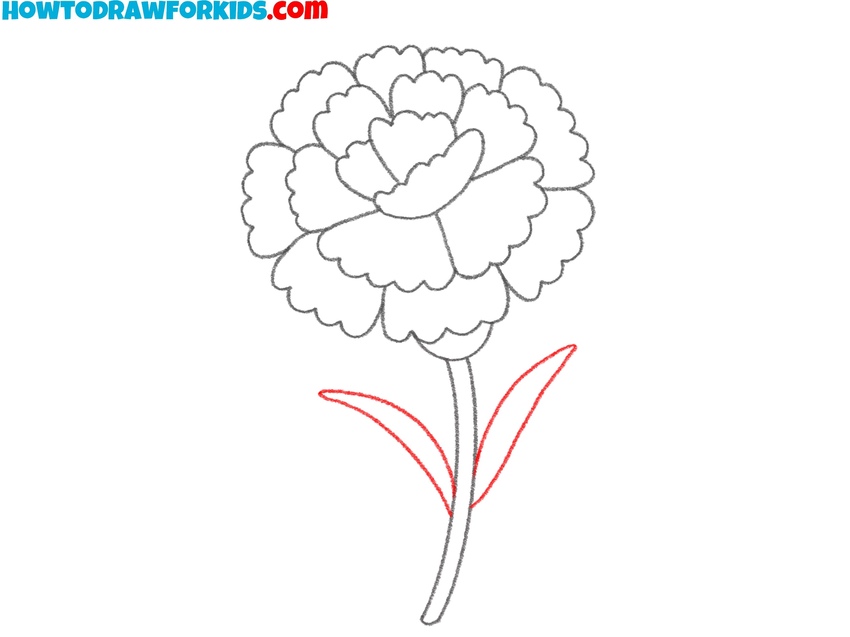
- Sketch long pointed leaves.
Now draw two long, pointed leaves emerging from the lower part of the stem. Each leaf should curve outward slightly, resembling thin blades. Carnation leaves are narrow and long. These leaves should follow the same soft and smooth line style as the rest of the flower.
- Sketch simple detail marks.
To give your carnation drawing more texture, draw a few soft detail lines. Start by adding light, short curved lines inside some of the petals. These marks should be minimal – just enough to show dimension. Then add a central vein line to each leaf, following the curve from base to tip.
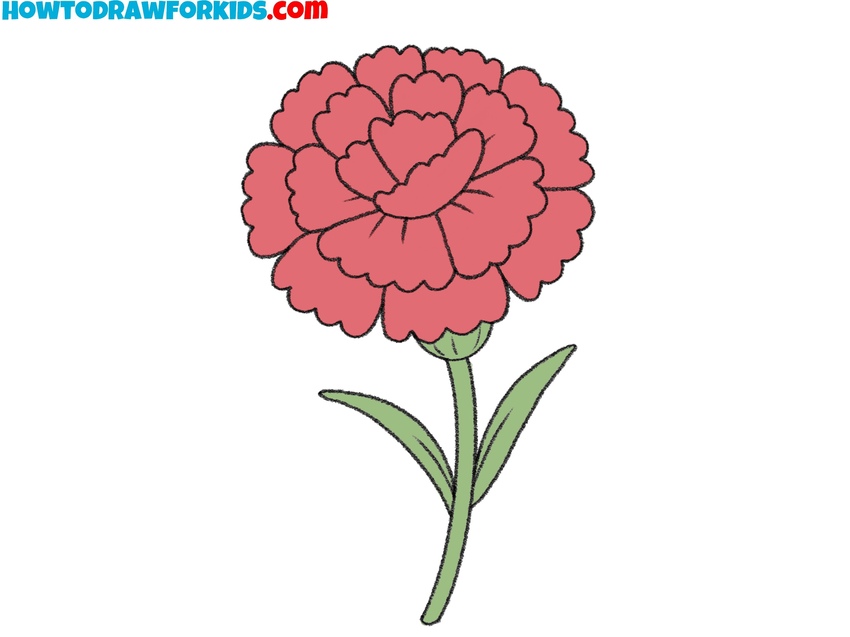
- Complete the flower with color.
Color the carnation with the help of a bold red or pink for the petals – these are traditional colors for this flower, though you can also choose white, yellow, or purple. Color the calyx and stem with medium or dark green. The leaves should match the stem but can be slightly lighter.

Conclusion
This carnation drawing tutorial is built around simple, layered shapes and repeating forms. It’s especially helpful for practicing how to construct a full, complex-looking flower using small curved segments and symmetry. It’s also a useful exercise in drawing rounded forms with complex textures.
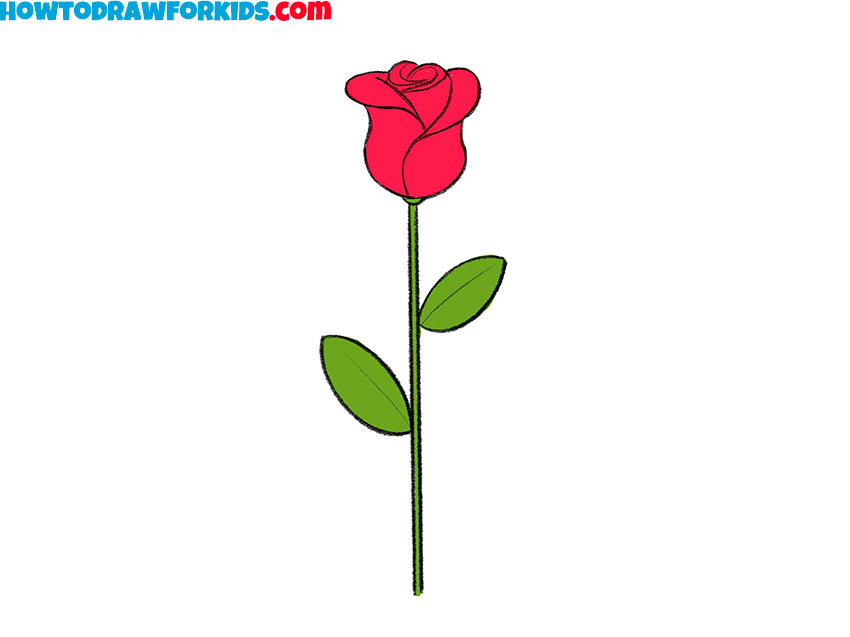
If you want to continue drawing more flowers, try the tutorial on how to draw a daffodil or a very detailed lesson on how to draw a rose next. These pair well with the carnation and let you build a full flower collection using the same step-by-step approach.
To follow all new tutorials, make sure to check the Pinterest page for printable worksheets and subscribe to the YouTube channel for very simple video lessons.