How to Draw a Cartoon Car
Let’s get to know the secrets of simplified illustration and figure out how to draw a cartoon car in 12 really simple steps.
How to Draw a Car: Basic Information
What are the key features of cars and other mechanisms drawn in cartoon style?
The main distinguishing features of mechanisms drawn in a cartoon style include exaggerated proportions, simplified details, and cute design elements. Unlike realistic depictions, cartoon-style mechanisms often focus on illustrating the most noticeable details of a device rather than its precise technical accuracy.
Components are typically exaggerated in size or shape to emphasize their function or to add a humorous effect. The details are often minimized or stylized, using bold lines and vibrant colors to create a more approachable and visually appealing representation.
Cars in real life are very complex machines, and illustrating them requires a significant level of skill. In this lesson on how to draw a cartoon car, I aim to explain and demonstrate the various nuances involved in drawing a car in a cartoon style.
Cartoon Car Drawing Tutorial
Materials
- Pencil
- Paper
- Eraser
- Coloring supplies
Time needed: 1 hour and 10 minutes
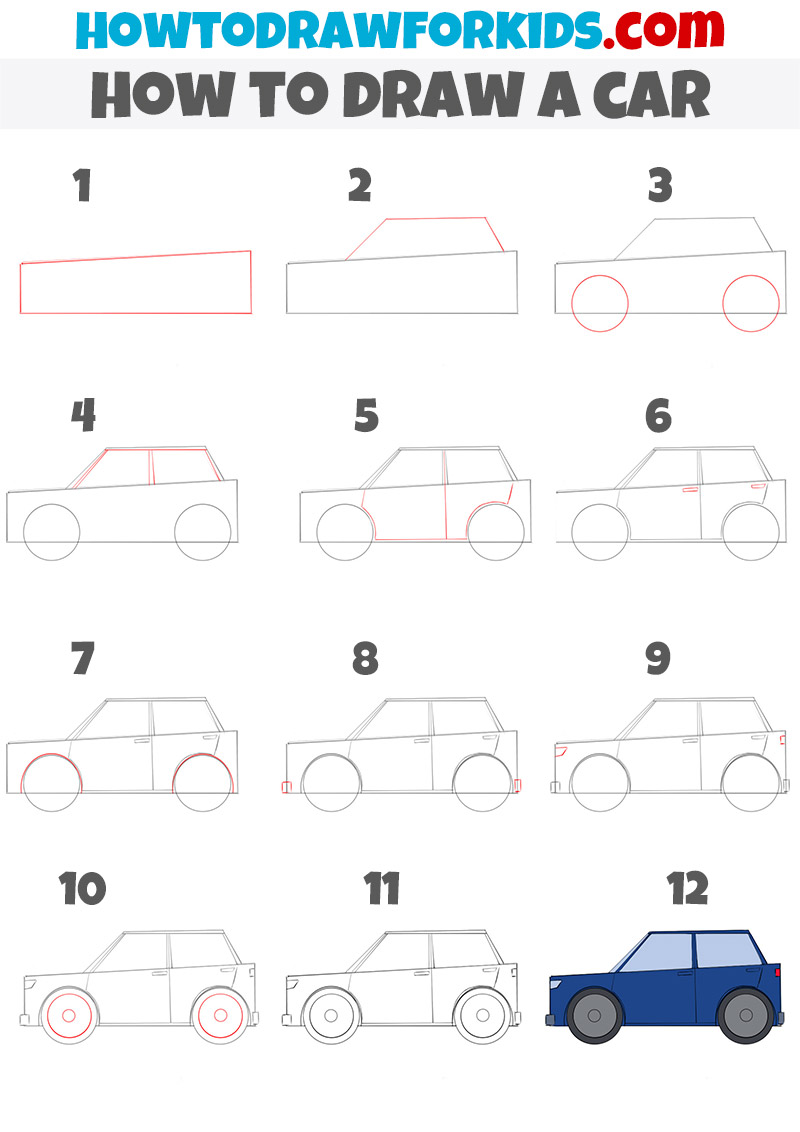
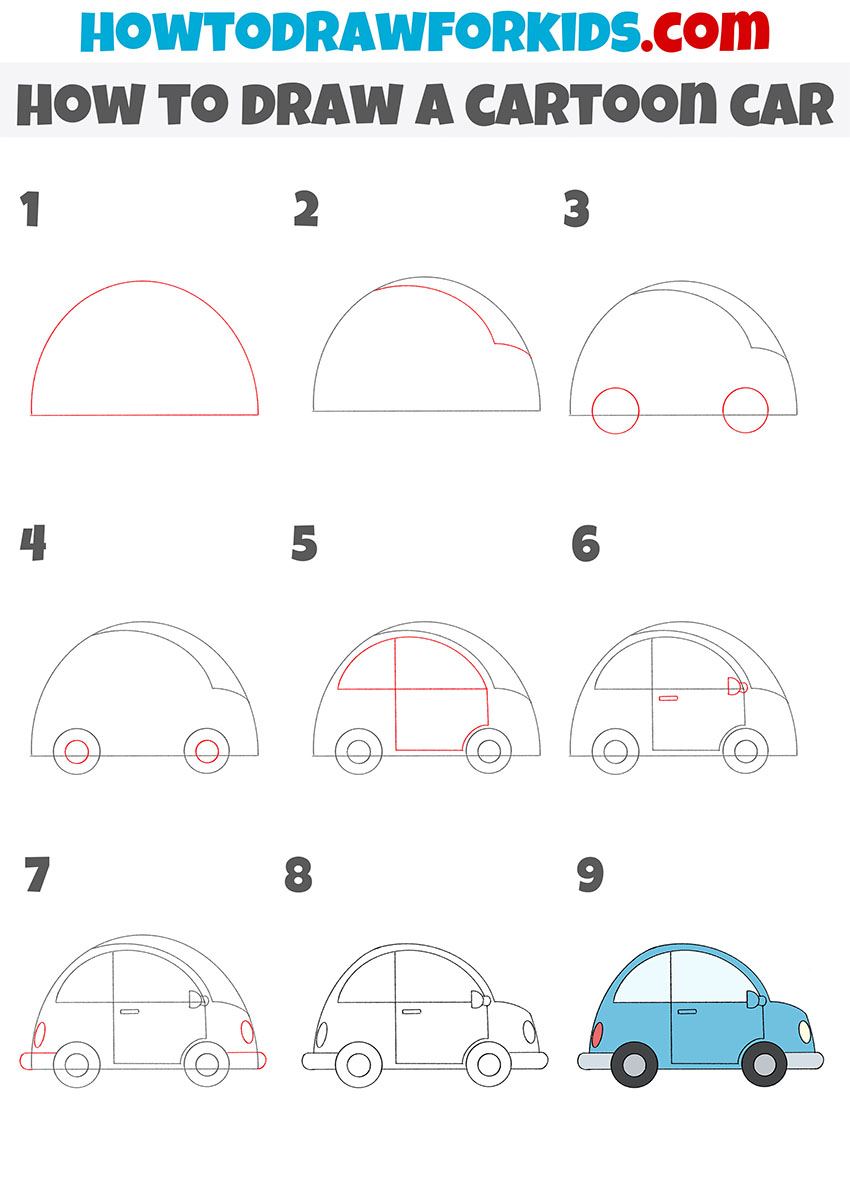
How to Draw a Cartoon Car Step-by-Step
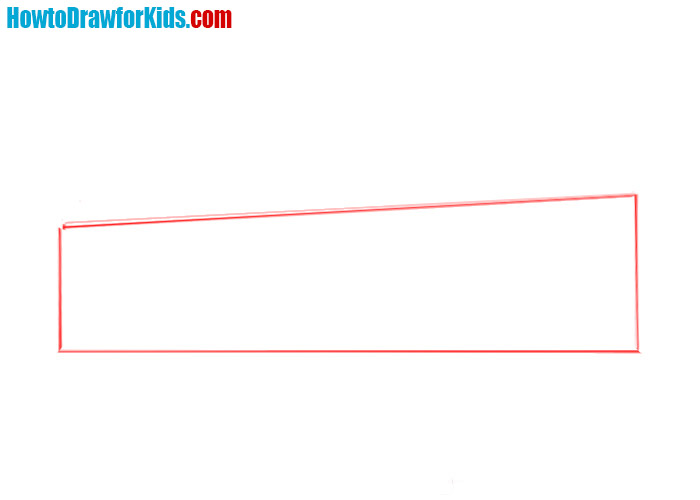
- Establish the base structure.
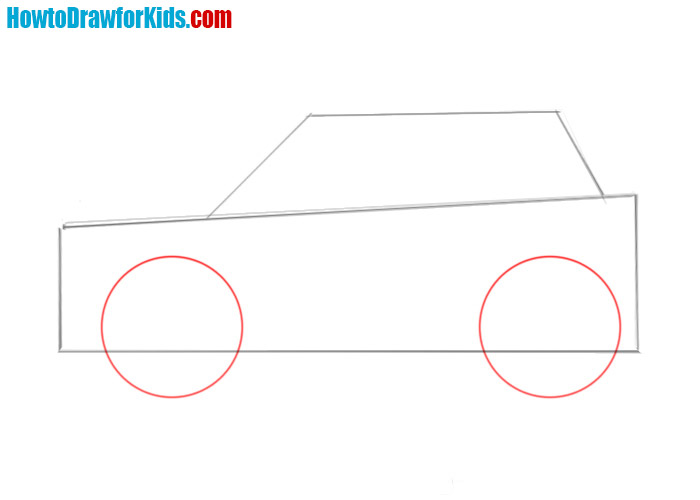
Begin with a long, horizontal rectangle. This rectangle forms the base of the car and is fundamental in establishing the vehicle’s proportions. Focus on keeping the lines straight and the corners sharp, as the accuracy here will determine the overall shape of the car.
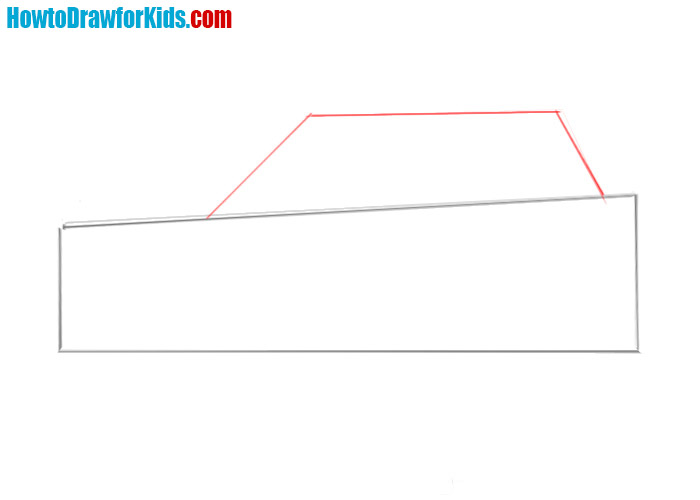
- Create the cabin profile.
Add a trapezoid on top of the rectangle to represent the cabin of the car. The shorter base of the trapezoid should be at the top to mimic the tapering of a car’s roof toward the rear. When drawing, remember to keep your hand relaxed yet stable.
- Illustrate the wheels.
Sketch two circles within the base rectangle to represent the wheels. Position one wheel near the front end and the other near the back. These circles should intersect slightly with the car body outline, indicating that part of the wheels is beneath the car.
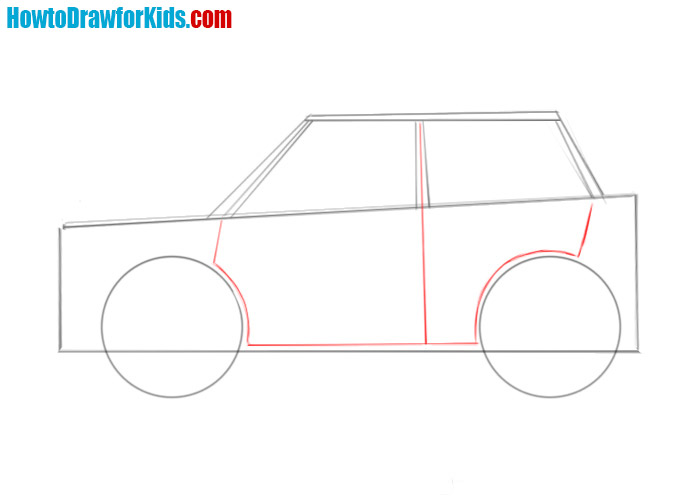
- Outline the side windows of the car.
Look closely at the placement of the straight lines in this step. The top line of the car’s cabin is not parallel to the line from the first step, it is directed slightly obliquely. Also the two lines at the front are not parallel to the front line of the cabin. Notice such details and try to draw without bends.

- Draw the doors of the car.
Start by adding vertical lines on the car body to outline where the doors will be. For a standard car, there should be two doors visible: one near the front and one towards the rear. The front door line should be drawn just behind the front wheel, and the rear door line should be placed before the back wheel.
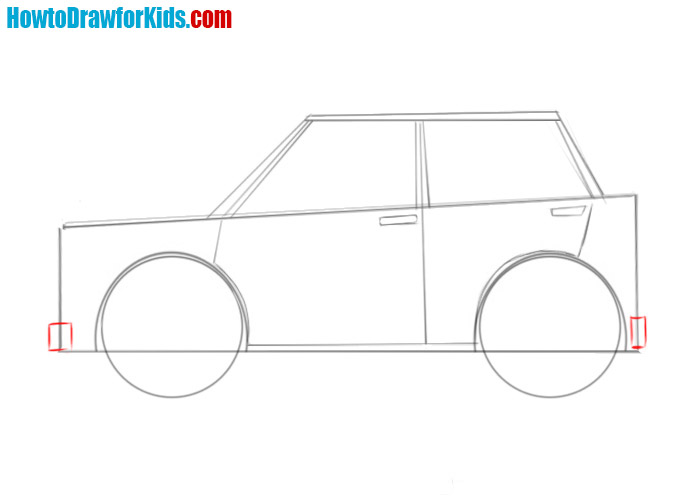
- Add the door handles.
Despite the simplified drawing style, a little detail is always useful. These are indeed two very small figures, but it is very important to maintain the shape with smooth corners and the correct location close to the rear edges of each door. This will make your cartoon car more recognisable.

- Draw the wheel arches.
Draw the arches for the wheels with two semicircles. The arches should be the same size. However, it’s important to note that arches don’t always have to be round. To make your car design unique from mine, you could, for instance, shape the rear arch as a square instead.

- Detail the bumpers.
Sketch the front and rear bumpers, which from the side look like two small squares. Keep the lines light at first, so you can make adjustments if necessary for symmetry. The front bumper looks larger and wider compared to the rear bumper.
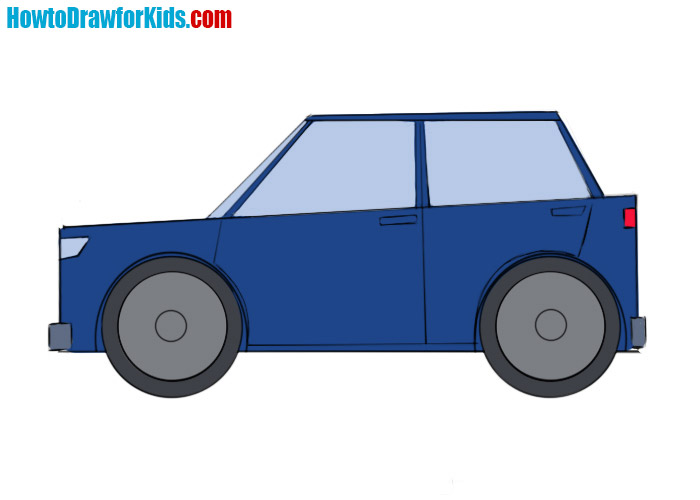
- Draw the headlights and taillights.
Draw small circles or ovals at the front corners of the car to represent the headlights. For the taillights, draw similar shapes at the rear corners of the car. These lights should be slightly smaller than the headlights. In a cartoon style, these features can be exaggerated or simplified, but they should be easily recognizable.

- Detail the wheels.
Inside the hubcaps, draw smaller circles or lines to indicate the rims, giving the wheels more realistic look. You can also add simple, curved lines around the edges of the tires to suggest tread patterns, even if lightly. These details add texture and realism to the wheels while still fitting within the cartoon aesthetic.

- Make the final touches.
In this phase, remove any unnecessary guidelines and refine the final outlines of your car. Careful erasure of the extra lines will clean up the image, while reinforcing the main outlines will bring your drawing into sharp focus. The goal is to add clarity and definition without overwhelming the simple, cartoonish style.

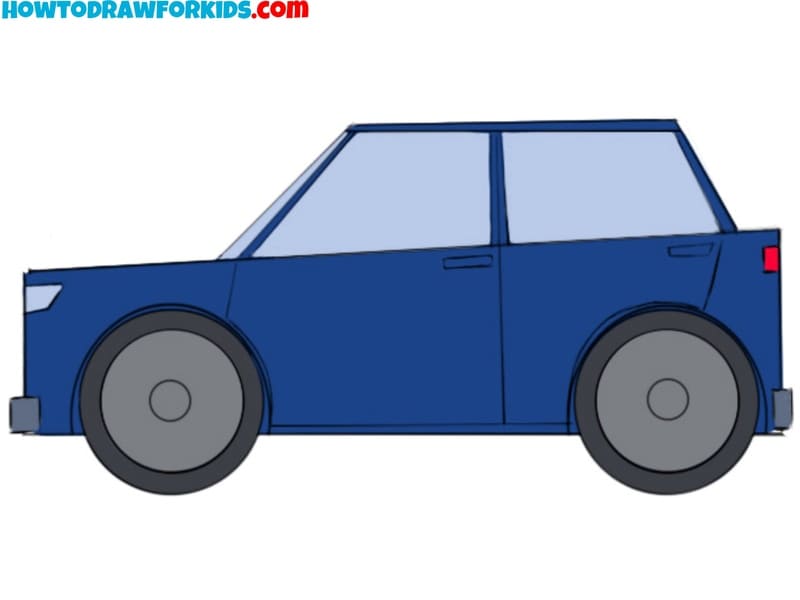
- Add colors to the cartoon car.
Finally, color the car in some vibrant shade, like blue or red. Coloring within the lines will give the car a neat and professional appearance. Consider using shading techniques to give the car a three-dimensional form, with lighter areas indicating highlights and darker tones for shadows.
Advanced Cartoon Techniques
You can make your cartoon car drawing more cool and interesting. Add some details. For example, you can depict the passengers inside the car and details such as the steering wheel and seats.
Experiment with drawing the cartoon car from various angles, such as a three-quarter view or an exaggerated perspective, to create a more dynamic composition.
Use exaggeration to highlight certain features of the car, such as oversized wheels, a lowered body, or an elongated front. This technique can make the cartoon car more visually striking or humorous.
Play with the proportions of different elements, such as making the wheels larger relative to the body or the windows smaller, to create a unique and stylized look. This technique is particularly effective in cartooning, where realism is less important than visual impact.
Add motion lines around the car, especially near the wheels or exhaust, to convey speed and movement. This gives the drawing a sense of action and makes the car feel alive, even in a static image.
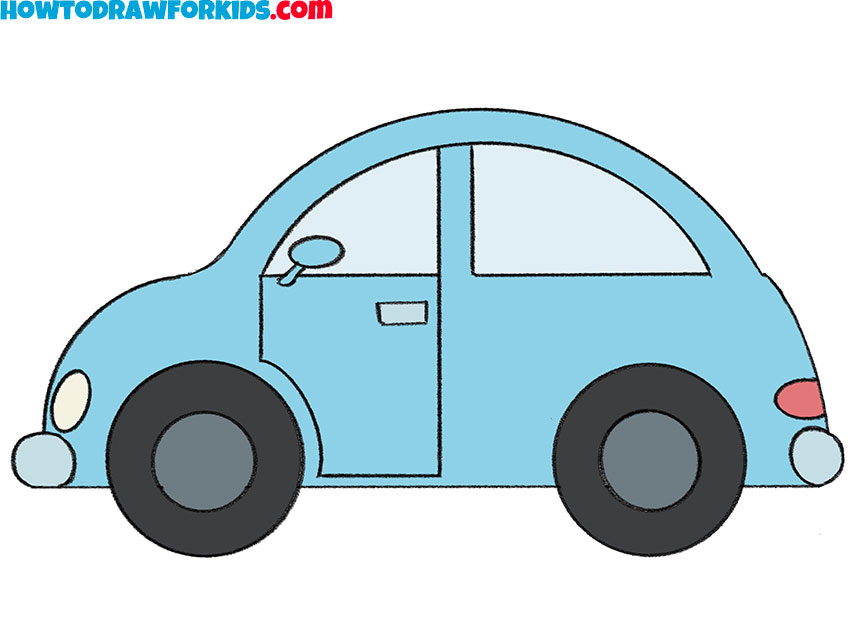
How to Draw a Cartoon Car: Alternative Style
The figure shows a small cartoon car that has the simplest form. The top of the car is rounded, on the side you see only one door. Such a car looks concise and at the same time very funny.
This additional tutorial offers an alternative method for drawing a cartoon car, complementing the previous tutorial by focusing on a simpler and more rounded design. Unlike the first tutorial, which focused on boxy car shape, this tutorial guides you through creating a softer, more compact vehicle with a rounded top and simplified features.
Start by drawing a large half-circle shape to form the car’s body. Establish the rounded, cute design from the beginning. Add the car’s roof with a curved line, then draw the wheels as simple circles beneath the body. Outline the windows and doors within the curved structure, keeping the car compact.
Add details like door handles, headlights, and taillights, maintaining the simple and rounded aesthetic. Finish by coloring the car with bright, vibrant colors, giving it a cheerful and cute look.
Conclusion
By following this tutorial, you’ve learned how to draw a cartoon car in cute style using simple shapes and easy steps. The compact appearance of the cars from this tutorial adds a unique and friendly look to your drawing.
Did you enjoy this drawing lesson? Was it easy to follow? Would you recommend it to your friends? Share your thoughts in the comments below and follow me on social media so you don’t miss any new lessons!


hi
Hi.