How to Draw a Dinosaur
If you want to learn how to draw a dinosaur, you are in the right place. Today I will show you many dinosaur drawing guides that I created especially for this article.

How to Draw a Dinosaur: Basic Information
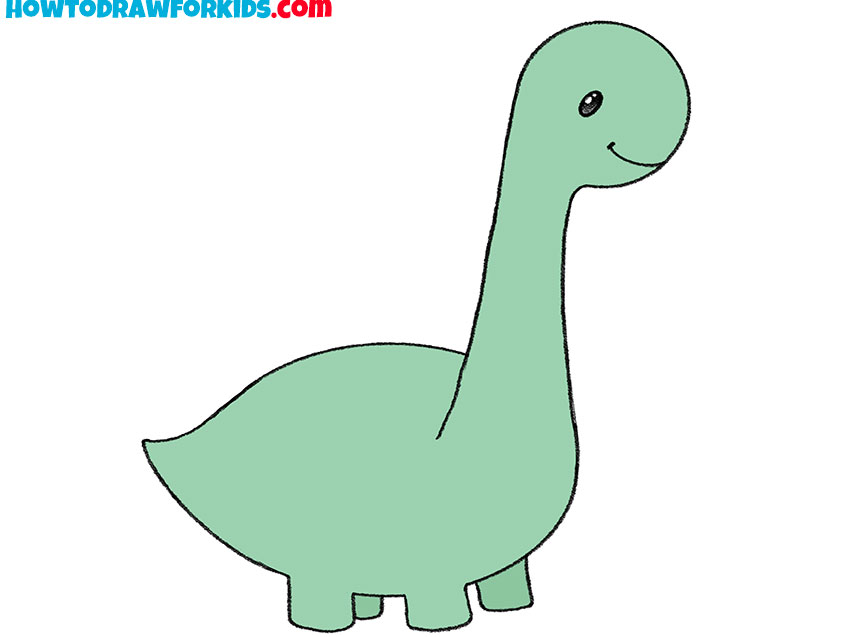
So, how to draw a dinosaur? I aimed to answer this question with some very simple drawing tutorials. The result is not a scary, realistic dinosaur in an aggressive pose, but a friendly, cartoonish one.
I chose a simplistic, cartoon style to create a dinosaur that resembles a toy or a children’s cartoon character. This effect was achieved using smooth, rounded lines, cartoonish proportions, and minimal details.
Special attention was given to the facial features. Smooth, rounded contour lines are combined with minimalistic features. The mouth is depicted with a simple line, and the eye is an oval with a highlight. I avoided complex shadows, detailed eyes or teeth, and texture painting. Despite the simplicity, basic proportions and body part contours are maintained.
If you want to draw a more realistic dinosaur, stay tuned until the end of the tutorial. I’ll show additional tutorials and techniques to transform your cartoonish dinosaur into a more believable creature. By adjusting the facial features, refining the body proportions, and adding small details, you’ll be able to create a realistic dinosaur.
Dinosaur Drawing Tutorial
Materials
- Pencil
- Paper
- Eraser
- Coloring supplies
Time needed: 40 minutes
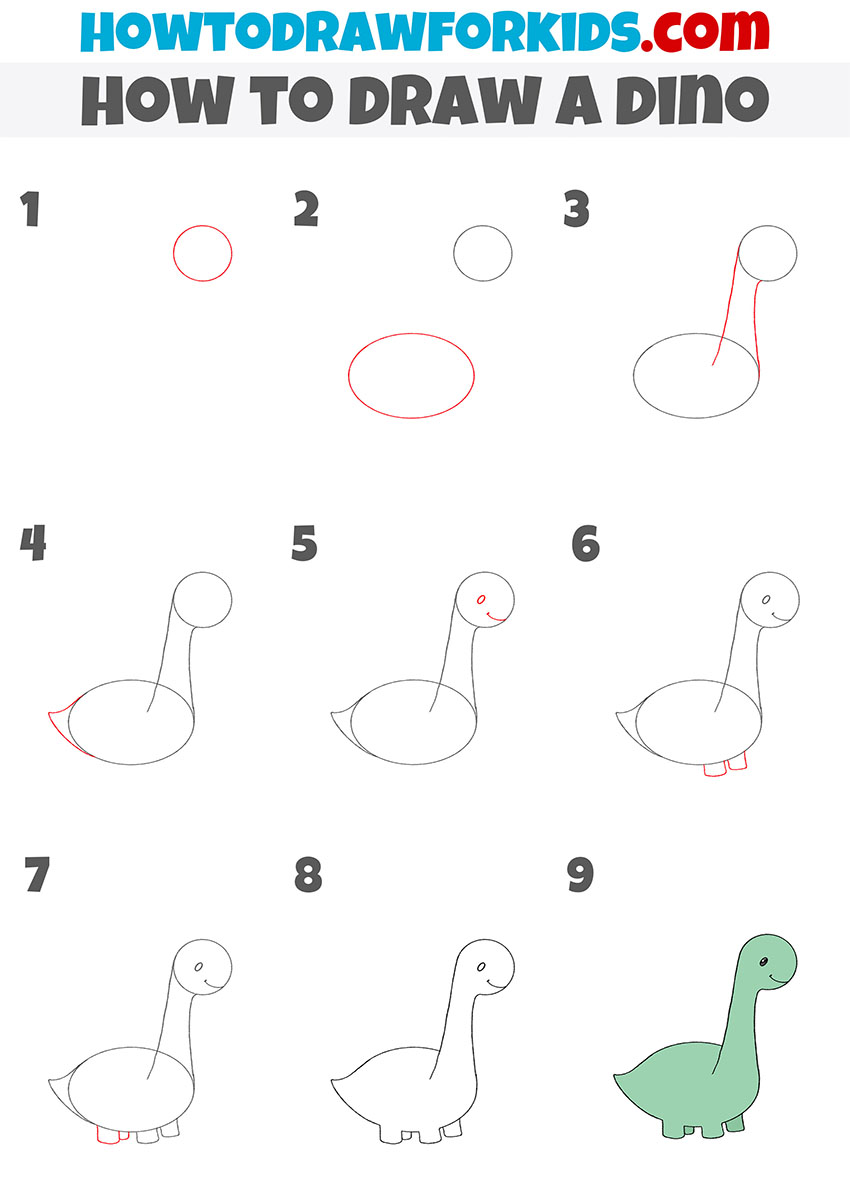
How to Draw a Dinosaur
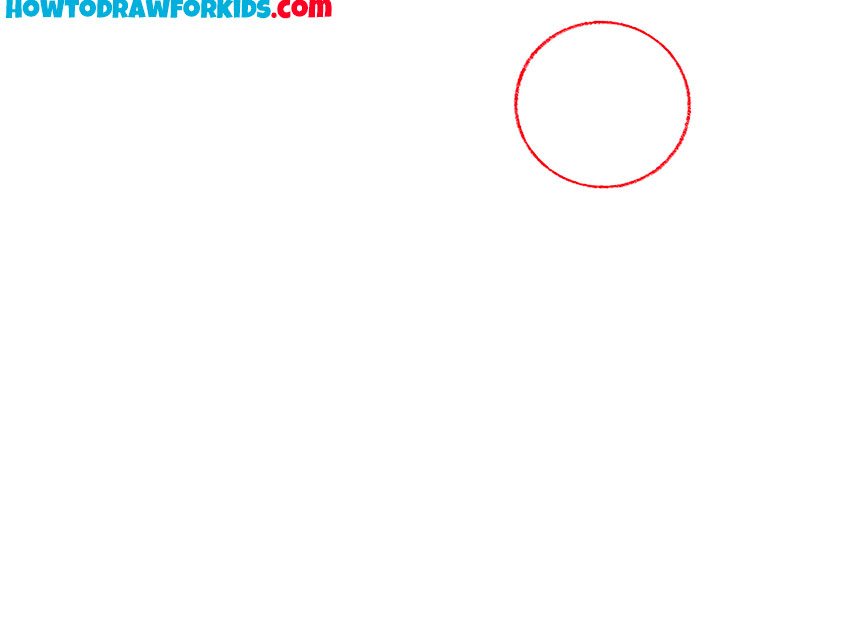
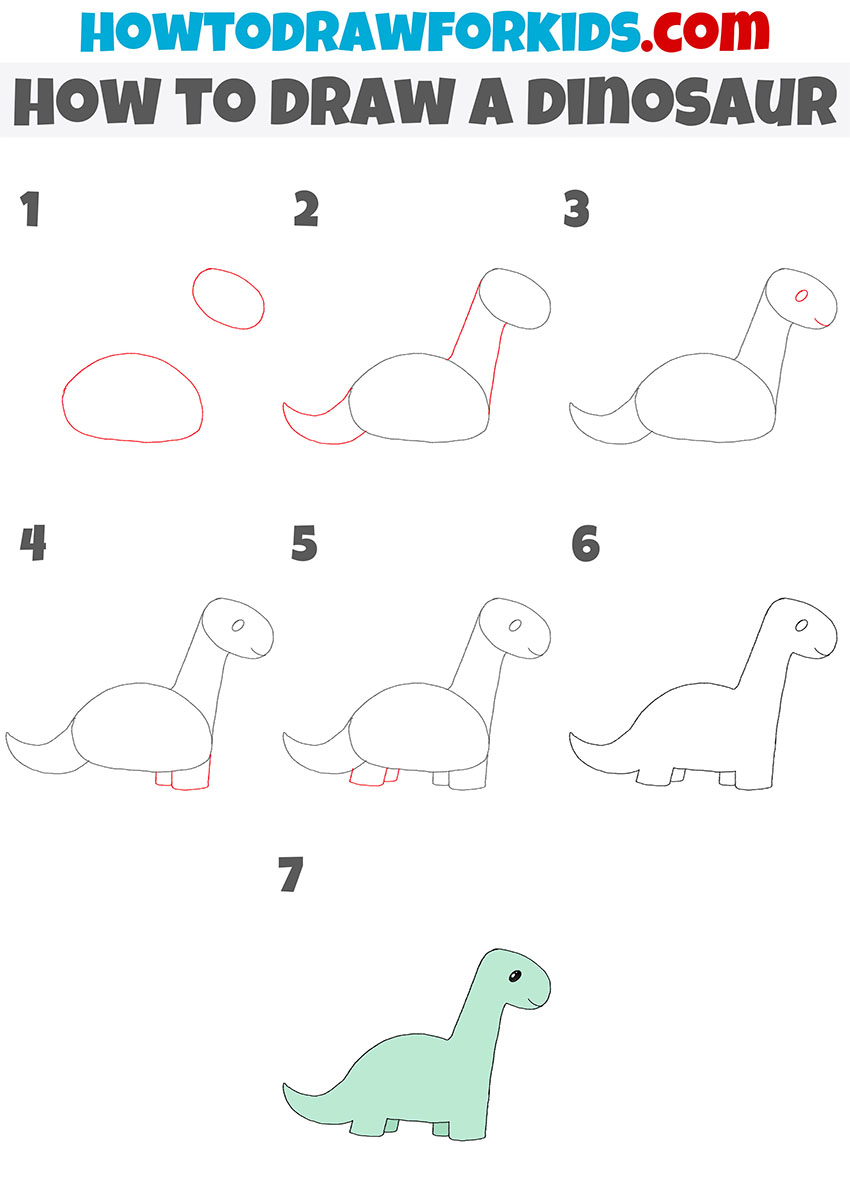
- Sketch the head of the dinosaur.
Begin your drawing by focusing on the head. To start, sketch a small oval shape near the top of your paper. This oval will form the dinosaur’s head. Keep the shape smooth and simple. It’s important to make this shape large enough to add the facial features later on.
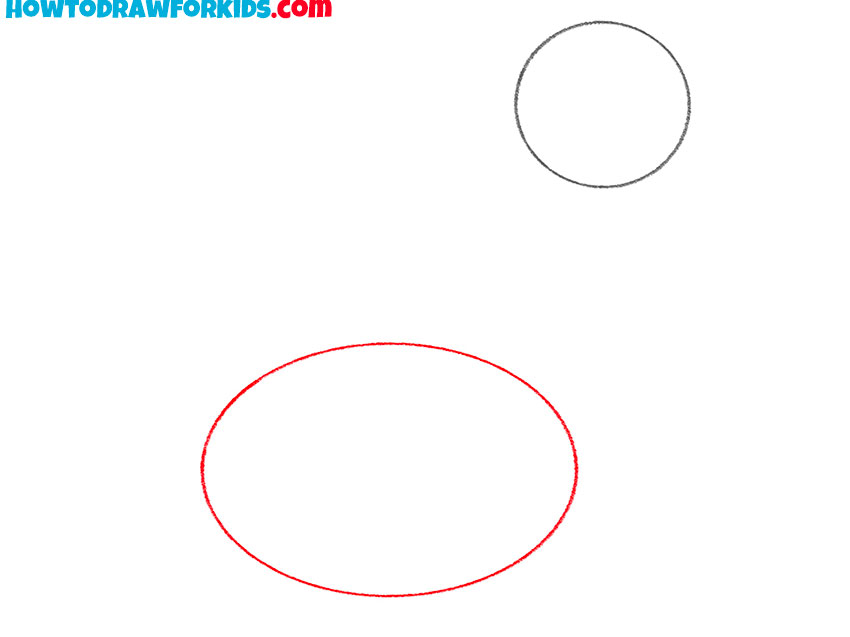
- Draw the body.
Below the oval you drew for the head, sketch a larger oval shape that will represent the body. This second oval should be wider and horizontally elongated compared to the head. Leave a bit of space between the two ovals for the dinosaur’s neck, which will be drawn next.
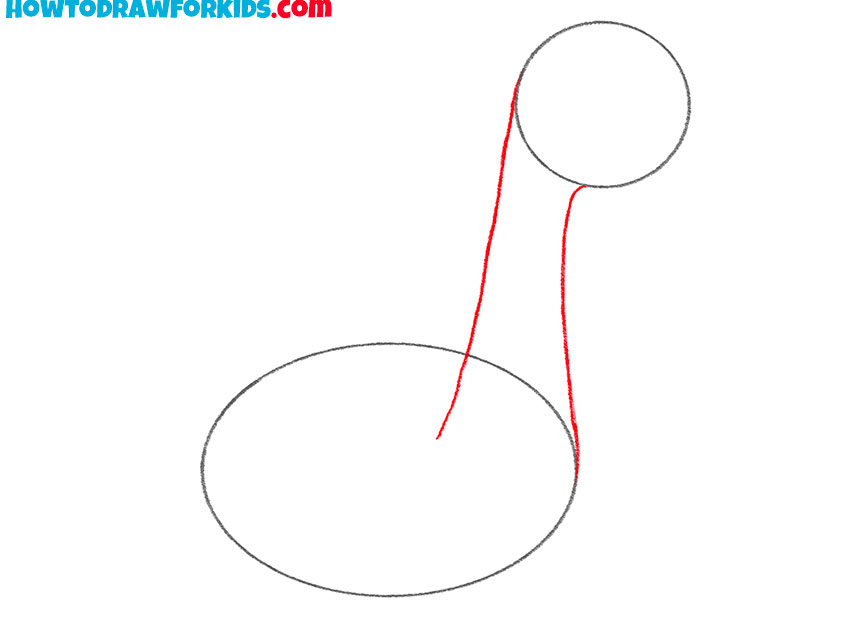
- Connect the head and body.
Now that you have the head and body in place, it’s time to connect them by drawing the neck. To do this, draw two slightly curved lines extending from the head oval down to the body oval. The neck should start narrower near the head and gradually widen as it reaches the body.
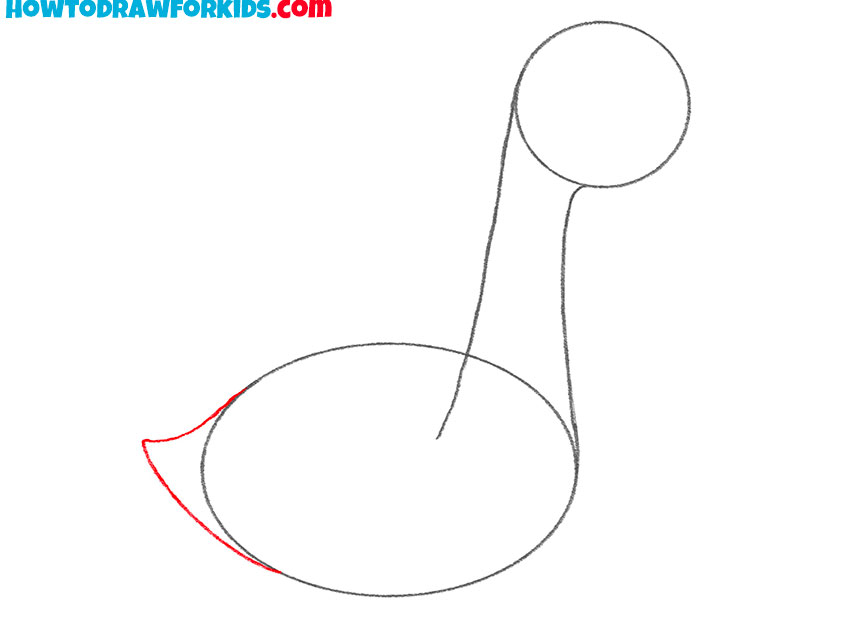
- Add the tail of the dinosaur.
Begin by sketching a curved line that extends from the back of the body oval. The tail should start wide where it connects to the body and gradually taper to a point as it curves outward. You can make the tail as long or short as you prefer.
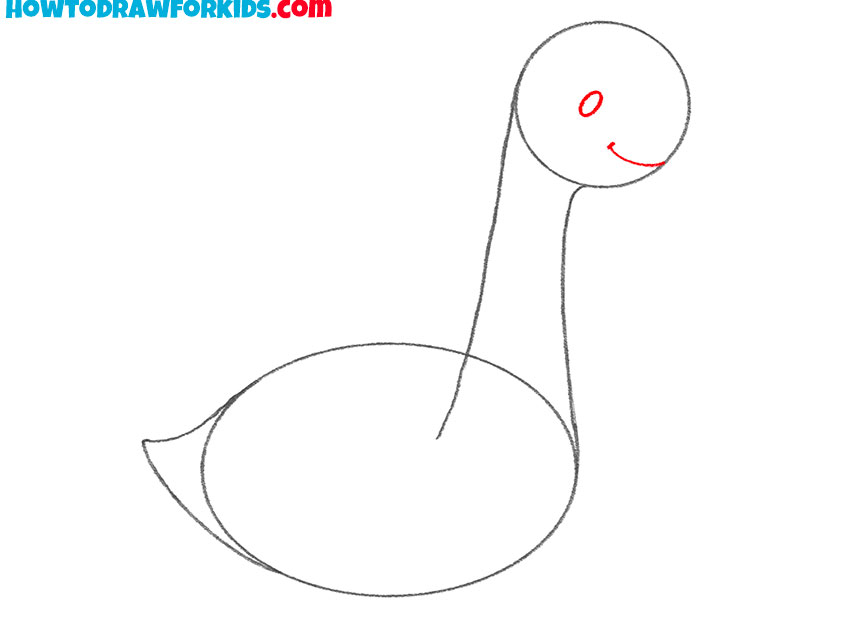
- Draw the face.
Now that the basic shapes of the head, body, neck, and tail are in place, you can begin adding some details to your dinosaur by drawing the face. Start by placing a small oval shape on the head oval to represent the eye. Next, draw a simple curved line beneath the eye to create a smiling mouth.
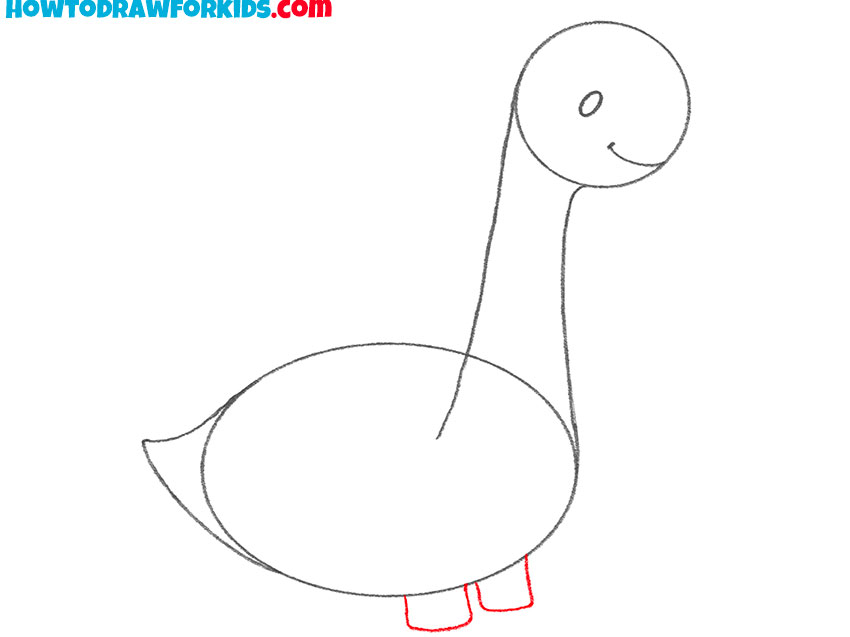
- Add the front legs.
Now, it’s time to start adding the limbs, beginning with the front legs. To draw the front legs, sketch two straight vertical lines starting from the bottom of the body oval near the front. At the bottom of each leg, you can add a small, rounded rectangle to represent the feet. Be sure that both legs are about the same size.
- Illustrate the back legs.
After adding the front legs, it’s time to move on to the back legs. Using the same method as you did for the front legs, sketch two vertical lines extending from the back part of the body oval. These lines should be the same size as the front legs.

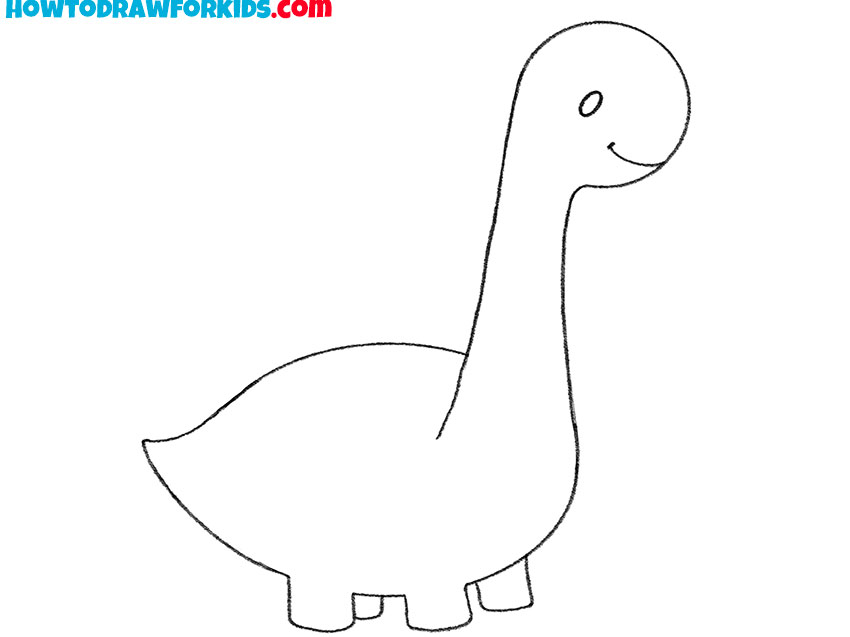
- Erase the guidelines from your sketch.
With all the basic shapes and details are sketched, the next step is to refine the overall outline of your dinosaur. Go over the lines you’ve drawn so far, darkening and smoothing them to create a more finished look. This is the step where you can clean up any rough edges or uneven lines.
- Color your dinosaur.
You can use any color you like, but a classic green is always a good choice for a friendly-looking dinosaur. Start by coloring in the body, making sure to keep the color even and consistent. You can also add some darker or lighter shades along the neck, legs, and tail to create a sense of realism.
Additional Сontent
The dinosaur drawing tutorial has almost come to an end, but there’s a way to continue practicing without needing access to the Internet. Download the free PDF version of this tutorial, which includes an illustrated guide covering all the steps from the tutorial. Inside the PDF, you will also find a coloring page, a tracing worksheet, and a grid drawing worksheet.
How to Draw a Dinosaur: Additional Methods
In this section, I will introduce several different methods for drawing a dinosaur in a cartoon style. Each method has its own unique method and style, allowing you to learn various techniques to find the one that suits you best. Whether you prefer simple, rounded shapes, or more detailed look, there is a method here that will be ideal for you.
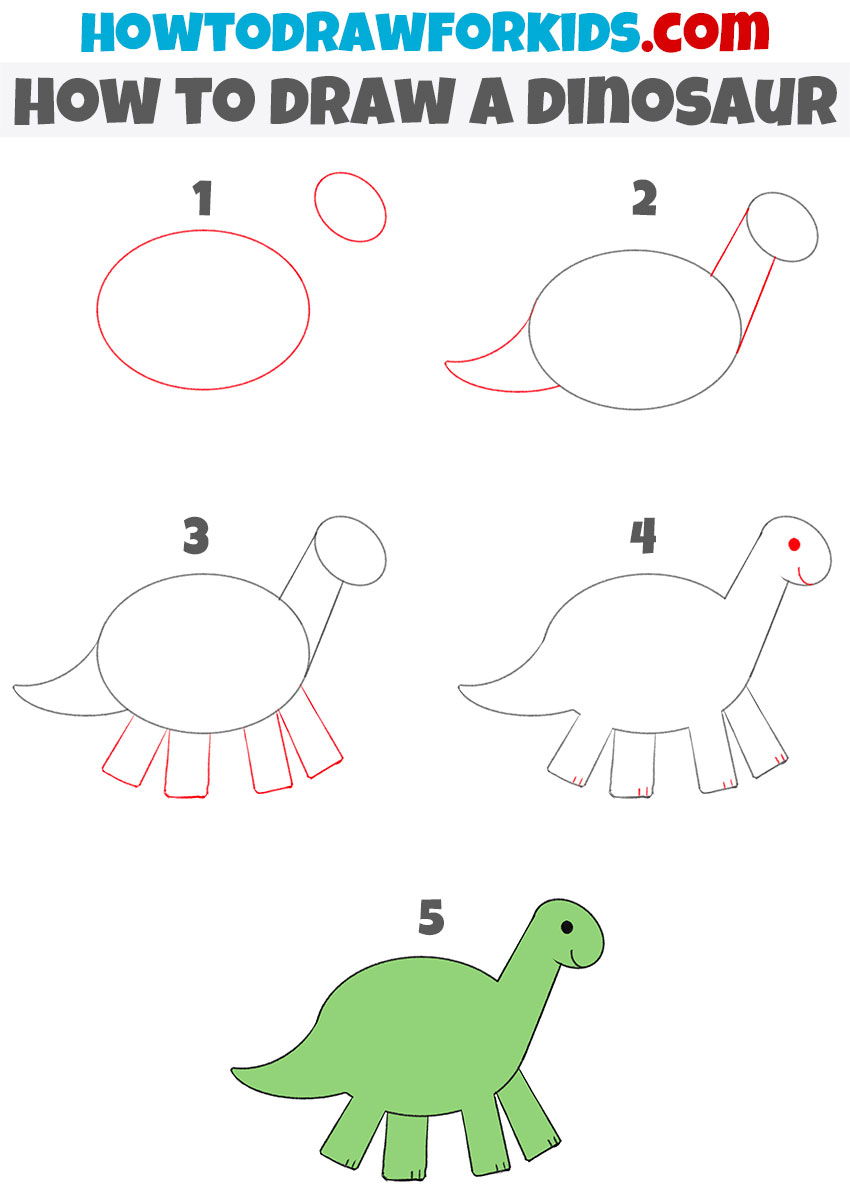
Drawing a Brachiosaurus
This tutorial introduces a slightly different sequence of steps and drawing principles, focusing on the classic step-by-step method using simple geometric shapes.
Start by sketching an oval for the body and a smaller oval for the head. Connect the head and body with two lines for the neck, and add a curved tail. Draw the eye on the head. Next, add two rectangles for the front legs and two more for the hind legs.
This method is very convenient, especially for simplified or cartoon styles, as it relies heavily on smooth and rounded shapes, which remain prominent in the final version.
Drawing a Dinosaur for Kindergarten
This is the easiest dinosaur drawing tutorial ever, designed as an additional instruction to the first one. This guide is created for the youngest artists and preschoolers.
Start by drawing a large oval for the body and a smaller oval for the head. Connect them with two lines for the neck and add a simple curved tail. Draw the legs as rectangles, simplifying the form further. Add a small dot for the eye and a curved line for the mouth.
This step-by-step method excludes all details that might complicate the lesson, such as rounded paws or highlights inside the eye. Finally, color your dinosaur to complete the drawing.
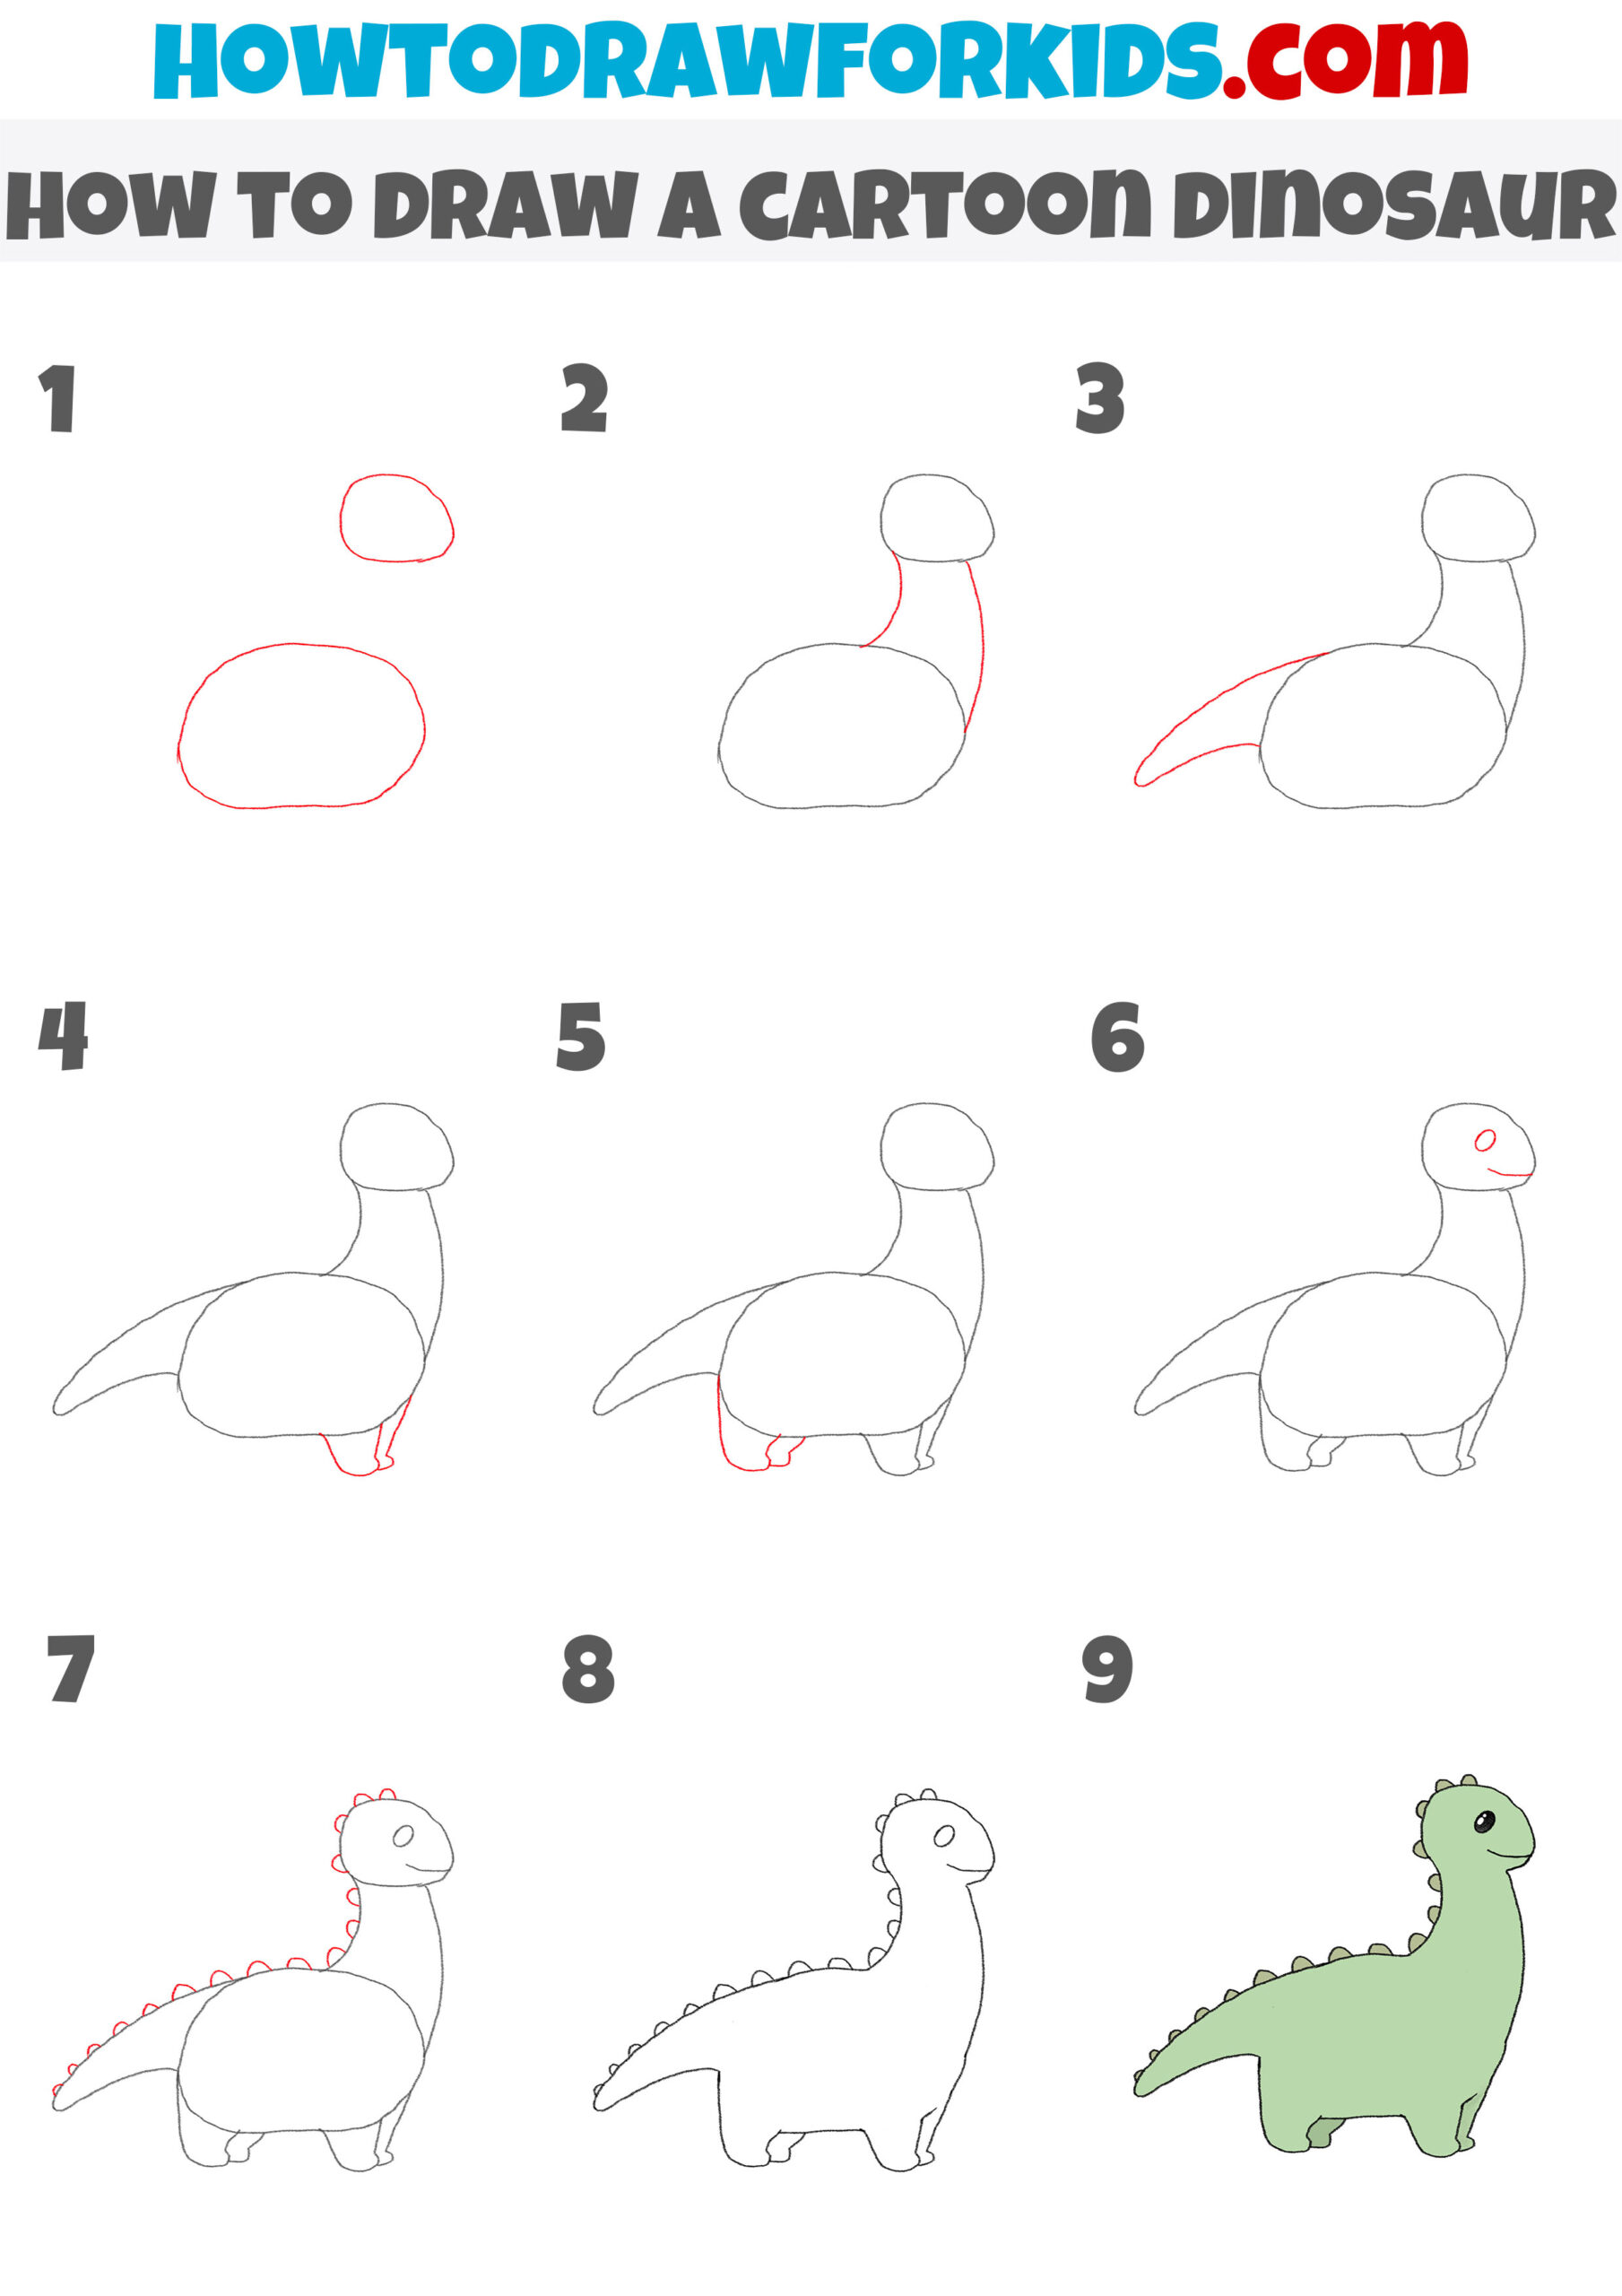
Drawing a Cartoon Stegosaurus
For this simple tutorial, I used a stegosaurus as a prototype, a famous dinosaur known for its bony plates.
Start by drawing an oval for the body and a smaller oval for the head. Connect them with a curved line for the neck. Add a long, curved tail extending from the body. Sketch the legs using simple shapes, with the front legs first, followed by the hind legs.
Add the facial features, drawing a simple eye and mouth. Draw the characteristic bony plates along the back and tail. Finally, refine your drawing and color it to complete your cartoon Stegosaurus.
This guide offers a great way to add variety to your dinosaur drawings while keeping a simple, cartoon style.
Drawing a Simple Dinosaur
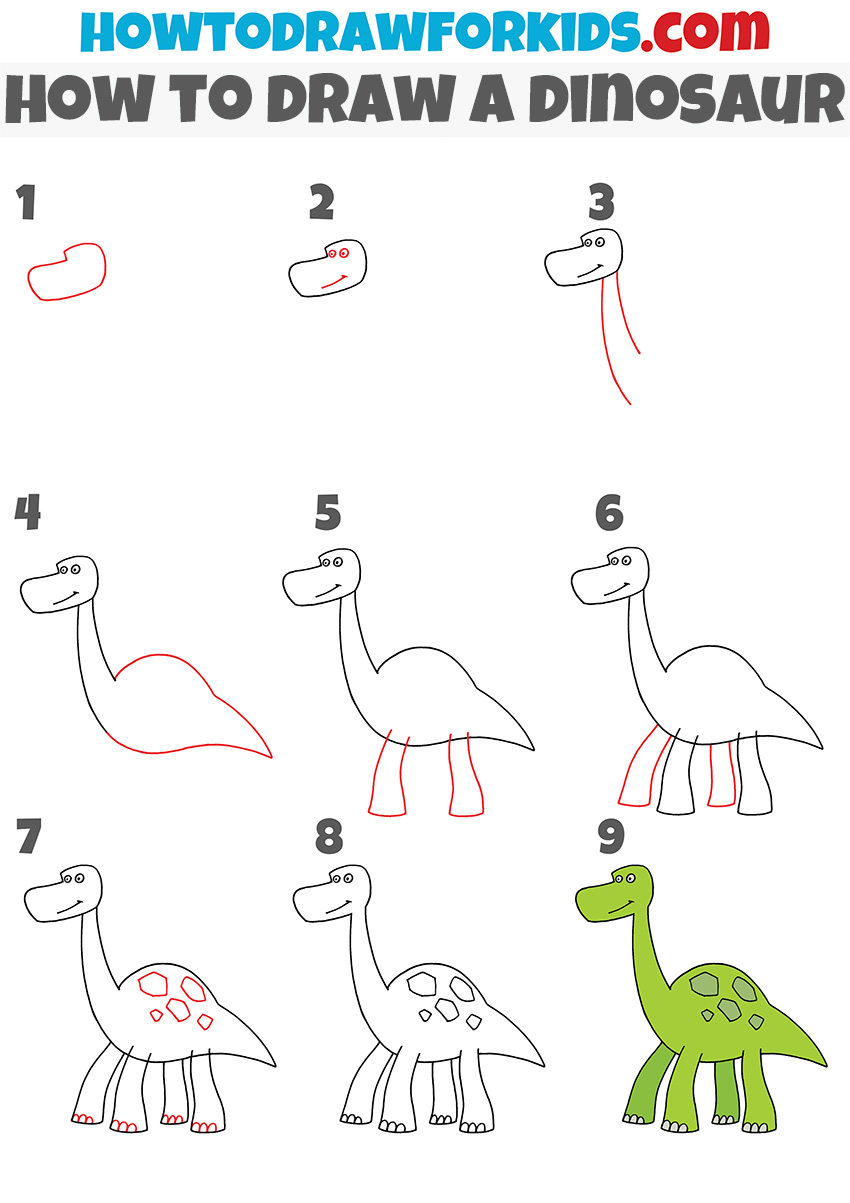
This is another dinosaur drawing guide. I drew a large dinosaur with a long neck and a small tail. The drawing steps in this tutorial are different from several previous lessons but quite similar to my main drawing tutorial.
Start by sketching the head, adding eyes and a smile. Draw the long neck and a body that resembles a large comma. Add the front legs, followed by the hind legs, ensuring they have rounded and smooth lines. Carefully draw the claws on the paws. Add some spots on the body for detail. Finally, color your dinosaur to complete the drawing.
Drawing a Cute Dinosaur
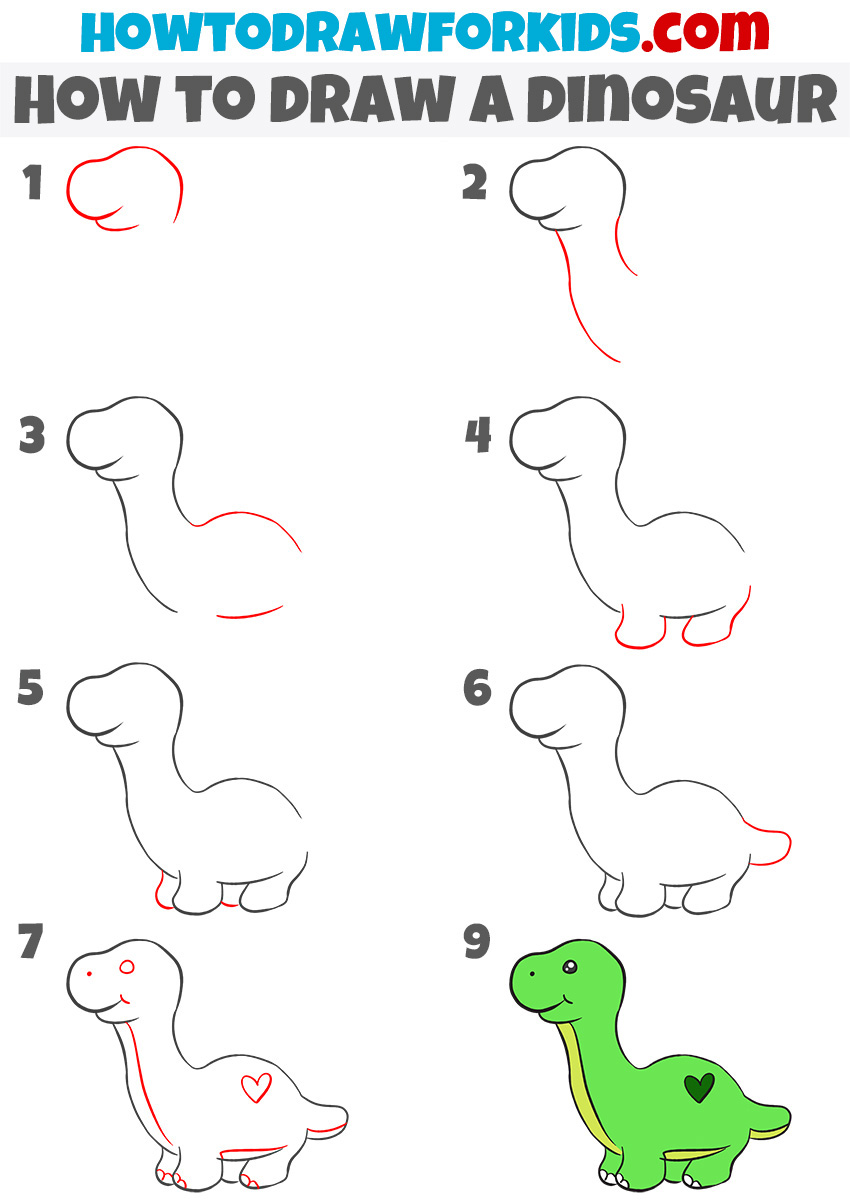
In this tutorial, I will show you another way to draw a very simple and cute dinosaur with a short tail and a very long neck.
Start by drawing the head using a rounded shape with a distinct jawline. Next, add the neck, extending it downward with a smooth curve. Draw the body as a large, rounded shape connecting to the neck and a small, curved tail at the back. Add two rounded shapes for the front and hind legs. Draw the facial features, including an eye with a highlight and a small, smiling mouth.
Refine the legs by adding simple feet. For added detail, draw a small heart shape on the body. Finally, color your dinosaur to complete the drawing. Use simple geometric shapes and avoid unnecessary details, focusing on the smooth, rounded lines to keep the dinosaur looking really cute.
Drawing a T-Rex Easy
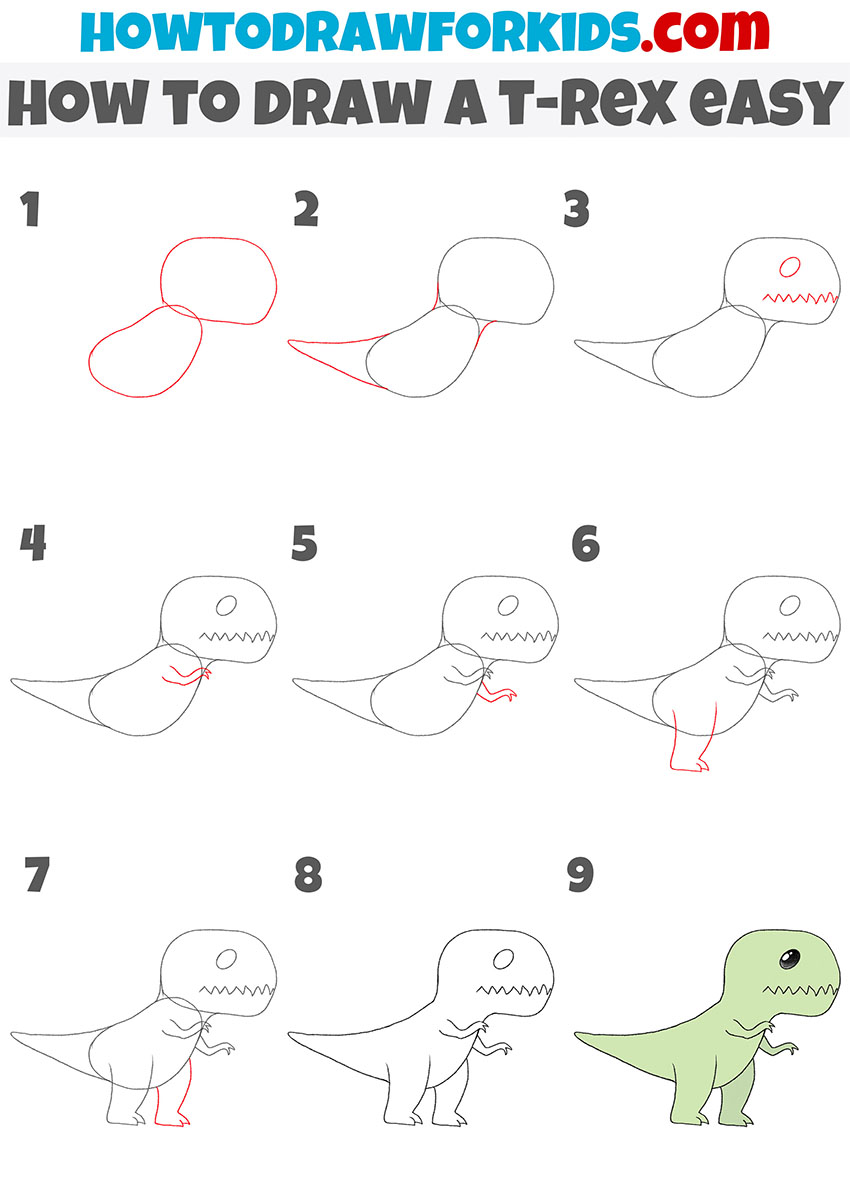
In this example, I decided to show another version of a dinosaur with different proportions, featuring powerful hind limbs and a large head. This drawing represents a Tyrannosaurus Rex, one of the most famous predatory dinosaurs.
Start drawing this dinosaur by an oval for the head and a larger, overlapping oval for the body. Add a long, curved tail extending from the body. Sketch the mouth with sharp, zigzag lines for teeth and a circle for the eye. Draw the small arms with clawed fingers. Next, add the strong hind legs, ensuring they are thick.
Refine the body shape and add details like toes on the feet. Finally, erase unnecessary lines and color your T-Rex to complete the drawing. This method avoids realistic details but maintains the basic proportions of this prehistoric animal.
Drawing a Triceratops
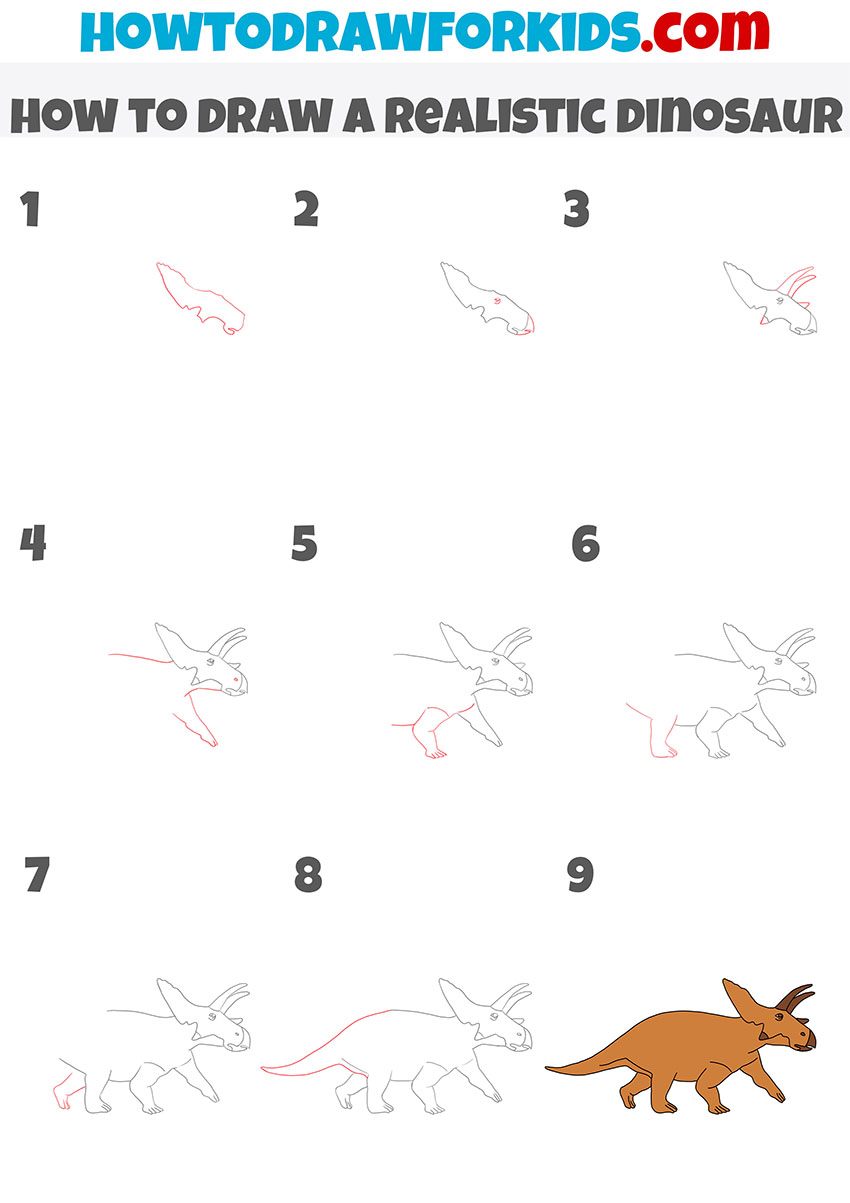
To draw a triceratops, start by sketching the head outline in profile view with an open mouth and distinct crest. Add details to the head, including eyes and nostrils. Draw the neck and the front limbs with defined joints and claws. Extend the body from the neck, shaping the torso and back.
Add the hind limbs, ensuring they mirror the front limbs in style and detail. Sketch the tail extending from the back, tapering to a point. Refine the drawing by adding texture and details like scales. Finally, color your triceratops in brown or green.
Conclusion
Drawing dinosaurs can be an interesting and useful activity. This tutorial was created to guide you through the steps of creating your own dinosaur drawing.
To expand your knowledge and consolidate what you have learned, visit other sections and tutorials on my site. For example, you can learn how to draw a dog or other cute animals using my simple step-by-step method.
Try drawing dinosaurs in different poses and from various angles to improve your understanding of simplified proportions and form. Continuing to experiment with different methods will help you make progress. Your comments and participation are valued, and any feedback or questions are appreciated.
thiis is so good thanks for thiis picture
Thank you