How to Draw a Fox
In this tutorial, I will show you how to draw a fox using three different methods and provide some additional advanced tips.


How to Draw a Fox: Basic Information
In this tutorial, we will draw draw a fox in simplified style with a focus on recognizable elements of this cute animal. When drawing a fox, it is important to pay attention to its characteristic features, such as the pointed ears, bushy tail, and characteristic snout.
The tail is one of the most distinctive features. It should be drawn with volume, showing the thick, fluffy shape that gives the fox its well-known silhouette. Another distinctive feature of the fox is its characteristic fur pattern and color. By accurately conveying these features in your drawing, you can create a simple and easily recognizable image of a fox.
The simplified look is achieved by exaggerating certain features, like the large eyes and oversized ears, while keeping other elements, such as the body and legs, relatively simple. Drawing a fox in this style is a really easy way to learn drawing this animal for kids.
Simplified cartoon drawings often highlight specific traits to make characters more expressive, which helps young artists learn how to convey the characteristic look of the animal or character through their art.
Fox Drawing Tutorial
Materials
- Pencil
- Paper
- Eraser
- Coloring supplies
Time needed: 35 minutes
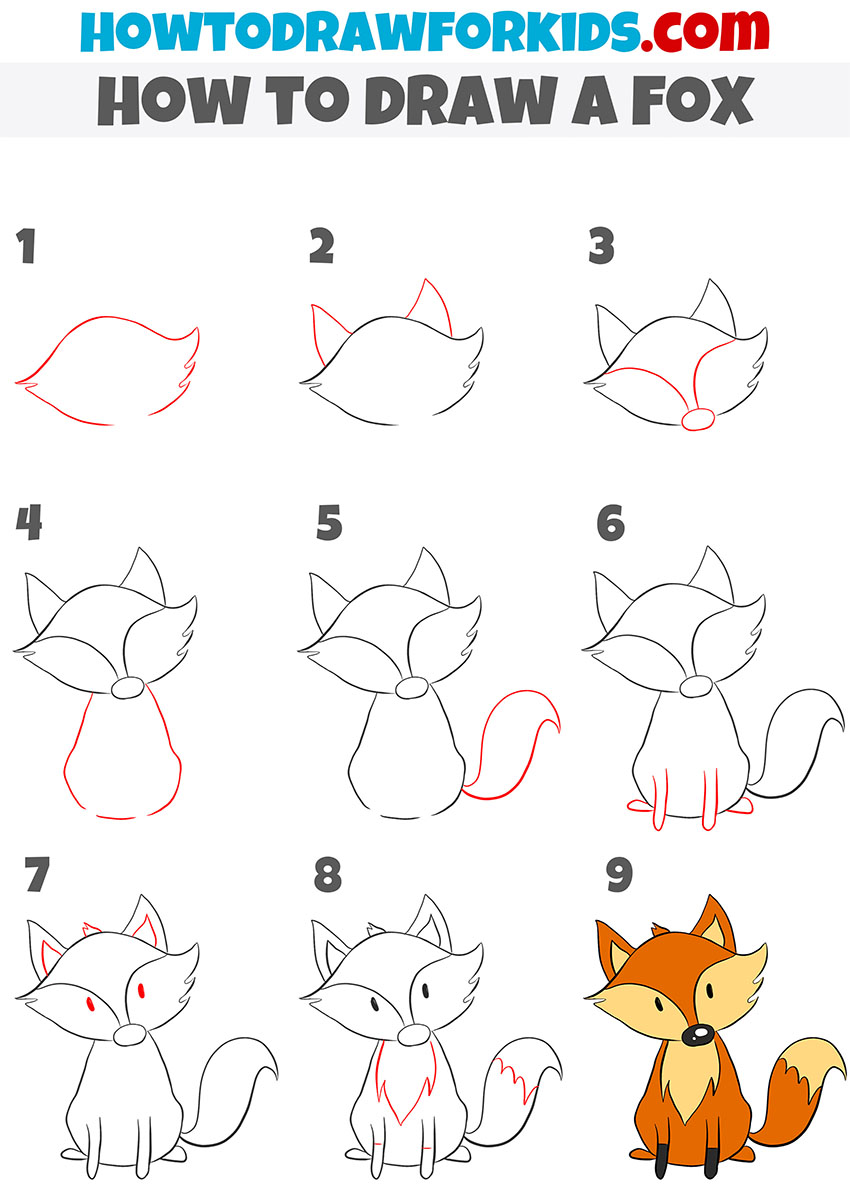
How to Draw a Fox
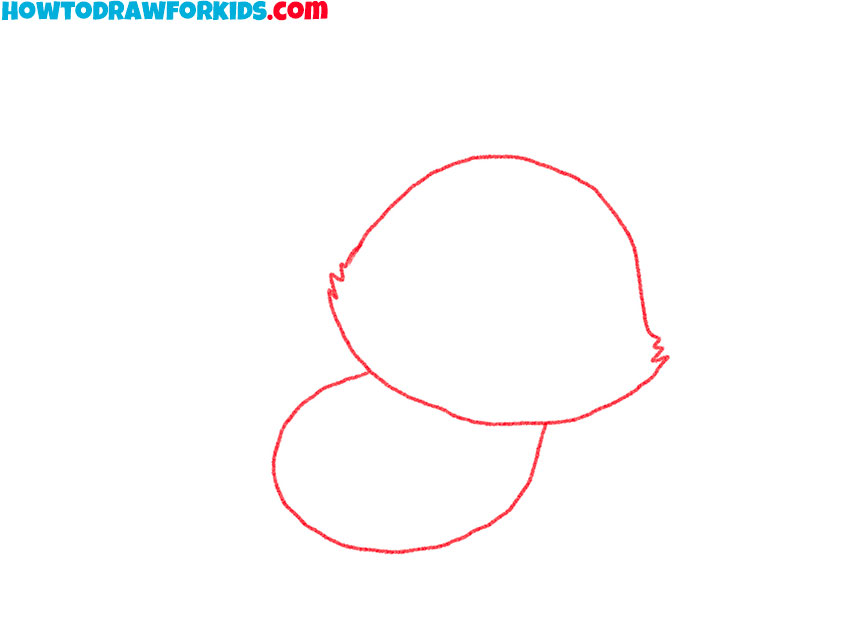
- Sketch the head and body.
For the start, sketch two simple shapes for the fox’s head and body. Sketch an oval shape for the head, and a slightly smaller, rounded oval for the body. Keep the lines smooth and light, as you will refine them later. The body should be positioned lower and slightly behind the head.
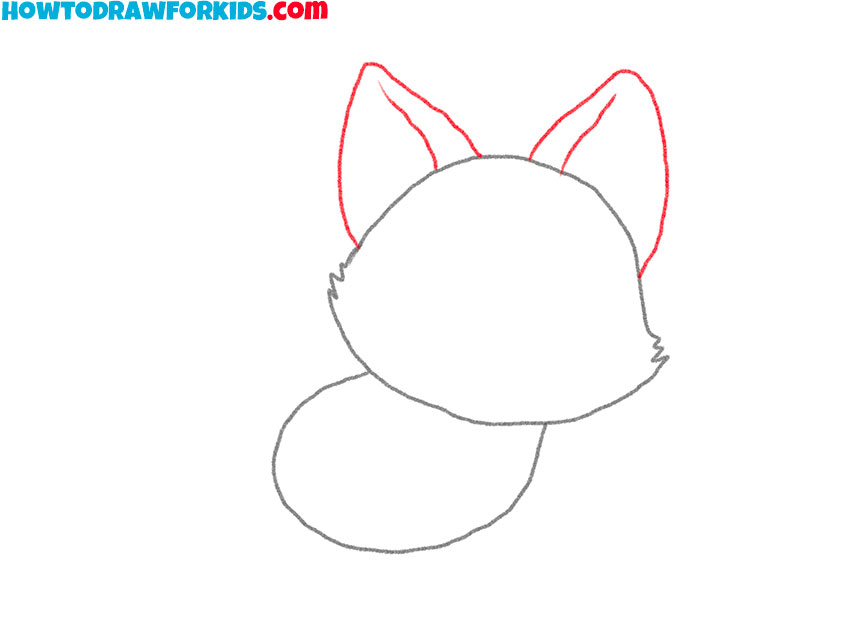
- Add the ears of the animal.
Next, draw two large, triangular shapes on top of the fox’s head to represent the ears. These exaggerated ears are an important characteristic of the simplified fox drawinf, giving it a cute and recognizable look. You can also add small lines inside the ears to represent the inner structure.
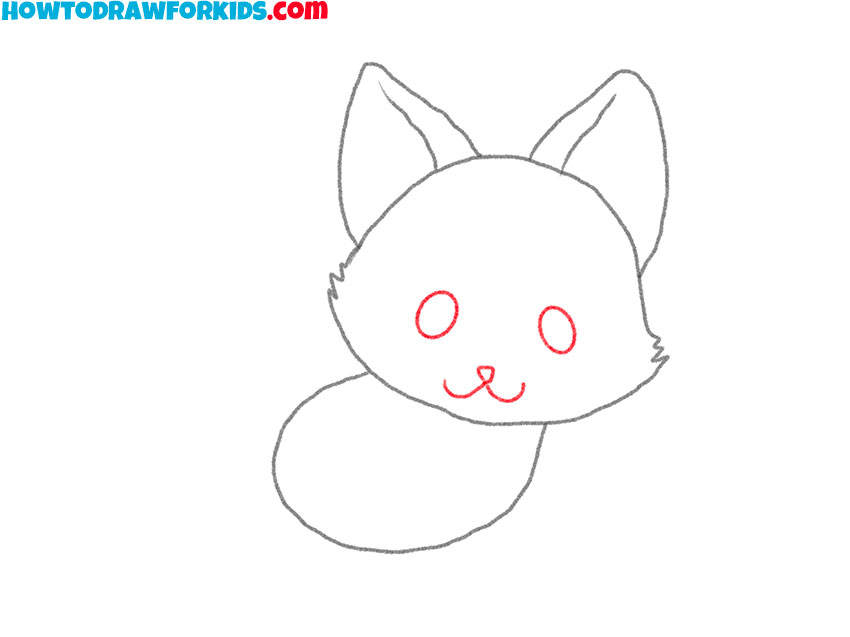
- Draw the fox’s face.
In this step, focus on drawing the facial features. Start with two large circles for the eyes, placed towards the lower half of the face. Leave enough space between the eyes. Below the eyes, draw a small oval for the nose. Then, add a simple curved line beneath the nose to create a smiling mouth.
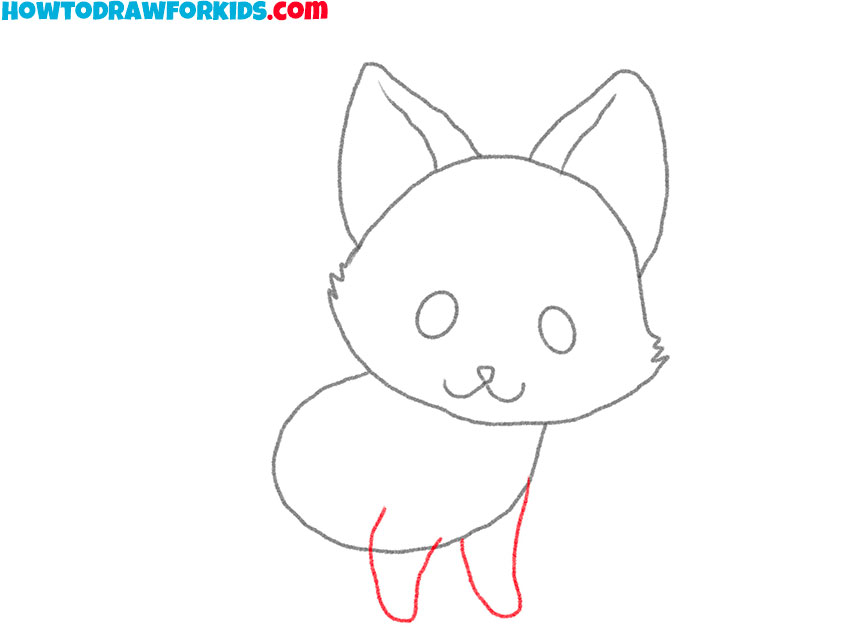
- Draw the front legs.
Now, it’s time to add the front legs of the fox. Draw two slightly curved lines extending downward from the body to represent the legs. The feet should be rounded at the bottom, giving the legs a soft, cartoon-like appearance.
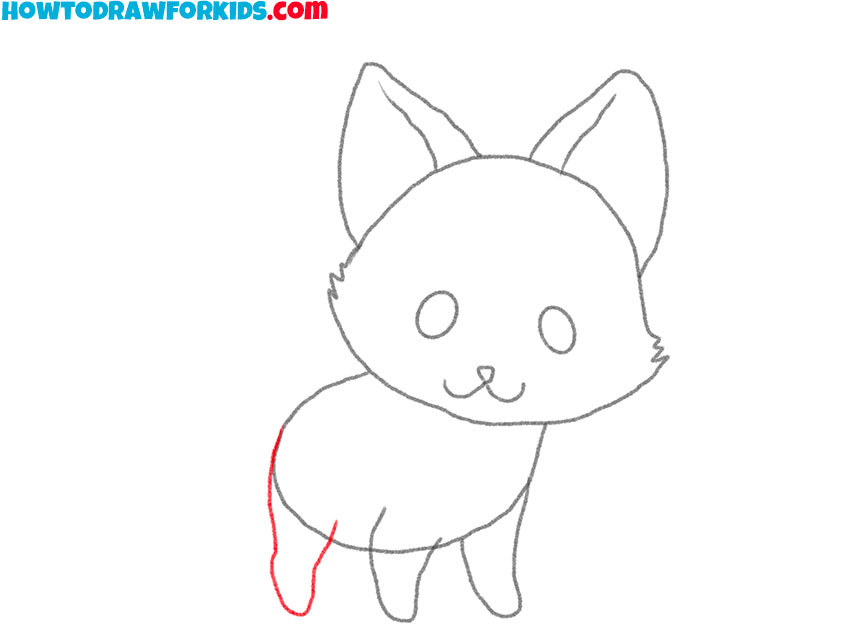
- Add the back legs.
For the next step, draw the fox’s back legs, following a similar approach to the front legs. The back legs should be drawn as curved lines extending from the lower part of the body. Like the front legs, the back legs should have rounded feet to match the soft, simplified look.
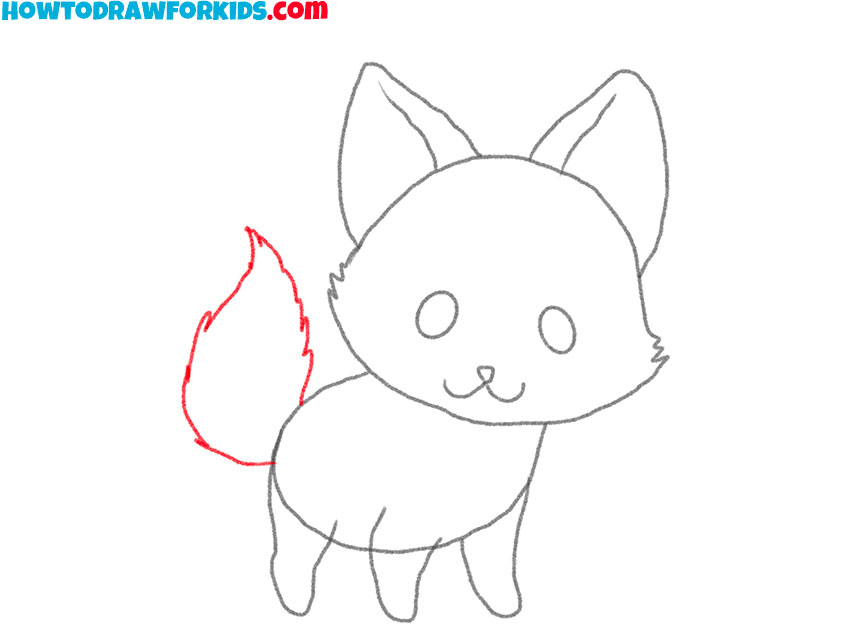
- Draw the tail of the fox.
Next, draw the fox’s iconic bushy tail. Start from the back part of the body, extending a large, curved shape outward and upward. The tail should be almost as long as the body itself, with a slight wave or curve to give it a natural, flowing appearance. Add a jagged edge at the tip to represent the fur.
- Add details to the face and body.
Draw small lines on the ears and the cheeks to represent fur. You can also add a curved line down the center of the fox’s belly to separate the light-colored fur on its underside. These details, though minimal, help define the fox’s shape and give it more character without overwhelming the simple, cartoon-style design.
- Remove the guidelines.
In this step, go over your fox drawing and remove any unnecessary guidelines or construction lines that were used to shape the animal. Once the guidelines are erased, you can begin darkening the final lines to make the drawing drawing look cleaner and more defined.
- Color the fox.
In the final step, color your fox to complete the drawing and give it a finished look. Use a light orange or brown color for the body, leaving the belly, snout, and tip of the tail white or a lighter shade. Color the eyes black, leaving a small white highlight in each to give the fox a lively, animated look.
Additional Content
A downloadable PDF version of this fox drawing gutorial has been provided for easy access. This condensed guide is ideal for quick reference or practicing offline. It allows you to work on your fox drawings without needing an internet connection.
The PDF contains the key steps of the lesson, making it a useful tool for continuous practice. It can be printed or viewed on a device, offering a convenient way to revisit the tutorial whenever needed.
How to Draw a Fox: Alternative Techniques
To further improve your drawing skills, I have prepared two additional tutorials on how to draw a fox. These instructions are created to offer you alternative methods for approaching the subject, giving you a chance to learn different techniques. The guides present different sequences of steps, focusing on a different ways to illustrate fox from the start to finish.
Alternative Fox Drawing Tutorial
This is an additional fox drawing tutorial that complements the previous one, offering a different approach and style. Compared to the first tutorial, this version is even more simplified. The overall design is more rounded and cartoon-like, with fewer details, which helps keep the drawing even more simple.
The sequence starts with a large circle for the head and a smaller oval for the body, followed by the addition of simple ears and a fluffy tail. The legs are drawn like simple shapes, and the facial features are minimal, with large, round eyes and a small nose. Then, add the details of the fur, remove the guidelines and color your fox drawing.

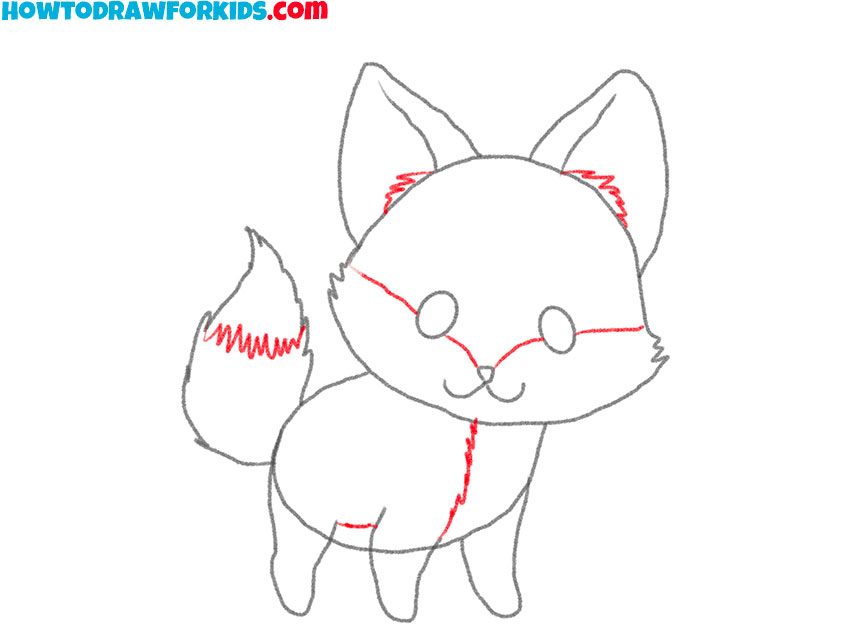
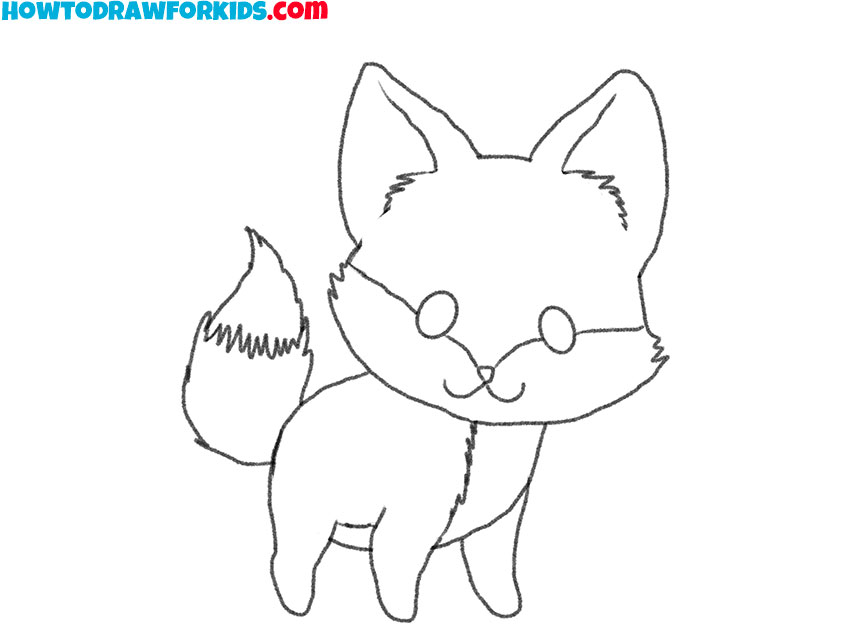
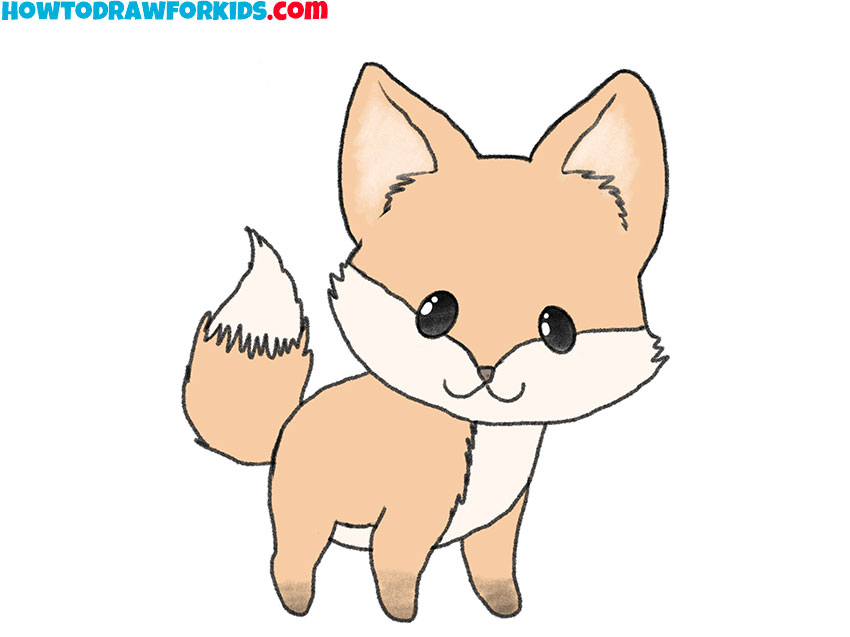
How to Draw a Sitting Fox
This is an additional tutorial that demonstrates how to draw a fox in a sitting position. Compared to the previous tutorial, the overall look of the fox is even more stylized and has more simplified appearance.
To draw a sitting fox, start by sketching the head, focusing on a simplified shape with a slight point for the fur on the sides. Add large, pointed ears on top. Next, sketch the face by adding a small oval for the nose and two curved lines for the texture of the fur. Draw the body in a sitting position, using a large curved line for the torso. Once the body shape is established, add the long, curved tail.
Next, define the fox’s legs with two parallel lines extending downward, keeping them simple and short. Add details to the face and fur, such as eyes, inner ear lines and small markings on the tail and chest. Finally, darken the lines and color the fox, using light and dark orange for the body and white for the chest and face markings.
Conclusion
And here we finish our fox drawing tutorial, and your paper now holds a completed fox drawing created step by step. However, your drawing practice doesn’t end here. On my website, you will find more tutorials to study. From learning how to draw a polar bear to following steps to draw a wolf, there are many options for further development.
To stay updated with new tutorials, be sure to check my social media channels where I share updates. If you have a specific character or animal you’d like to learn how to draw, feel free to reach out or leave a comment.