How to Draw a Baby Tiger
In this tutorial, I will show you how to draw a baby tiger. I hope that the creative process will give you great pleasure.
So, now you will learn how to draw a baby tiger step by step. The tiger is a formidable predator of the cat family. The tiger is very dangerous and a meeting with him threatens with trouble, but his babies look very cute and funny.
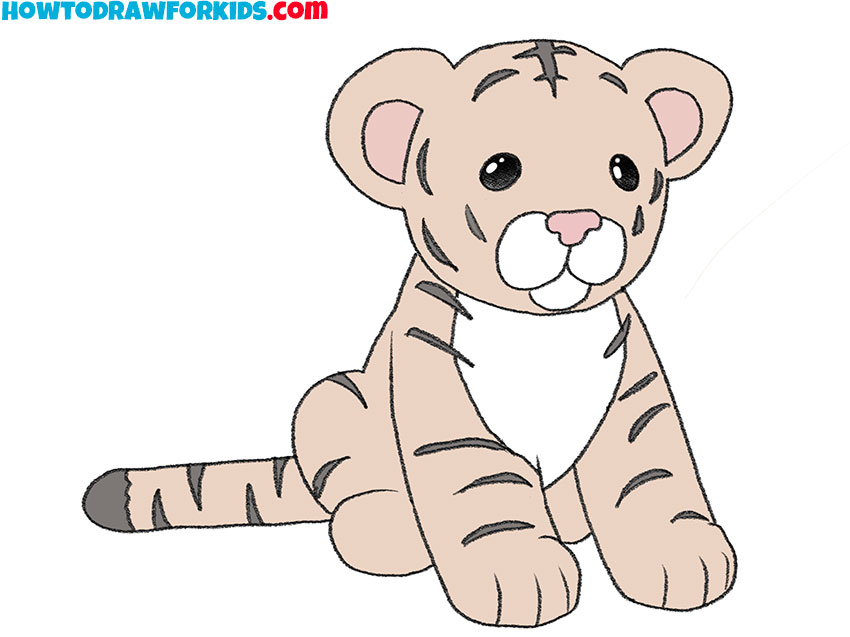
This picture shows a small baby tiger in a sitting position. In this form, the tiger cub is very similar to a soft plush toy. With the help of a simple instruction, you can easily draw a baby tiger and get a good result. Just follow the drawing steps in sequence and use small hints to achieve the best result.
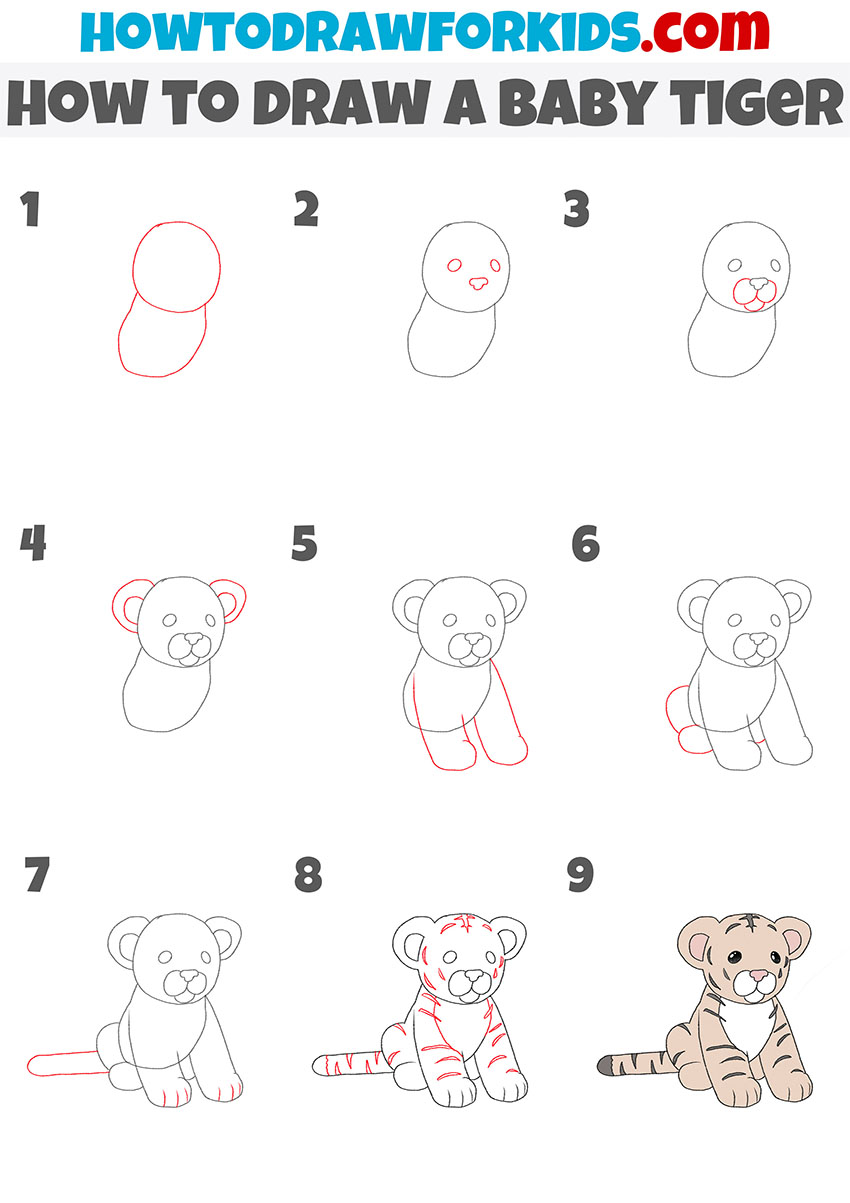
As usual, first you will draw the base and then gradually add small details. Carefully draw all the lines that are marked in red, be careful at every stage of drawing.
Materials
- Pencil
- Paper
- Eraser
- Coloring supplies
Time needed: 30 minutes
How to Draw a Baby Tiger
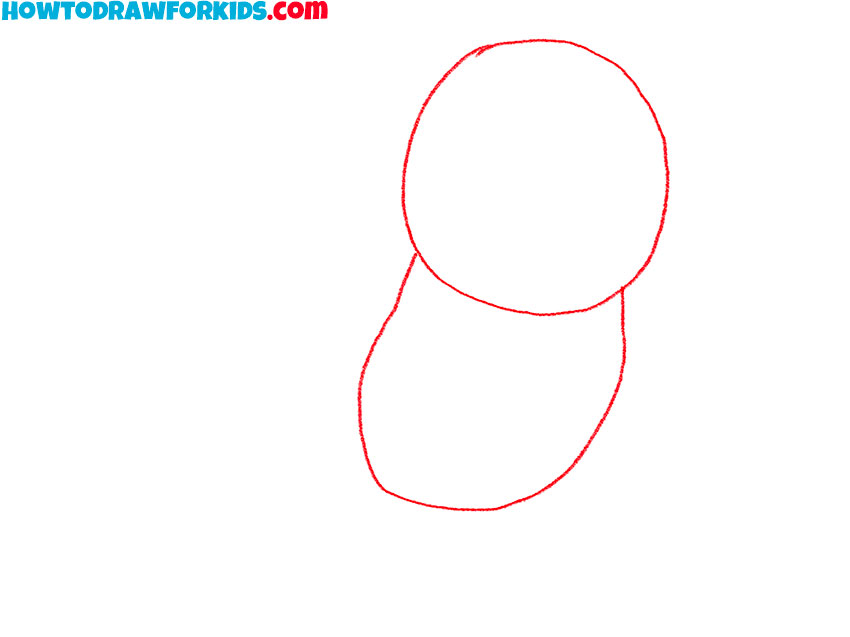
- Draw the head and torso.
Depict a circle to represent the head and use a smooth line to represent the torso.
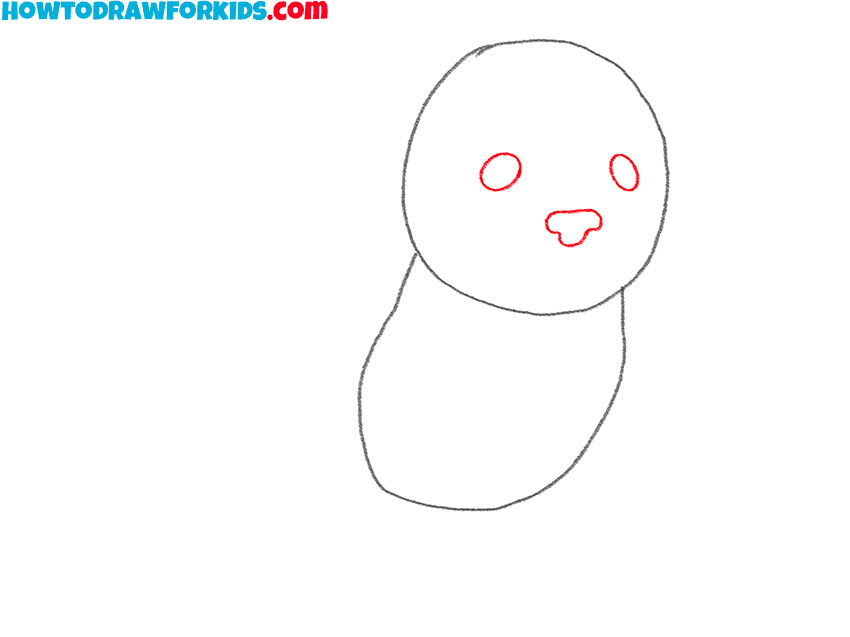
- Add elements of the face.
Sketch out two eyes in the form of an oval and add the nose.
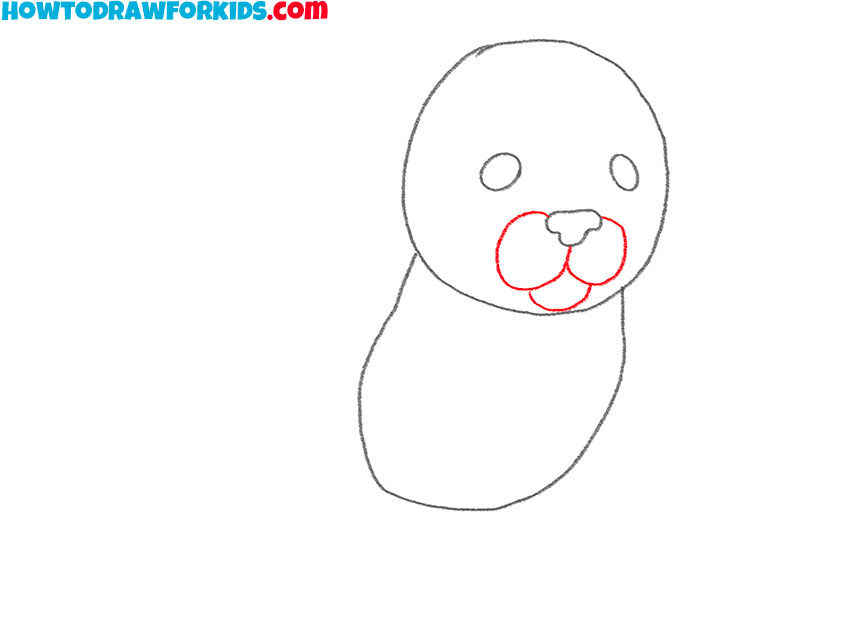
- Depict the front of the muzzle.
From the nose, draw smooth rounded lines on each side and add the mouth.
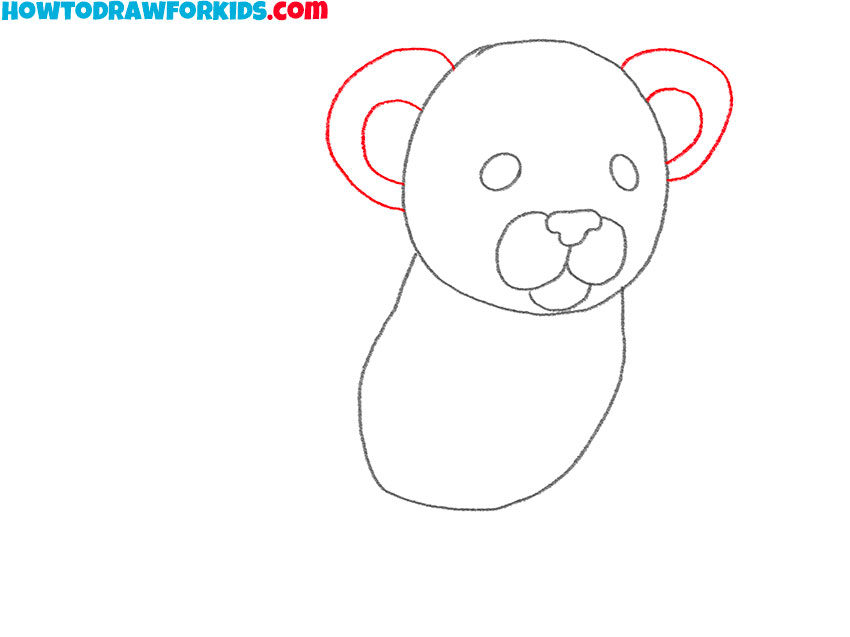
- Sketch out the ears.
Draw rounded lines on the sides of the head and immediately add the inner part of the ear.
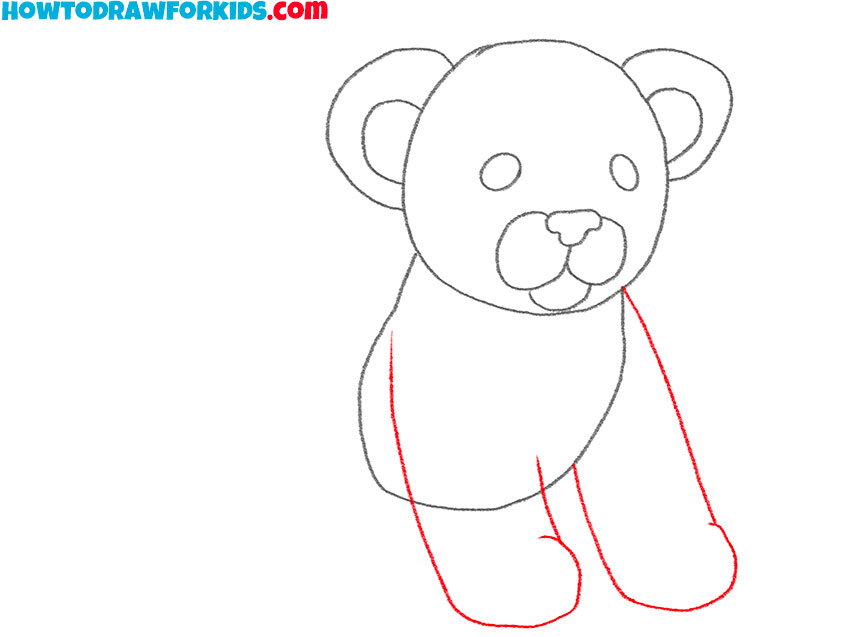
- Draw the front paws.
Depict smooth lines from the upper part of the torso to draw the two front paws.
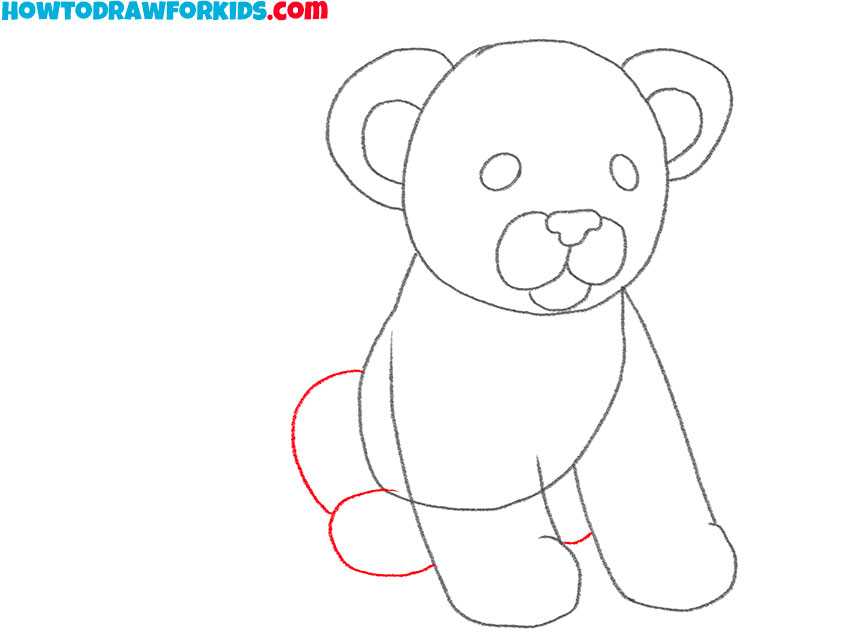
- Depict the back paw.
On the side of the body, draw the upper and lower parts of the hind legs.
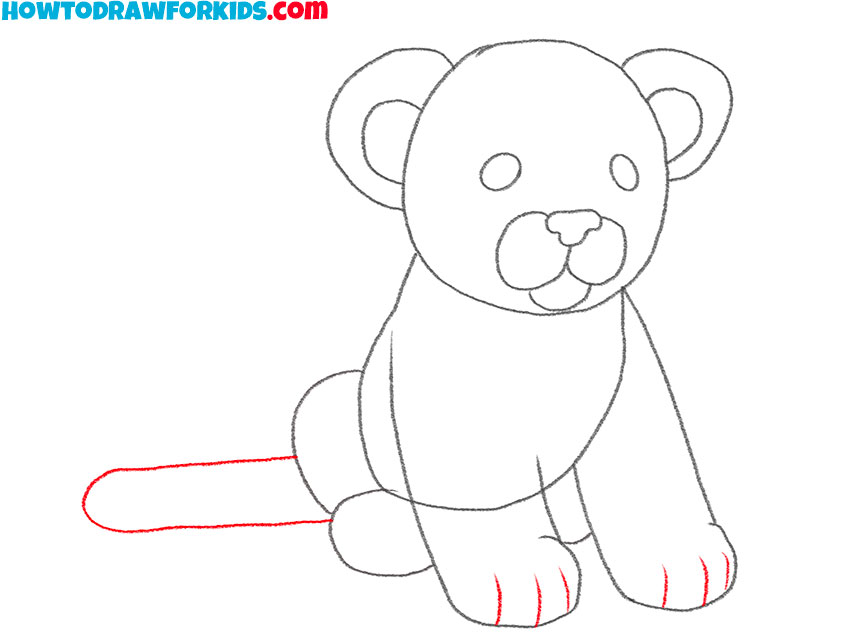
- Add the tail and fingers.
Using short strokes, draw the fingers on each paw and draw the tail on the side.
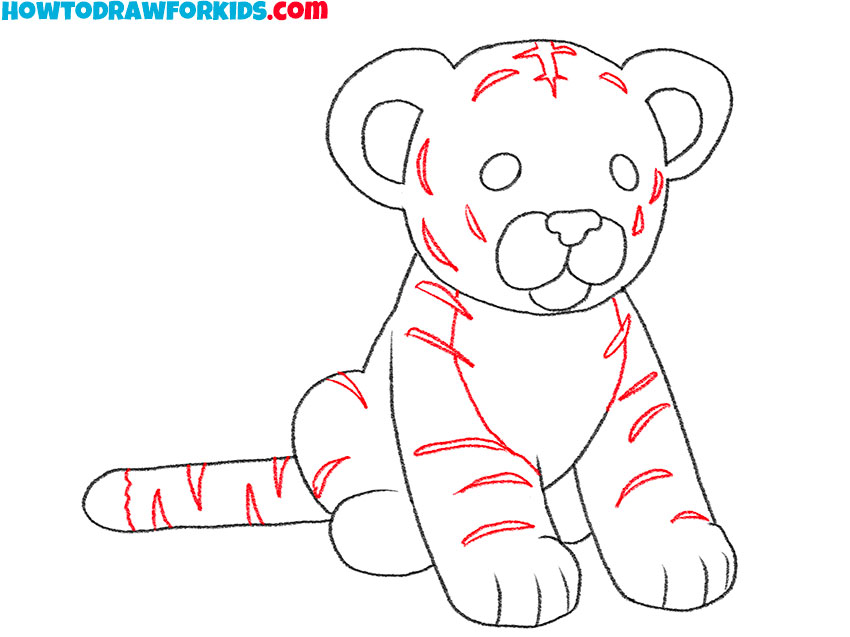
- Detail the color.
On the body of the baby tiger, draw short strips of different sizes.
- Color the baby tiger.
For coloring the fur, use beige, and color the stripes with a darker color.

Don’t forget to download the PDF file, which contains a short version of the lesson and additional useful tools you need to effectively complete the lesson.

