How to Draw a Cartoon Tiger
In this tutorial on how to draw a cartoon tiger, I will demonstrate how to transform this menacing and ferocious animal into a cute creature portrayed in a simple style.

How to Draw a Cartoon Tiger: Introduction
In this tutorial on how to draw a cartoon tiger, I will guide you through a simple process with nine stages. Each stage uses a few easy shapes and lines, making it really simple for kids and beginners.
The cartoon tiger in this tutorial is drawn in a style similar to the chibi style, which means the head is larger and the body smaller. So, using the guide you can draw also a chibi tiger.
If you want the cartoon tiger drawing to appear slightly more realistic, you can make the head a little smaller or the body larger. Pay attention to how this affects the overall look of the drawing, as it will change the proportions.
When coloring your drawing, you can use traditional colors like orange with black stripes, or you can try other color combinations. For example, using black and white will make it look like a white Bengal tiger. Whichever colors you choose, keep the coloring simple and smooth for a clean finish.
Cartoon Tiger Drawing Tutorial
Materials
- Pencil
- Paper
- Eraser
- Coloring supplies
Time needed: 35 minutes
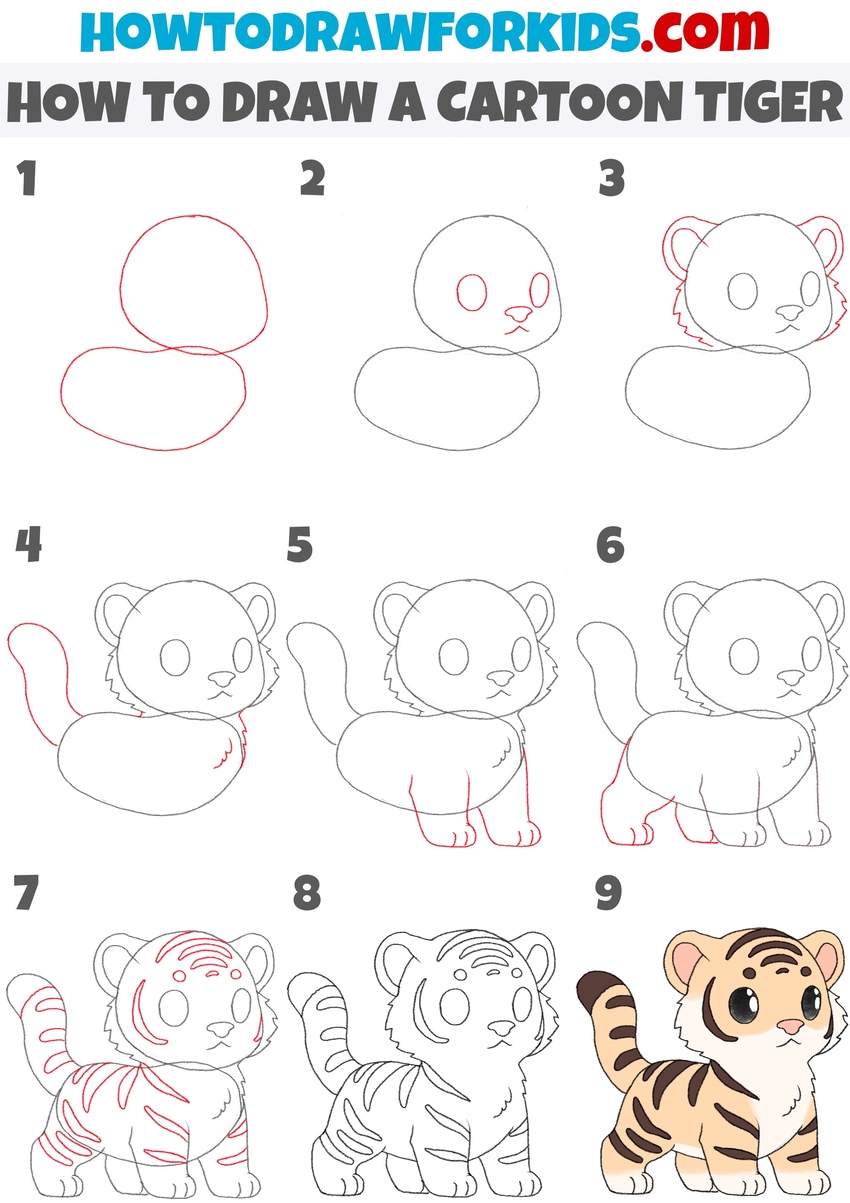
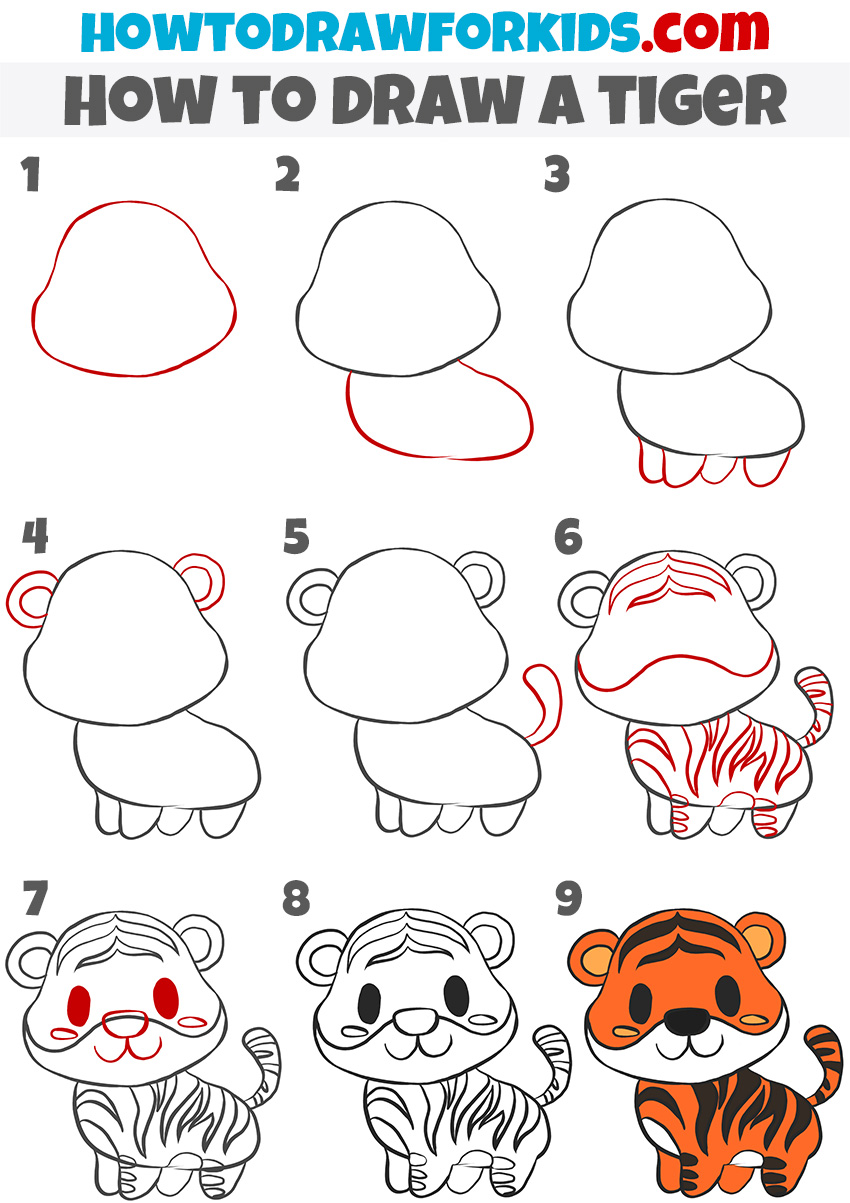
How to Draw a Cartoon Tiger
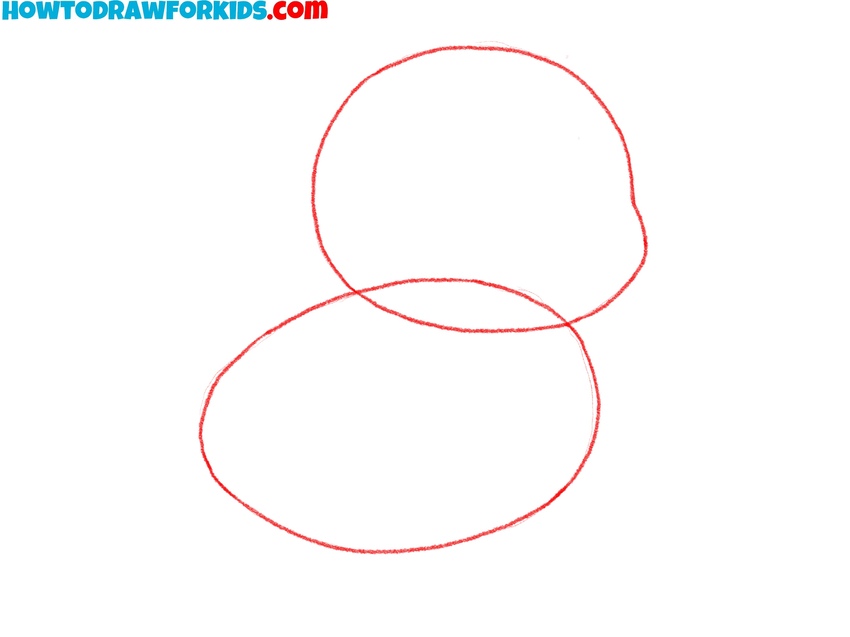
- Sketch the head and body shapes.
The head is a large oval shape, while the body is a smaller, slightly elongated oval overlapping the lower part of the head. Keep the shapes light and simple, as these will serve as the base structure for the tiger. This step helps create the overall proportions of your cartoon tiger.
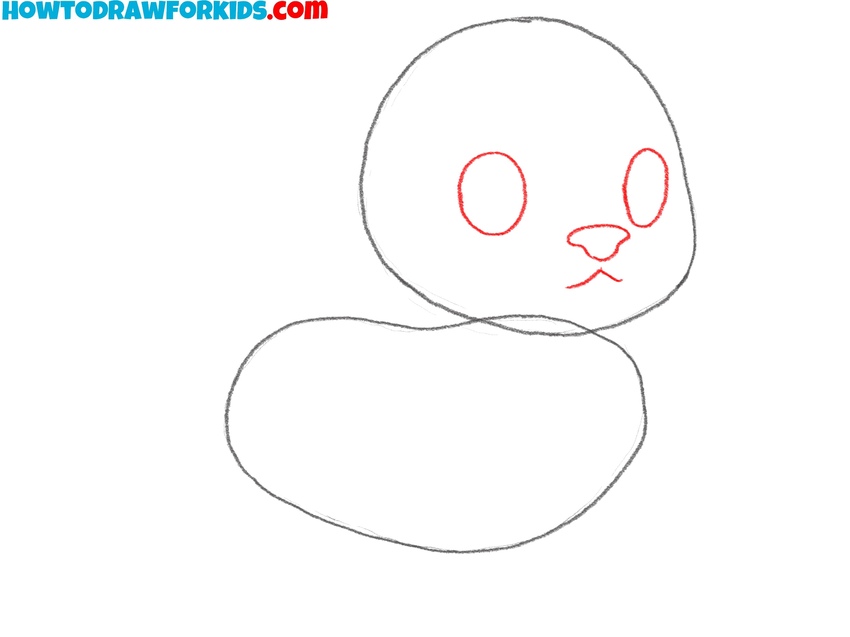
- Add facial features.
Sketch two circles or ovals for the eyes with a small, triangular nose and two curved lines for the mouth underneath it. These features should be basic and circular to give your tiger drawing more cartoon look. To give your tiger even more cute look you can make the the eyes larger.
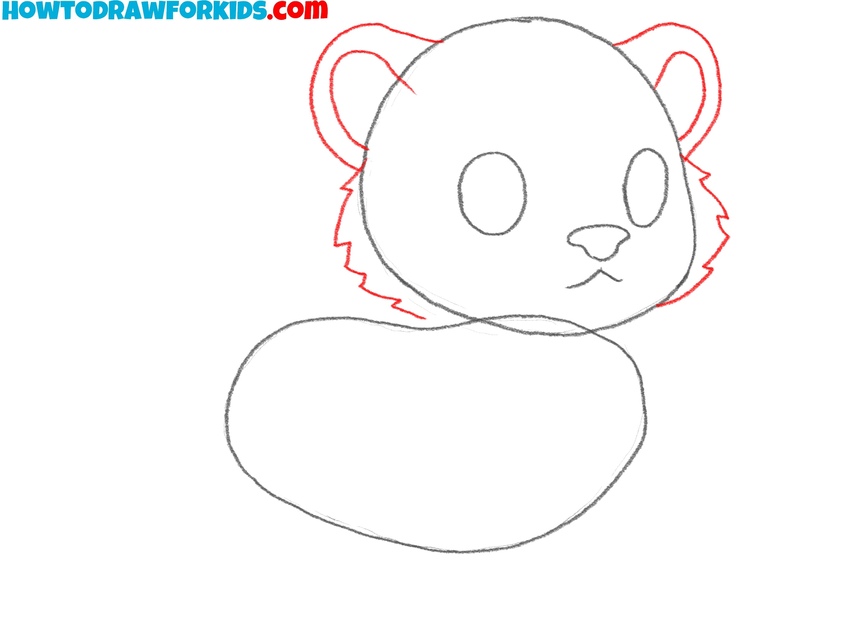
- Draw the ears and outline the fur.
Now, add the tiger’s ears on top of the head, making them rounded and simple. Inside the ears draw the inner texture. To give the tiger head a slightly fluffy appearance, add curved, jagged lines along the sides of the head, representing the fur.
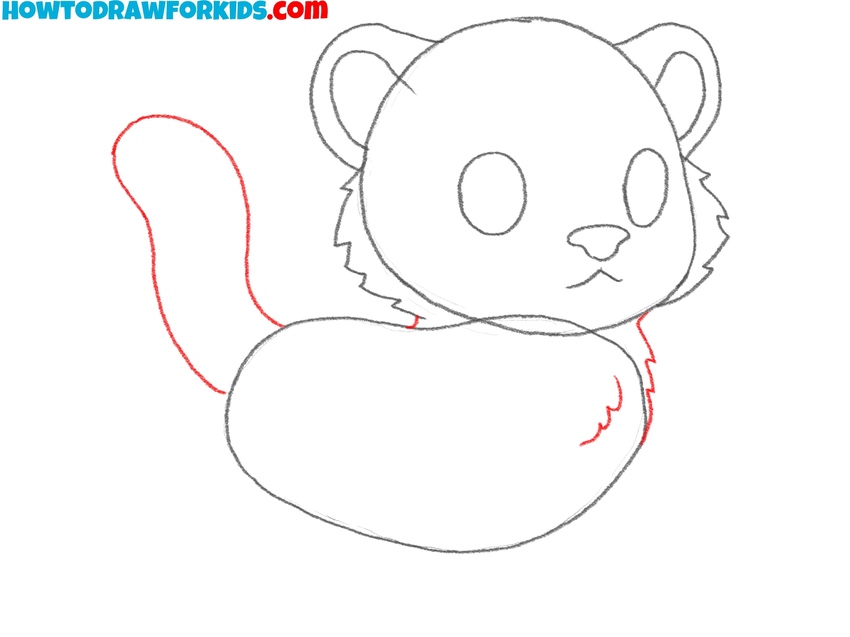
- Add the tail of the cartoon tiger.
In this step, start by adding a long, curved tail on the back of the body. The tail should be simple and rounded at the tip, with no sharp angles. This will help the tiger look really cartoon. After that, connect the head and body with jagged lines.
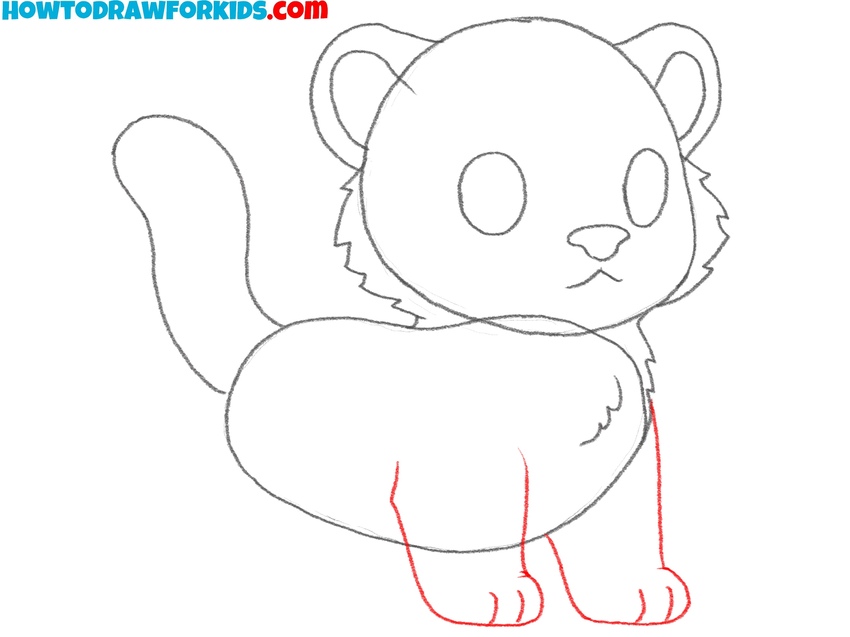
- Draw the front legs and paws.
To do this, draw two simple vertical lines extending down from the body. Each leg should end with small, rounded paws. Leave a slight gap between the legs of the big cat. Don’t forget to create the toes of the tiger sketching short lines on the paws.
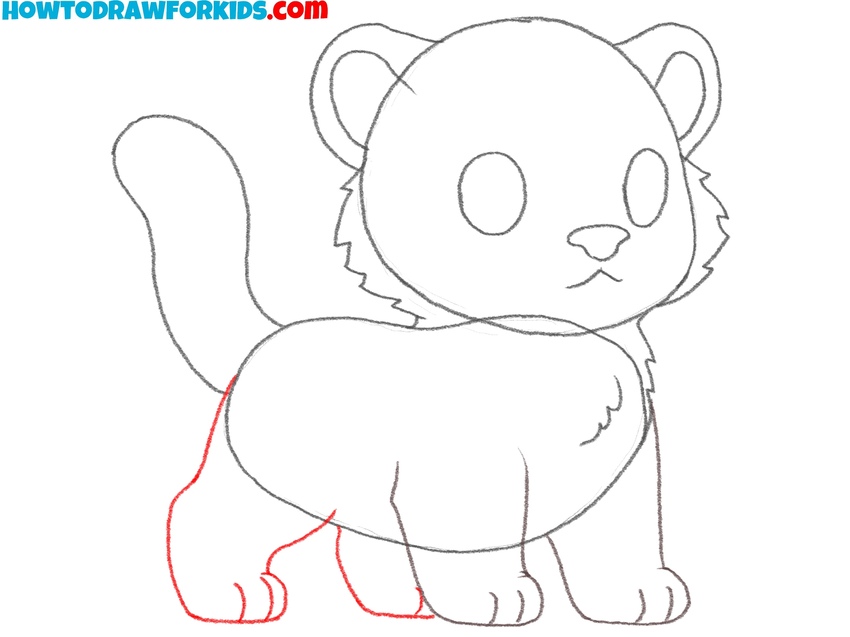
- Add the back legs and paws.
Similar to the front legs, draw two vertical lines extending from the back of the cartoon tiger’s body, ending with rounded paws. The back legs should be the same length as the front legs. Next, draw the toes on the back paws just as you did in the previous step.
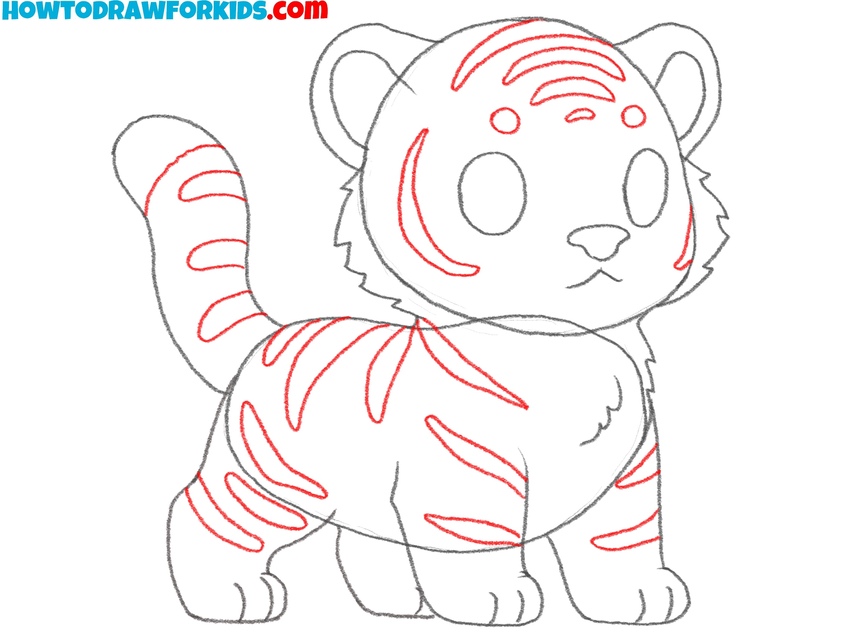
- Draw the tiger’s stripes.
To create these tiger stripes, draw several curved lines across the head, body, legs, and tail. These lines should be irregular and vary in size, as tiger stripes are not uniform. Avoid making the tiger stripes too detailed. Keep the lines bold but simple to give the tiger more cartoon look.
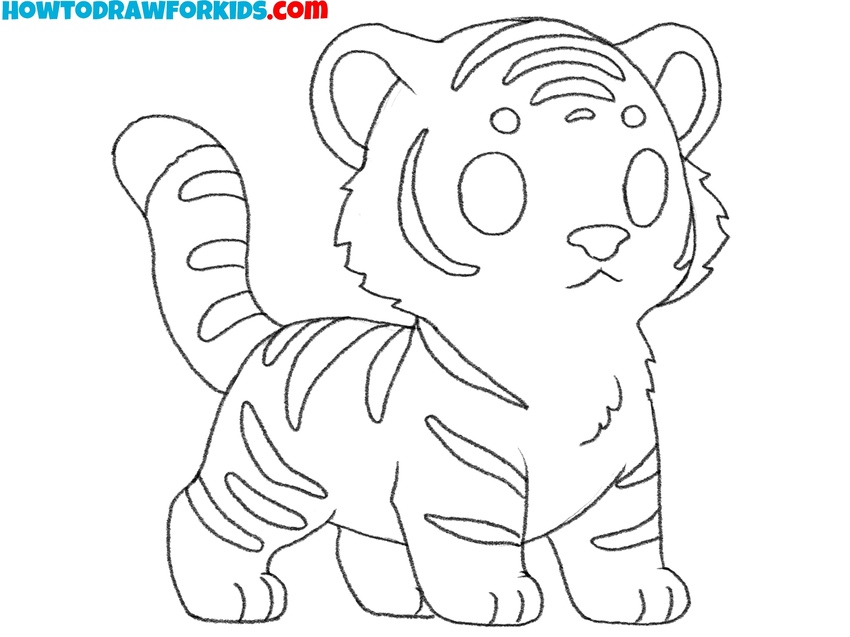
- Finalize the sketch.
Erase any guidelines from your sketch. Also, refine any facial features and body detail to give your cartoon tiger drawing a finished look. Check the placement of the stripes and facial features. Once satisfied, you’re ready to move on to the final stage to color your tiger.
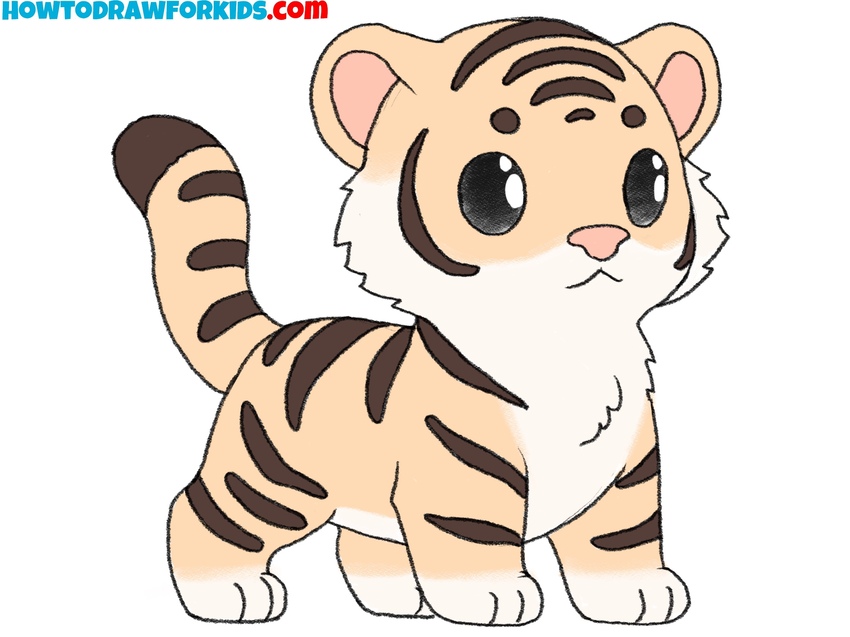
- Color the tiger.
Use traditional colors for a tiger, such as orange for the body, black for the stripes, and white for the belly, and face. Color the nos and inner areas the ears pink. The eyes can be filled with black, leaving small white highlights. Use simple colors to give your tiger cartoon look.
Alternative Cartoon Tiger Drawing Tutorial
Start by drawing the head of the cartoon tiger using a large oval shape and a smaller oval for the body beneath it. Next, draw four small curved lines for the tiger’s paws at the bottom of the body. Add two rounded ears on both sides of the head.
After that, draw a simple curved tail extending from the body. Now, create the stripes on the tiger’s body and head by adding simple curved lines. Once the stripes are in place, draw the tiger’s face with two large eyes, a nose, and a wide smile.
The eyes should be oval, and the nose is positioned in the middle, with the mouth below it. Finally, color the tiger using traditional orange and black colors, leaving some areas white for the highlights. The tiger should now be complete.
Conclusion
This was a simple tutorial where we drew a cartoon tiger. We went through two tutorials, and I hope both were useful. Feel free to let me know which one worked better for you.
If you enjoy drawing cartoon characters, visit my Cartoons section to learn how to draw well-known cartoon figures. If animals are more your style, check out the Animals section to learn how to draw a cat, dog, and other animals in a simple, cute style.
happy