How to Draw a Compass
Let’s learn how to draw a compass – an important tool for any sailor, navigator, or traveler who needs to find direction on land or at sea.

How to Draw a Compass: Introduction
We’ve already covered a variety of drawing lessons related to the sea, travel, and exploration. In previous tutorials, we learned how to draw Earth and practiced drawing a boat. Today, continuing with that theme, we’ll learn how to draw a compass. As usual, this lesson is built around simple shapes and easy lines, making it suitable for any beginner – even young children.
This drawing tutorial shows how to draw clean, symmetrical circles. It’s created to help young artists practice drawing round shapes like a compass without using a compass tool. Developing the ability to draw circles freehand is an important skill, especially when working on geometric or technical illustrations.
From my experience, children and beginners tend to learn more effectively when lessons are presented in a fun and engaging format. Practicing to draw perfect circles becomes much more enjoyable when done through drawing meaningful and recognizable objects like a compass, rather than repeating plain circles on a page.
Compasses can come in many styles and designs, so feel free to personalize your drawing. Once you’ve completed this tutorial on how to draw a compass, you can add your own details, choose a different color scheme, or even place your compass into a more creative or adventurous background scene.
Compass Drawing Tutorial
Materials
- Pencil
- Paper
- Eraser
- Coloring supplies
Time needed: 25 minutes
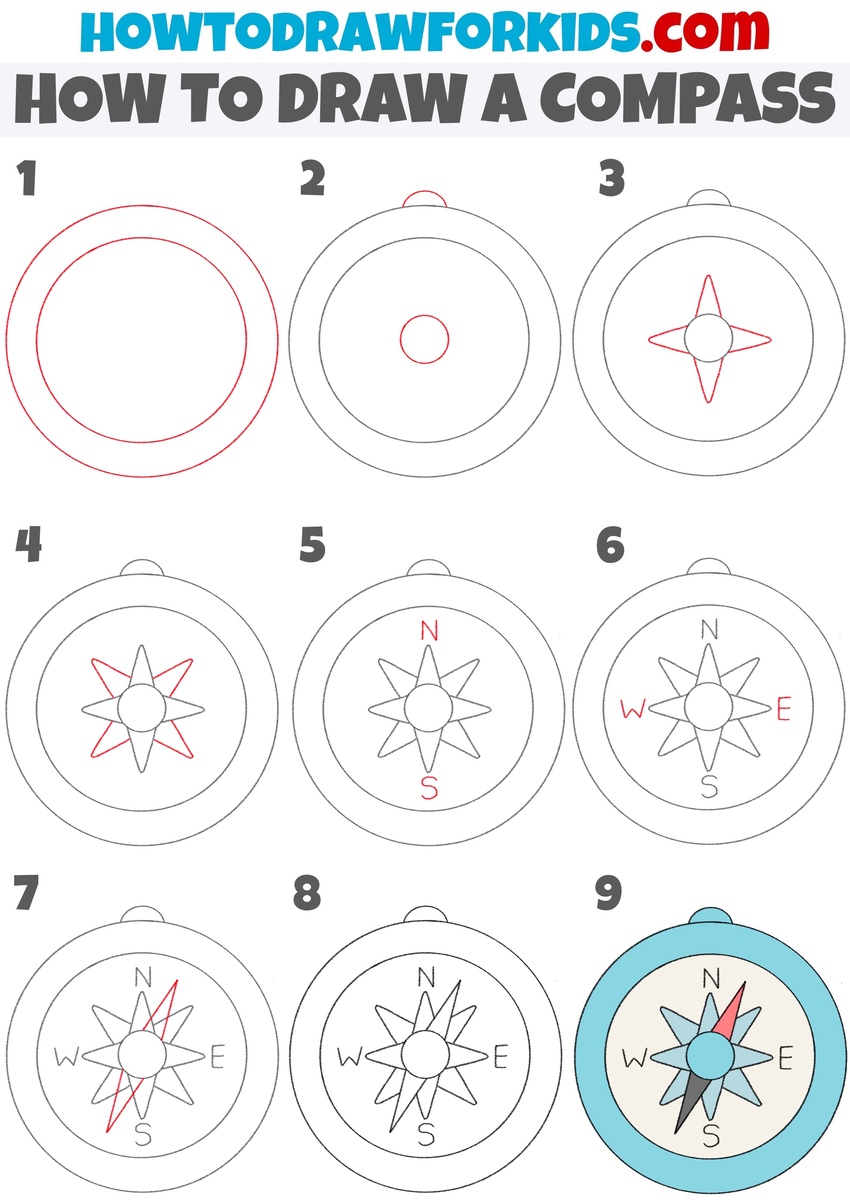
How to Draw a Compass
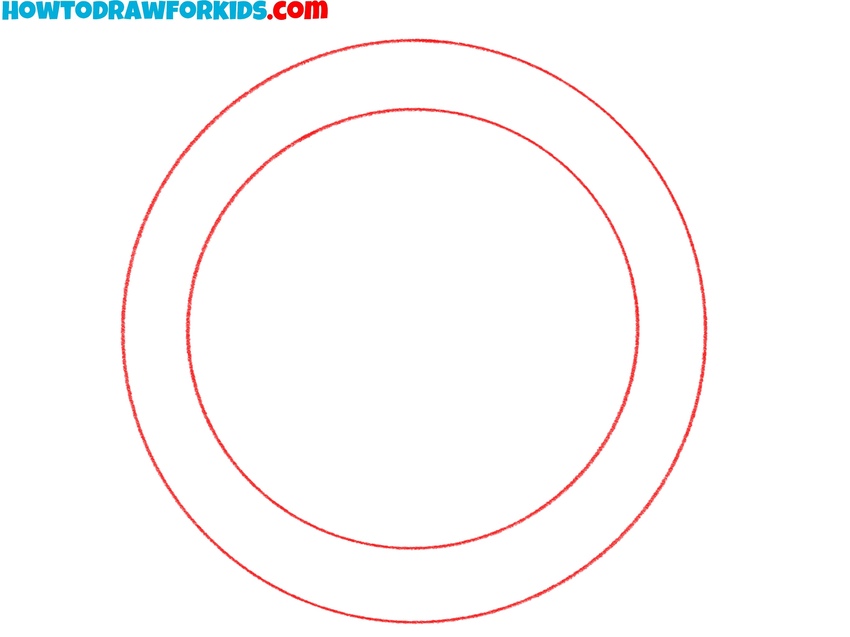
- Draw the main compass circles.
Begin your compass drawing by creating two concentric circles, one inside the other. The outer circle will represent the edge of the compass casing, and the inner circle will be the boundary for the compass face. Use light pressure and try to keep your lines smooth and evenly spaced to maintain symmetry.
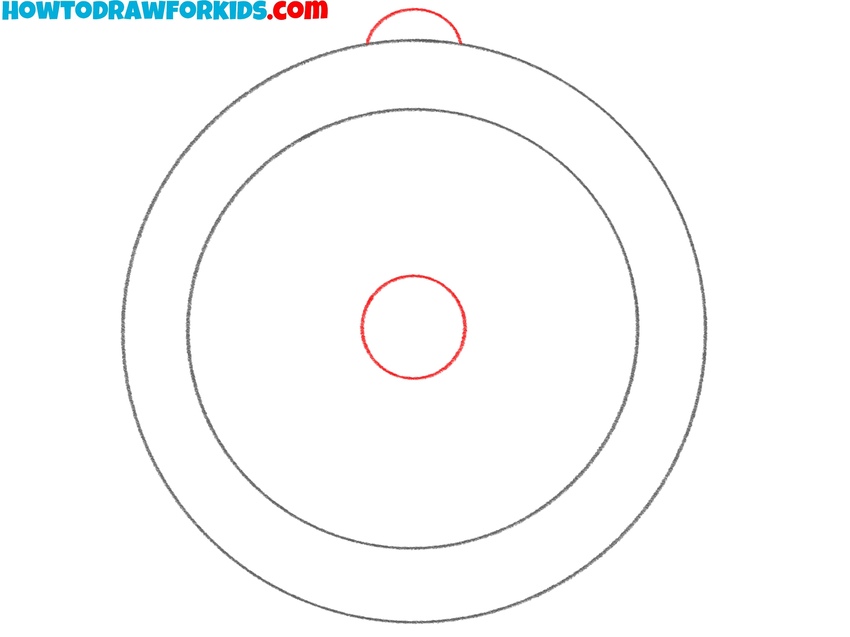
- Add the top loop and center circle.
In this step, draw a small loop on the top center of the outer circle to represent the hanging loop of the compass. This detail makes the drawing resemble a handheld compass. Next, draw a small circle right in the center of the inner circle. This small circle will serve as the pivot point for the directional needle.
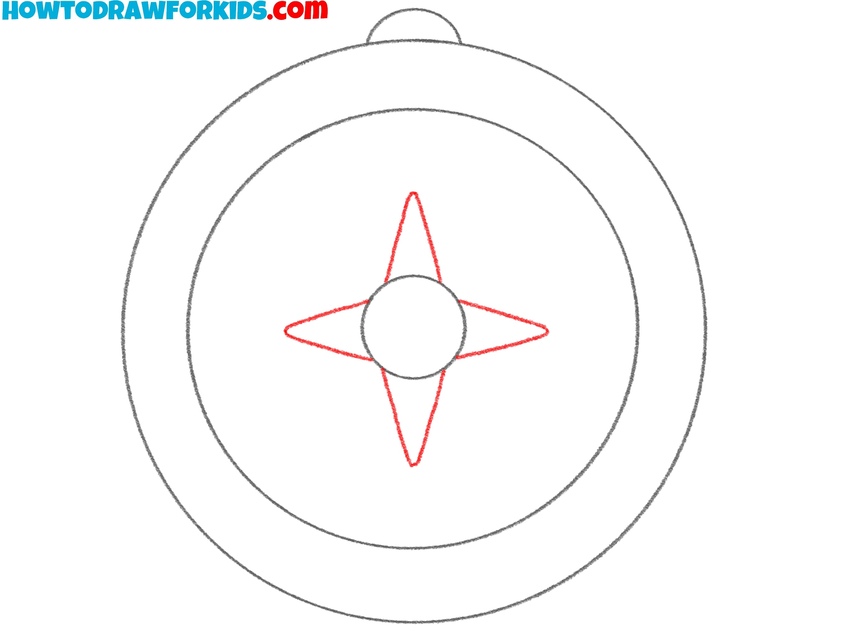
- Draw the four main compass points.
Now it’s time to draw the four main directional points. Start from the center circle and extend two long triangles pointing vertically and horizontally – one pointing up (north), one down (south), one left (west), and one right (east). These four diamond-shaped forms create the compass rose, which helps indicate direction.
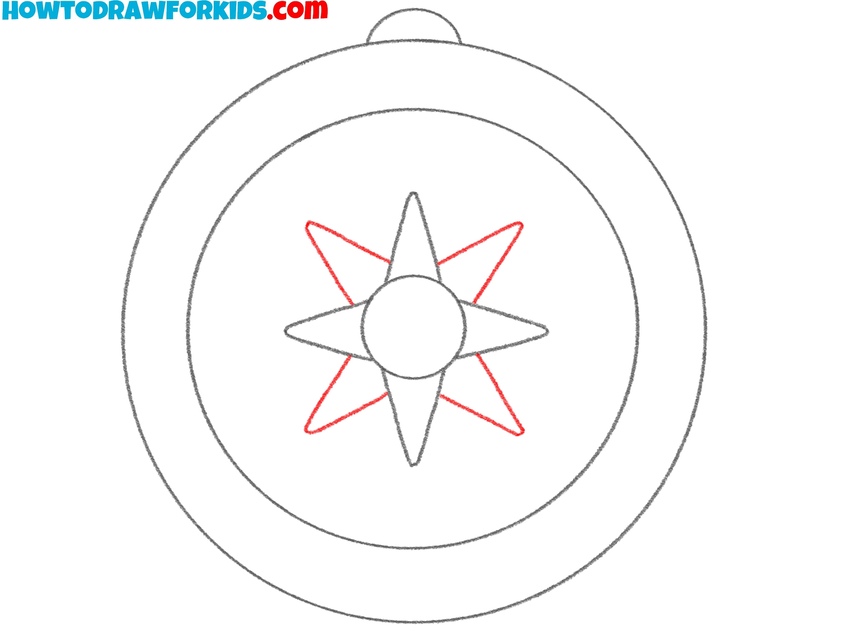
- Add the remaining compass points.
Next, draw four additional directional points between the ones you already created. These diagonals fill in the compass rose with a total of eight points, making it more detailed and accurate. Add four narrow triangles pointing diagonally – northeast, southeast, southwest, and northwest.
- Label the north and south directions.
Now that the compass rose is complete, it’s time to add direction labels. Start by drawing the letter “N” at the top for North and “S” at the bottom for South. Place these letters just inside the inner circle, directly aligned with the vertical points. Use capital letters for clarity.

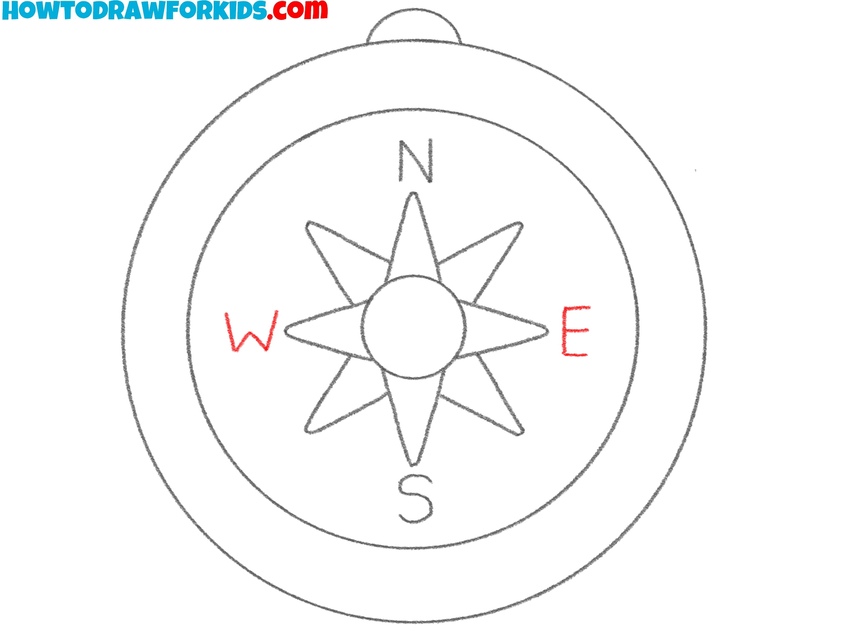
- Label the east and west directions.
Next, write the letters “E” and “W” on the right and left sides of the compass to mark East and West. Place them just inside the inner circle, directly in line with the horizontal points. Together with the N and S from the previous step, these labels complete the four main cardinal directions on the compass face.
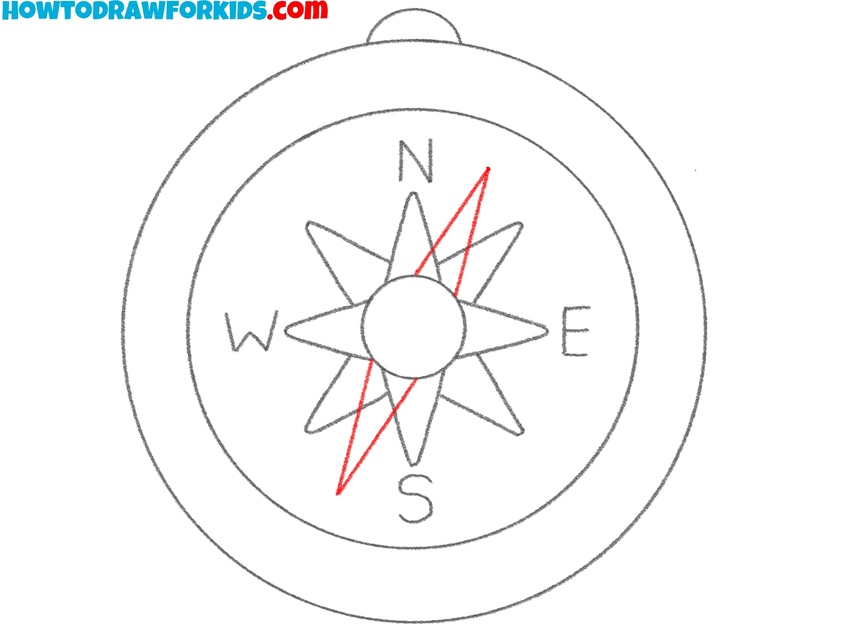
- Draw the compass directional needle.
Now it’s time to add the directional needle, which is one of the most recognizable features of a compass. Starting from the center circle, draw two long, narrow triangles overlapping the north and south points of the compass rose. These needle shapes should point in opposite directions.
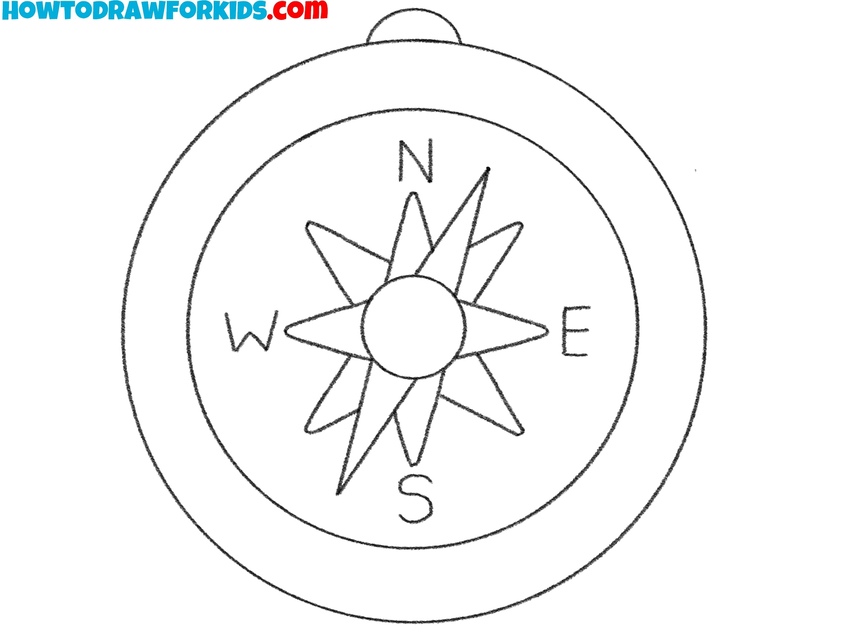
- Finalize the outlines and erase the guidelines.
At this stage, review your entire compass drawing and clean up any guidelines. Trace over the final outlines with a darker pencil or pen to make the drawing bold and clear. Double-check the symmetry of all elements, especially the center, since the compass relies heavily on balance and alignment.
- Color the compass drawing.
Use a light cream or beige color for the background of the inner circle to resemble the face of a real compass. Color the casing in light blue or any color of your choice. Use red and black for the directional needle to distinguish the north and south ends. But you can choose any other color scheme.

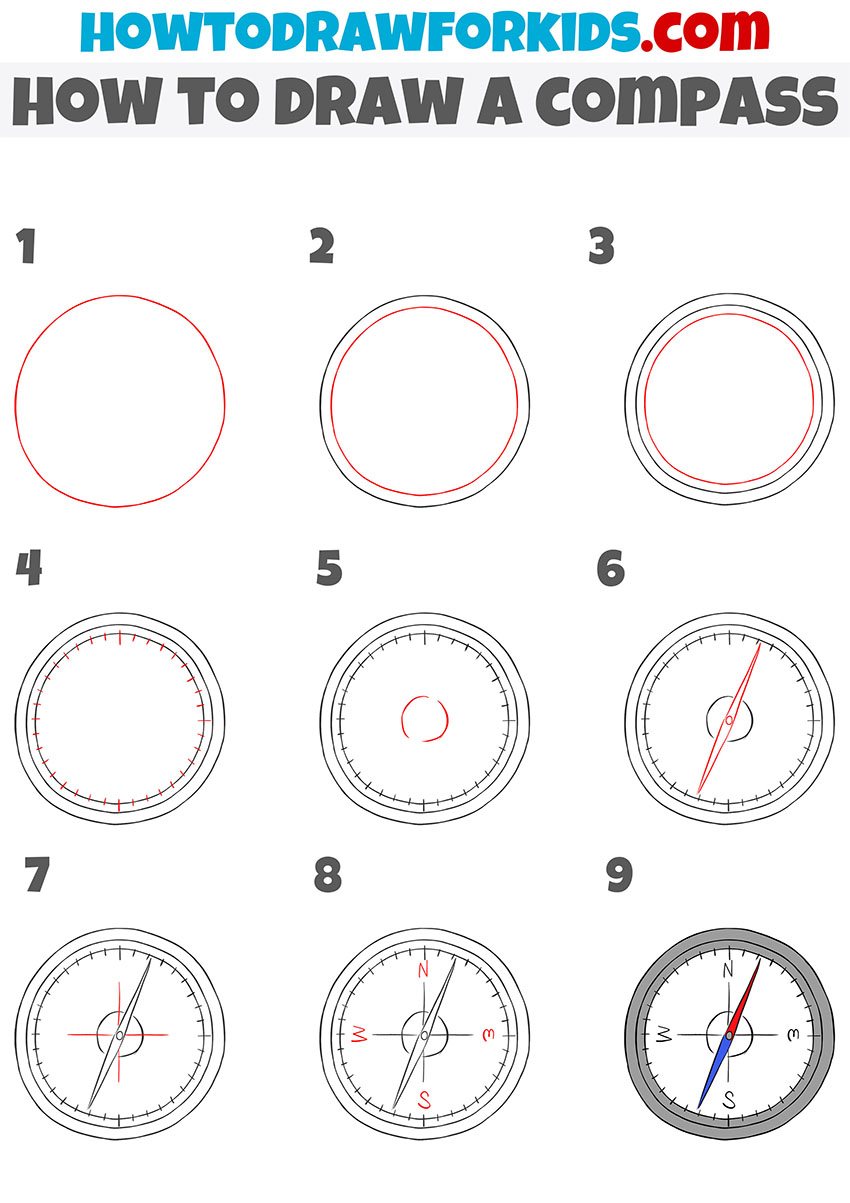
Simple Compass Drawing Tutorial
This version of the compass drawing tutorial offers a simpler approach, with fewer decorative details and a slightly different sequence of steps. It shows how to build the circular frame and placing the directional elements later in the process, rather than developing a detailed compass rose.
To follow this tutorial on how to draw a compass, begin by sketching one large circle to form the outer shell. Then add a slightly smaller circle inside to create the inner boundary. Draw a third, smaller circle to define the inside face. Next, sketch short ticks along the inner edge to mark degrees or intervals. Add a small circle in the center for the needle base. Draw two long diagonal needle shapes, crossing through the center.
Add vertical and horizontal guide lines to form a cross. Label the four main directions – N, S, E, and W – along the compass face. Finalize the outer contour of the compass drawing to smooth out any uneven parts. Finalize this tutorial on how to draw a compass by coloring the object using light and dark grays along with red and blue for the needle.
Conclusion
Today, we used the basic shapes and lines that are traditional to my website to learn how to draw a compass step by step. Did you complete your compass drawing using just one of the tutorials, or did you try both versions? Did you follow my example exactly, or did you add your own unique details? Were there any steps in the drawing process that you found difficult, or did you complete the tutorial without any issues?
You’re welcome to share your thoughts or questions in the comments section of this tutorial on this compass drawing tutorial, or you can contact me directly on Pinterest. You can also follow me there to stay updated on new articles and other content.
If you prefer video format, I also invite you to subscribe to my YouTube channel. There, I regularly post new drawing tutorials in video form. This may be a more convenient or clearer format for some of you, or it can simply serve as a helpful addition to the written tutorials with images.