How to Draw a Cricketer
Cricket is a very interesting game, but learning how to draw a cricketer or cricket player can be even more fun, as we’ll do in this tutorial.

In this tutorial, you will learn how to draw a cricketer. Cricket is a team sport that uses a bat and a ball. The game takes place on a special field. The player’s task is to reflect the opponent’s ball while getting more points.
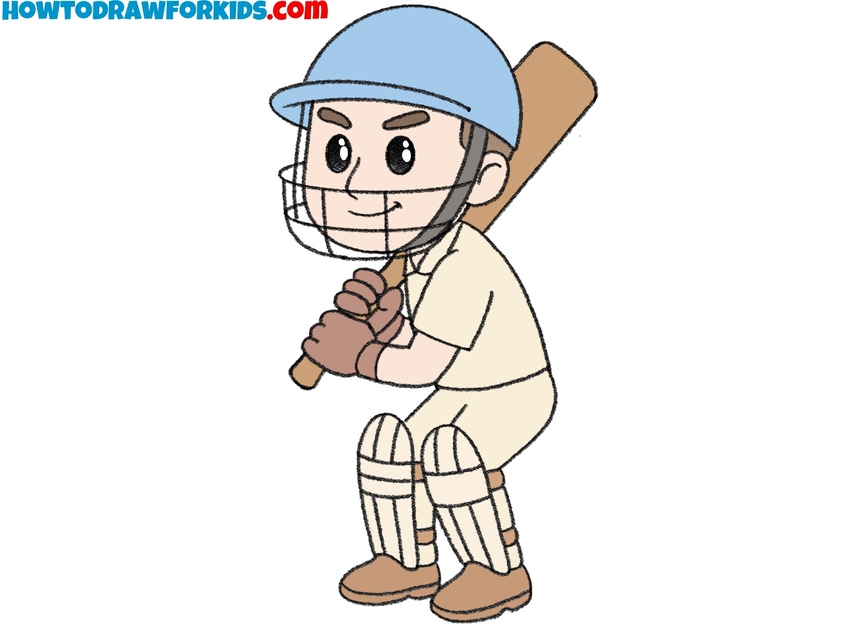
In cricket, there are players who serve the ball and there are players who hit the ball. In the picture, you see an athlete who hits the ball. This player has the appropriate posture and is ready to parry the blow at any moment.
This lesson will be interesting and useful for you because you will once again train the ability to draw a human figure. The tutorial includes nine simple steps that any aspiring artist can easily follow.
Here you will need the ability to make smooth rounded lines because most of the elements of the picture consist of precisely such lines. Be careful and attentive at each stage, and you will get an excellent result.
Materials
- Pencil
- Paper
- Eraser
- Coloring supplies
Time needed: 30 minutes
How to Draw a Cricket Player
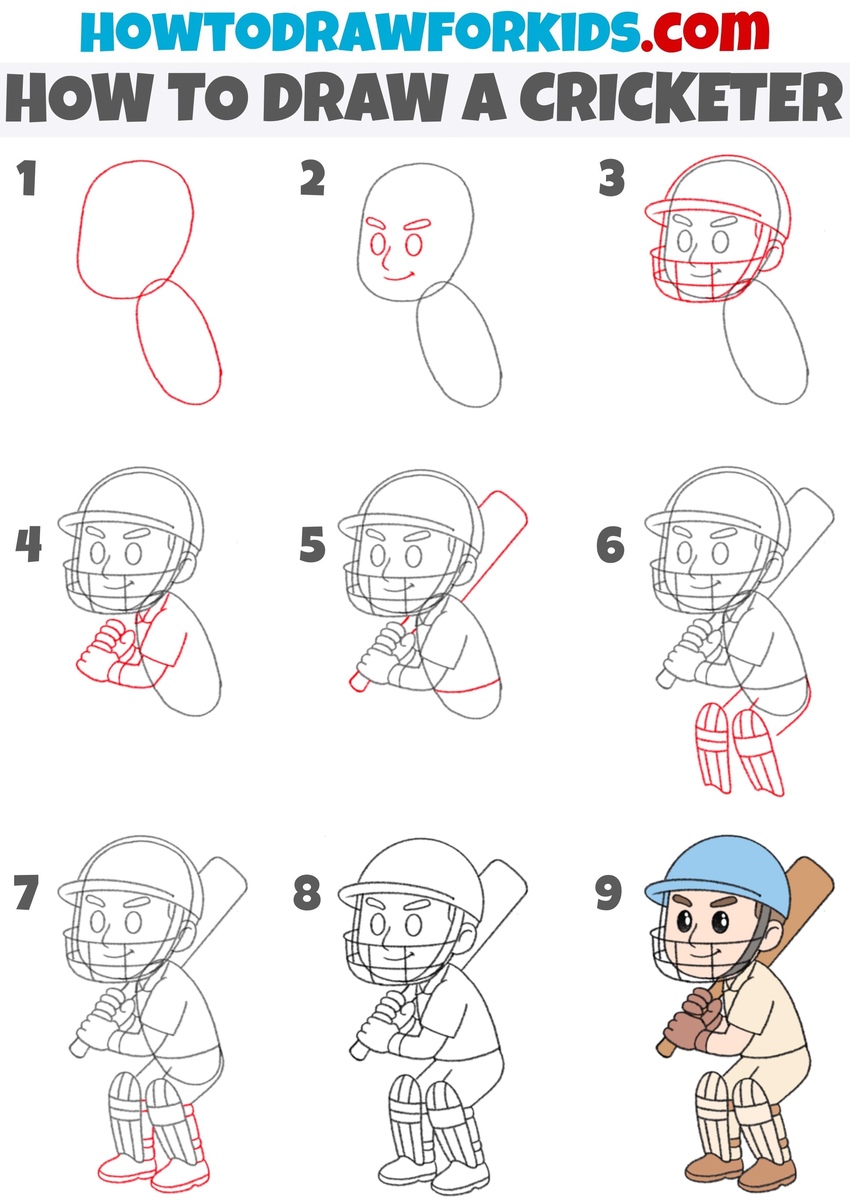
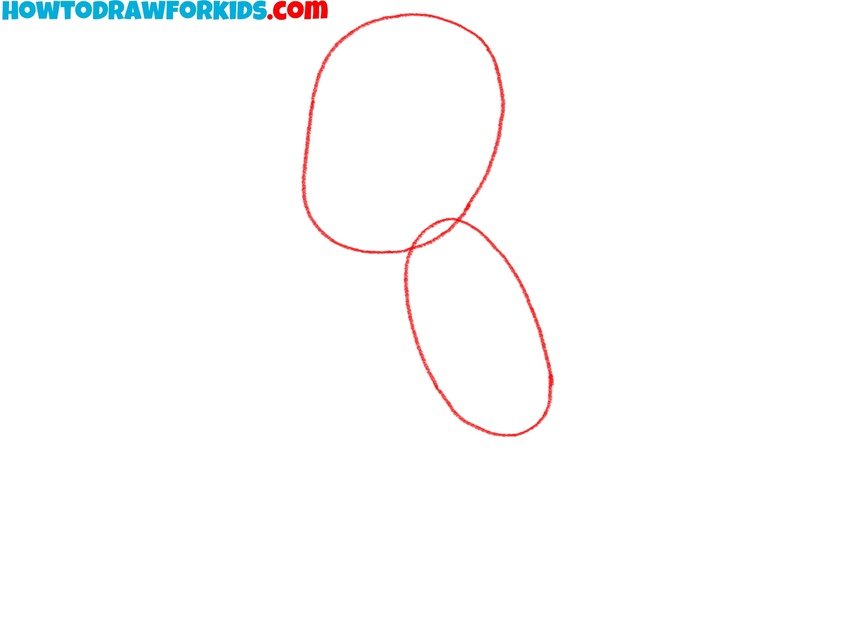
- Sketch the player’s head and body.
To start this drawing, it’s useful to set the overall pose using simple shapes. Draw an oval or rounded shape for the cricketer’s head. Position it slightly tilted forward, since the figure will be shown in a batting stance. Below the head, sketch a long oval at an angle to represent the upper body.
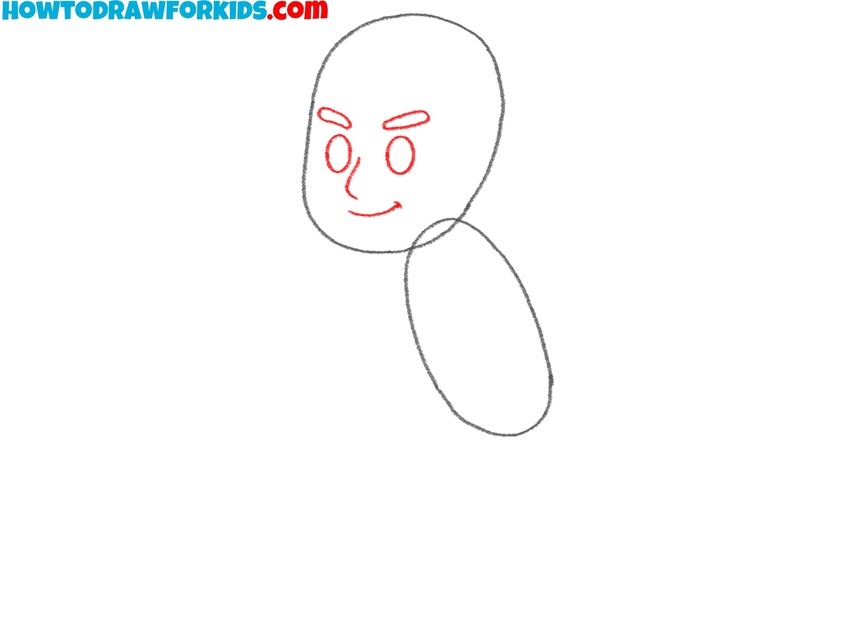
- Place the facial features on the head.
Once the basic head shape is finished, it’s time to draw the cricketer’s face. Inside the oval for the head, draw two small vertical ovals for the eyes. Below the eyes, sketch a simple curved line for the nose and a short line for the mouth. Since this is a cartoon-style cricketer, the features can remain minimal.
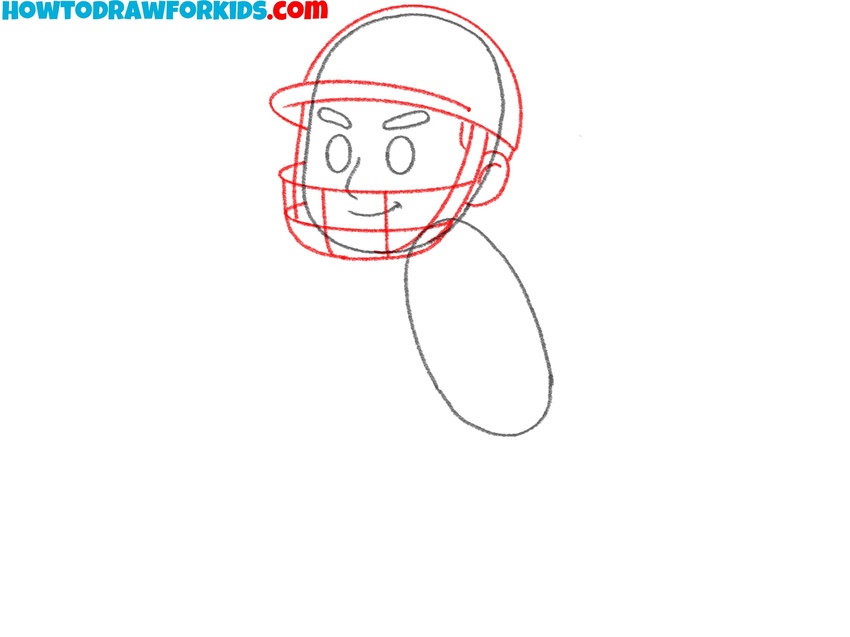
- Draw the cricketer’s helmet.
Cricket is played with protective gear, so now sketch the helmet. Begin by drawing a large dome over the head, slightly wider than the head outline, to represent the helmet shell. Next, add the brim by sketching a small curved rectangle at the front. Around the lower part of the face, draw a grid of horizontal and vertical lines to illustrate the face guard bars.
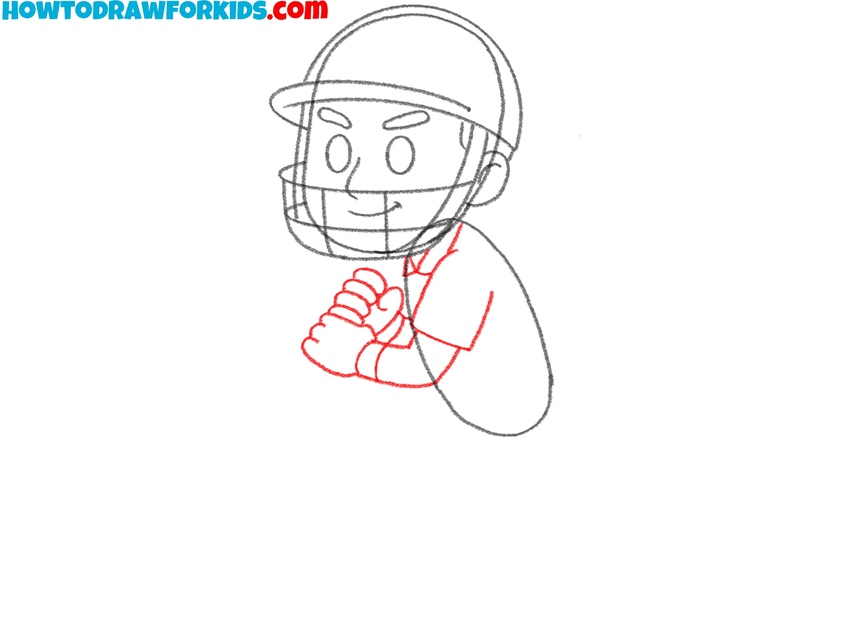
- Sketch the arms in batting stance.
To show the batting stance, draw the cricketer’s arms folded forward, gripping the bat. Start by drawing two curved shapes on the top of the torso oval, bent at the elbows. Then add the hands together in front, forming a grip. Also, sketch the shapes of the gloves and fingers.
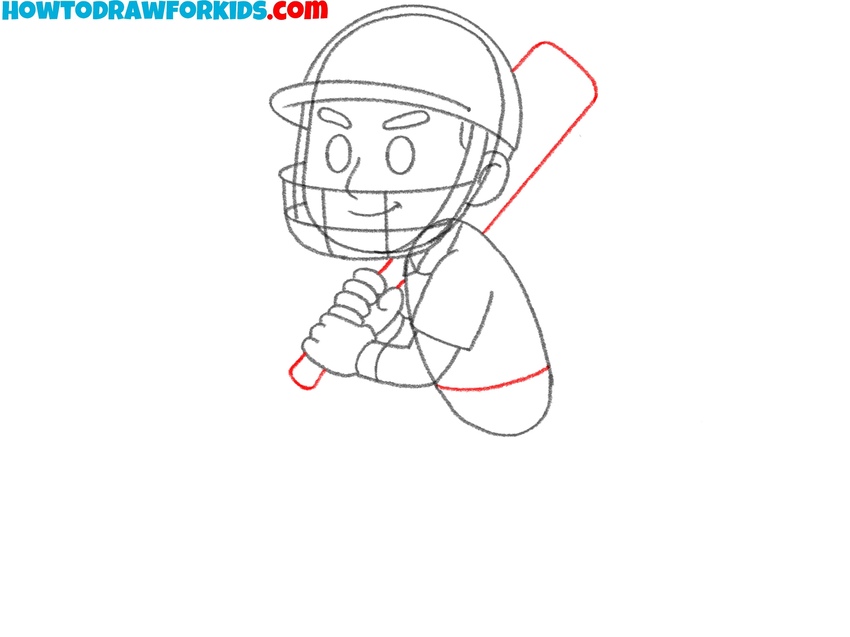
- Add the cricket bat outline.
Now that the grip is defined, draw the bat of the cricketer itself. Sketch simple lines to form the bottom of the bat handle, and then draw a wider rectangular block at the top for the bat blade. Also, draw the bottom edge of the shirt, separating it from the pants.
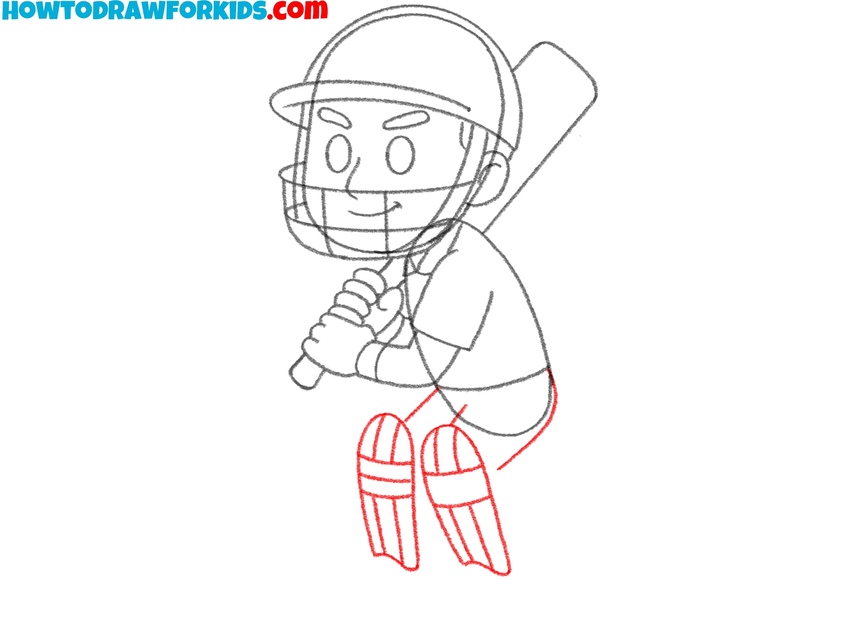
- Sketch the legs and protective pads.
With the upper body finished, shift attention to the legs. From the bottom of the torso oval, draw two bent legs of the cricketer, showing the player crouching in a ready position. Over the front of each leg, sketch long rectangles with rounded tops to represent protective cricket pads. Add parallel lines down the pads to indicate the ridges. These details make the figure much more authentic to the sport.
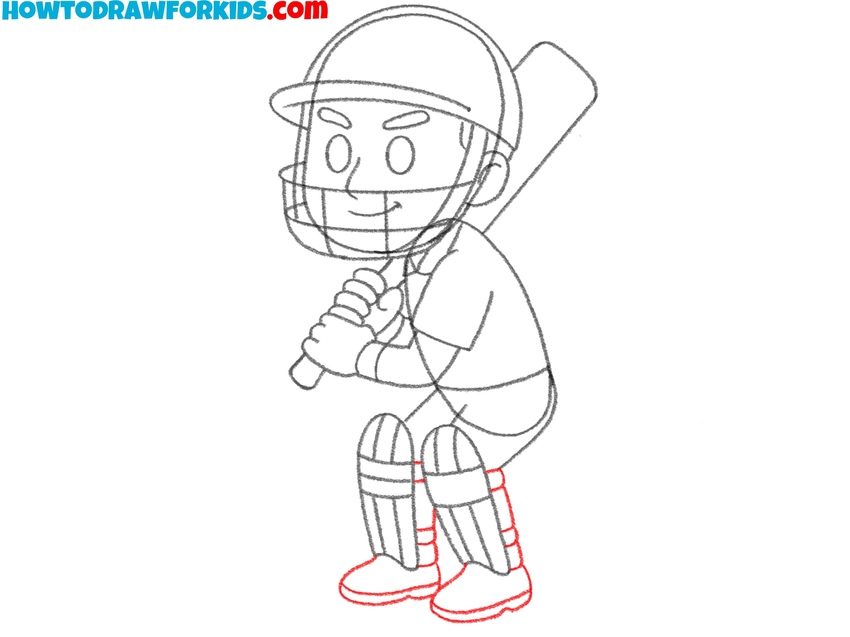
- Draw the shoes beneath the pads.
Now that the pads are in place, complete the lower part of the figure by sketching the ankles and shoes. Draw the ankles as short connecting lines beneath the pads. Then, sketch the shoes with simple rounded shapes. Keep them simple, but lines for the soles.
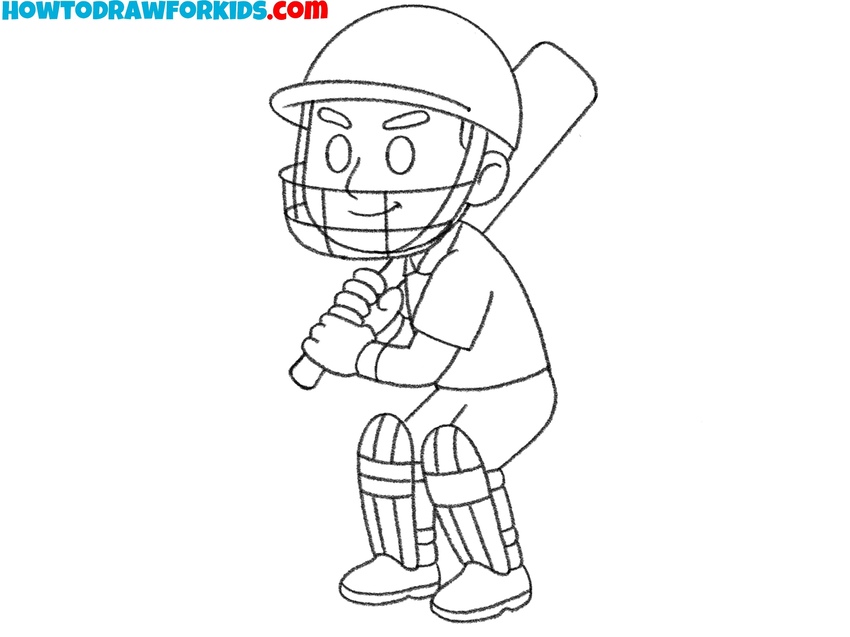
- Darken the lines for the final look.
Once every part of the cricketer is sketched, it’s time to finalize the linework by tracing the drawing. Use a darker pencil or pen to carefully darken main lines. Be sure to erase the lighter construction lines underneath, including the ovals used for the torso and head. This is also a great place to add some extra details, for example some folds or logos.
- Finish the player drawing with uniform colors.
At this stage, the cricketer’s form is finished, and what remains is to add colors that makes the figure feel real. Instead of just filling in shades, think about the overall look of a cricket uniform. Use a pale cream or off-white tone for the shirt and trousers, or switch to brighter shades. The helmet can be colored in a blue or green tone, while the gloves and shoes may use darker tones. For the bat, apply a light wood color. The pads should stay light.
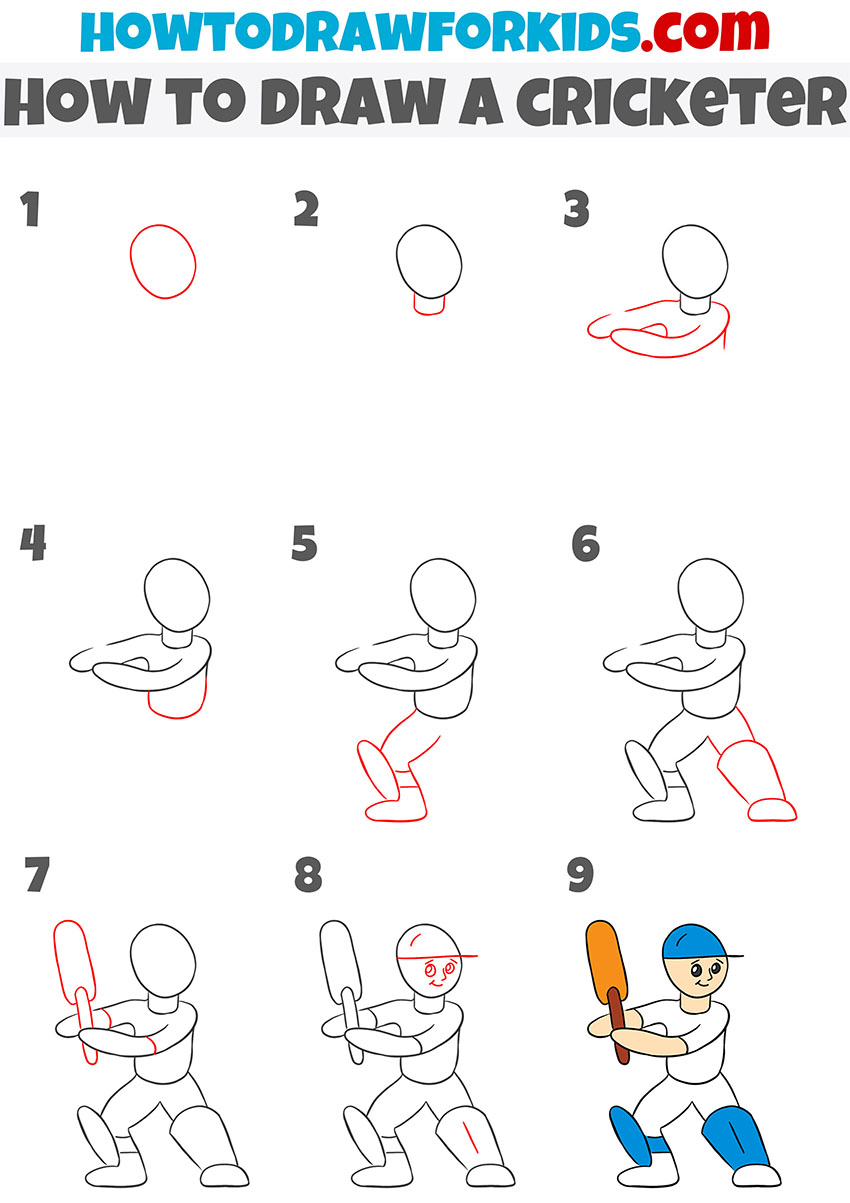
Bonus: Easy Cricketer Drawing Tutorial
To create this cricket player drawing, sketch an oval for the head and then place a short rectangle below it for the neck. Add bent shapes for the arms that will form the holding gesture.
Sketch the torso with a rounded rectangle and add the legs by sketching two smooth lines. Attach protective pads to the legs as simple elongated shapes. Next, outline the cricket bat with two rectangles, one for the handle and one for the blade, placing it in the player’s hands.
Trace the figure by thickening the lines and adjusting the angles. Add the helmet and face details with small curved lines, and coloring the player using any color you choose.