How to Draw a Cup of Coffee
Let me lead you through the delightful process of learning how to draw a cup of coffee with four unique methods, each carefully chosen to bring out the artist in you. You’ll learn to depict the perfect cup, capturing the warmth and aroma that coffee lovers cherish, in just a few easy steps.

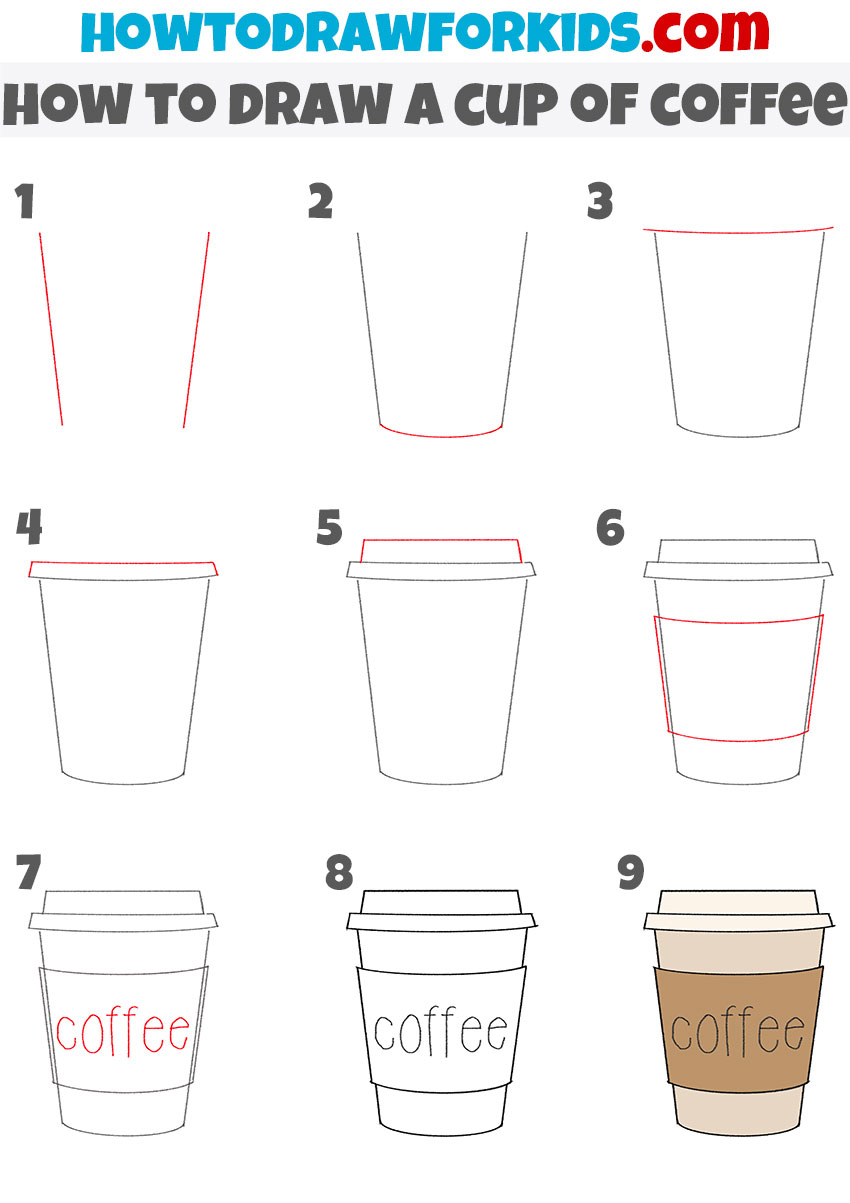
How to Draw a Cup of Coffee: Basic Information
Welcome to my step-by-step guide on how to draw a cup of coffee. As an artist and educator, I crafted this tutorial to demystify the art of illustration. This particular lesson focuses on creating a recognizable and cozy cup of coffee, the kind you might find accompanying a morning routine or an afternoon break.
The cup of coffee in this drawing is designed with simplicity and clarity in mind. Unlike elaborate designs, we aim for a clean and straightforward representation that captures the essence of a coffee cup. My method ensures that even beginners can draw a cup of coffee with ease, starting with basic shapes and gradually adding details.
In the final steps, when we draw a cup of coffee, we focus on the little touches that make it unique. The addition of the word ‘coffee’ is not just about labeling; it’s about giving character and context to our drawing. I’m delighted to guide you through this enjoyable process of creation.
Cup of Coffee Drawing Tutorial
Materials
- Pencil
- Paper
- Eraser
- Coloring supplies
Time needed: 20 minutes
How to Draw a Cup of Coffee
- Draw the sides of the cup.
You can depict them as two identical straight lines.

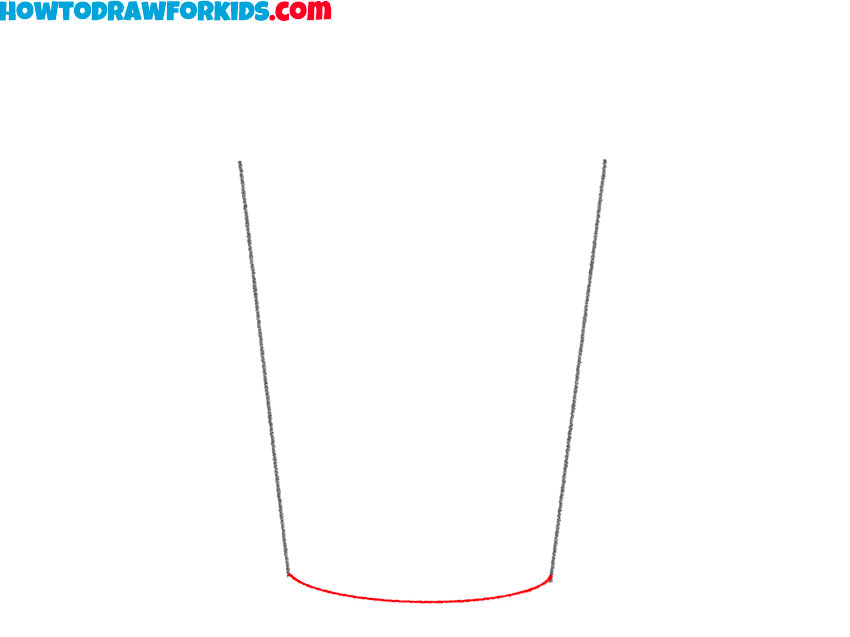
- Outline the bottom of the cup.
Draw a curved line that connects the two previously drawn lines together.
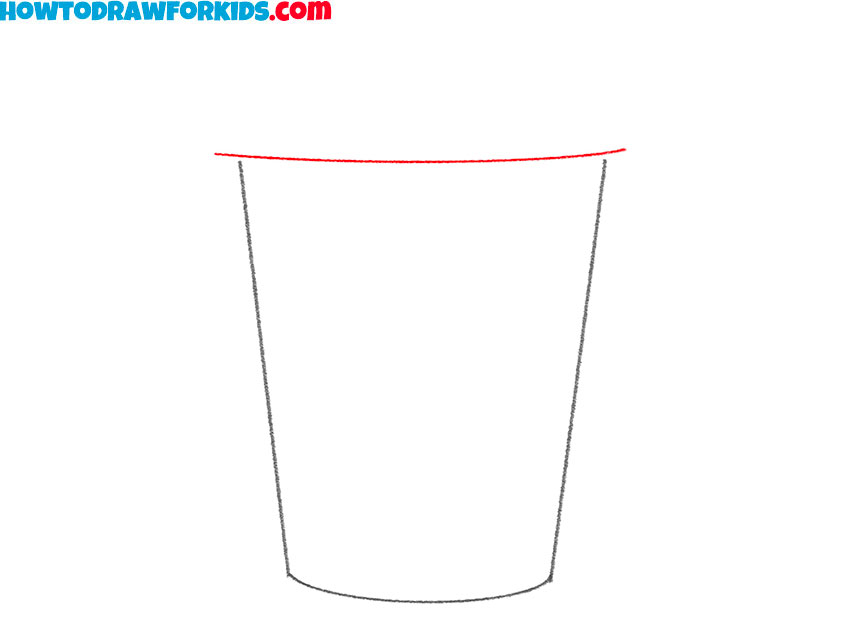
- Start drawing the top of the cup.
At the top of the cup, add a curved line connecting the straight lines.
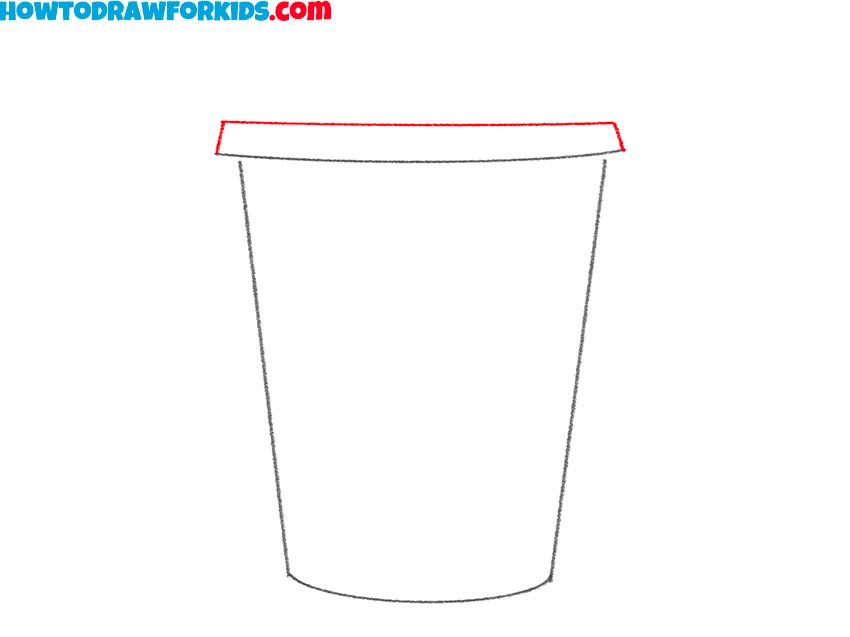
- Add the part of the lid outline.
Use straight and curved lines to represent this detail. Draw it over the previously drawn line.
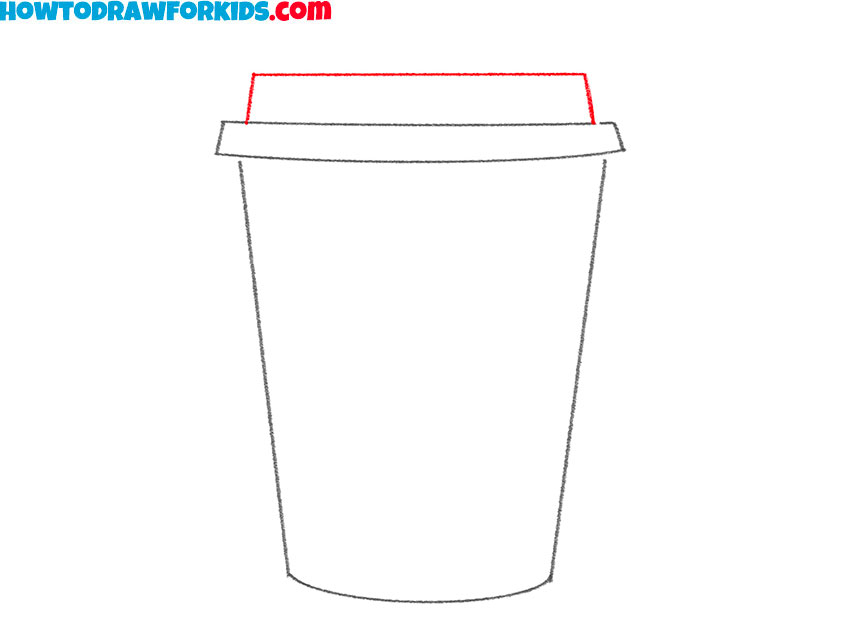
- Complete the drawing of the cup lid.
Draw it as a shape similar to a trapezoid without a lower base.
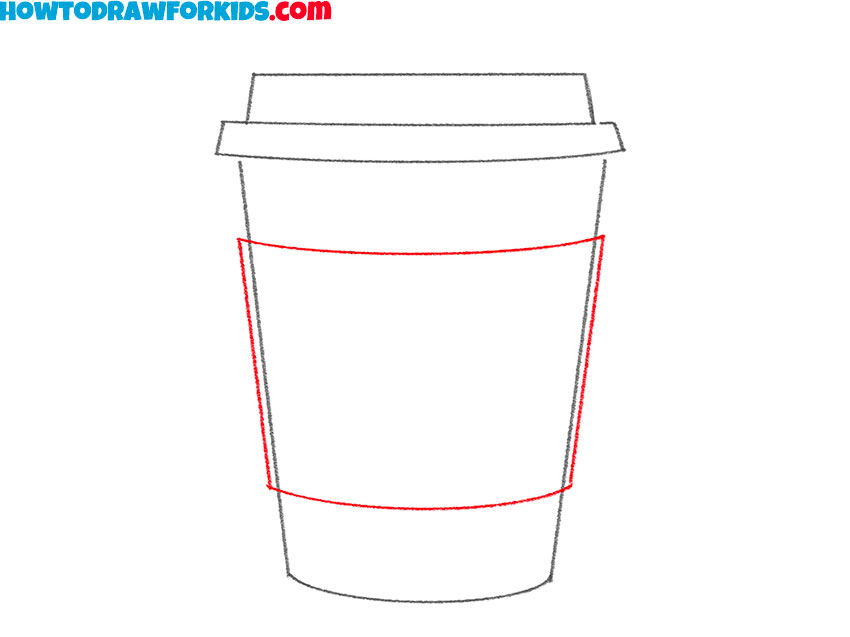
- Add an outline of the label on the cup.
Use two straight lines and two curved lines to depict it in the middle of the cup.
- Add the inscription.
Write the word «coffee» on the previously drawn label.

- Erase the auxiliary lines.
Use an eraser to remove unnecessary lines from the drawing.

- Color the drawing.
Use grey, beige and brown to color the cup of coffee.

Additional Content
For those passionate about learning to draw but often find themselves offline, I’ve created a free, downloadable PDF file as a supplement to our online lesson on how to depict a cup of coffee. This compact version serves as an invaluable tool, enabling you to practice anywhere, anytime, without the need for internet access.
Ideal for artists on the move or those who prefer physical copies for reference, this PDF ensures the art of drawing a coffee cup is always within your reach, facilitating continuous learning and improvement in any setting.
Alternative Drawing Techniques
To further enrich your drawing experience, I’ve devised a set of alternative techniques specifically tailored to the theme of drawing a cup of coffee. These additional practices are designed not just for skill enhancement but also for sparking creativity.
This exploration is key to nurturing flexibility in your artistic process, enabling you to approach each drawing with a fresh perspective and a willingness to try new things. It’s through such varied practice that you’ll truly refine your artistic skills, developing a versatile approach that transcends the subject of coffee cups.
How to Draw a Coffee Cup and Saucer
In this alternative method, you’ll capture the cozy ambiance of coffee time by sketching a coffee cup with its accompanying saucer. Focusing on the overall composition, you’ll learn to shape the cup’s contour and its relationship with the saucer, ensuring that each element is proportionate and aesthetically pleasing.
The technique emphasizes the gentle curves of the cup and saucer, the correct placement of the handle, and the inviting appearance of coffee, creating a harmonious and complete image that evokes the essence of a relaxing coffee break.
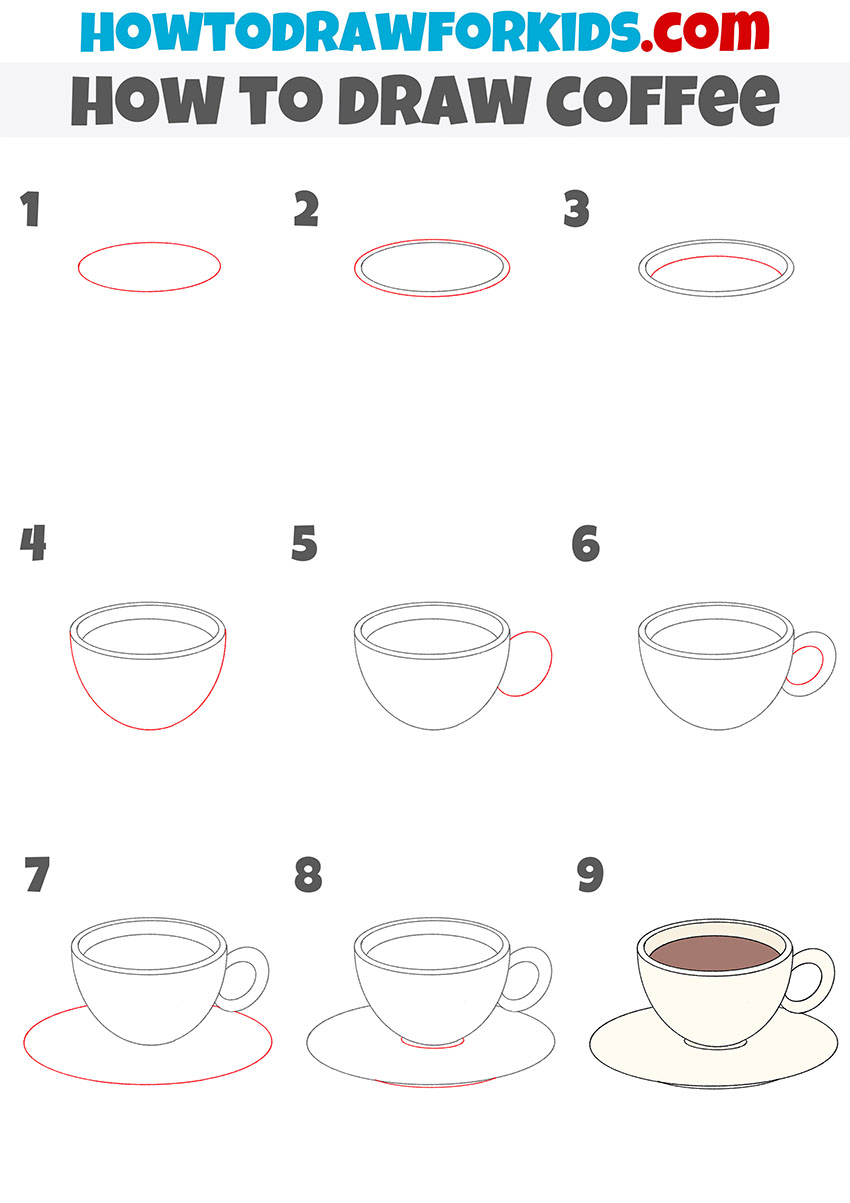
Drawing a Coffee Cup in 7 Steps
In this streamlined method, we’ll revisit the steps from the first alternative technique to draw a cup of coffee with a saucer, but this time we’ll accomplish it in just seven concise steps. This refined approach is about efficiency and clarity, allowing you to quickly grasp the essentials of the drawing process.
By focusing on the key elements – oval for the cup’s opening, base shape for the cup and saucer, and final details for the handle and coffee – you’ll learn to create this comforting image with a few strokes, making it an ideal practice for both quick sketches and detailed studies.

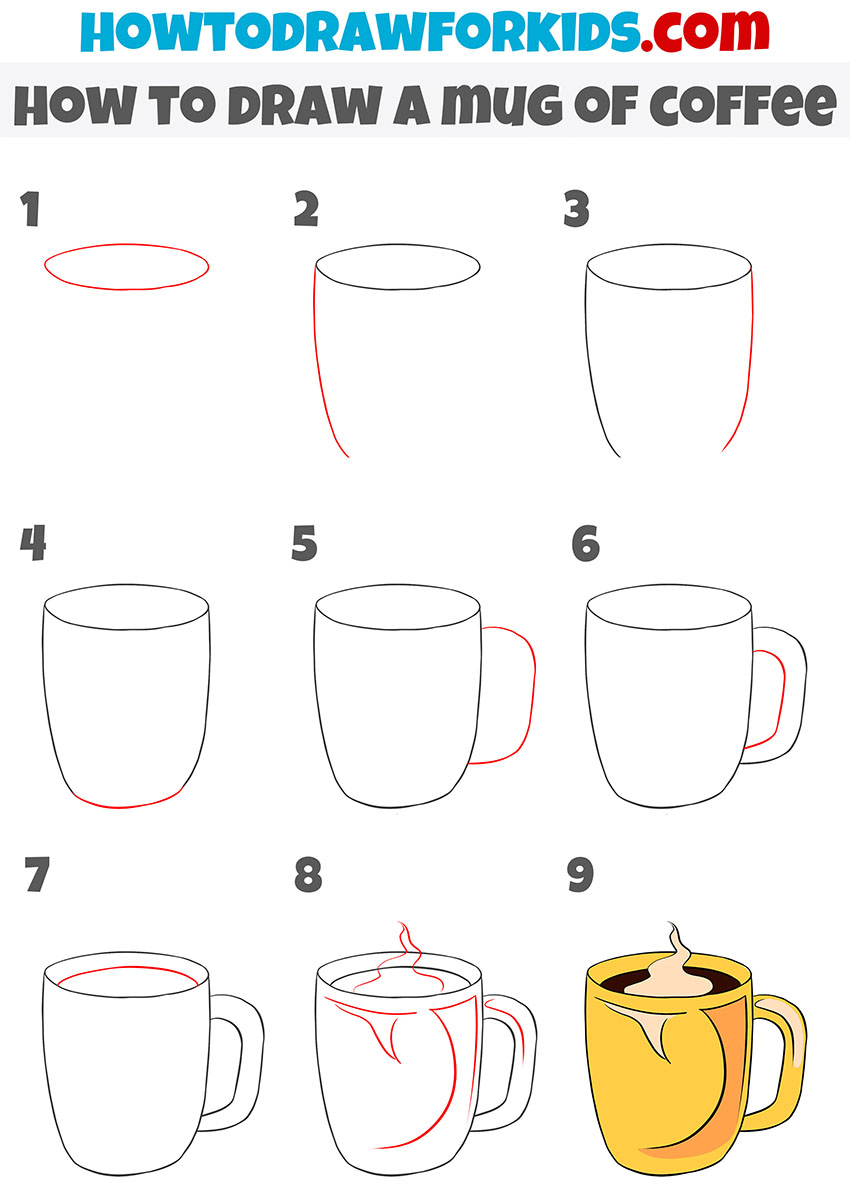
How to Draw a Mug of Coffee
In this lesson, we’ll explore the cozy art of drawing a coffee mug, perfect for those who enjoy its warm embrace. Through a series of well-structured steps, you’ll learn to draw not just the basic shape of the mug but also the inviting swirl of coffee inside.
We’ll focus on capturing the mug’s sturdy form, its handle that promises a good grip, and the dynamic surface of the coffee, complete with steam to evoke the feeling of a fresh, hot brew. This method is designed to be approachable for beginners while still offering the satisfaction of creating a detailed, lifelike drawing.
Conclusion
I hope you enjoyed bringing your cup of coffee to life as much as I loved teaching you! There’s a whole world of drawing lessons on my website, just waiting to be discovered. Whether you’re in the mood to sketch a relaxing beach scene or bring a zany monster to the page, I’ve got you covered.
Stay updated with the latest and greatest by following me on social media – trust me, you won’t want to miss out. And if there’s something you’re itching to draw, leave me a comment under this lesson. Your suggestions might just inspire the next fun tutorial!



I like your drawings