How to Draw a Dog
My readers very often asked me to make a lesson on how to draw a dog, and I decided to prepare this simple and cute step-by-step tutorial.
On this page, in addition to this lesson, you will find several instructions for drawing a dog of various levels of difficulty, as well as free worksheets for each instruction.
How to Draw a Dog: Introduction
So, this drawing lesson will focus on how to draw a dog. As you can see, this instruction will be as simple and accessible to everyone as all the lessons on my website.
What do you need to know before you begin the process of learning how to draw a dog?
First of all, you need to keep in mind the rules of proportions, symmetry and composition. This is important even when you are creating very simple and cartoonish creatures.
Pay attention to how cartoonists draw. They, of course, draw taking into account all the rules existing in the fine arts, and that is why the characters, creatures and environments in cartoons look so convincing.
Also, when drawing a dog, always try not to focus too much on one detail. Try to look at the entire artwork as a whole. To do this, you can also move the sketch away from you from time to time to see all the errors and inaccuracies.
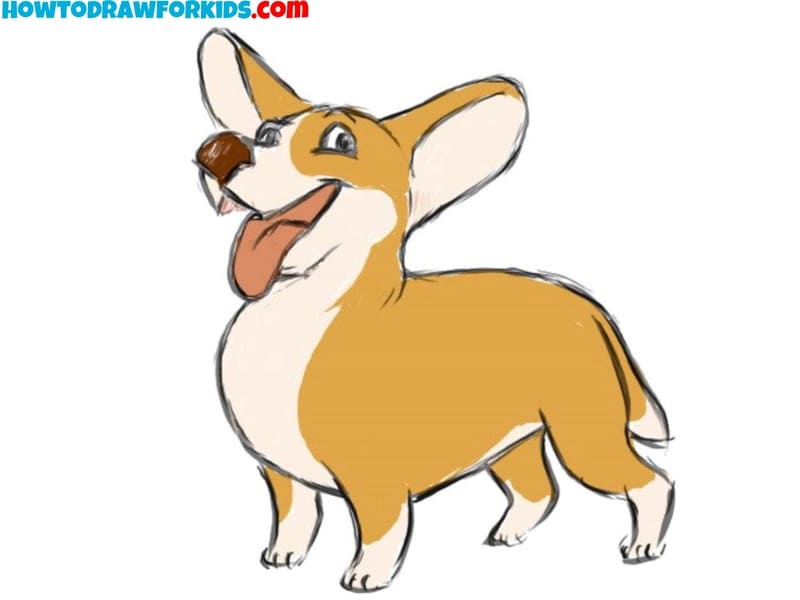
Dog Drawing Tutorial
Time needed: 40 minutes
How to dog a dog step by step
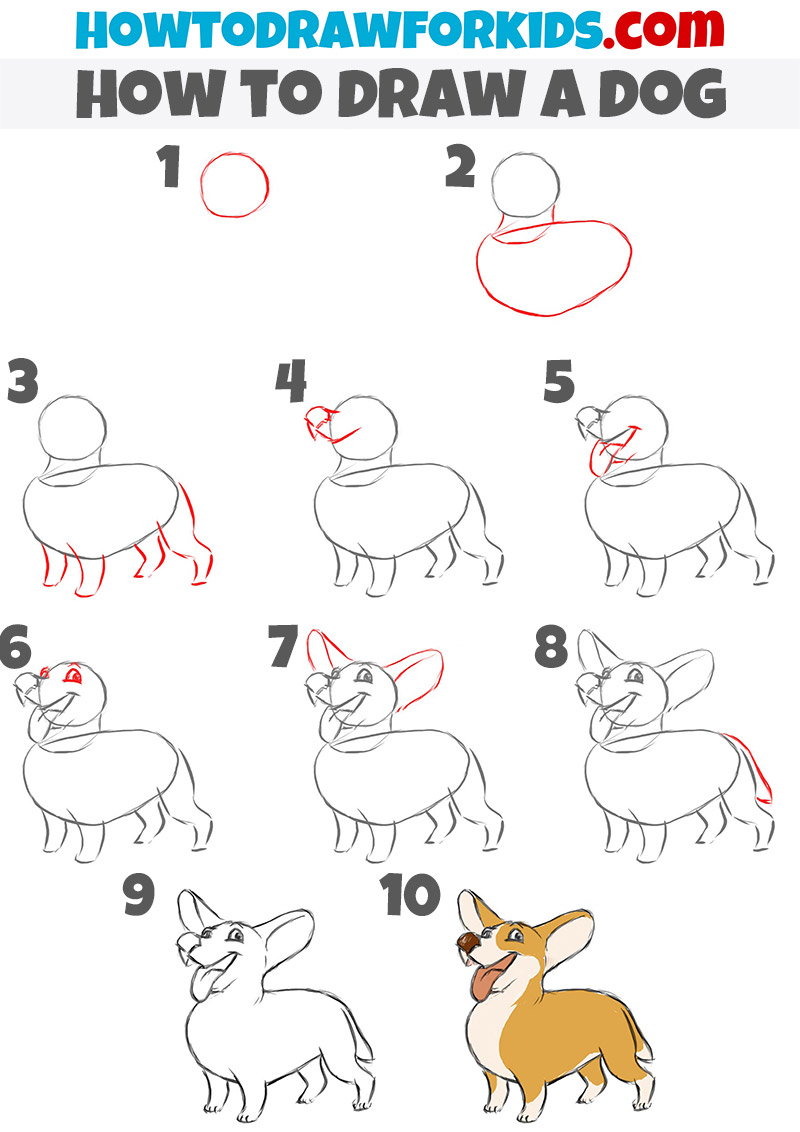
- Sketch the dog’s head.
Start by drawing a medium-sized circle near the top left of your page. This represents the dog’s head and serves as the foundation for its facial features. Position it to leave space for the body. This circle will guide the rest of the drawing, creating the initial proportion.
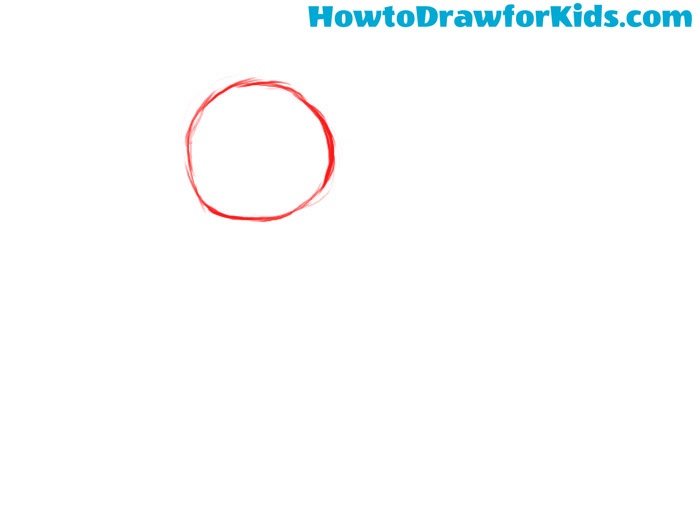
- Draw the neck and torso.
Below the head, sketch a larger oval for the torso. This oval should connect to the head with a slight curve, forming the neck. Make sure the torso is proportional to the head, allowing room for legs and tail. The torso’s shape provides the base structure for the dog’s body.
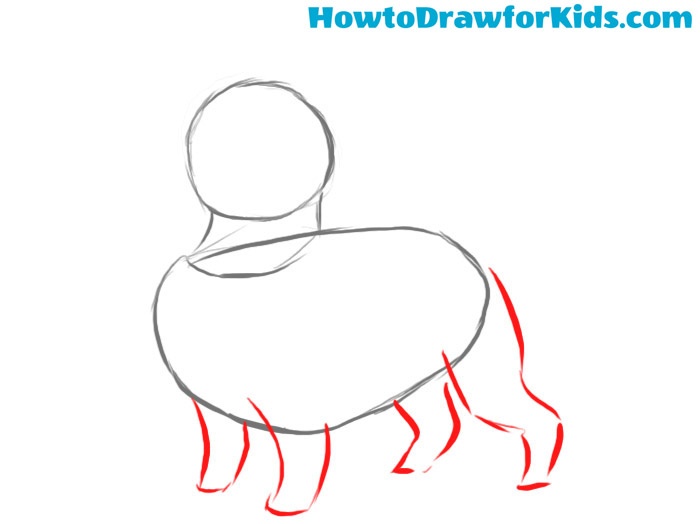
- Draw the dog limbs.
Beneath the torso, draw four geometric figures to create the legs. Each line should have a slight bend to illustrate the natural posture of a dog. Position the legs symmetrically, with two on each side of the torso. Since we are drawing a cartoon-style dog, the legs are cartoonish small.
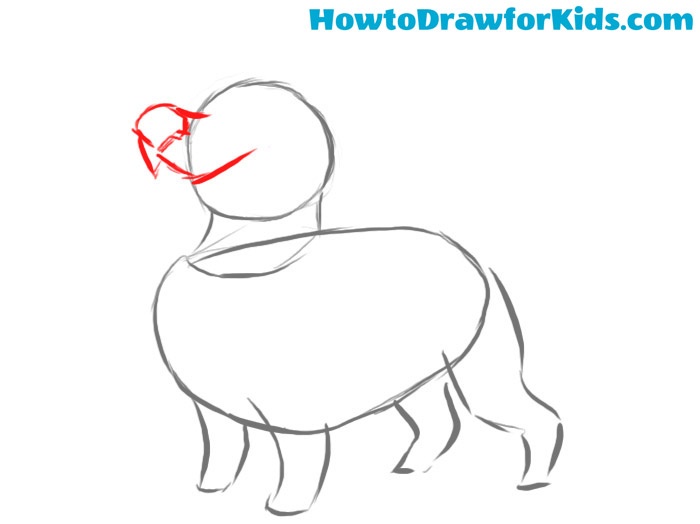
- Sketch the upper jaw and nose.
Return to the head and add a prominent curve extending outward from the circle, creating the upper jaw. At the end of this curve, draw a small rounded triangle or circle to represent the dog’s nose. This helps form the dog’s profile, preparing it for further facial details.
- Draw the lower jaw and tongue.
Under the upper jaw, sketch a curved line to create the dog’s lower jaw. Extend this line outward, following the contour of the upper jaw. Inside the mouth, add a tongue by drawing a downward curve or squiggle, slightly protruding from the mouth.

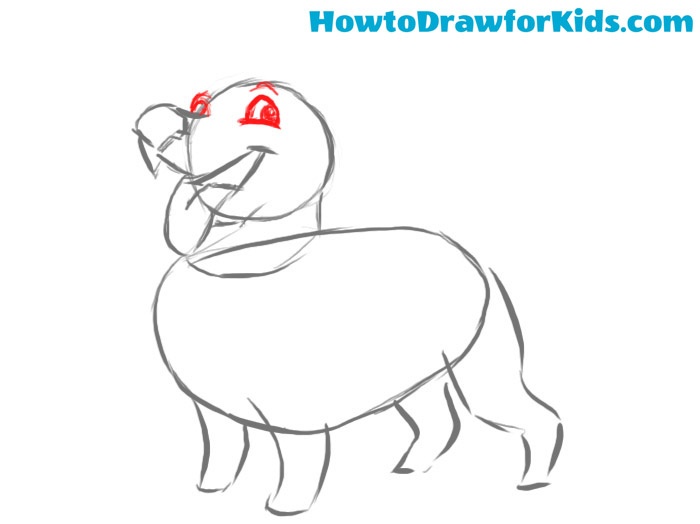
- Draw the dog eyes.
Above the snout, add two circles or ovals to represent the dog’s eyes. Position these symmetrically, leaving a small gap between them for the bridge of the nose. Inside each eye, draw a smaller circle or dot to indicate the pupils. This will make your sketch look more natural.
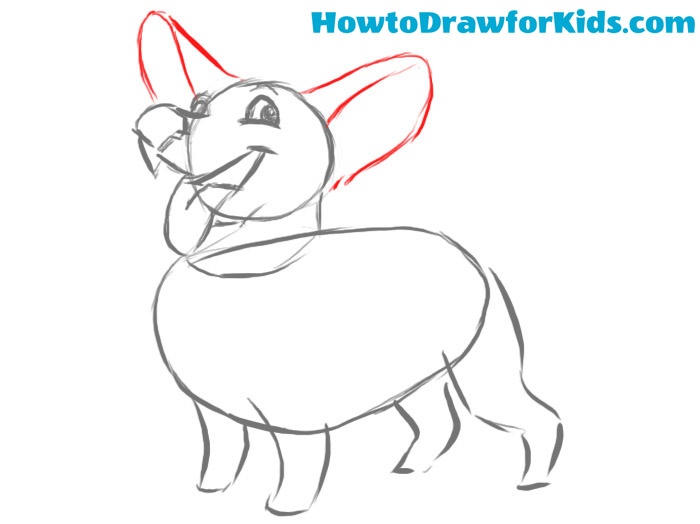
- Add the ears of the pet.
On either side of the head, sketch two large, triangular ears. Position them symmetrically, extending outward from the top of the head circle. Draw inner lines of the ears to make them look more realistic. These ears can be slightly curved or straight, depending on the dog’s breed.
- Sketch the tail.
At the back of the torso, add a curved line to create the dog’s tail. This line can be short or long, straight or curled, depending on the desired look. Ensure it is proportionate to the rest of the body and positioned correctly at the torso’s end.
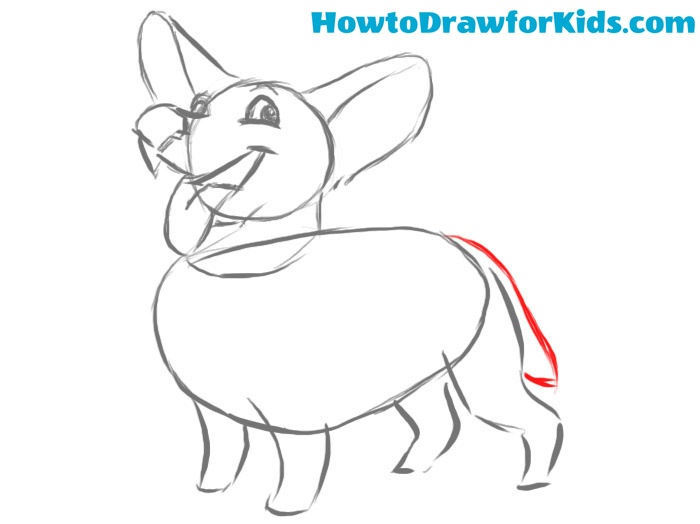
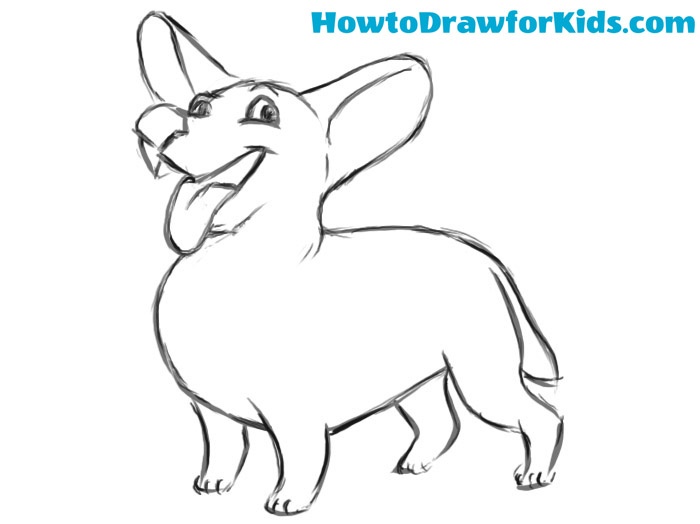
- Refine your sketch.
Go over the entire drawing, refining the shapes and adding details to the dog. Smooth out lines, improve curves, and adjust proportions as needed. You can add small features like paws, fur, and facial expressions to make your dog look more natural. This step brings the drawing closer to its final form.
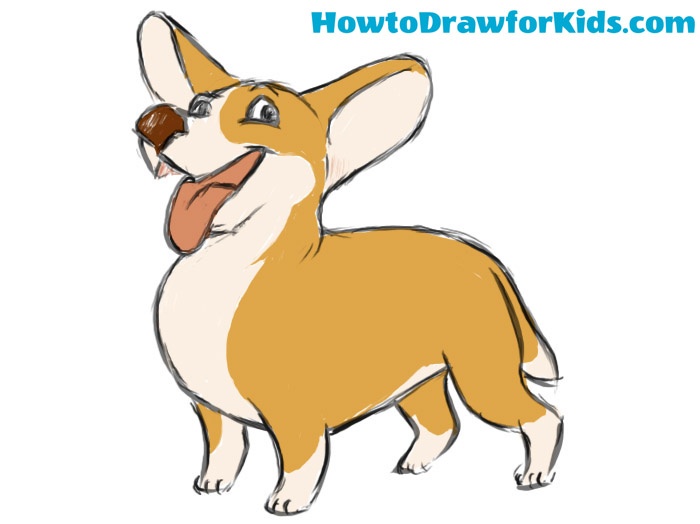
- Add colors to the artwork.
Finally, color in the drawing to finish the drawing. Use appropriate hues for the dog’s breed, including brown, white, or black for the fur. You can add shading and highlights to give your dog drawing more realistic look, and apply contrasting colors to details like the tongue, eyes, and nose.
Additional Materials
As you may know, all my tutorials contain completely free additional materials, which include:
- Coloring page
- Drawing lesson
- Tracing worksheet
- Grid drawing worksheet
These completely free additional materials can be downloaded, printed and used at any time, for example if you are learning to draw at home or in the classroom.
Drawing a Dog: Advanced Tips
The dog drawing lesson is complete and now it’s time to take your skills to the next level. To do this, you will need to complete several very simple, but at the same time very effective tasks.
- To add dimension to your drawing and teach how to create volume on a piece of paper, add shadows and highlights where needed. In this article about light and shadow, I tell you the most important things you need to know about these concepts.
- To learn how to draw animals in motion, try repeating the steps in this tutorial, but putting your dog in a different, more dynamic pose.
- You need to be able not only to repeat what you see before your eyes, but also to create images yourself. So try to draw a different breed of dog using the steps above.
How to Draw a Dog: Alternative Methods
Now, dear reader, you have finally reached the additional methods. But why are they needed?
Of course, first of all, as a real artist, you must be able to depict a dog using a variety of methods. The more techniques you know for drawing the same subject, the wider your arsenal as an artist.
In addition, this is additional training, because by outlining the subject in a variety of ways and techniques, you learn to more deeply understand the essence of the subject. This in turn allows you not to feel constrained in the creative process.
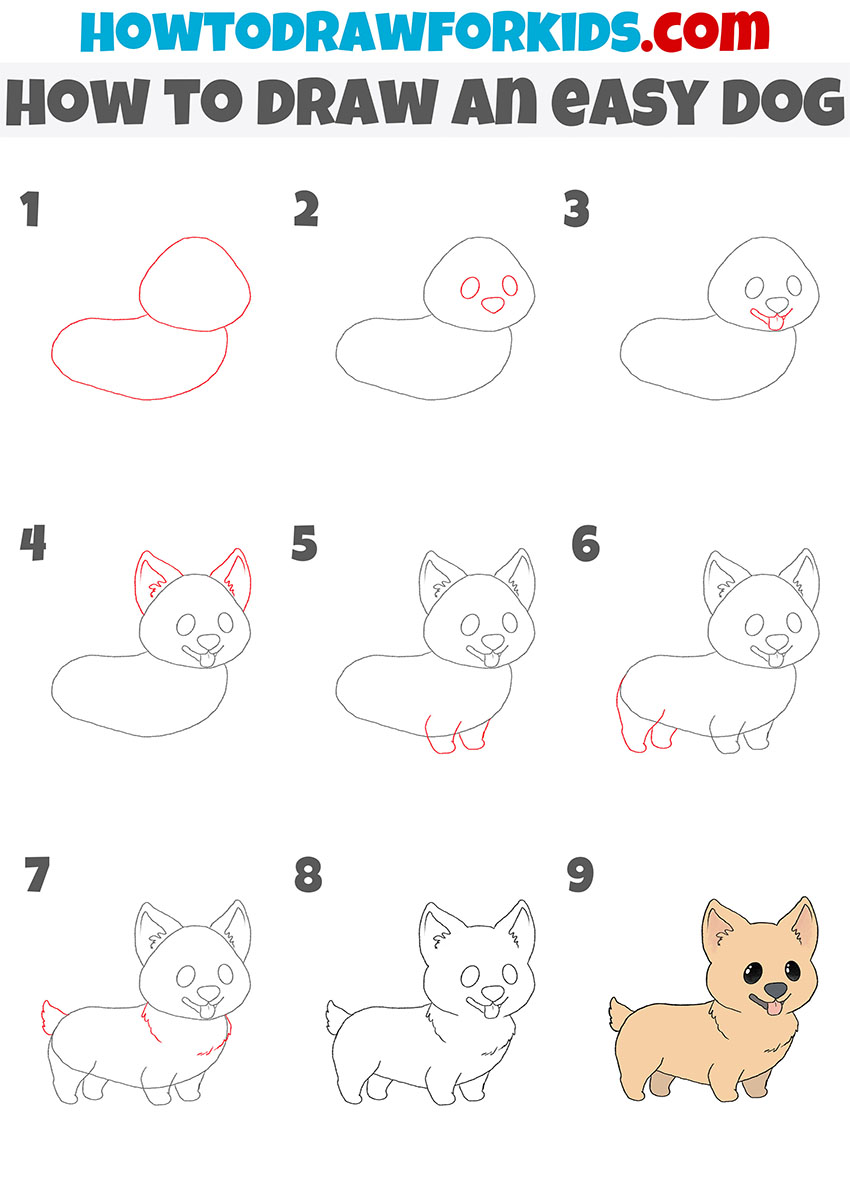
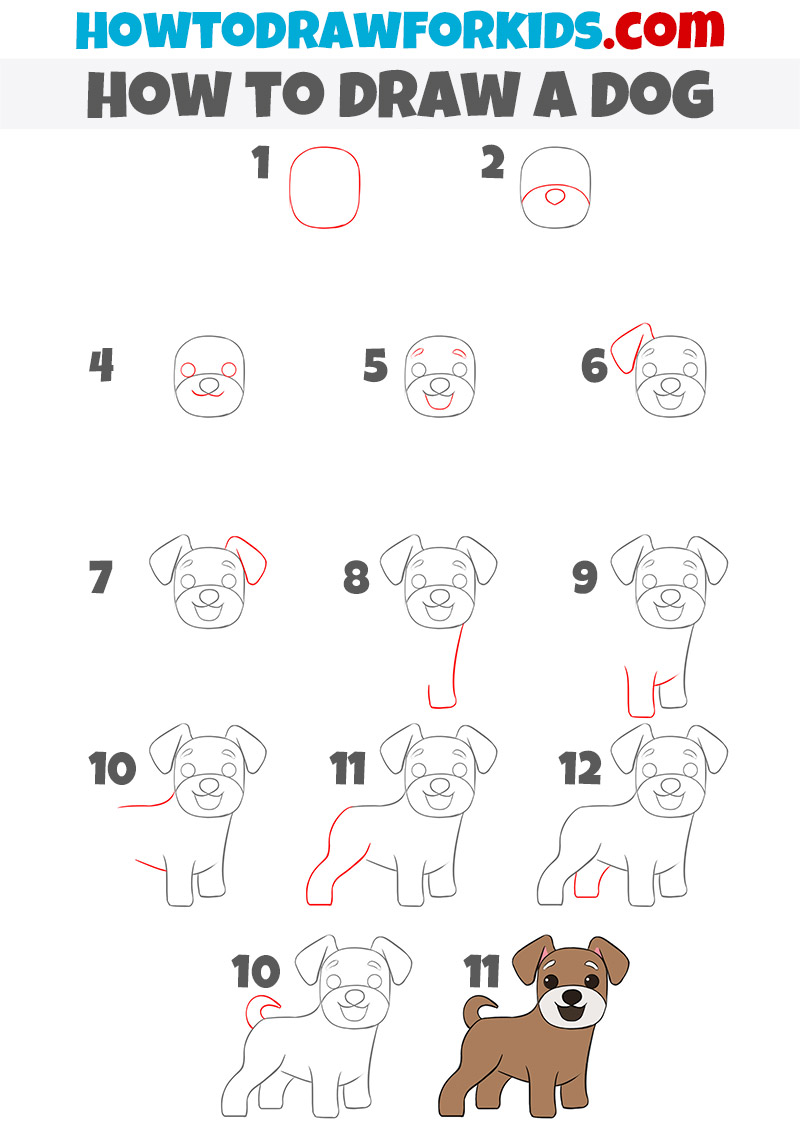
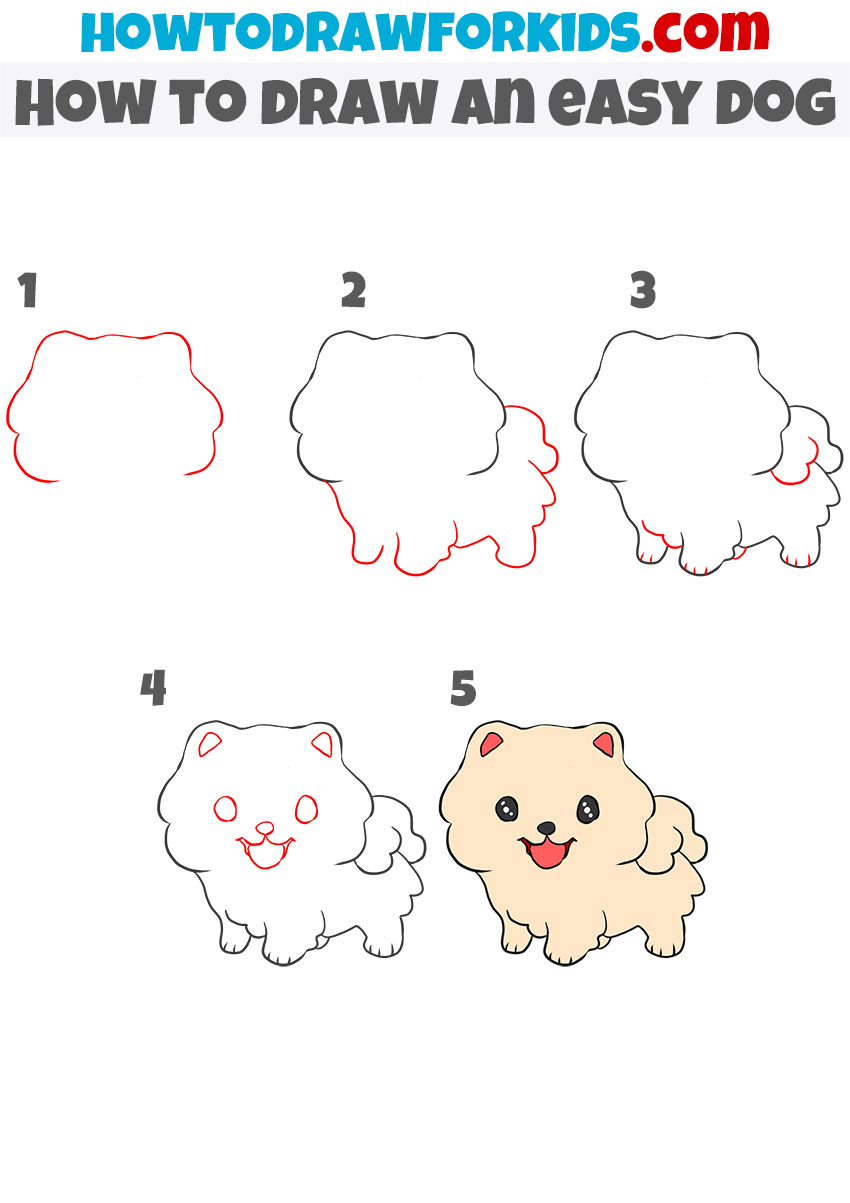
Method 1: How to Draw an Easy Dog
Here is a small and cute dog that can be drawn in 9 simple steps. Here you can already see a slightly different series of steps. In addition, here you can see a slightly different style of drawing details, such as eyes and ears.
Start by drawing a bean-shaped body and a circle for the head. Add two circles and an oval for the eyes and nose, and draw a small smiling mouth with a tongue. Next, draw two large, pointy ears at the top of the head. Sketch the front legs as simple, straight lines extending from the body, and add the hind legs similarly.
Draw a fluffy tail at the back and add fur details around the neck. Finally, outline the whole drawing with more defined lines, erase any unnecessary sketch marks, and color the dog with a light brown shade.
Method 2: Funny Dog
Here the process of drawing a dog is divided into 11 steps. This allows you to go into greater detail, but at the same time it will take you a little longer to complete the entire process.
Begin by drawing a rounded rectangle for the head. Add a small oval for the nose and connect it with a line to form the mouth. Draw two circles for the eyes and add curved lines for the eyebrows. Sketch large, floppy ears on each side of the head.
From the bottom of the head, draw a straight lines down for the front legs and add a curve for the body. Complete the front legs and add the hind legs with similar lines. Draw a small, curved tail at the back. Finally, outline the entire drawing with more defined lines, erase unnecessary sketch marks, and color the dog with a dark brown shade.
Method 3: How to Draw a Sitting Dog
Here we again return to the drawing method where the first step is to create the basic shapes, then gradually move on to the details.
Begin by drawing a rounded square for the head and a smaller, similar shape for the body below it. Add two triangular ears on top of the head. Sketch two small circles for the eyes and an oval for the nose. Draw a small, curved line for the mouth and add a tongue sticking out.
Next, outline the front legs by drawing lines extending from the bottom of the body. Add the hind legs as curved lines extending from the back. Draw a fluffy tail at the back. Finally, outline the entire drawing with more defined lines, erase any unnecessary sketch marks, and color the dog with a light beige shade.
Method 4: Cute Sitting Dog Drawing
In the previous example, the head and body shapes were drawn first, then the facial details were only added. Here you can see that after sketching out the head, the details of the face are drawn first, and then only the body and body parts.
Begin by drawing a large circle for the head. Add a smaller circle within it for the nose and two small circles above it for the eyes. Draw a rounded triangle around the nose for the snout. Sketch two large, pointy ears at the top of the head. Then, draw a larger circle below the head for the body. Add two straight lines extending down from the body for the front legs, and two curved lines at the sides for the hind legs.
Draw a small, curved tail at the back. Add details to the ears and fur around the neck. Outline the entire drawing with more defined lines, erase any unnecessary sketch marks, and color the dog with a light beige shade.
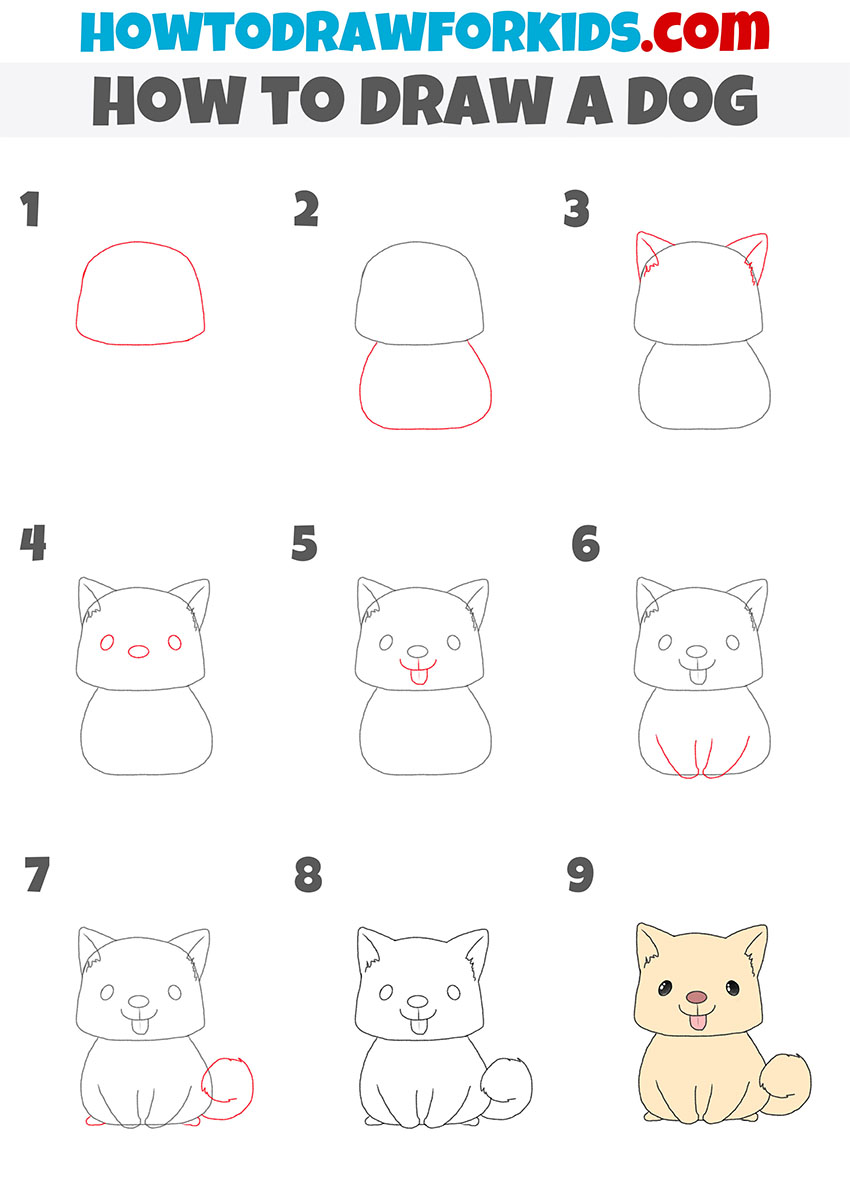
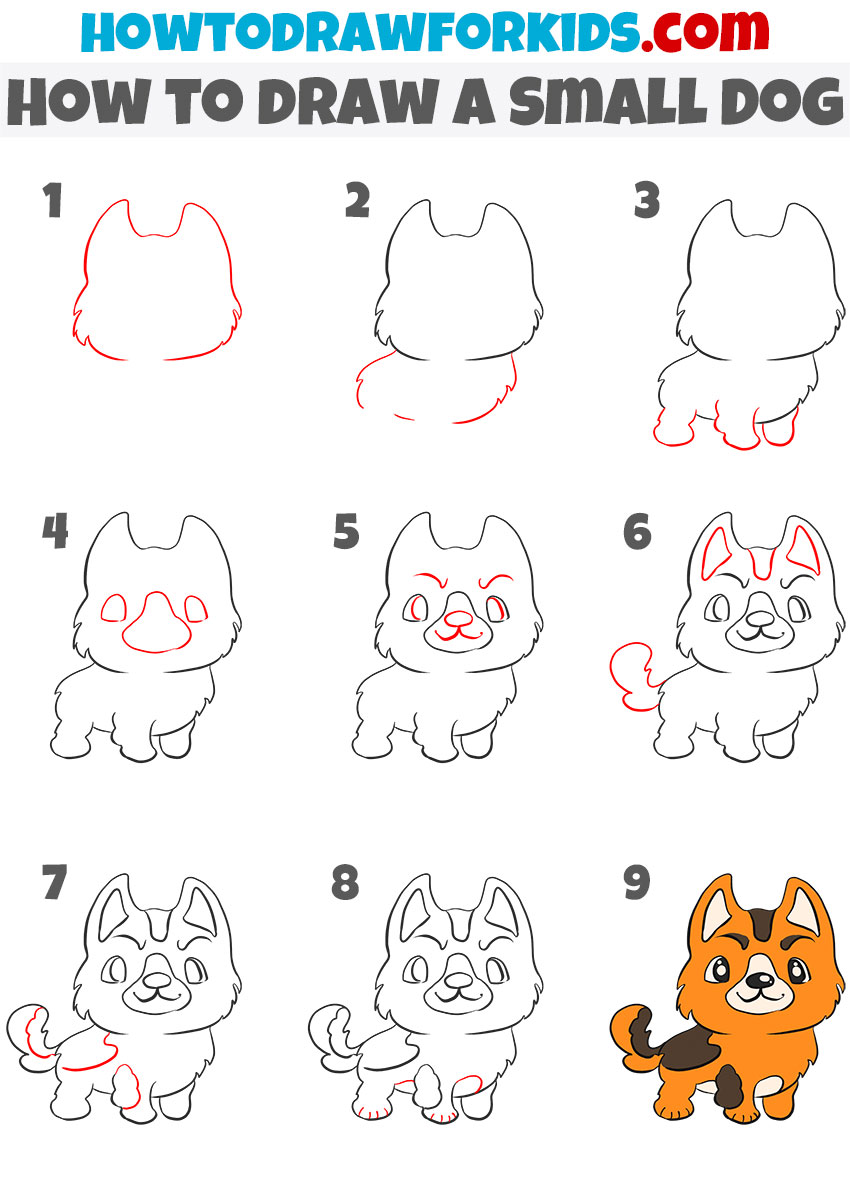
Method 5: Small Dog Drawing Tutorial
This picture shows the cute cartoon puppy. He has a large head and short legs. These proportions give it a funny look. The puppy has a bright color. You can paint it in the same colors as in the sample, or you can get creative and choose the colors yourself. So let’s start drawing.
Begin by drawing the outline of the head with a distinct furry texture and add the body with a similarly fluffy outline. Sketch the hind legs with rounded paws and then draw the front legs in the same manner. Add a fluffy tail to the back. Next, draw the facial features starting with two oval eyes and a rounded nose. Add a smiling mouth and detailed eyebrows to give the dog a cute look.
Sketch the inner ear details and add additional fur lines to illustrate the fluffy appearance. Finally, outline the entire drawing with more defined lines, erase any unnecessary sketch marks, and color the dog with a combination of orange and dark brown shades to highlight its features.
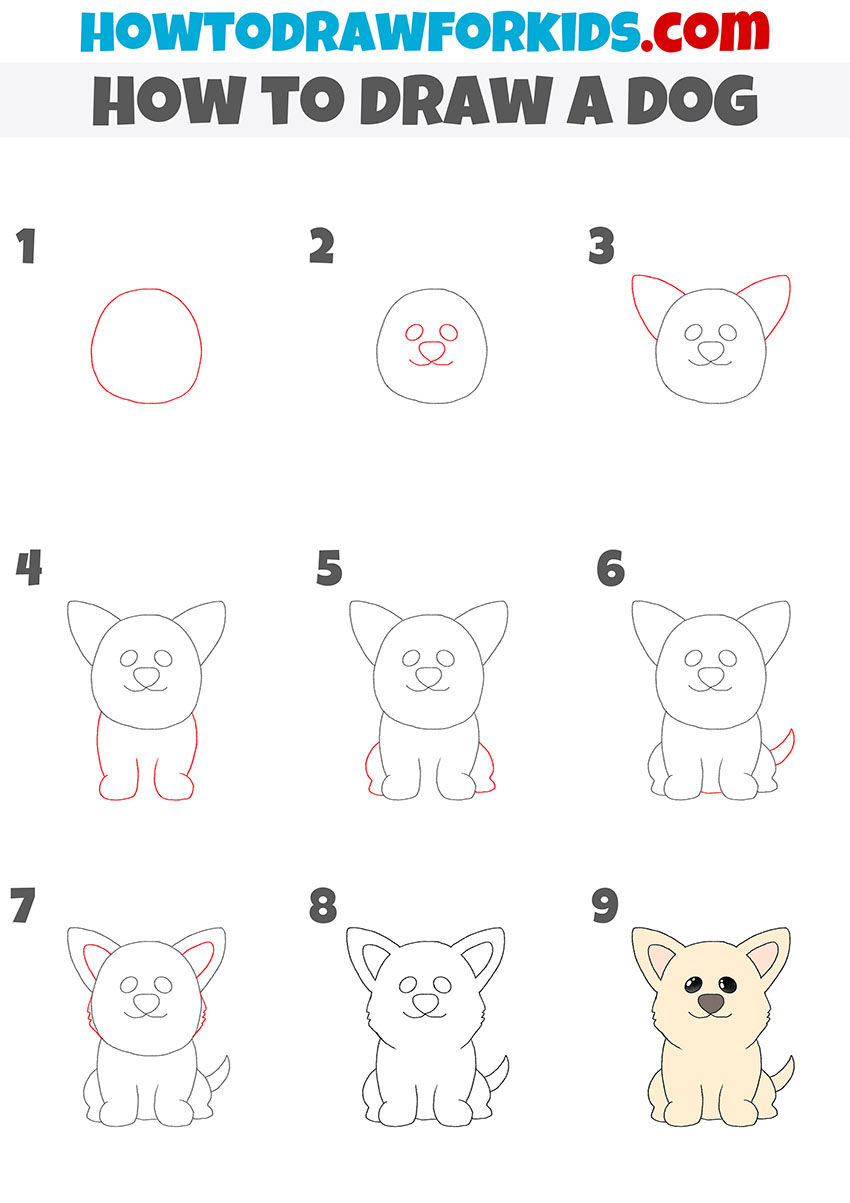
Method 6: Cute Dog Tutorial
The picture also shows a cartoon dog and it looks very cute. The dog is very fluffy and at the same time has smooth body contours. The dog has small ears and a short fluffy tail. You can easily sketch it, and drawing will give you pleasure.
Pay attention to the proportions of the body. The head is much larger than the body and the legs are very short. It is these proportions that give the dog a funny cartoon look.
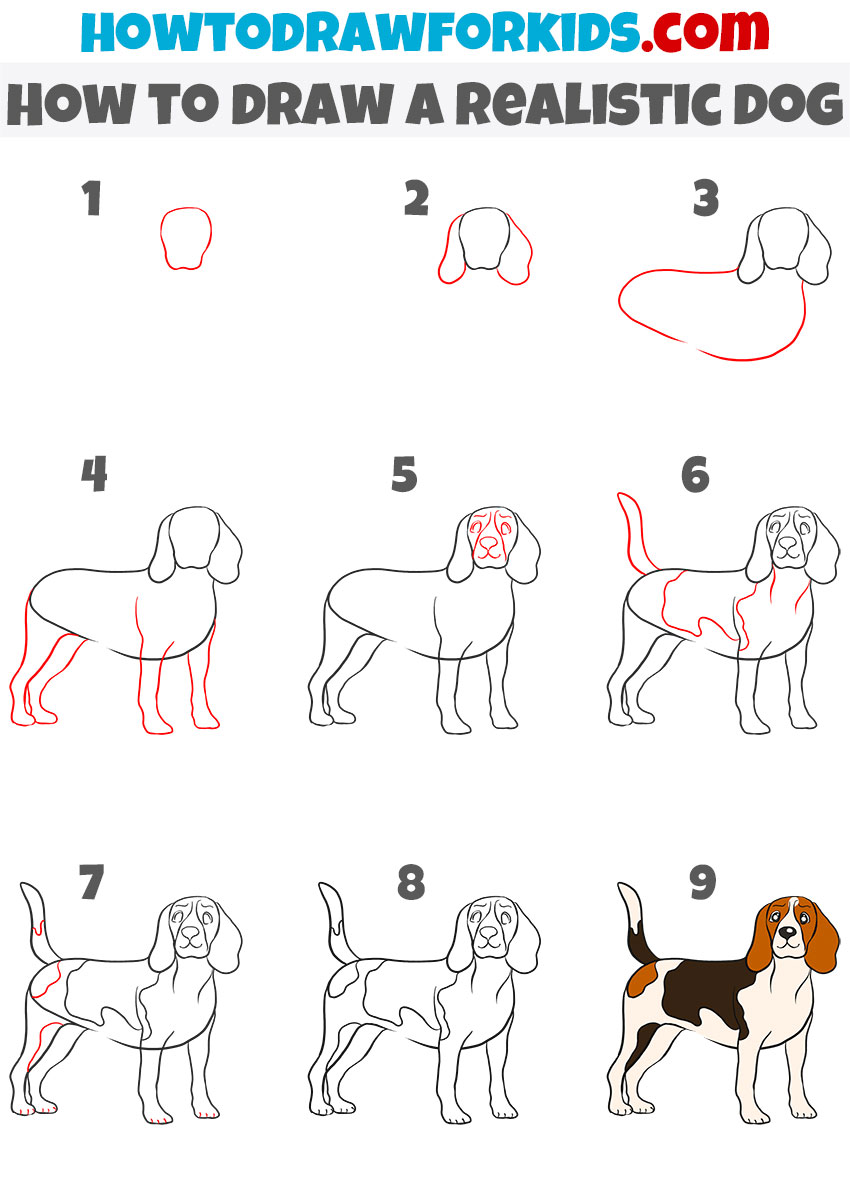
Method 7: Realistic Dog Drawing Tutorial
This dog drawing lesson is a little more realistic than the others. Here you can see more realistic facial contours and expressions.
Start by drawing the outline of the head with a distinct shape and add large, floppy ears. Sketch the dog’s body with a smooth, elongated shape and connect it to the head. Add the legs with defined joints and paws. Draw the dog’s facial features, including the eyes, nose, and mouth, with a realistic expression.
Add the tail, making it curved and natural-looking. Enhance the dog’s body with detailed lines indicating the fur pattern. Finally, outline the entire drawing with more defined lines, erase any unnecessary sketch marks, and color the dog with shades of brown, black, and white to highlight its realistic appearance.
How to Draw a Dog: Conclusion
So, what did you learn from this dog drawing lesson?
First, of course, you learned how to sketch dogs. Actually, this was the most basic thing that I tried to teach you in this drawing lesson.
Secondly, if you were careful and tried to repeat everything that I describe, you learned to see the volume and convey it on a piece of paper.
And of course, you generally improved your drawing skills very well, especially if you completed all the additional tasks at the end of the guide.
If you easily completed the steps of this lesson and all the additional tasks, then be sure to go to the section called Animals on my website to learn how to portraynot only a dog, but also all the other fauna that exists on planet earth.


Omg! So cute!
I had so much fun drawing and painting
Thank you so much ♥
I’m really glad you enjoyed it, Carol. Sounds like you had a good time creating this drawing.