How to Draw a Dumbbell
If you enjoy sports as much as art, then this tutorial on how to draw a dumbbell, featuring two versions, is made for specially you.
How to Draw a Dumbbell: Introduction
In this lesson on how to draw a dumbbell, you will become familiar with one type of sports equipment. A dumbbell can be used to build muscle and achieve a well-defined athletic body. And this lesson in turn will help you build a solid foundation for your artistic skills.
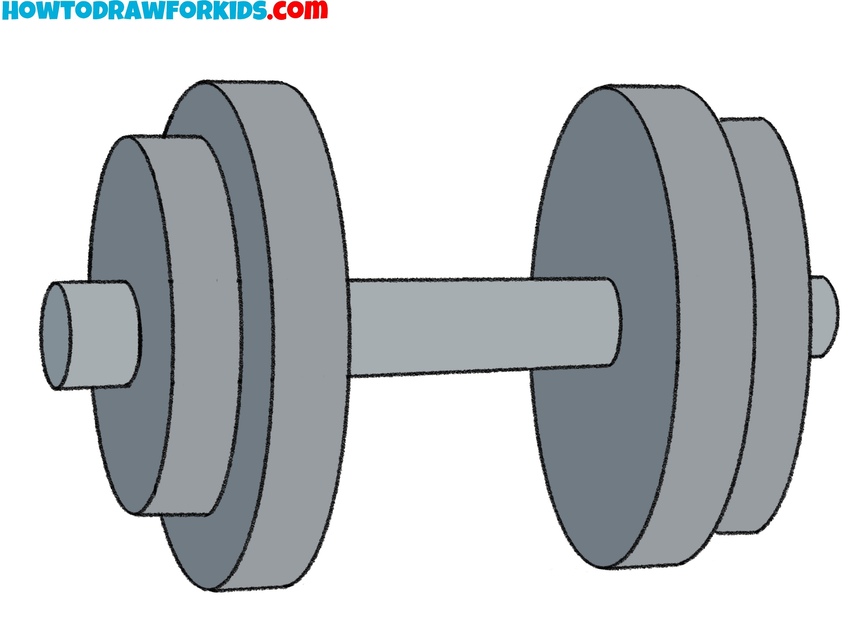
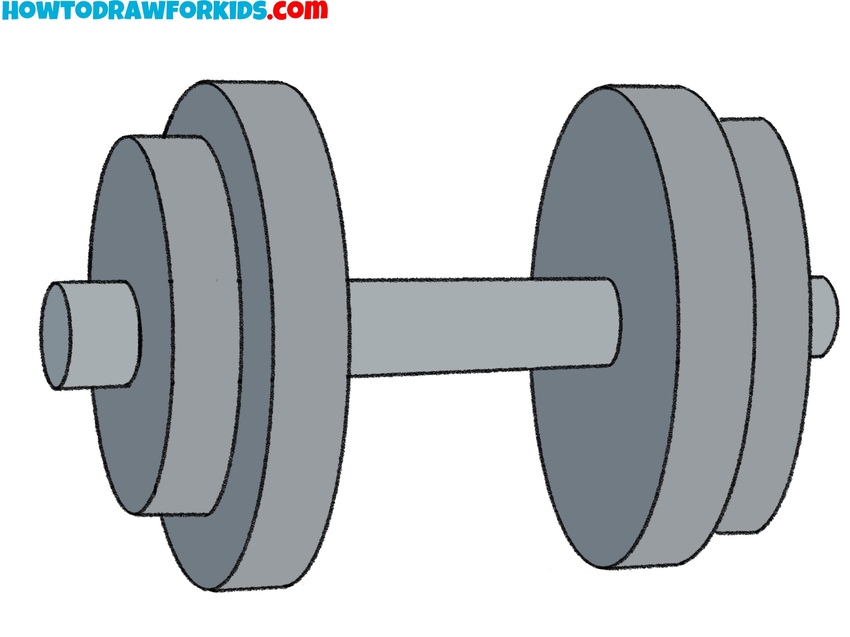
The figure in both of these dumbbell drawing tutorials shows a basic model of a dumbbell. As seen, the dumbbell has a simple design, consisting of a handle in the center with weighted discs attached to each side. These discs vary in size and weight.
To complete the dumbbell drawings from this guide, it is important to create even, straight lines for the handle and smooth, curved shapes for the disks. Ensure that both sides of the dumbbell are symmetrical. The finished dumbbell should be colored in dark blue or metallic shades.
Dumbbell Drawing Tutorial
Materials
- Pencil
- Paper
- Eraser
- Coloring supplies
Time needed: 30 minutes
How to Draw a Dumbbell
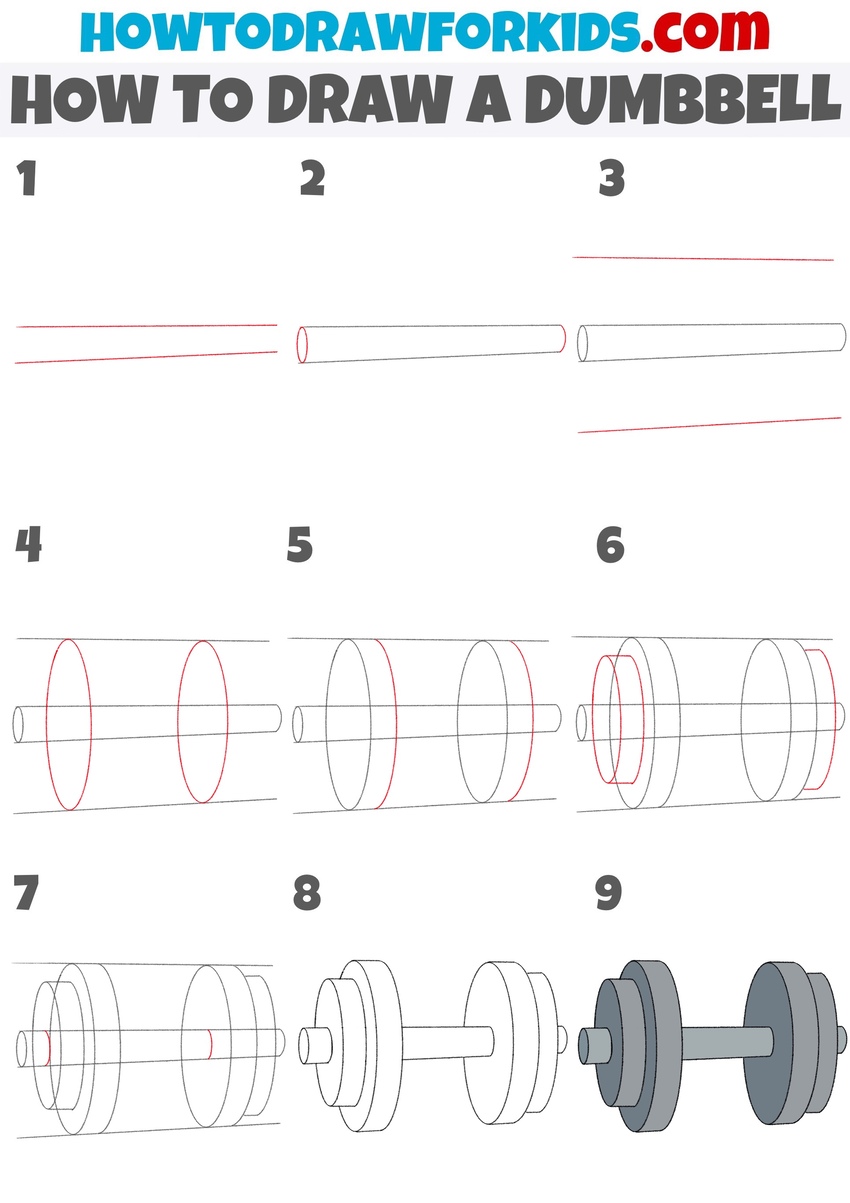
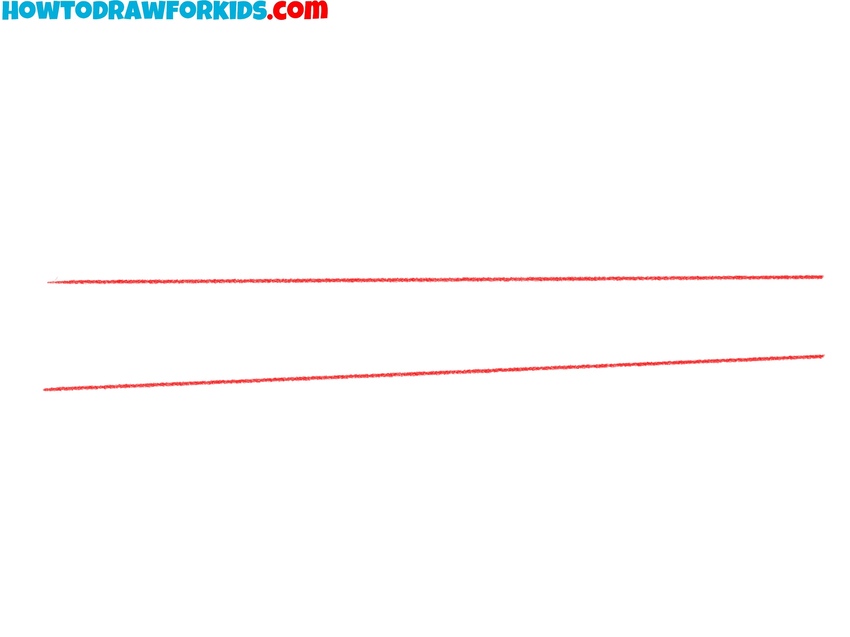
- Draw the dumbbell handle’s guidelines.
Begin by drawing two parallel horizontal lines across your paper. These lines will act as the guidelines for the dumbbell handle, illustrating its width and length. To convey a sense of perspective, you can draw these lines getting slightly closer as they recede.
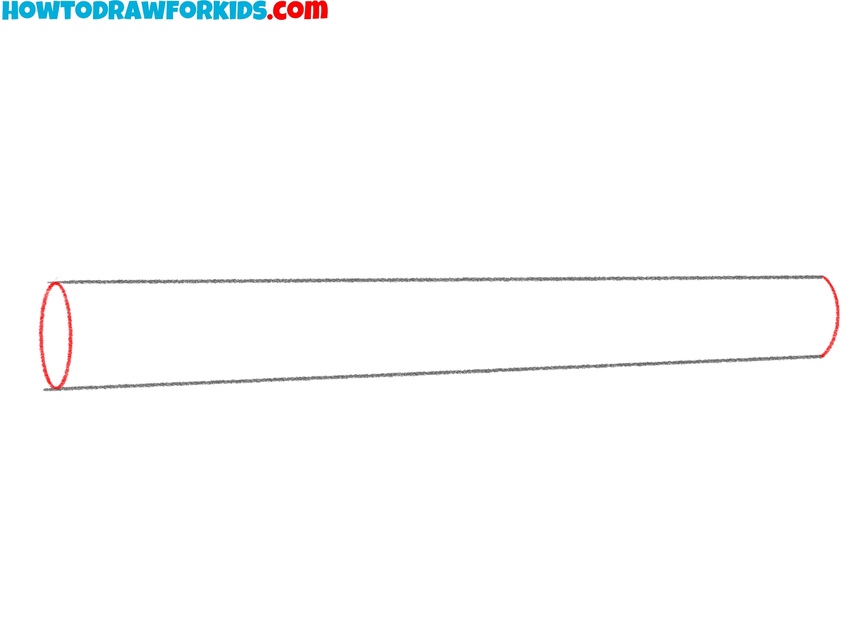
- Create the handle shape.
Using the guide lines from the first step, shape the handle of the dumbbell. Connect the ends of the two parallel lines with curved edges on both sides, forming a cylindrical shape. This cylindrical shape represents the central grip of the dumbbell.
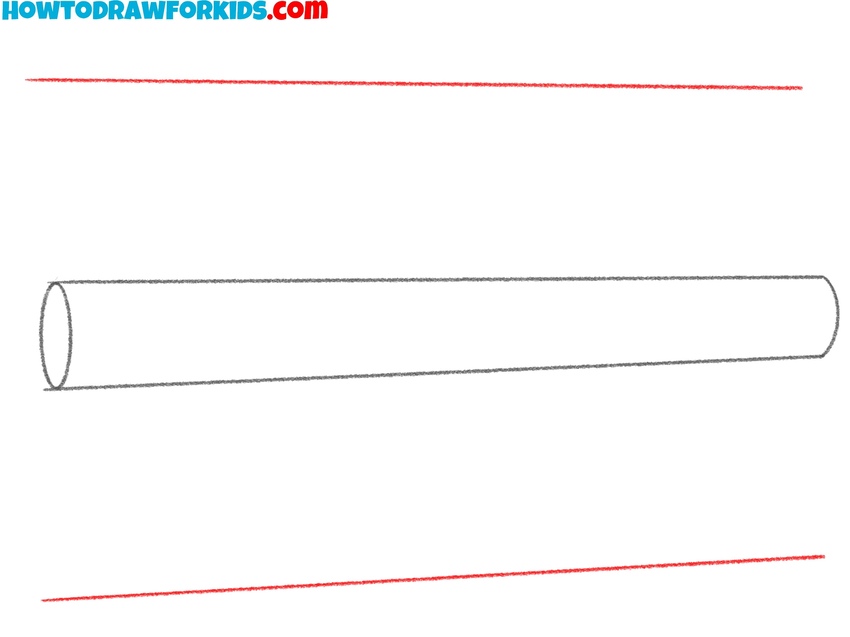
- Draw outer guidelines for weights.
Next, extend two more horizontal lines on both sides of the dumbbell handle. These additional lines act as guides for where to place the weights. Space these guidelines slightly away from the handle to allow room for the weight discs. Maintaining equal spacing on both sides will ensure symmetry for the disks.
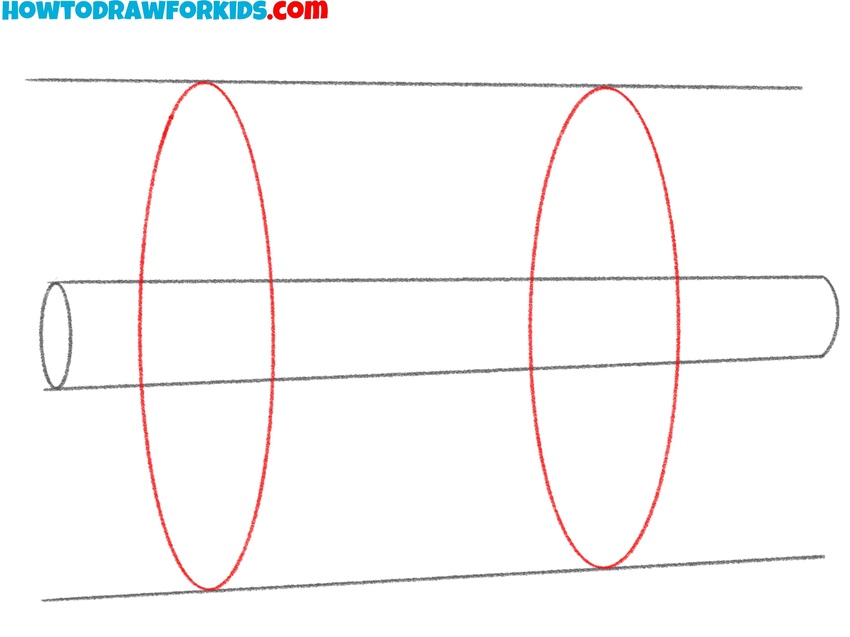
- Start sketching the weights.
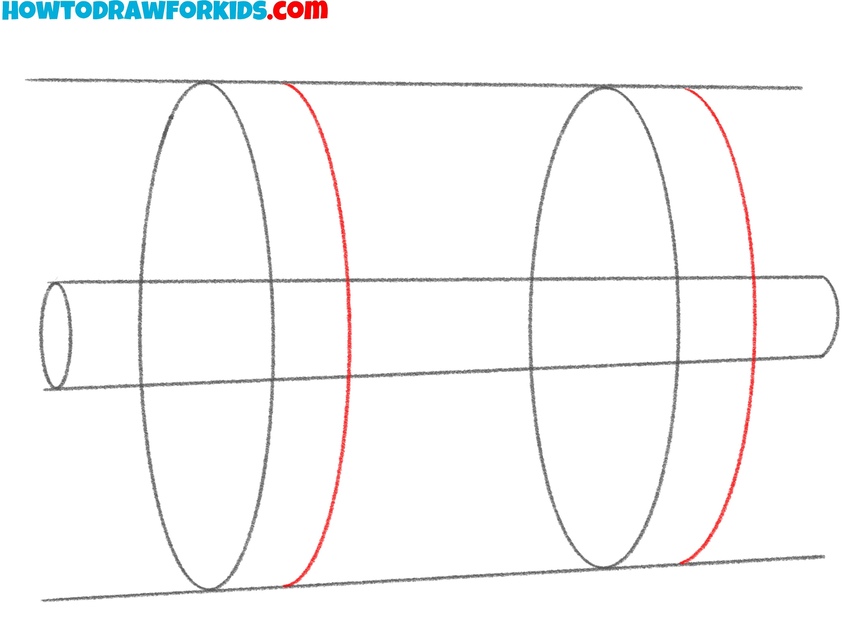
Now, using the guidelines from the previous step, draw the initial outlines for the disks. These ovals will represent the left edges of the weights. For added perspective, make the oval closest to the viewer slightly wider than the one further away.
- Finish drawing the larger disks of the dumbbell.
Now, using slightly curved lines that follow the outlines of the ovals from the previous step, complete the contours of the large dumbbell discs. To convey perspective, the distant disk can be slightly narrower than the one closer to the viewer.
- Add smaller disks at the sides.
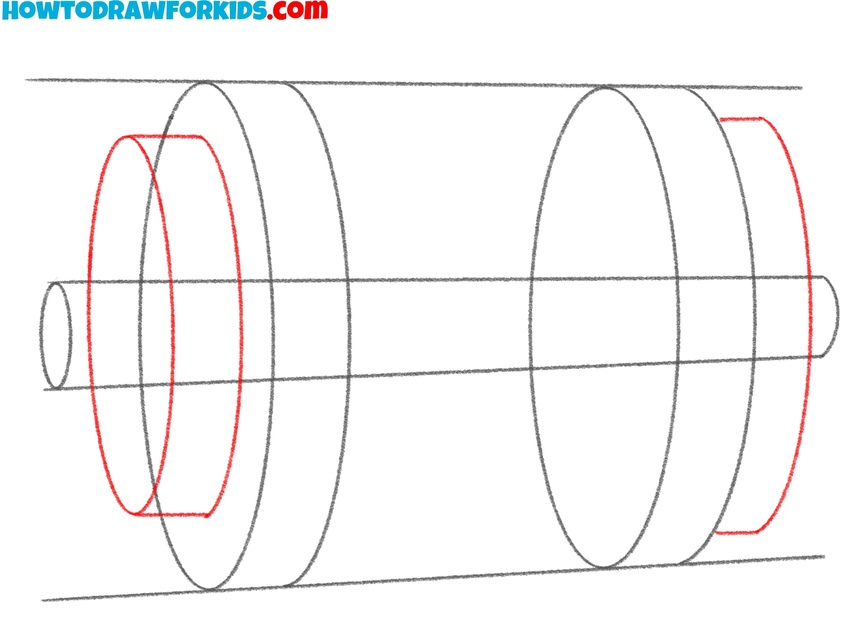
On the outer sides of the first weight discs, add two new ovals, slightly smaller than the first. These extra layers represent additional plates on the dumbbell, giving it a more realistic appearance. This step improves the 3D effect of the dumbbell, making it look like a multi-layered weight structure.
- Complete the basic shapes.
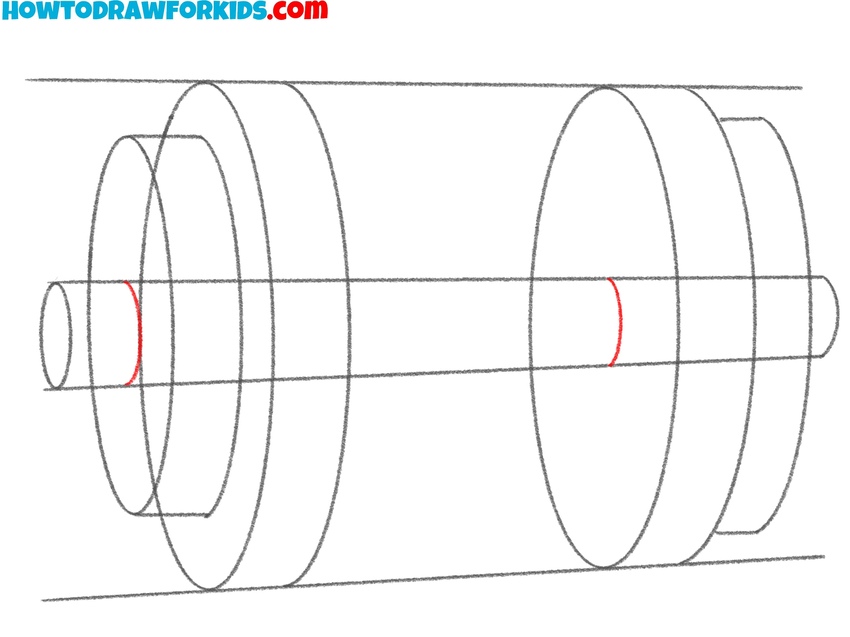
Now, add a couple of short, slightly curved lines on the handle’s surface to represent the holes of the weights. This will complete the basic outline of the dumbbell. Next, you may include additional details not shown in the example, such as locks or textured patterns on the handle.
- Finalize the dumbbell sketch.
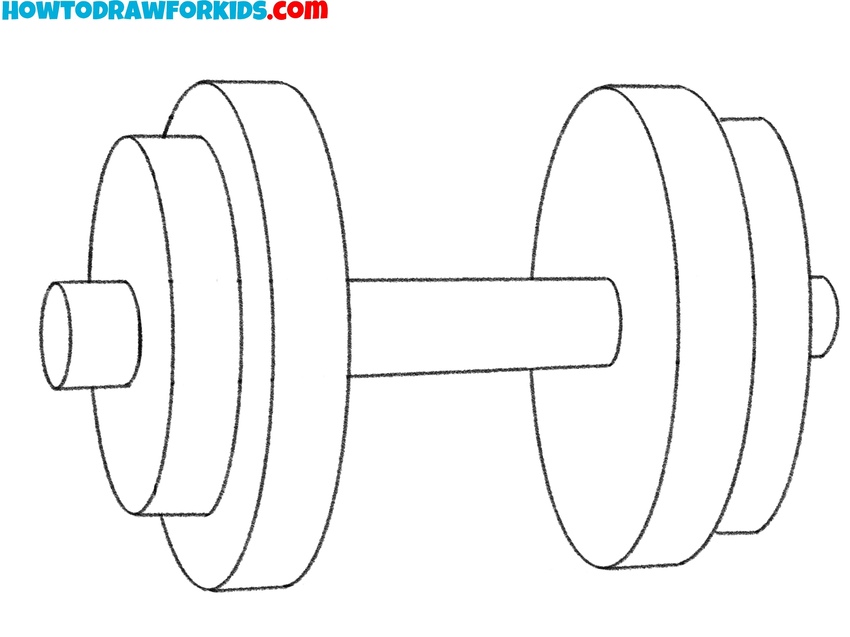
Carefully erase the initial guidelines used to construct the dumbbell, leaving only the essential outlines. This will clean up the dumbbell drawing and make the it look more finished and polished. As you remove the guidelines, refine any remaining lines to ensure they are smooth and ready for coloring.
- Add colors to the dumbbell.
And in the final step, color the entire dumbbell to give it more realistic appearance. Use a dark shade, such as gray or blue, to create a metallic look. To give your dumbbell drawing a more realistic and dimensional look, use different tones for the illuminated and unlit areas.
How to Draw a Dumbbell for Preschoolers
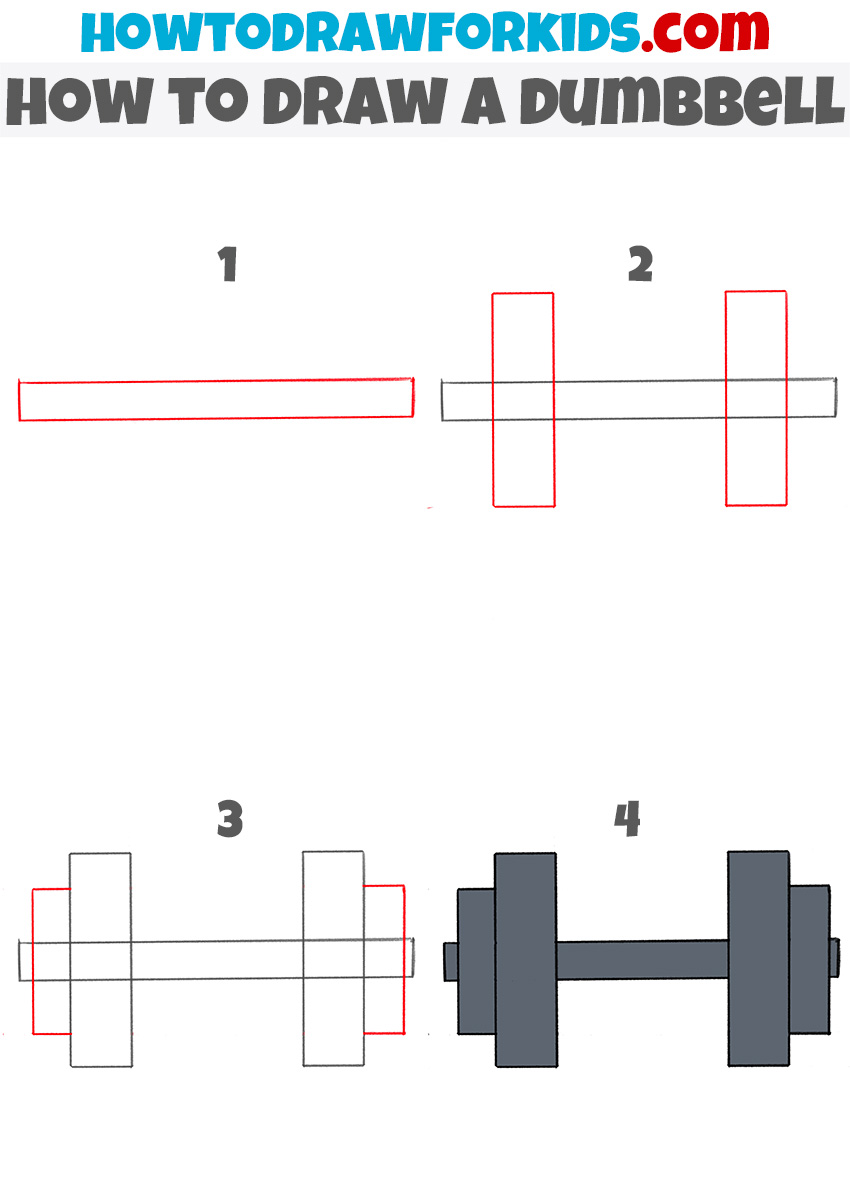
This simple dumbbell drawing tutorial differs from the first by focusing on a more simplified, rectangular design for this sports equipment. Instead of using curved shapes to represent the weight discs, this tutorial uses basic rectangles to depict each part, giving the dumbbell a more block-like appearance. The steps are also more simplified.
To draw a dumbbell in this easy style, start by sketching a horizontal rectangle for the handle. This will serve as the center of the dumbbell and should be long enough to leave space on each side for the weights. Next, add two vertical rectangles each side of the handle. These will represent the larger weights. Then, add another set of rectangles on the outer side of each weight, making them slightly shorter.
Finally, erase any unnecessary guidelines, trace the remaining outlines for a cleaner look, and color the dumbbell in a dark shade, such as gray, to give it a realistic finish.
Conclusion
You may have noticed how quickly and easily any drawing can be completed. The key is to choose the right technique. In this tutorial, I have provided two methods, and now you can write in the comments which one suits you best.
All the tutorials on my site are made up of very simple steps and basic shapes. My goal is to teach you how to draw effectively so you can spend less time and effort on it while gaining more enjoyment.
For more easy lessons on different themes, try your hand at drawing a car or practice drawing a book with my step by step instructions.

