How to Draw a Firefighter
Continuing the theme of professions, this lesson will teach you how to draw a firefighter – one of the most respected and brave jobs in the world.
How to Draw a Firefighter: Introduction
Different professions have different uniforms, and perhaps the outfits of firefighters, medics, and police officers are among the most recognizable. In this lesson, I’ll show you how to draw a firefighter, complete with distinctive clothing and a key tool – in this case, an axe. These features help clearly identify the profession and make your drawing more accurate.
Of course, you can also add other characteristic elements to your firefighter drawing. For example, you might include a fire extinguisher in the firefighter’s hand or draw a fire truck in the background to create a more detailed scene.
In this tutorial, I’ll guide you through a simple yet effective way to draw a firefighter using basic shapes and easy-to-follow steps. The methods used here are accessible for beginners while still helping you create a recognizable and complete image.
At the end of this article, you’ll also find an additional firefighter drawing tutorial. This version will differ in style, step sequence, difficulty level, and coloring. This allows you to either try two different approaches to deepen your understanding or choose the one that suits your preferences best.
Firefighter Drawing Tutorial
Materials
- Pencil
- Paper
- Eraser
- Coloring supplies
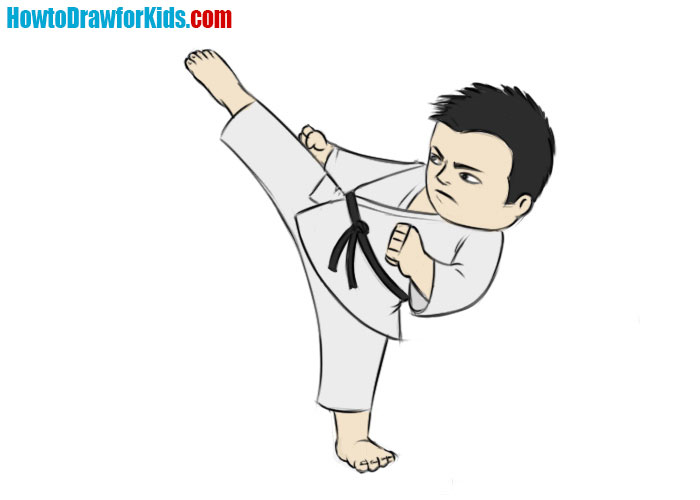
Simple Firefighter Drawing Tutorial
Time needed: 40 minutes
How to Draw a Firefighter
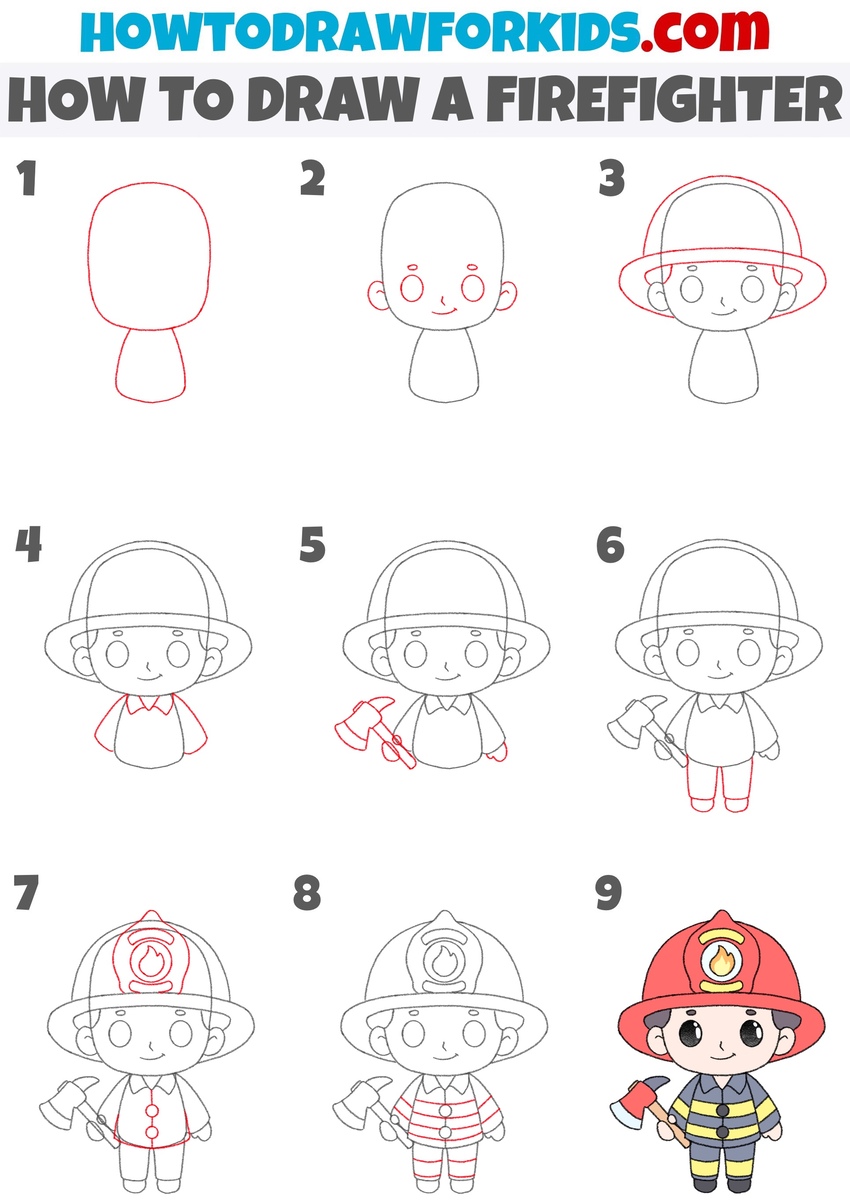
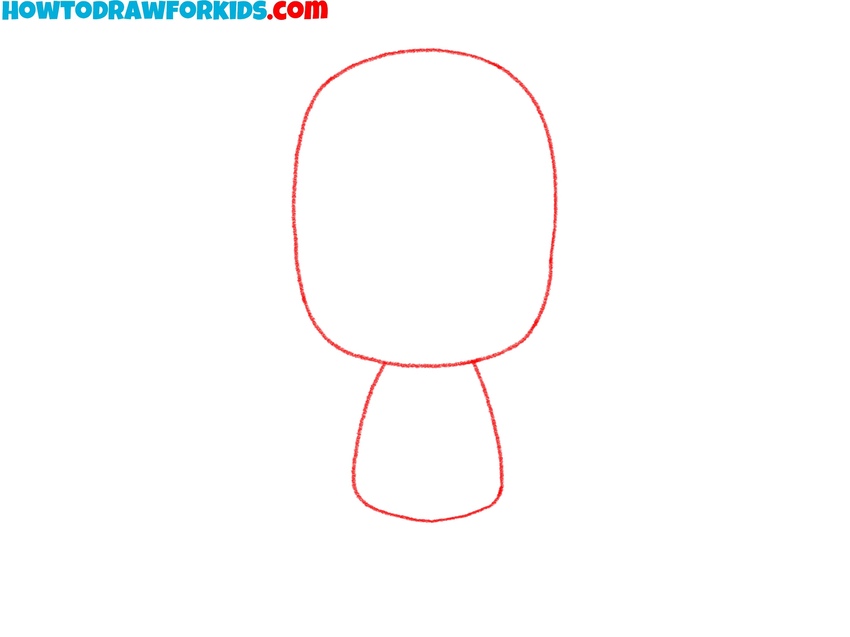
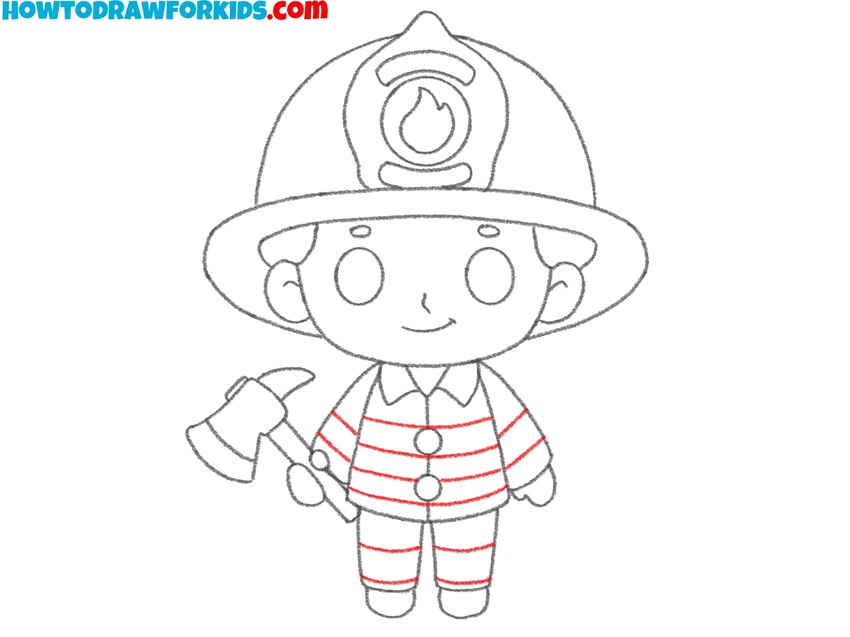
- Sketch the head and torso base.
Start this tutorial on how to draw a firefighter by sketching the basic outline of the character’s head and upper body. Draw a large oval shape for the head. Under the head, draw a smaller, rounded trapezoid or bell-like shape to represent the torso. The head should be larger than the torso for a cartoon look.
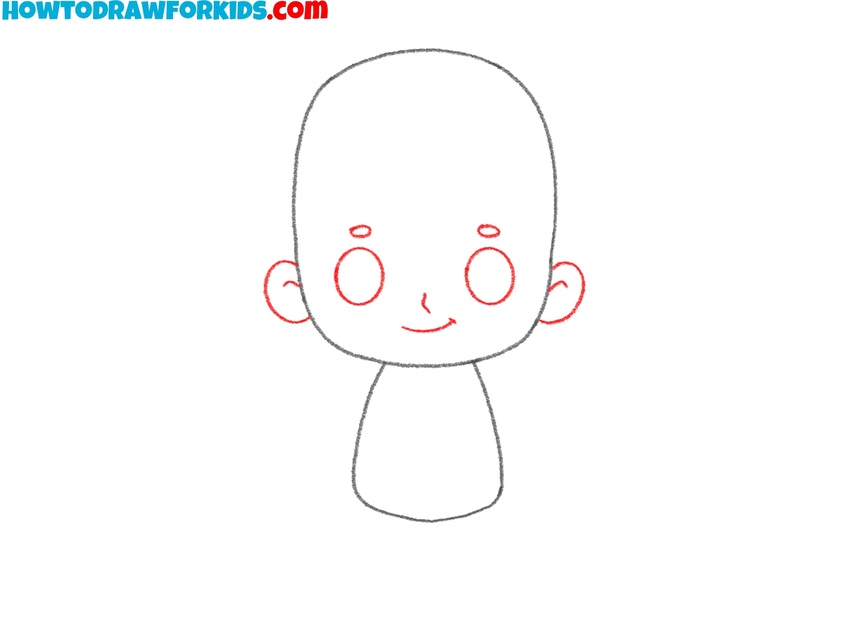
- Add the face and ears.
Now, draw the eyes of the firefighter as two ovals or circles at the center of the head. Above the eyes of the firefighter, draw two small flat ovals for the eyebrows. Add a short curved line in the center for the nose and another curved line underneath for the mouth. Draw the ears as two small curves at the sides of the head.
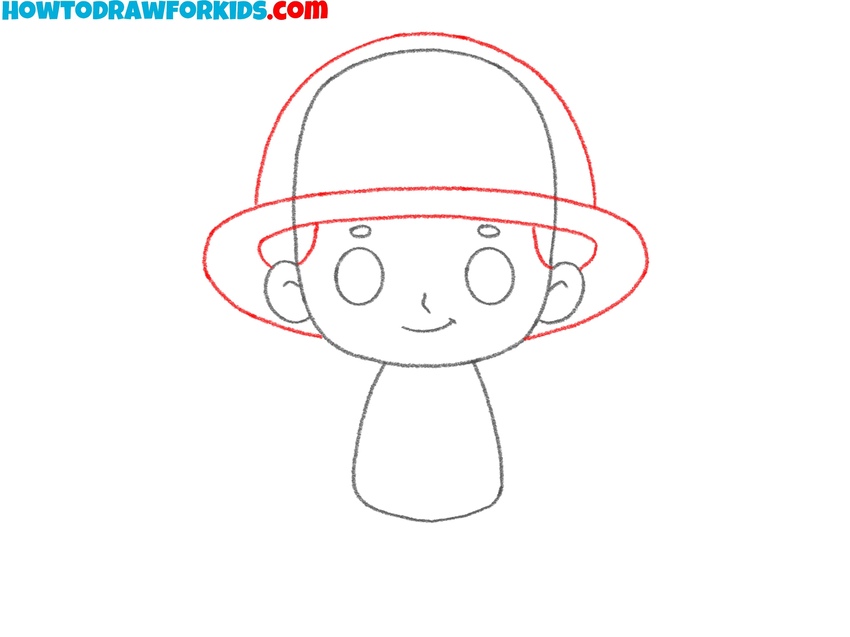
- Draw the firefighter’s helmet outline.
Sketch a large curved line across the top of the head to form the crown of the helmet. Then, draw an oval brim around the head. The brim should be wider than the head and sit low on the forehead, with the ears partially visible below.
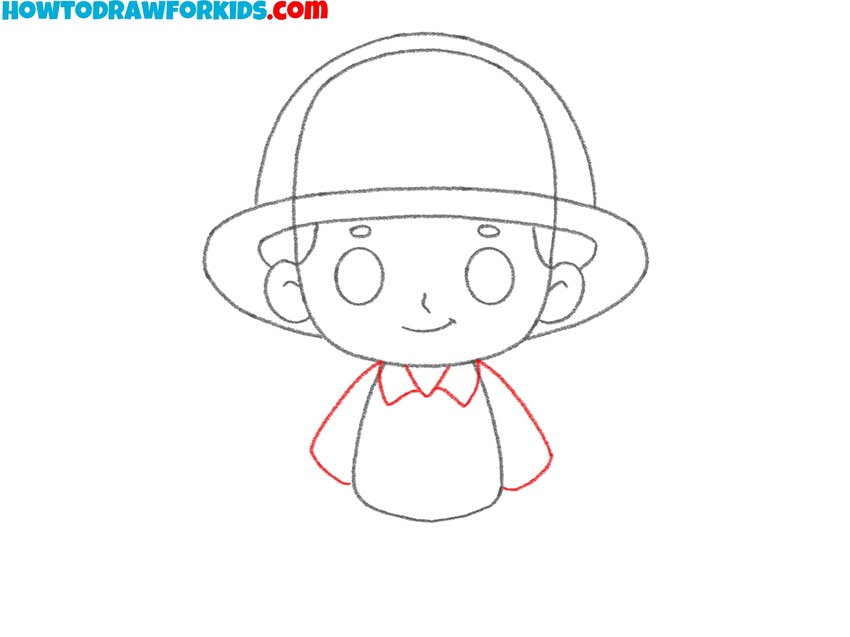
- Add the arms and collar.
Sketch firefighter’s arms as two simple lines on each side of the torso. Then, draw a pointed shirt collar just below the head by using two small triangular shapes that extend outward from the center of the neck area. Keep all shapes of the collar and sleeves of the firefighter rounded and simple.
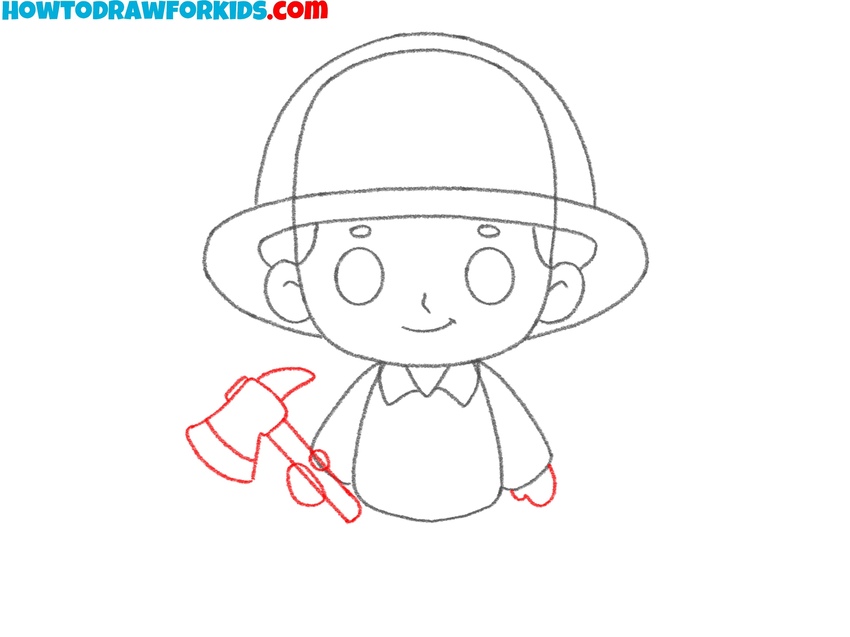
- Draw the firefighter‘s axe and hands.
Now, draw the hands of the firefighter using two mitten-like shapes. Then, draw the axe in the right hand. Begin by drawing the handle of the axe with simple lines and a rounded shape at the bottom. At the end of the handle, draw the blade of the axe, which should be wide and curved on one side.
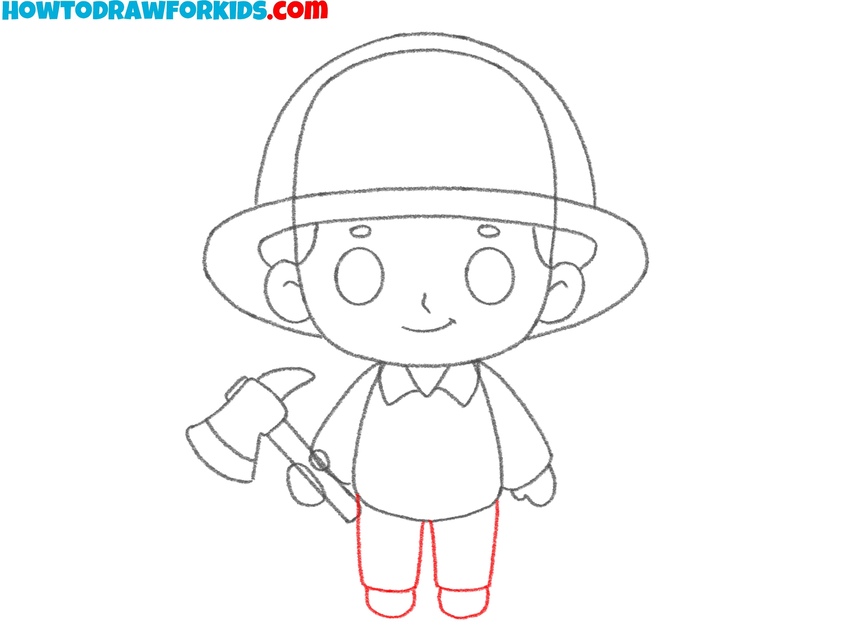
- Draw the legs and boots.
From the bottom of the torso, sketch two vertical shapes that extend downward. Each leg should be about the same width as the arms. After that, draw the boots of the firefighter as two small and curved shapes at the bottom of tach leg. You can add details to the boots for a more realistic look.
- Add the helmet emblem and buttons.
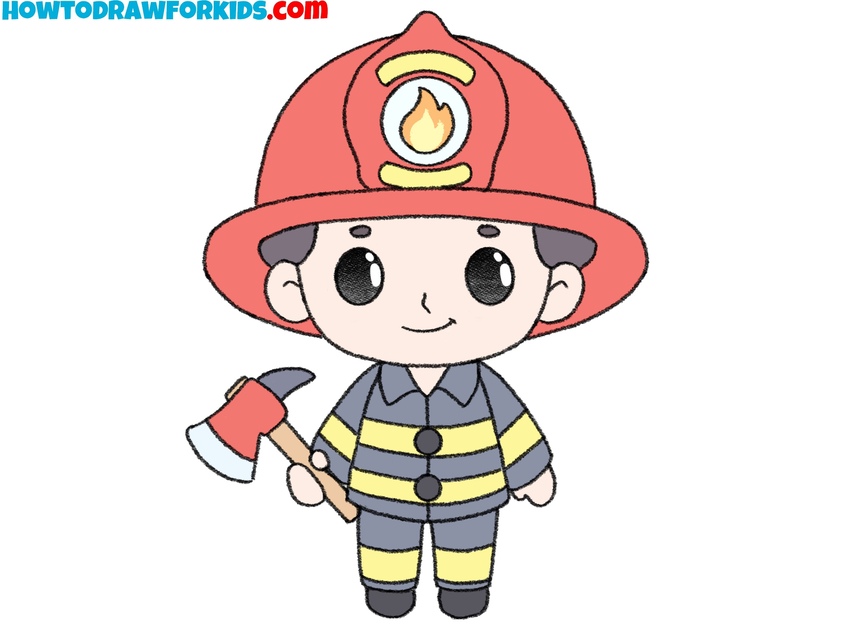
Now, draw the flame-shaped emblem in the center of the helmet’s crown. Begin with a small shield or badge shape, then draw a simple flame icon inside. After that, draw the buttons of the jacket with a couple of small circles. Adjust the bottom of the jacket making it more angular.

- Add uniform stripes and erase the guidelines.
In this step, erase any unnecessary guidelines from your firefighter drawing to give it more finished look. Next, add horizontal stripes across the chest, arms, and lower part of the body to represent reflective safety bands commonly found on firefighter gear.
- Color the firefighter.
Use red for the helmet, yellow for the flame emblem, and dark gray or navy blue for the uniform. The reflective stripes can be colored yellow or white. Color the axe handle brown and the blade silver or gray with red accents. Use skin tone for the face and hands. Color the eyes black with white highlights.

Simple Firefighter Drawing Tutorial
This version of the firefighter drawing tutorial offers a more simplified and compact character design, using fewer shapes and Ana even more cartoon style. Compared to the first drawing tutorial, it replaces the axe with a fire extinguisher. The color palette is also simpler and bolder, using solid red and yellow for the uniform, and the helmet includes number and dot details.
To follow this tutorial on how to draw a firefighter, begin by sketching a curved shape for the bottom of the face. Add the helmet by sketching a dome-like shape with a wide horizontal band across the middle. Below the helmet, draw jagged lines to form the hair.
Add the ears on both sides, then draw the outline of the body using a single line that curves down into the legs. Add the arms, one holding a fire extinguisher. Draw the extinguisher with a rounded top and a small nozzle. Sketch the horizontal stripes across the uniform, then add helmet details, including dots and the number 1. Finally, draw a simple face and color the firefighter drawing using red, yellow, black, and brown.
Conclusion
Today, we completed two nine-step tutorials to learn how to draw a firefighter. Keep in mind that this is just one of many profession-themed lessons available on my website. Visit the “People” section to learn how to draw a doctor wearing a lab coat and a stethoscope around the neck. You can also try drawing a police officer in a classic police uniform.
These and other profession-related tutorials show how to draw people from different fields by using key uniform details that represent their roles. They help you understand how simple shapes and accessories can define a character’s job and make them recognizable.
Be sure to leave a comment letting me know what kind of drawing tutorial you’d like to see next. What are you interested in learning to draw?
To continue developing your drawing skills, explore the other categories on my website. You can find lessons on how to draw a person, a cat, a dog, and many more topics.


so good
Many thanks