How to Draw a Fishing Pole
This subject is a tool known to anyone who enjoys fishing, and we replicate it in detail in this tutorial on how to draw a fishing pole.
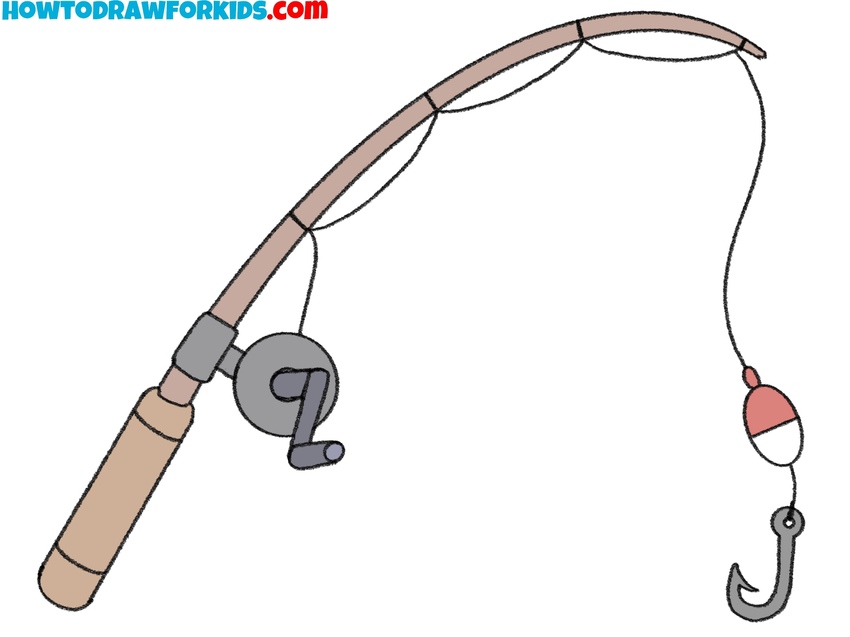
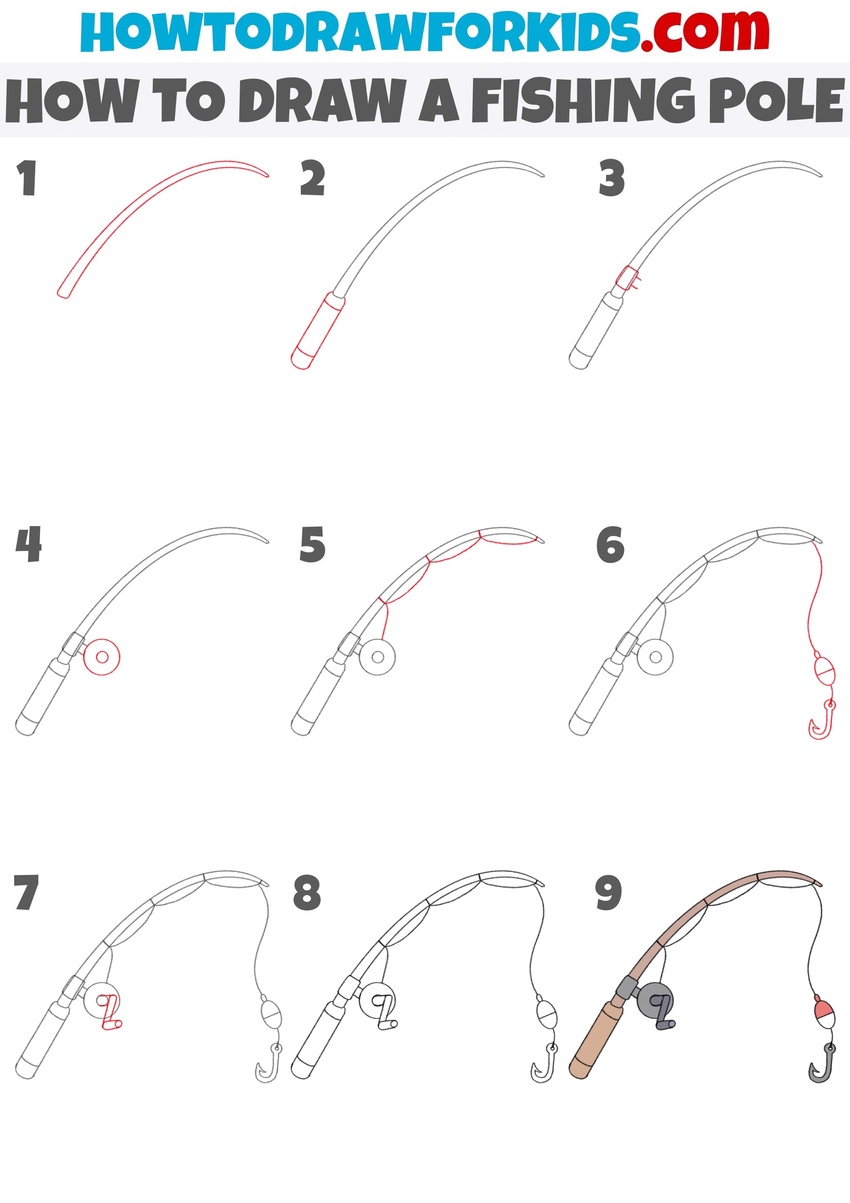
In this lesson, you will learn how to draw a fishing pole. Many people love fishing, for them, it is a hobby, a sport, and a way to get away from the everyday hustle and bustle.
If you like to spend time fishing, then you will be pleased to draw an object that is necessary for fishing. Even if you have never fished on your own, you will follow this lesson with interest and acquire new skills. In fact, drawing a fishing pole is very simple.
The rod has a simple design. The main element is a long stick, which is called a pole, and the pole also has a long fishing line and a reel on which the fishing line is wound. At the end of the fishing line, there is a small hook on which the bait is hooked.
You will depict all these elements step by step in your drawing. Use small hints as you work. If you are ready, you can begin this exciting work.
Materials
- Pencil
- Paper
- Eraser
- Coloring supplies
Time needed: 20 minutes
How to Draw a Fishing Pole
- Sketch the curved fishing rod.
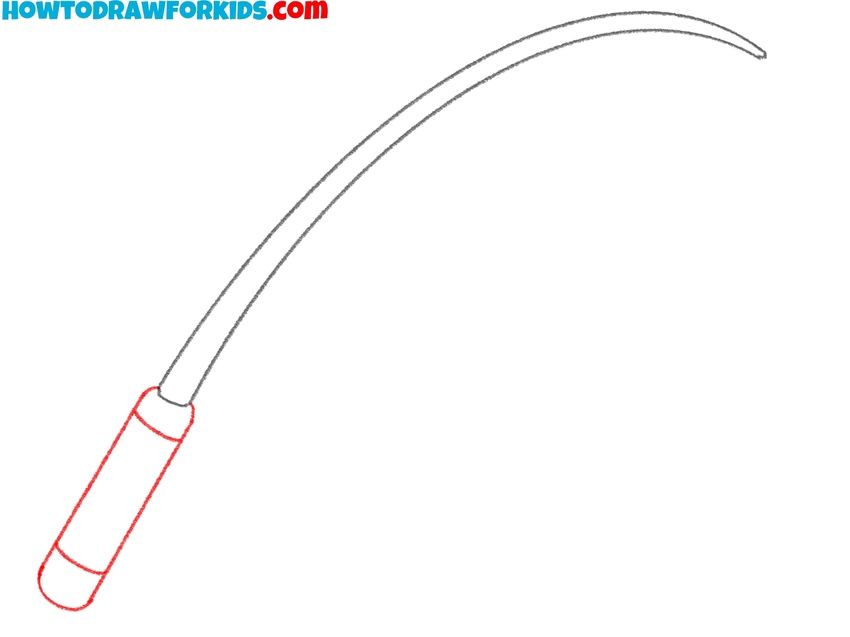
First, sketch two long curved lines to form the shaft of the fishing rod. This shape should tapper slightly to the tip. Make the very bottom end of the fishing pole thicker to indicate the place where the handle will be attached in the next step.

- Add the handle grip.
Next, define the grip by adding a long cylindrical handle at the bottom of the rod. The grip should be thicker than the rod. Next, add two short cross lines at the top and bottom of the handle to give this part more detail. The handles come in a variety of styles, so you can add your own texture or adjust the width and length to suit your ideas.
- Draw the fishing pole reel seat.
Fishing rods have small support parts that hold the reel. To indicate it, add a short rectangular section just above the grip. Draw it with two parallel lines wrapping around the rod. Keep it simple at this stage — the main reel will be added later.

- Sketch the circular reel.
Now sketch a small circle attached to the reel seat on one side of the rod. This will represent the fishing reel. Add a smaller circle inside it to illustrate the spool. If this detail is difficult to draw by hand, use a compass at this stage.

- Draw the fishing line.
Moving up the rod, sketch several small loops attached along the curve. These are the guides that keep the fishing line straight. Next, draw the fishing line itself with the help of very long, smooth lines connecting at the points you just drew. The line should follow the rod’s curve.

- Add the hanging line and hook.
Continue this thin curved line from the top of the rode down. At the end, sketch a curved fish hook with a pointed end. Fishing lines often have a float or bobber. Sketch a small oval attached to the line above the hook. This can be drawn as a simple oval with a dividing line in the middle. The hook in my example is noticeably exaggerated in size, and to make the drawing of the fishing rod more realistic, make it smaller.

- Add the winding arm.
Now, add the small but important detail that makes the reel look more realistic. From the side of the reel body, sketch short lines, ending in a small oval or rounded shape. This part represents the grip that an angler would hold while turning the reel.

- Refine the shape of the fishing pole.
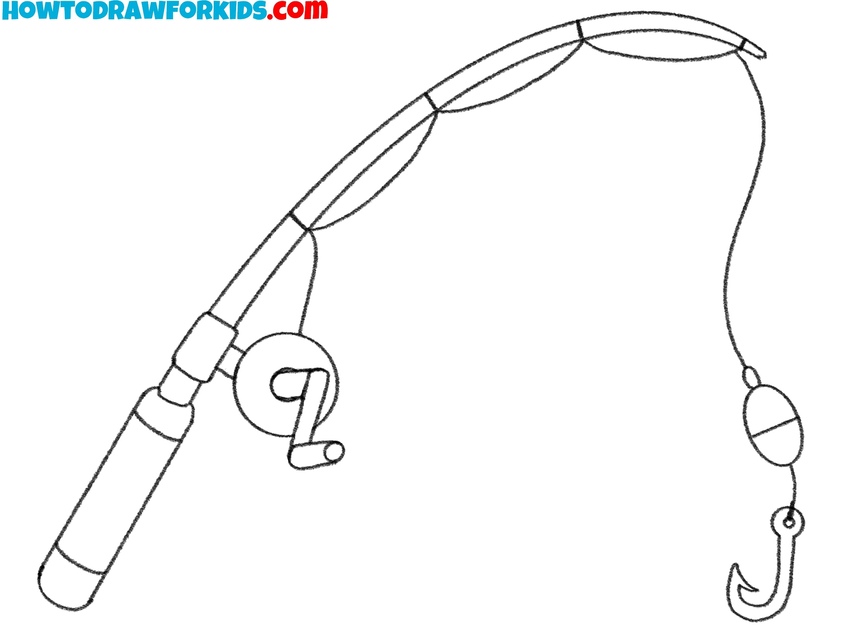
Now it’s time to give your linework a finished look, so erase those parts of the rod that are no longer needed. Don’t accidentally erase the final outlines of the rod, reel, or hook. Using a smaller eraser or the corner of one helps with precision.
- Add natural fishing gear colors.
With a clean outline of the fishing pole in ready, begin coloring it to give it a finished and colorful look. Take a medium brown for the rod itself, to convey wood or a modern composite material, and make the handle a lighter or darker tone to resemble cork or padded grip material. The reel should be filled with gray or dark silver, since real reels are usually made from metal or sturdy plastic. If you included a small bobber, use the traditional red-and-white combination

Bonus: Easy Fishing Pole Drawing Tutorial
To complete this fishing pole drawing, draw two long parallel lines to represent the shaft, then shape the handle at the base. Next, illustrate the small crank above the handle, followed by the reel with its round coil and handle.
Add a series of loops along the shaft, as these will hold the fishing line. Then, carefully sketch the line running through each loop and finish it with a hook at the end.
After that, trace over your drawing to refine the outline and add cleaner details. Finally, color the handle, reel, and line to complete the fishing pole.


