How to Draw a Hallway
In this drawing lesson, I will tell you how to draw a hallway step by step. This instruction will be simple and clear for you.
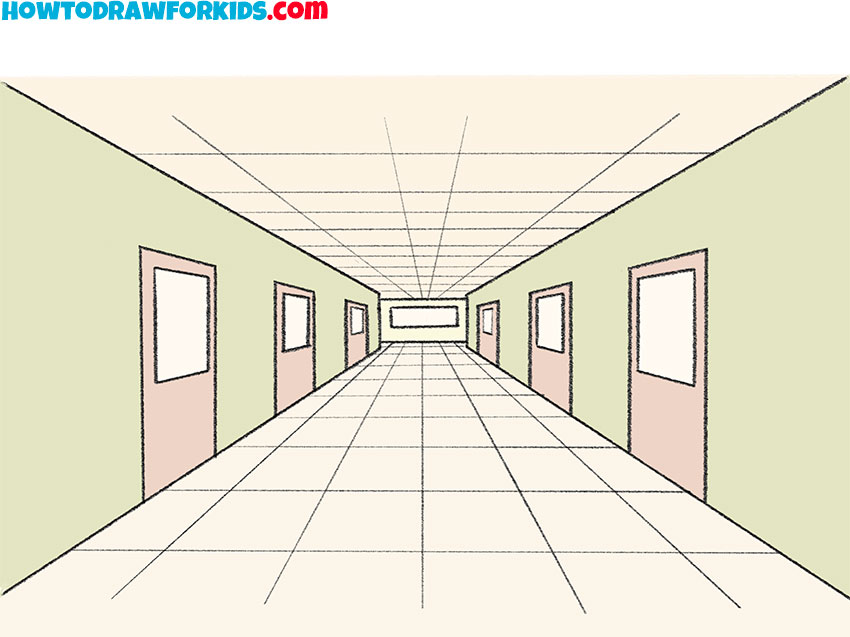
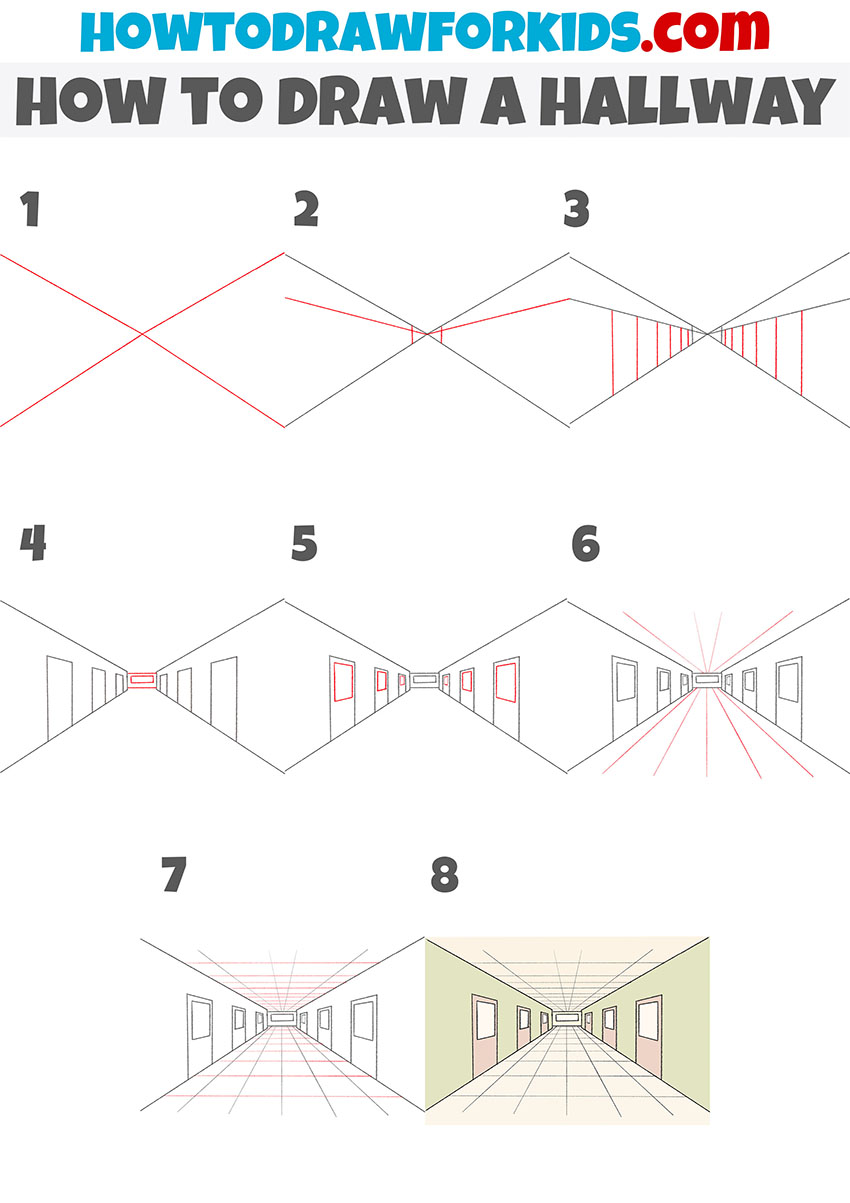
I am glad to bring to your attention a very interesting and unusual drawing lesson, in which I will tell and show you how to draw a hallway step by step. With the help of this lesson, you will learn how to depict a certain perspective of a drawing. This skill is important for every artist. I’m sure you’ll find this tutorial easy to follow, as I created it especially for beginners and kids who don’t have too much drawing experience.
I am sure that you have seen various hallways many times. The hallways, a long passage within a building or dwelling that connects rooms on the same floor. Hallways are the main elements that make up the interior layout of the building. The hallways where the doors of the rooms go are considered the most common layout of the hotel. We can often see a hallway not only in a residential building, but also in institutions such as a school, hospital, hotel, various government agencies, as well as other buildings. By learning how to draw a hallway with the help of this lesson, you will be able to add the additional details you need to depict hallways of various kinds.
In this lesson, you will draw a lot of straight lines. So if you want your drawing to look perfect, you can use a ruler when necessary. However, if you want to practice drawing straight lines on your own, you don’t have to use a ruler. You can also repeat this lesson several times to hone your skills. Now I suggest that you take the necessary art supplies and start this lesson by carefully following my instructions.
Materials
- Pencil
- Paper
- Eraser
- Coloring supplies
Time needed: 30 minutes
How to Draw a Hallway
- Draw the lines of the floor and ceiling.
Depict straight lines, as shown in the picture, to mark the vanishing point in the picture.

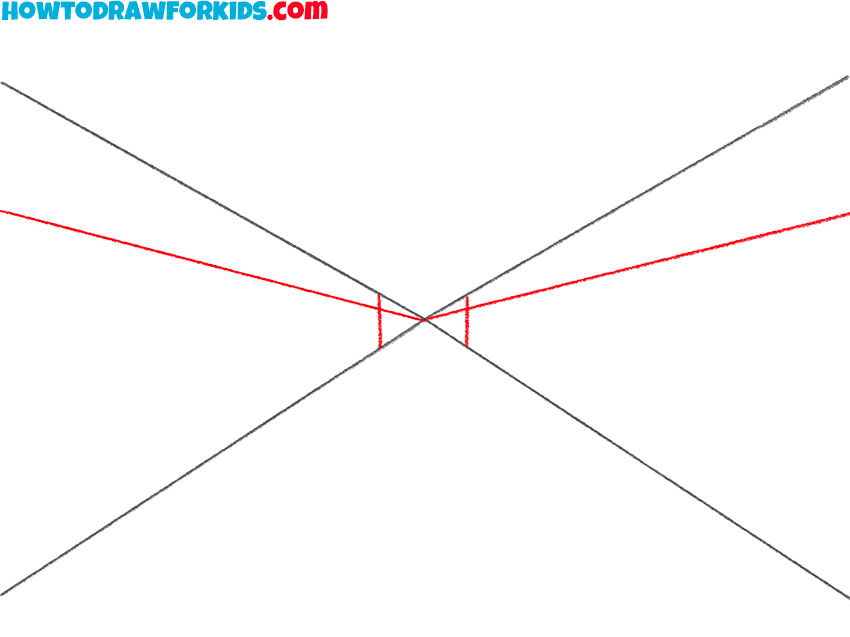
- Mark the door level lines and the end of the hallway.
Between the drawn lines, draw two inclined straight lines and two vertical straight lines.
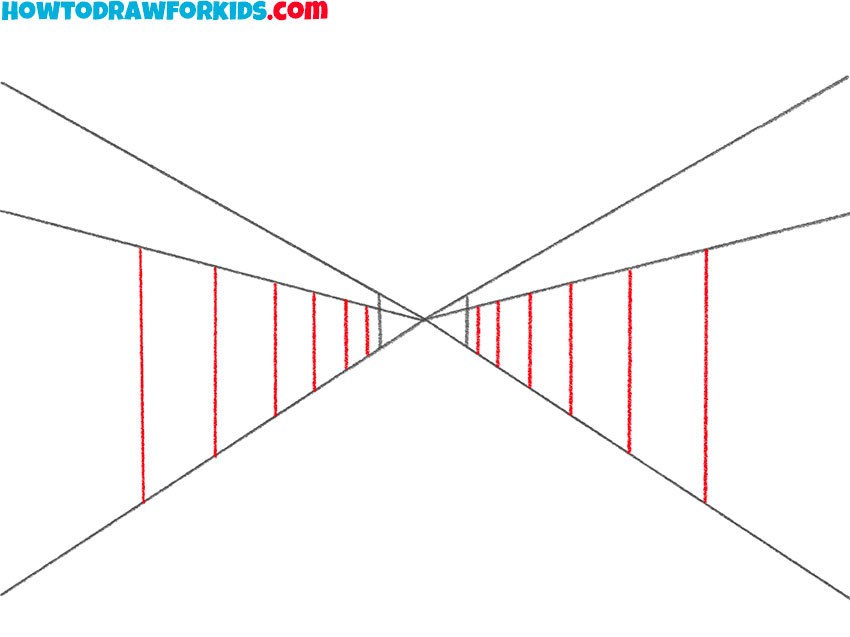
- Designate the dimensions of the doors.
Use straight vertical lines of varying lengths to mark the dimensions and location of the doors.
- Add the wall at the end of the hallway.
To complete the step, you need to draw two straight horizontal lines and a rectangle in between.
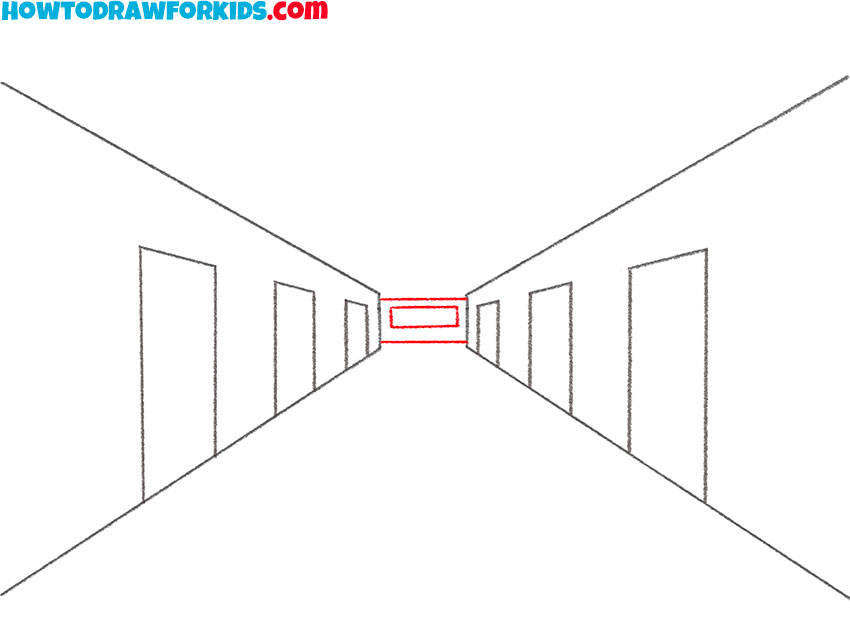
- Continue drawing the doors.
Draw trapeziums of different sizes inside each of the drawn doors, as shown in the picture.
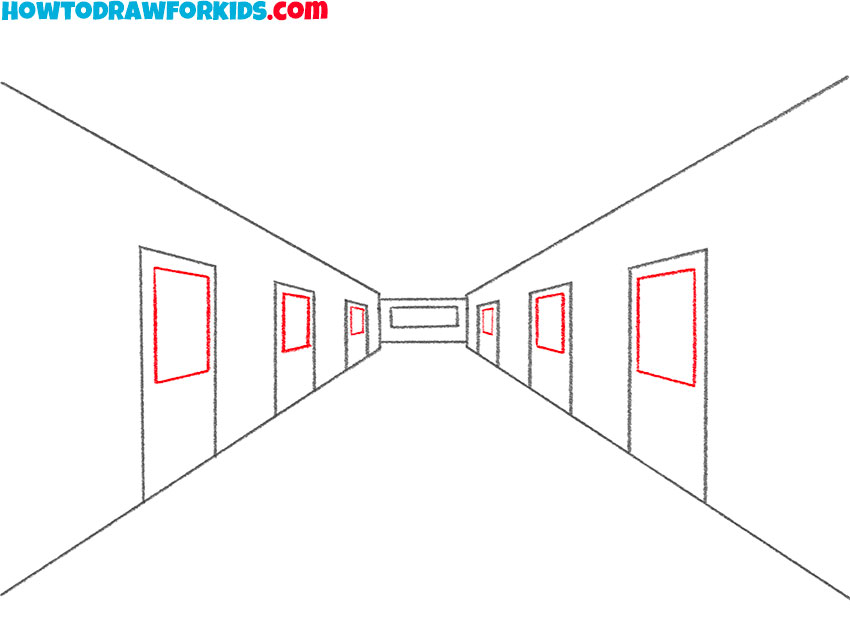
- Add details.
At the top and bottom of your drawing, draw many straight lines pointing in different directions.
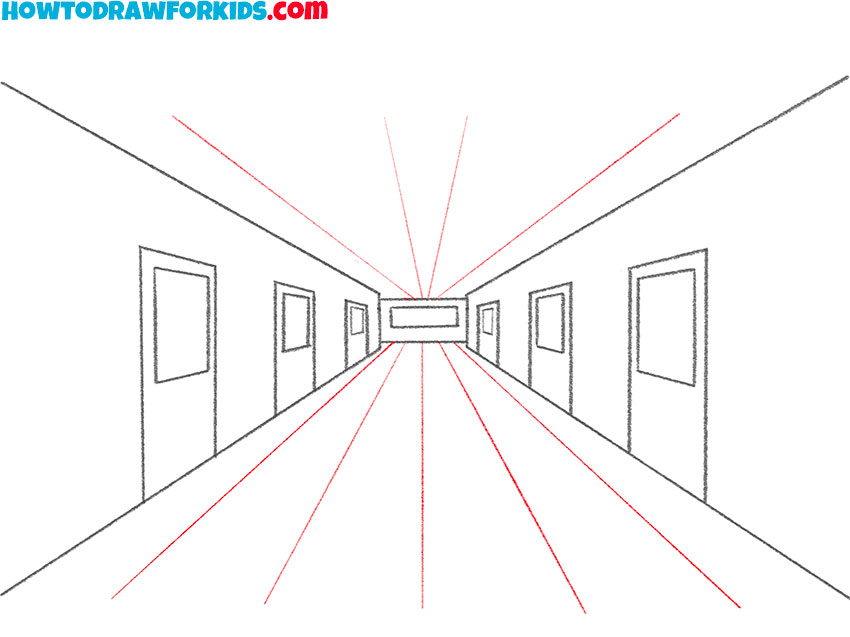
- Draw the contours of the decorative floor and ceiling trim.
Now draw many straight horizontal lines of different lengths on top of the drawn ones.
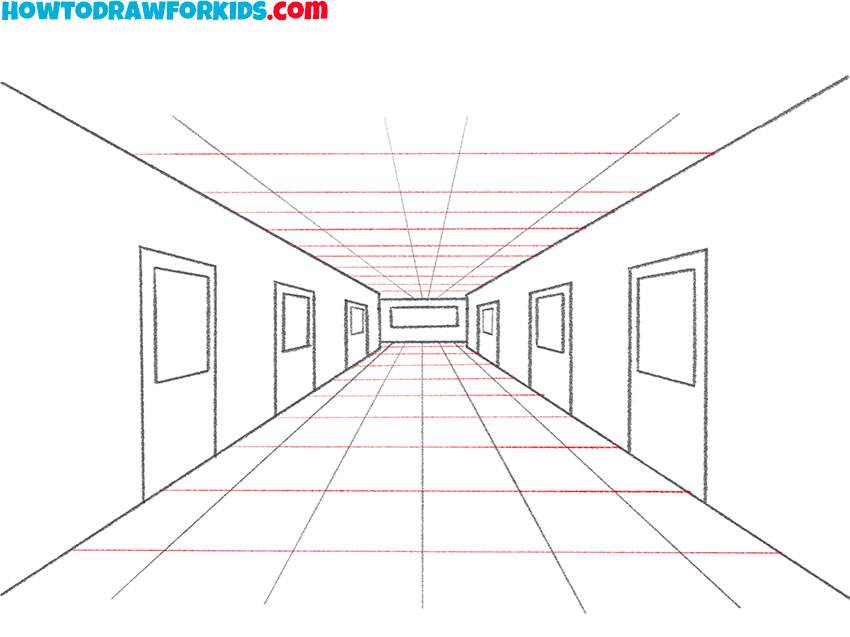
- Color the hallway.
To color this drawing, you can use gray, brown, beige, and green.

For your convenience, I have prepared a PDF file that contains all the useful information from this lesson, as well as additional practice materials that will help you develop your artistic abilities. You can download this file right now so you don’t lose it in the future, and return to this tutorial even without an internet connection.


